Compatible List:
Model | Version | |
NVR | All series | V8.2.4.1-20240914 |
XVR | XVR-3104-AI | V8.2.4.1-20240925 |
XVR-3108-AI | ||
XVR-3216-AI | 20240618 | |
XVR-3432-AI | ||
IP Speaker | AUDIO-IP-S21T-H30W | CS20-V3.3.20-AB1 |
AUDIO-IP-S21T-H15W | ||
AUDIO-IP-S01-C15W | ||
AUDIO-IP-S11-W15W |
Related question:
- How can I add an external alarm or siren?
- How do I bind an IP speaker to a camera?
Set up IP Speaker on the Recorder’s webpage
1. Adjust the network settings of the IP Speaker by changing its IP address to match the same range as the NVR. Refer to How to Configure the IP Speaker.
2. On the recorder’s webpage, click Remote Setting, and select Voice Prompts from the Alarm section, click IP Speaker and  .
.
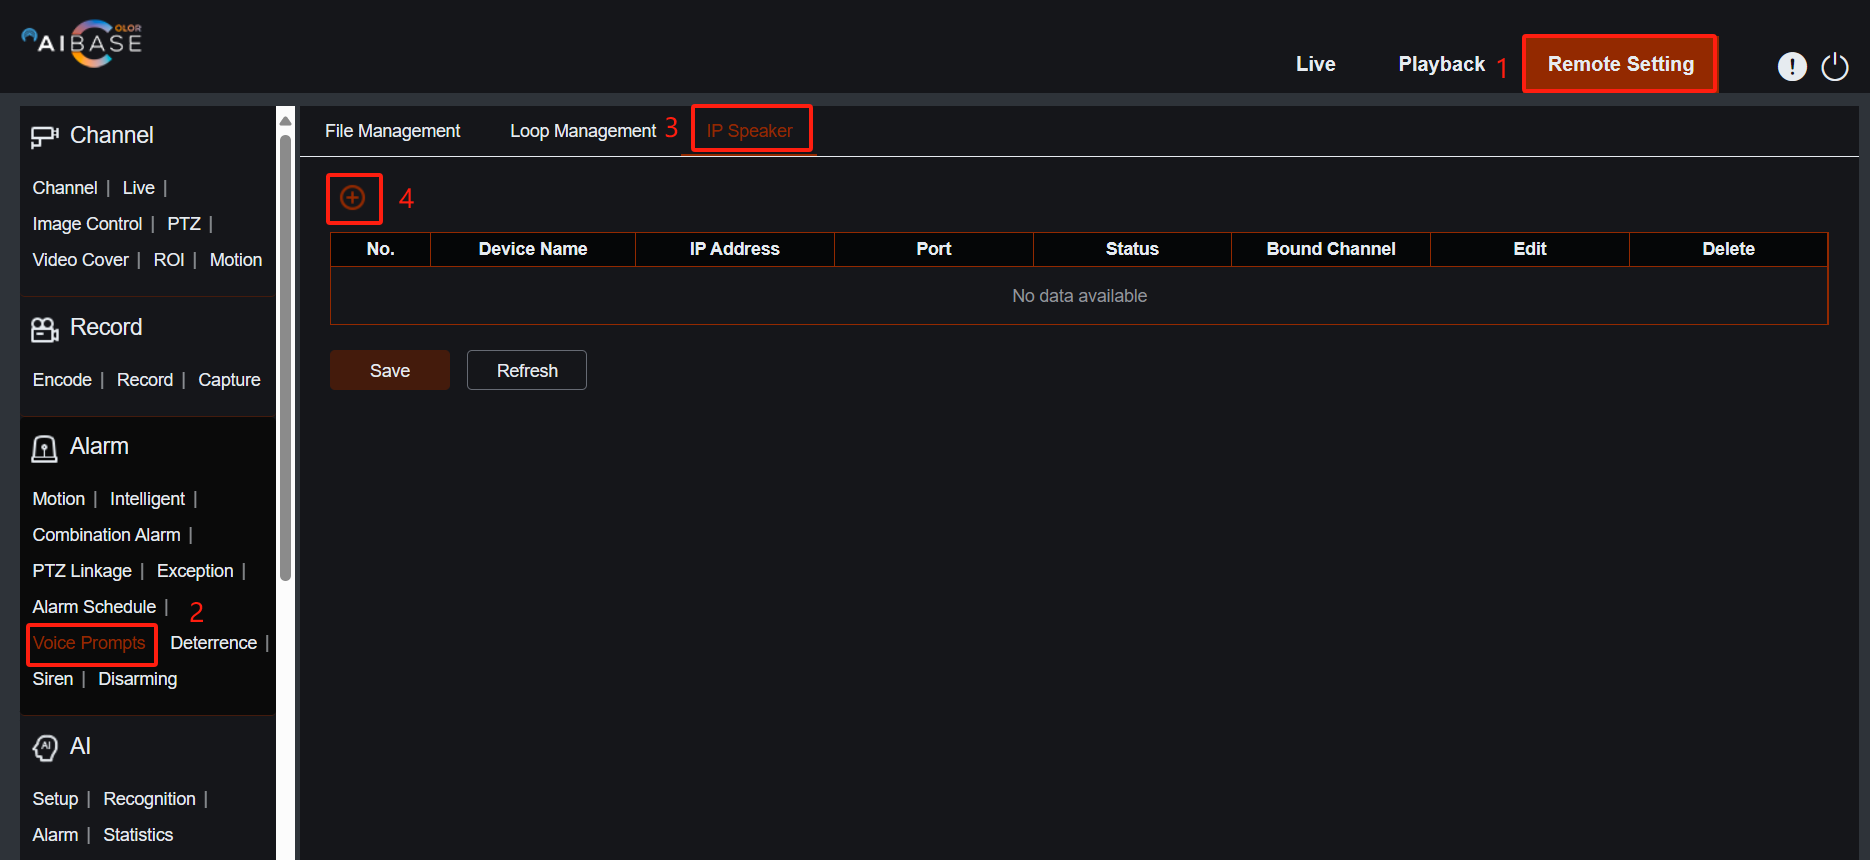
3. On the Add window, fill in the form and click on the OK button.
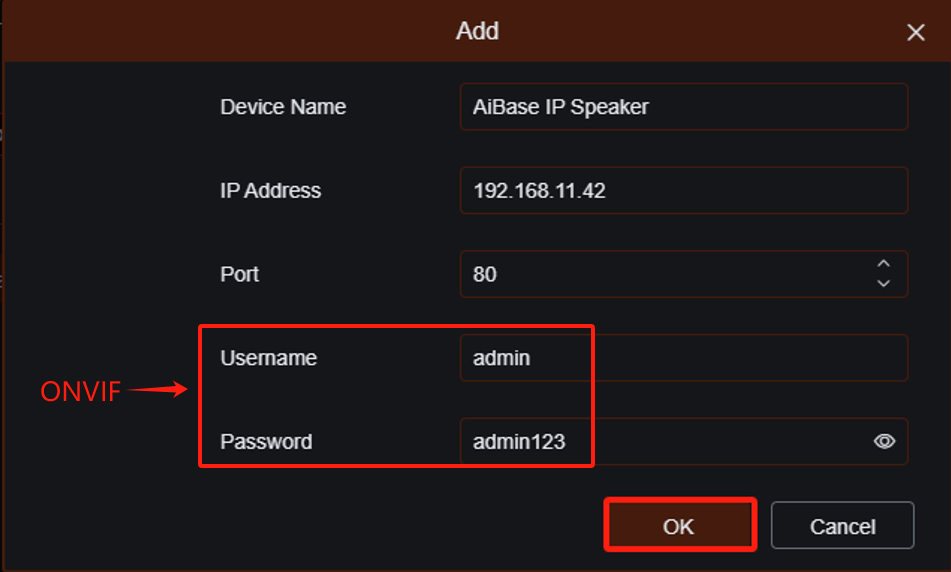
4. Click the Save button, then click the Refresh button. The status of the IP Speaker will change to "Online."


5. Click in the Bound Channel column, select the channels you want to bind with the IP Speaker and click on the Confirm button .

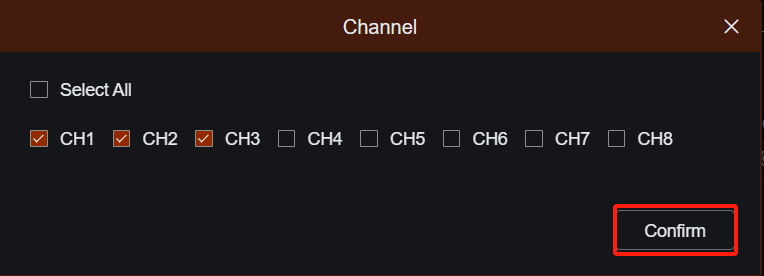
6. Click on the Save button to save your settings.

7. Now, you can use this IP speaker as an external speaker to play voice prompts from the linked camera. Please refer to the Voice Prompts Setup for configuration details.
Set up IP Speaker on the Local Monitor
1. Adjust the network settings of the IP Speaker by changing its IP address to match the same range as the NVR. Refer to How to Configure the IP Speaker.
2. On the local monitor, select Voice Prompts form the Alarm section.
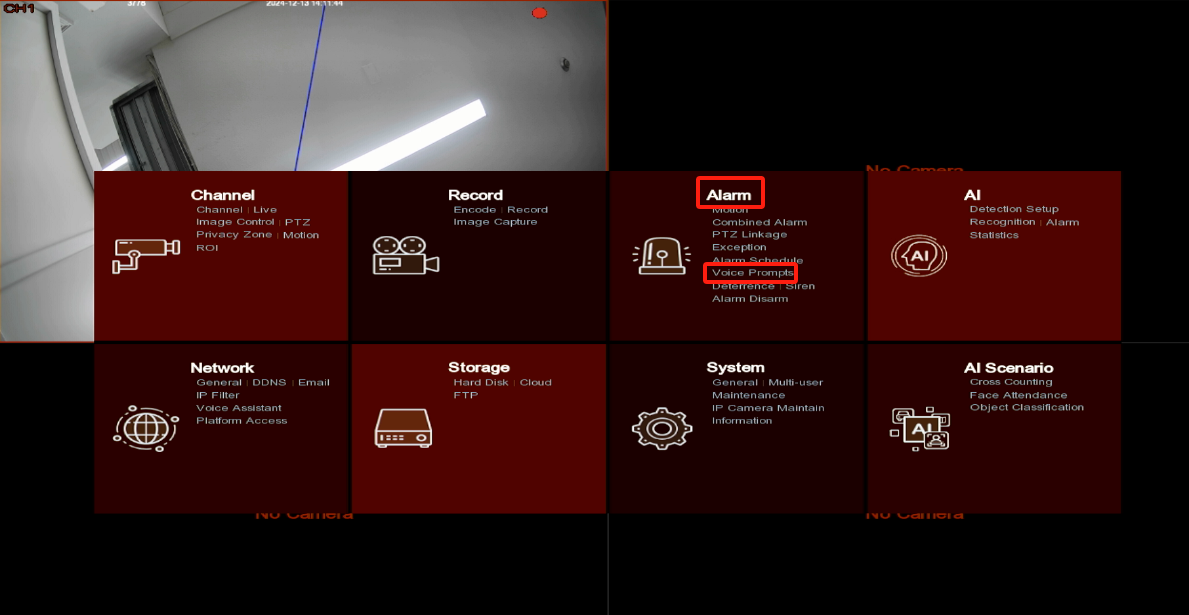
3. Click IP Speaker and  .
.

4. On the Add window, fill in the form and click on the OK button.
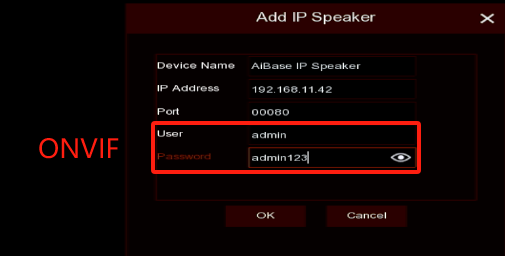
5. Click  in the Bound Channel column, select the channels you want to bind with the IP Speaker and click on the Apply button
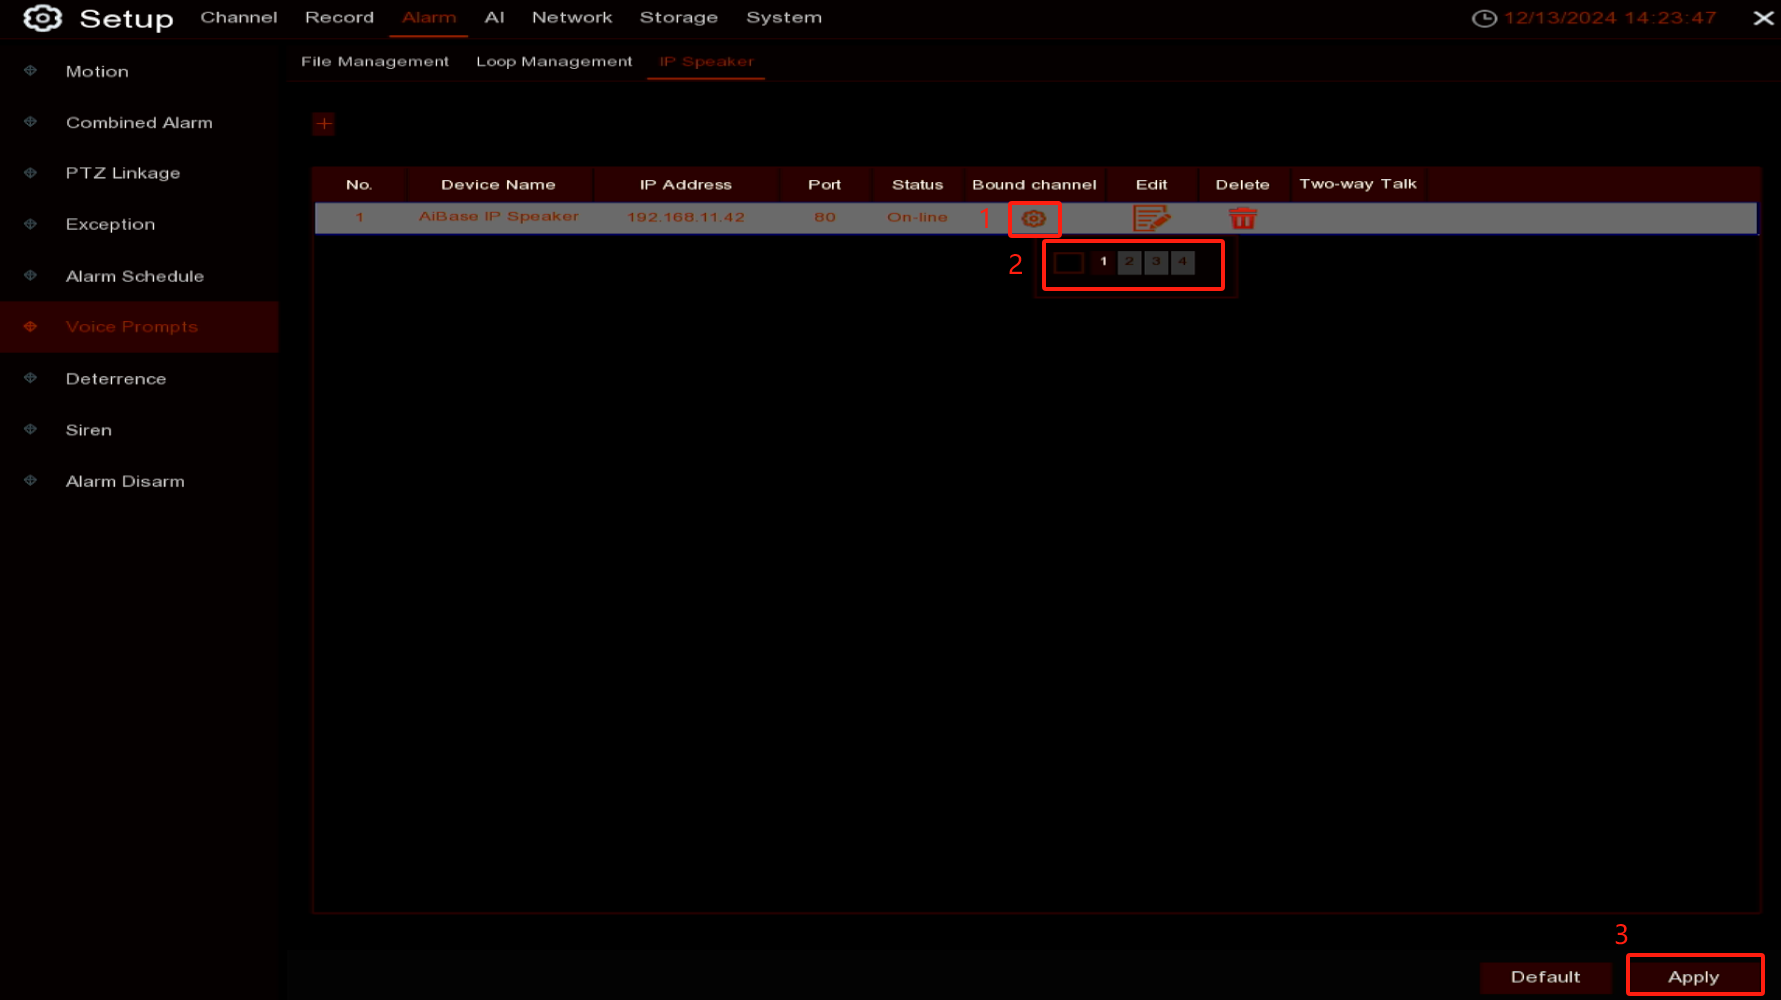
6. Now, you can use this IP speaker as an external speaker to play voice prompts from the linked camera. Please refer to the Voice Prompts Setup for configuration details.