Description
There are multiple options for configuring how the PTZ will function. See below for the different types and how to configure them via Camera webpage or in NVR local interface.
Preset - A saved position. The cameras Pan (Left/Right), Tilt (Up/Down), Zoom (In/Out) and focus position is saved in the preset.
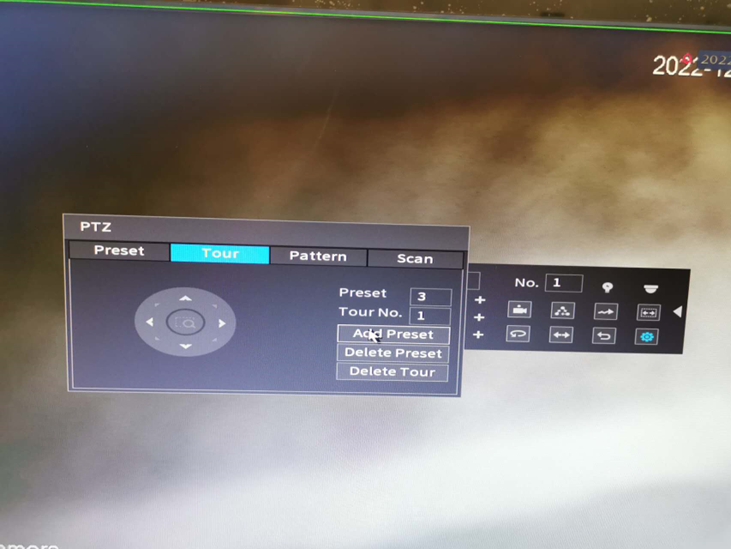
Tour - A collection of presets that the PTZ moves between automatically.
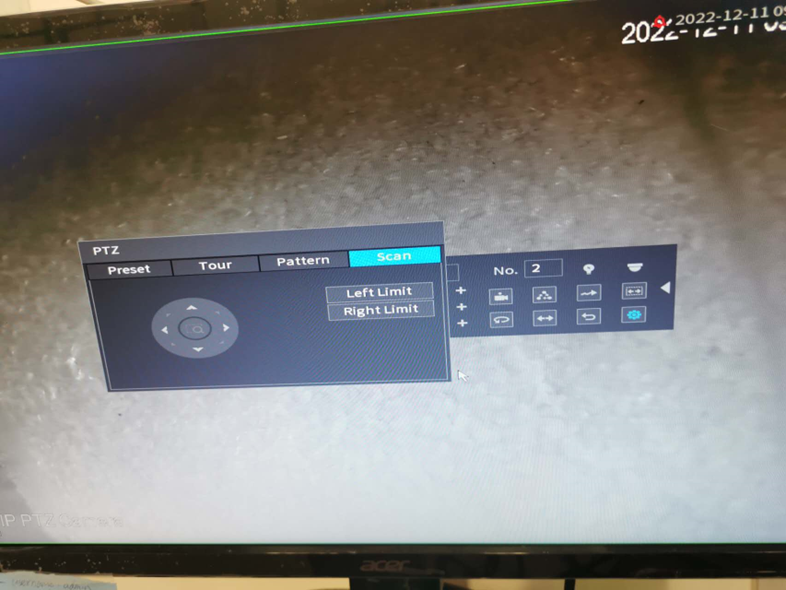
Scan - The PTZ will move left and right between set boundaries at a set speed.
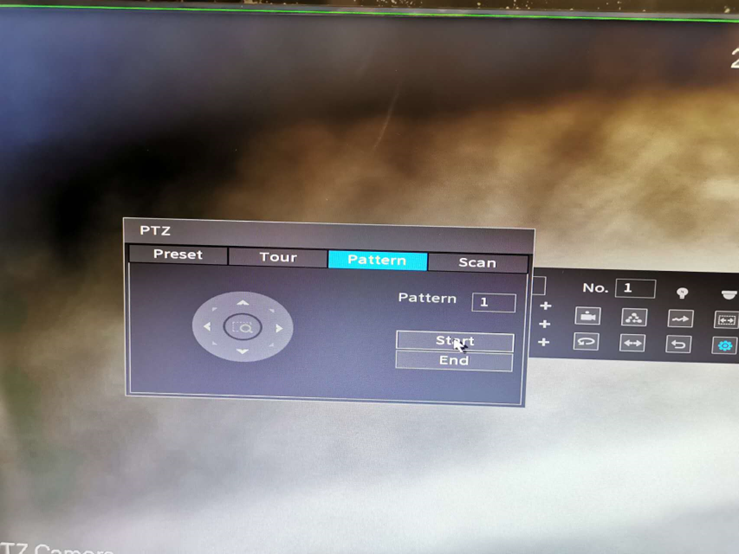
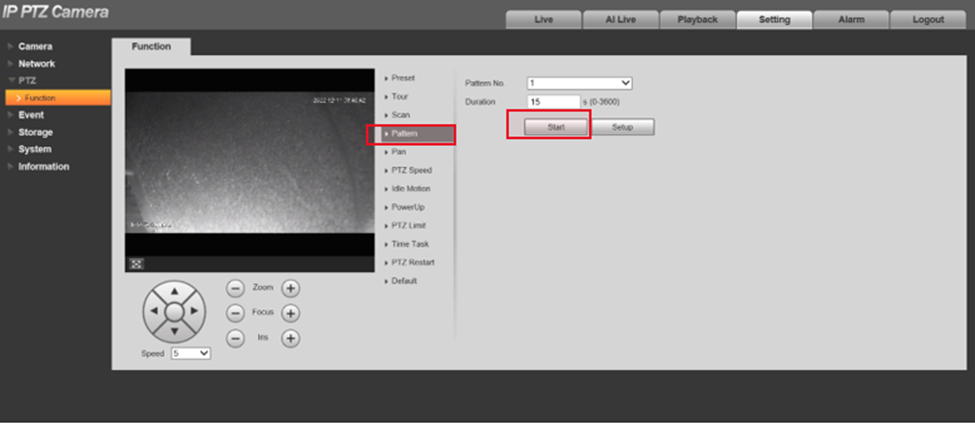
Pattern - A recorded series of pan, tilt and zoom movements that will be performed on repeat.
Recorder model: NVR-NV42A08-P4-4K-S2
Recorder firmware: 2022-07-19
Camera model: CAM-IP965A4-32-HNR
Config via NVR local interface
Preset
-
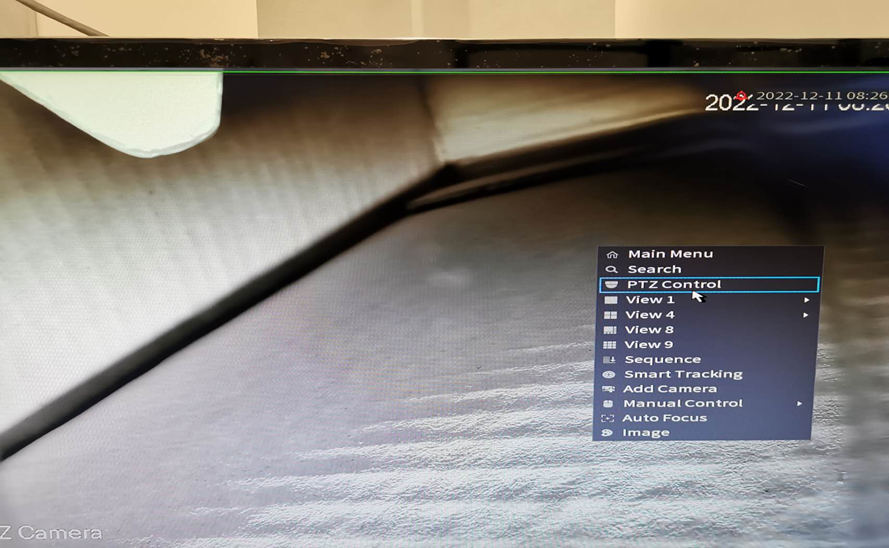
Right click the PTZ camera chose the PTZ control.
-
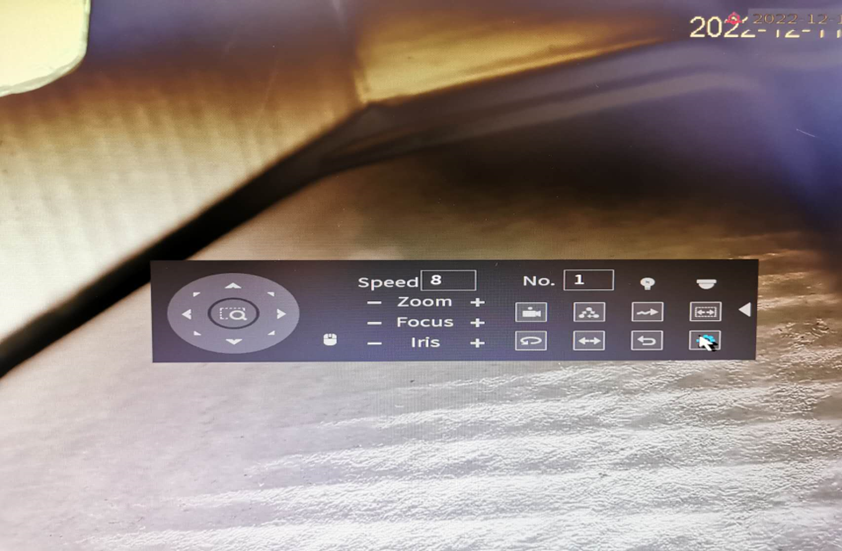
Click AUX control
-
Choose the image set as preset 1/2/3
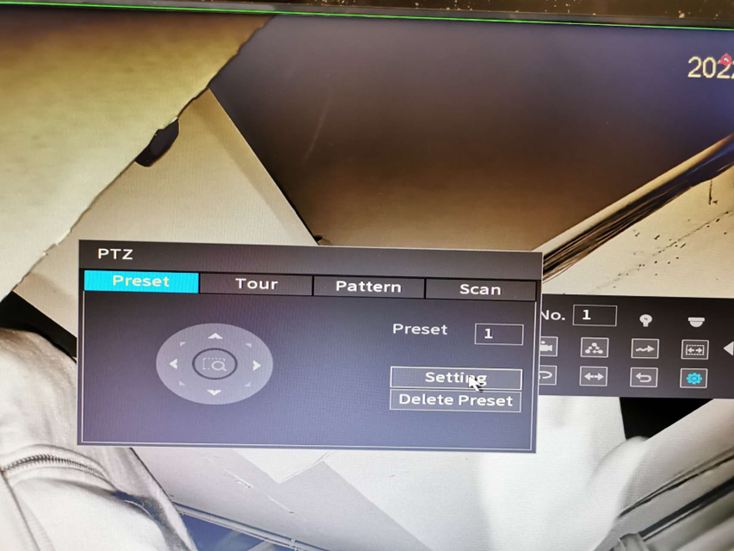
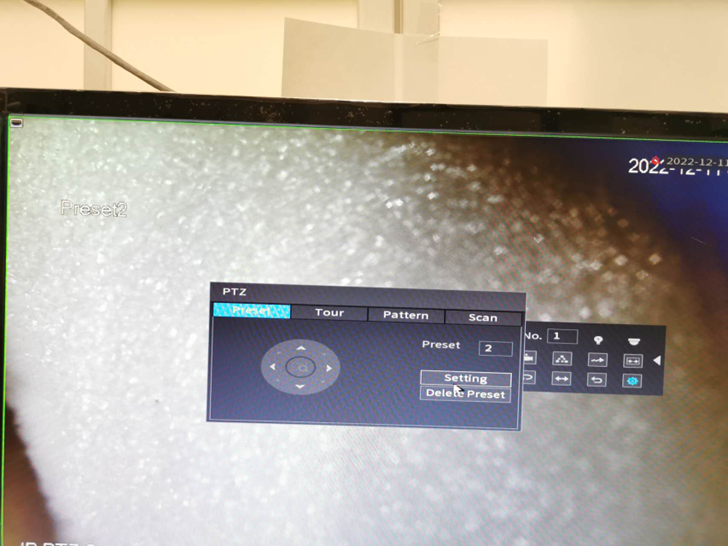
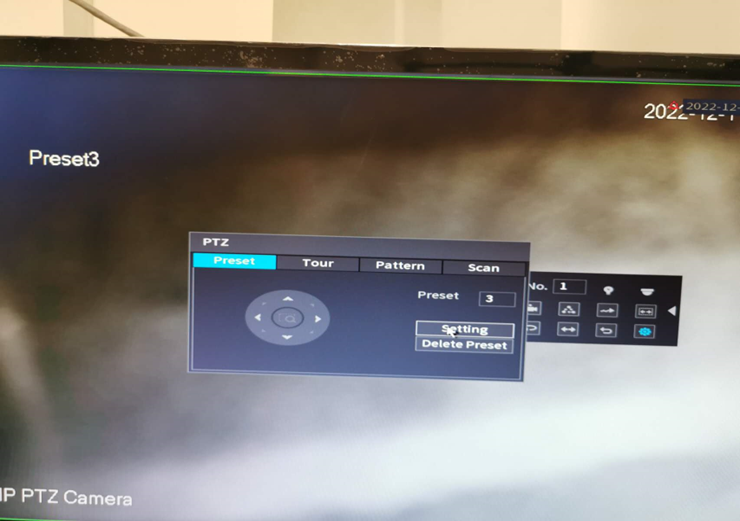
Tour
- Choose tour to add preset 1/2/3 as a to
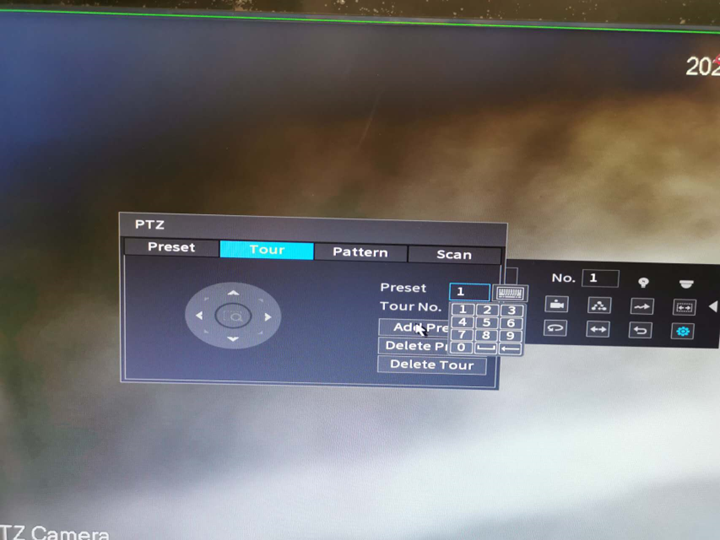
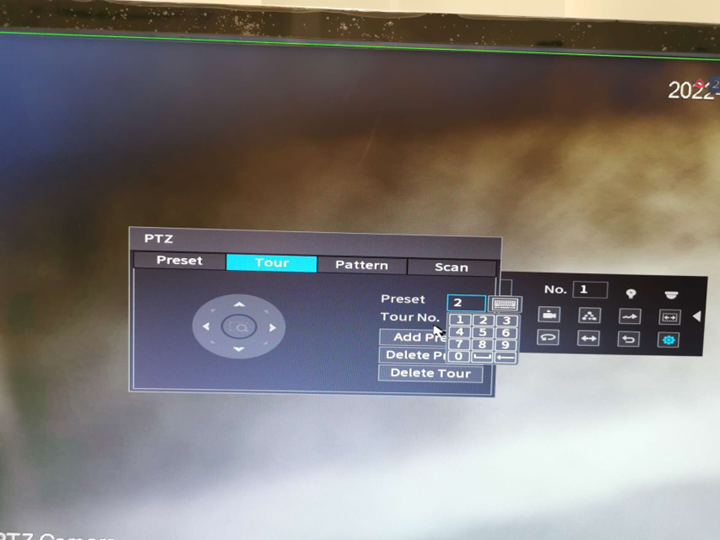
Pattern
- Choose pattern to record the camera moving as pattern
Scan
- Choose scan to set left/right limit to do camera scan
Config via Camera webpage
-
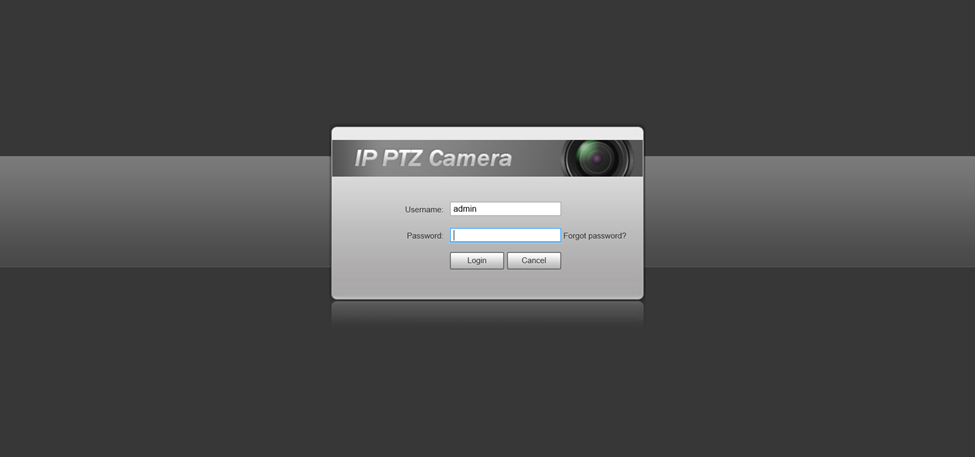
Use IE browser to load PTZ camera webpage
-
Click setting then chose PTZ function
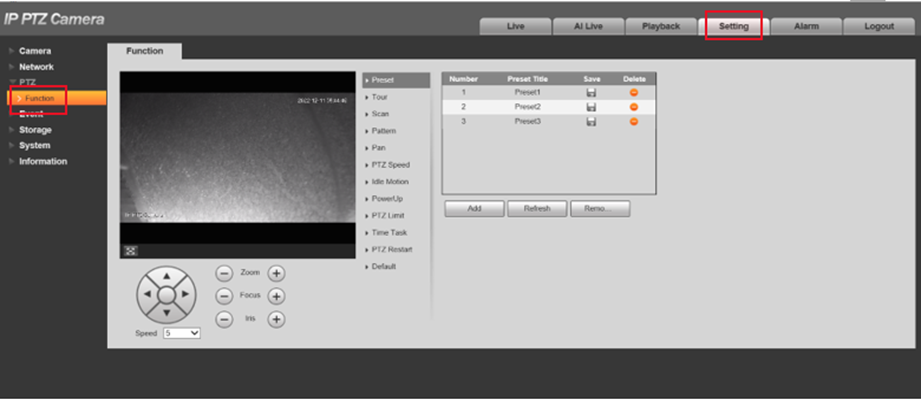
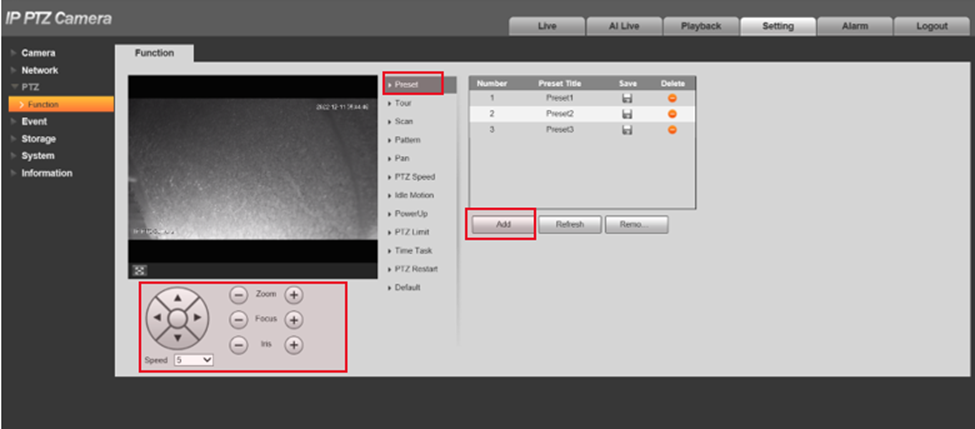
Preset
- Choose the Preset. Use the keypad to set direction/zoom/focus, then click add to save it.
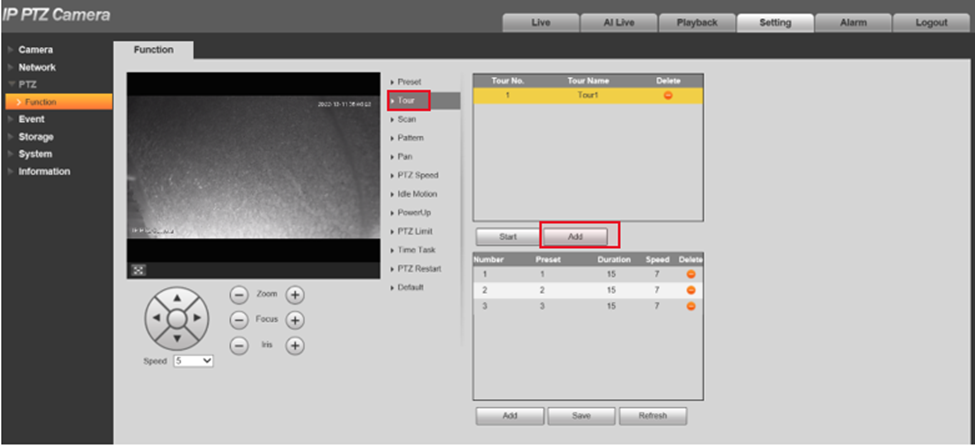
Tour
-
Choose Tour, then click add to set Tour1.
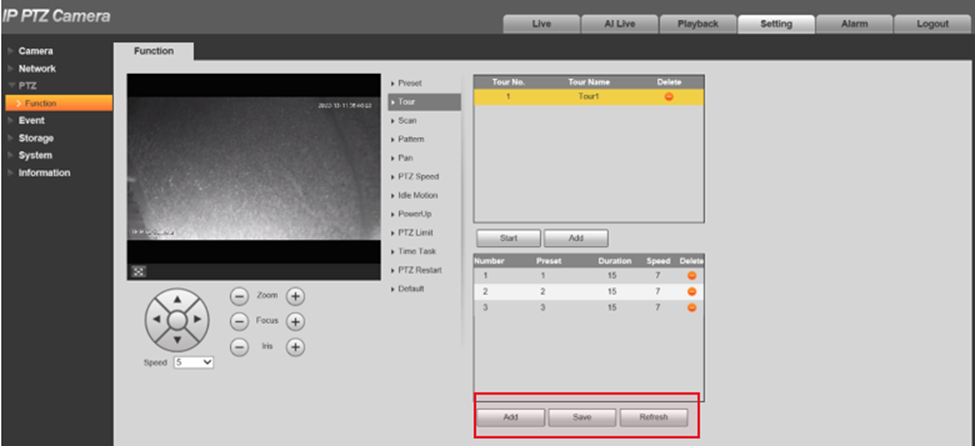
-
Add and save Preset to the Tour to finish the Tour setting.
Pattern
-
Choose Pattern and click start to start recording
-
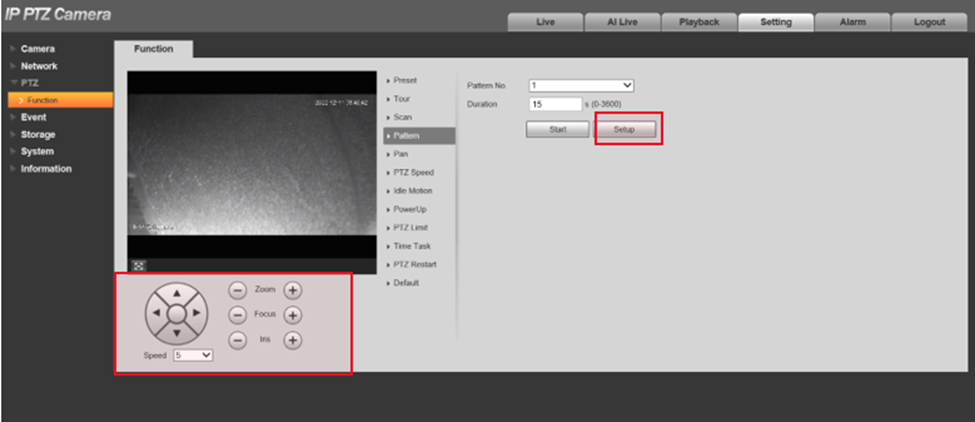
Use the keypad to set the moving track, then click setup to finish the record.
Timetask
-
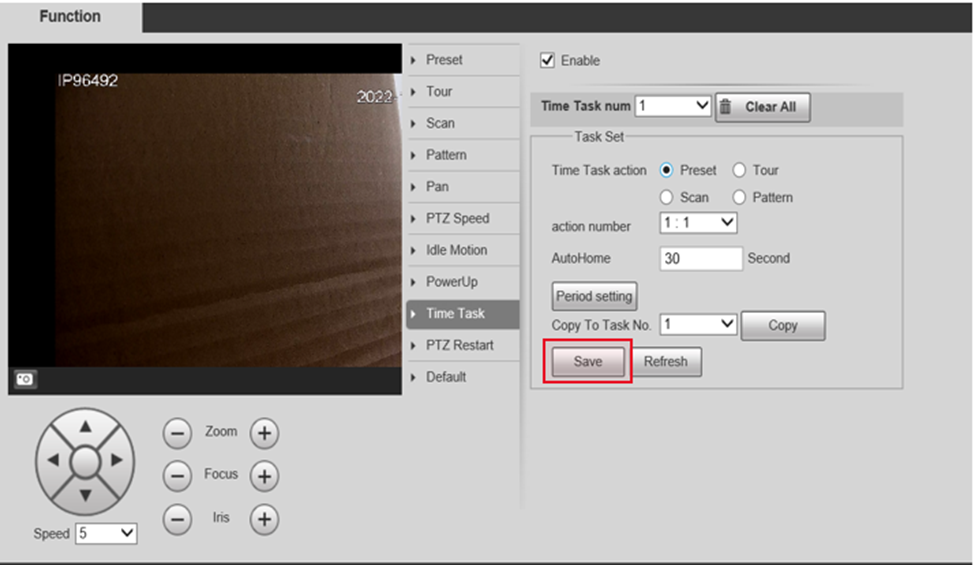
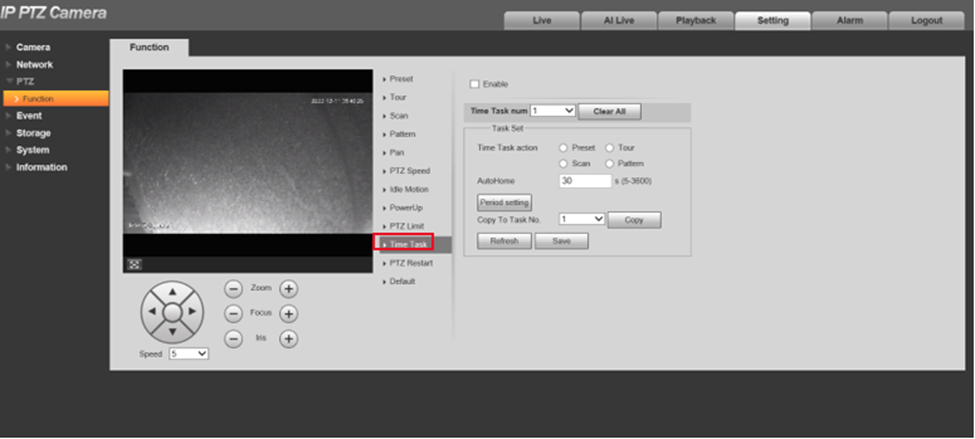
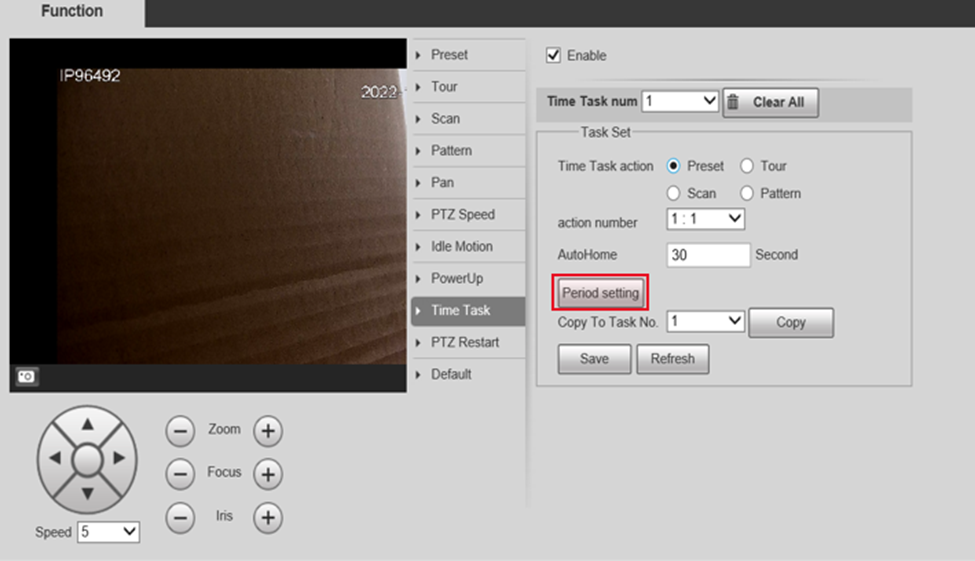
Choose Time Task to set the AutoHome action.
-
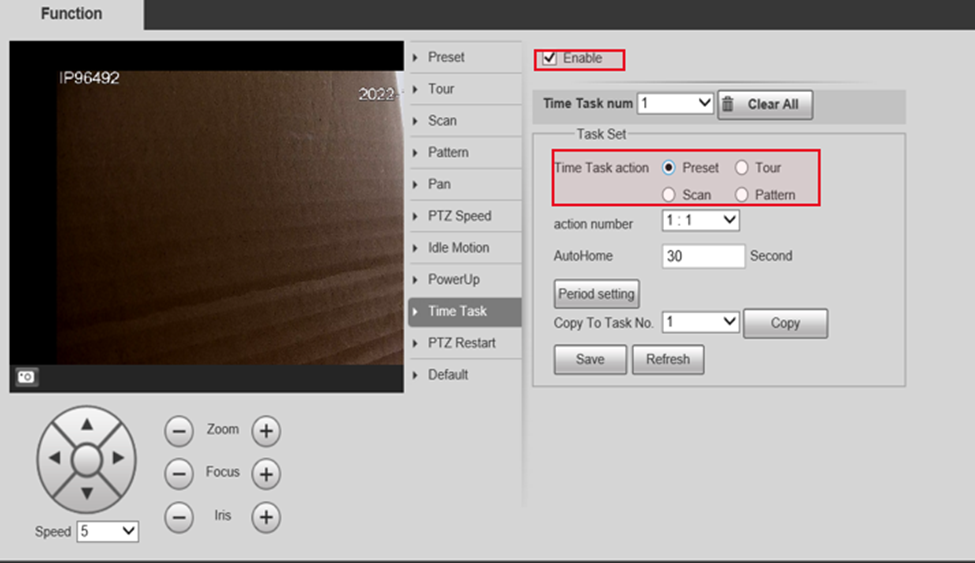
Check the enable, then choose with action you need.
-
Click the period setting to set the different period.
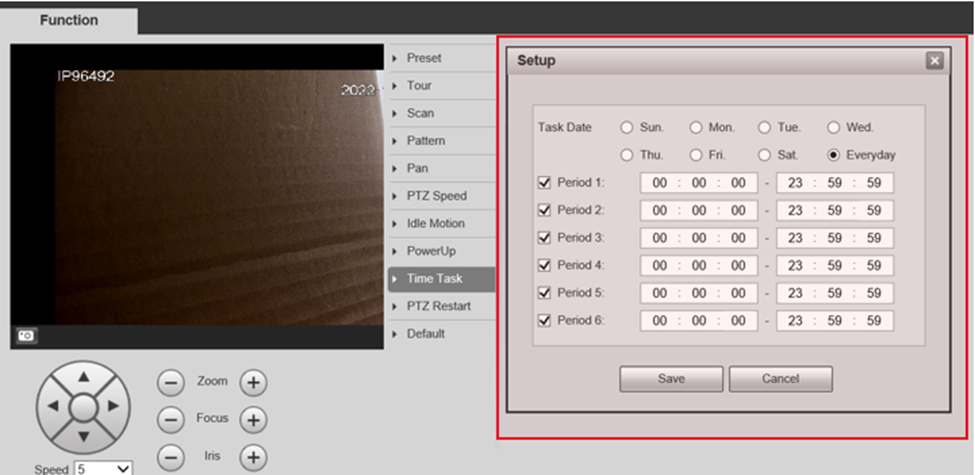
- Click save to save the time task 1
