Explanation
Here we will explain how to connect a Dahua IP camera to a Hikvision NVR.
Step 1:
Connect Dahua IP Camera to NVR
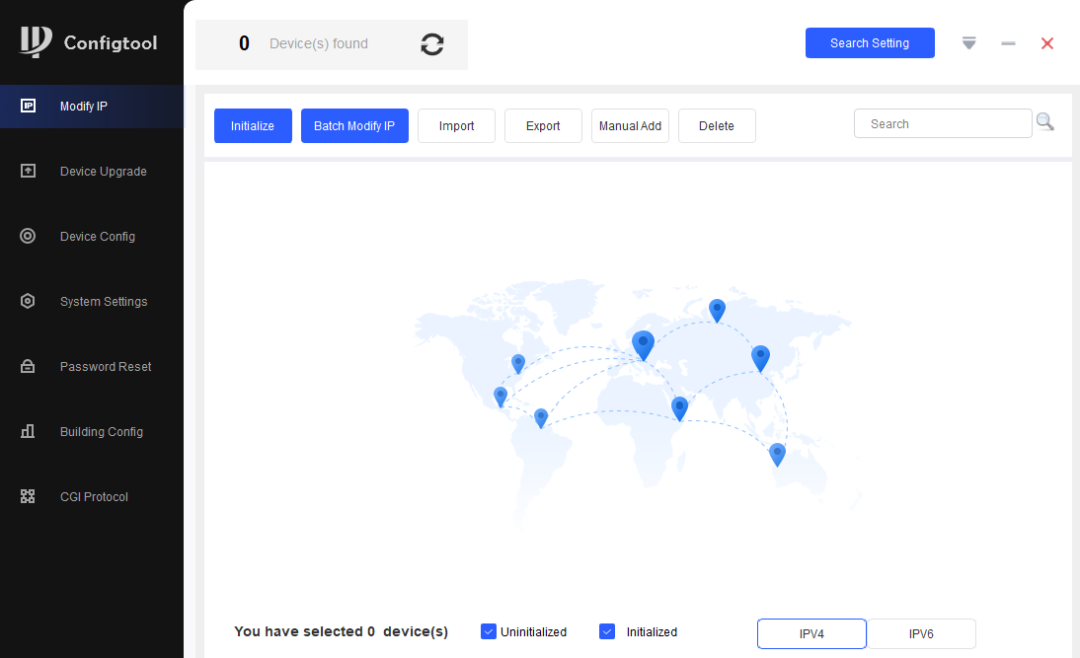
For a Dahua IP Camera, you’re going to be configuring your camera using the Config tool (you can download it on the website). Connect your IP camera to your network (router/switch) and ensure that it’s getting powered (PoE switch, power supply, etc).
Once you have the Config tool installed and open, use it to modify the network credentials of your IP camera to comply (match) with your NVR IP Setup. The tool will automatically detects your Dahua IP camera. Default Dahua IP camera address 192.168.1.108. This needs to be changed e.g. Default Hikvision NVR addresses for cameras (192.168.254.x)
*Ensure that you place an IP of (192.168.254.10-253). (192.168.254.1-9 are reserved by Hikvision).
Also change the Camera gateway for that of the Hikvision NVR which has a default of 192.168.254.1
You’ll only need to select it from the list and then, if necessary, modify the cameras network parameters using the options located on the right side of the screen. All other Onvif IP cameras will have a similar IP configuration tool or software that you’ll use to accomplish the same task.
The software will ask you to activate the camera first, meaning it will ask to create a password. This is the password for the camera and we will need it later.

Step 2:
Configure your Dahua IP Camera
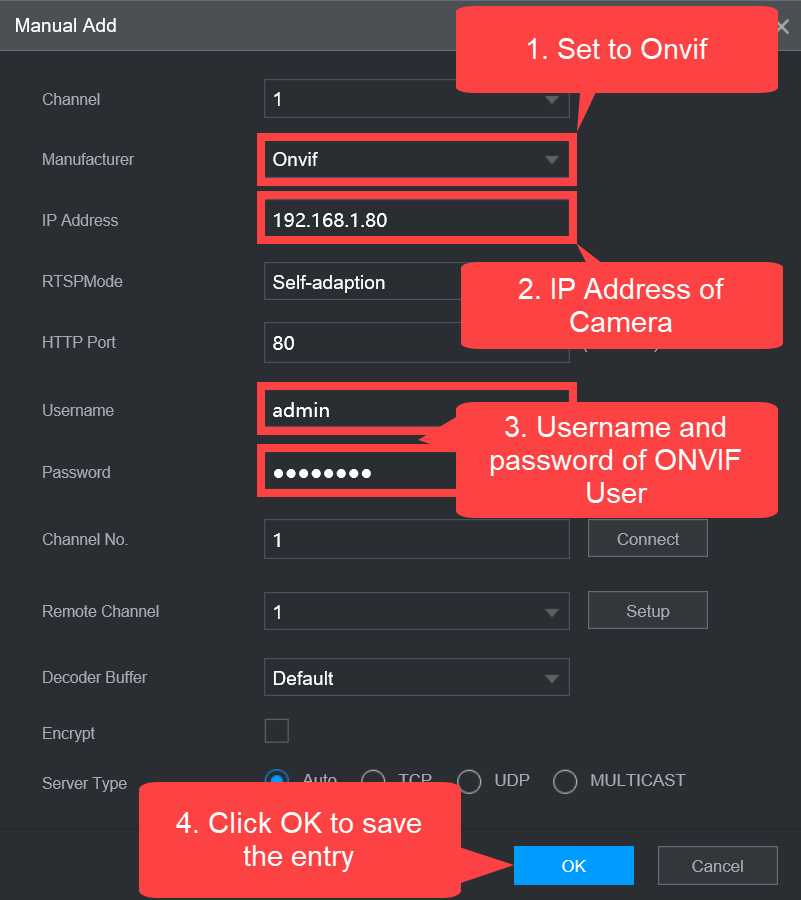
Now that camera connect is complete, it is time to connect it the Hikvision NVR. Once connected, head over to Configuration -> Camera -> Locate the location of the camera you have connected -> Operation and then Edit.
- Adding Method – Change from Plug & Play to Manual.
2)** IP Camera Address** – Change to IP Address of the Dahua Camera you set up.
-
Protocol – Change from HIKVISION to ONVIF.
-
Camera Password – Enter password created for the Dahua IP Camera in initialization.

You’re now ready to click OK and be brought back to the previous page. Once back on this page, you’ll see that your IP camera has now been added to the NVR. Verify that the Status column displays a green and not red.
Green indicates your camera is properly configured and connected to the NVR while red will indicate that something is incorrect with the way you setup the IP camera. If you find a red, the mistake is either in the configured network parameters within the camera, or with the way in which you attempted to add the camera.
Once green navigate back to the live view, you should now see your IP cameras video feed being displayed on the channel you designated.