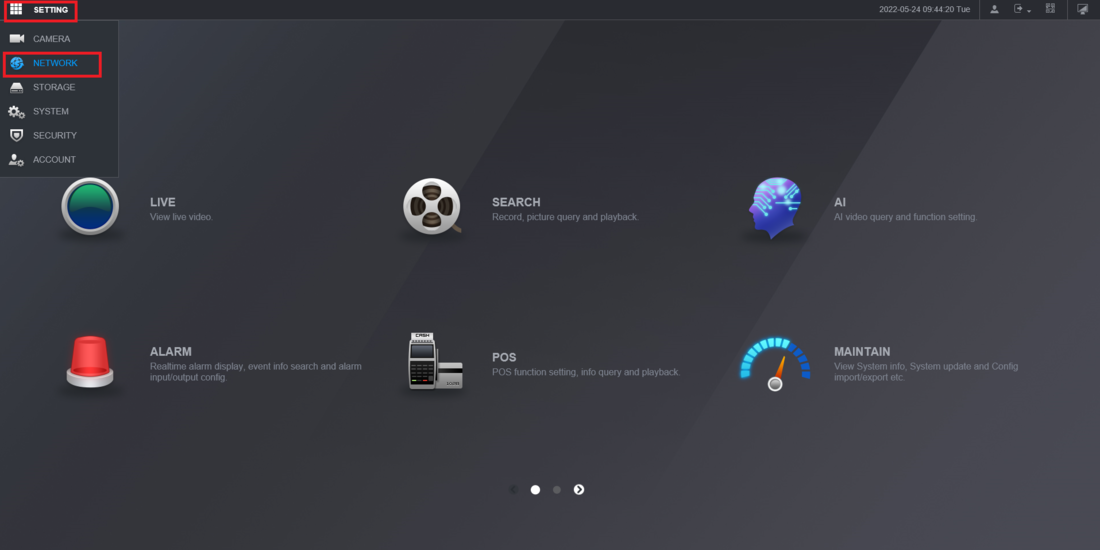
Log into the web interface of the NVR then select Setting at the top left. Select Network from the drop-down
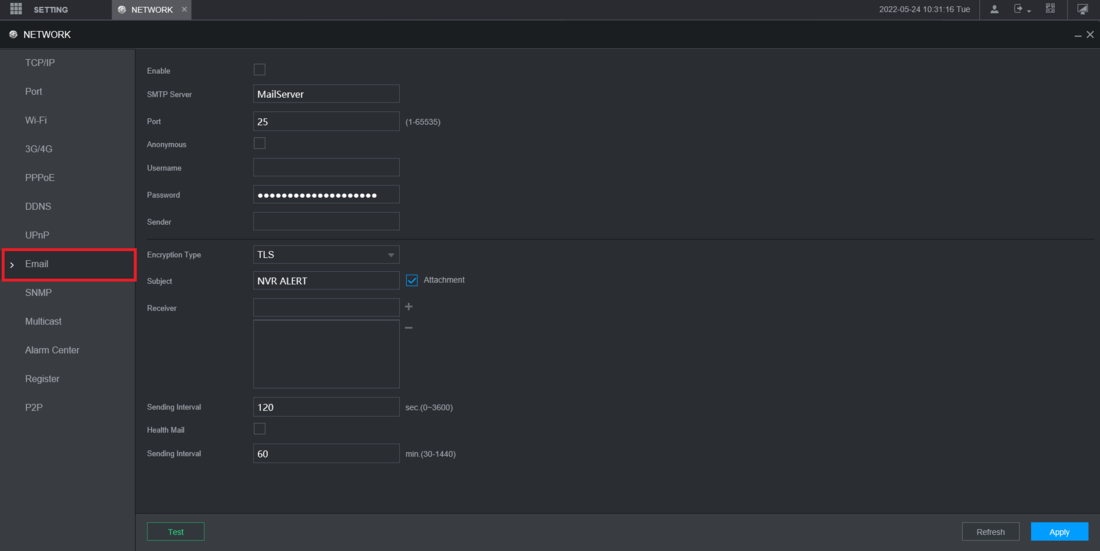
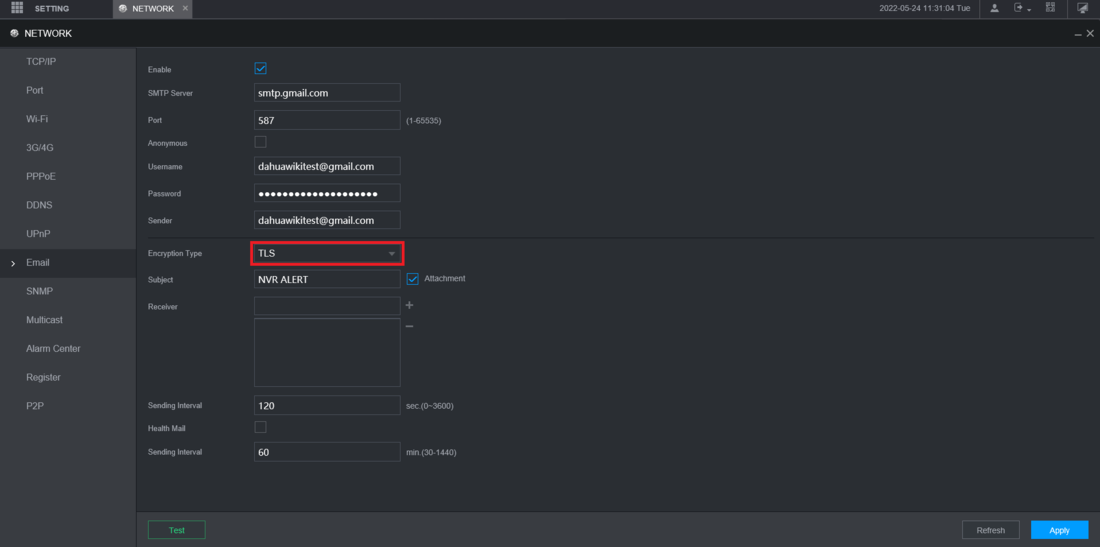
Select Email from the list on the left
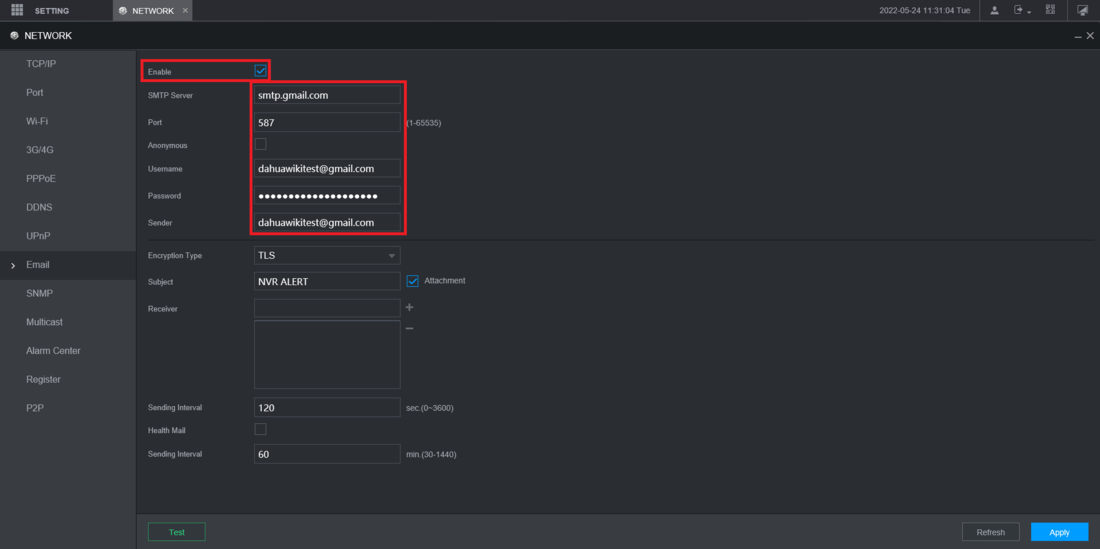
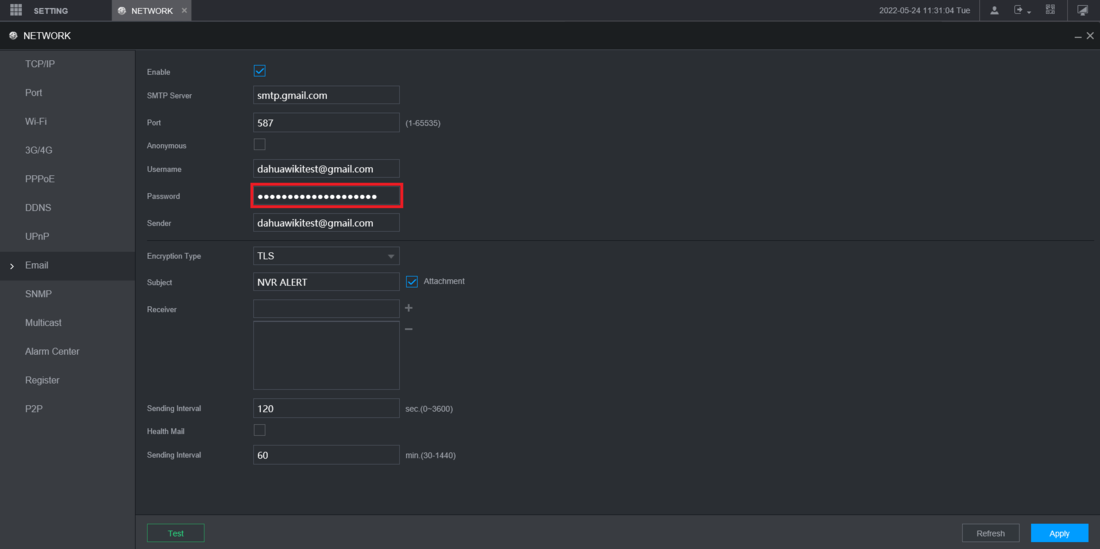
Check the box next to Enable. Input the following information into these fields:
SMTP Server: smtp.gmail.com
Port: 587
Username: [Your Gmail email address]
Sender: [Your Gmail email address]
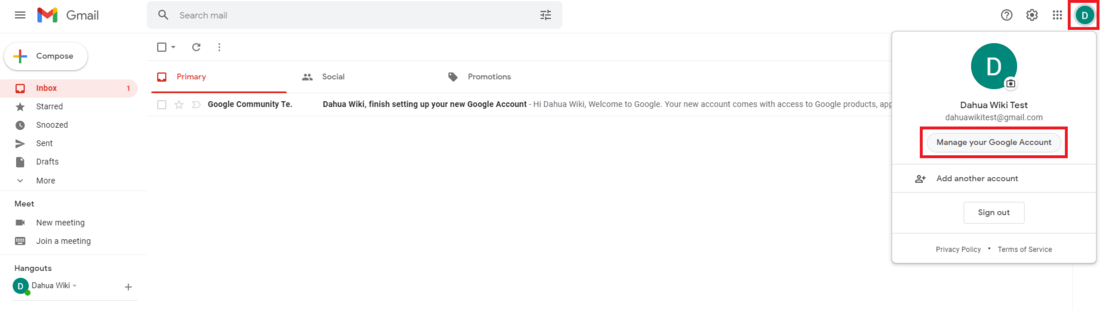
Open a web browser and log into your Gmail account. Click the Account icon at the top right
Select Manage your Google Account
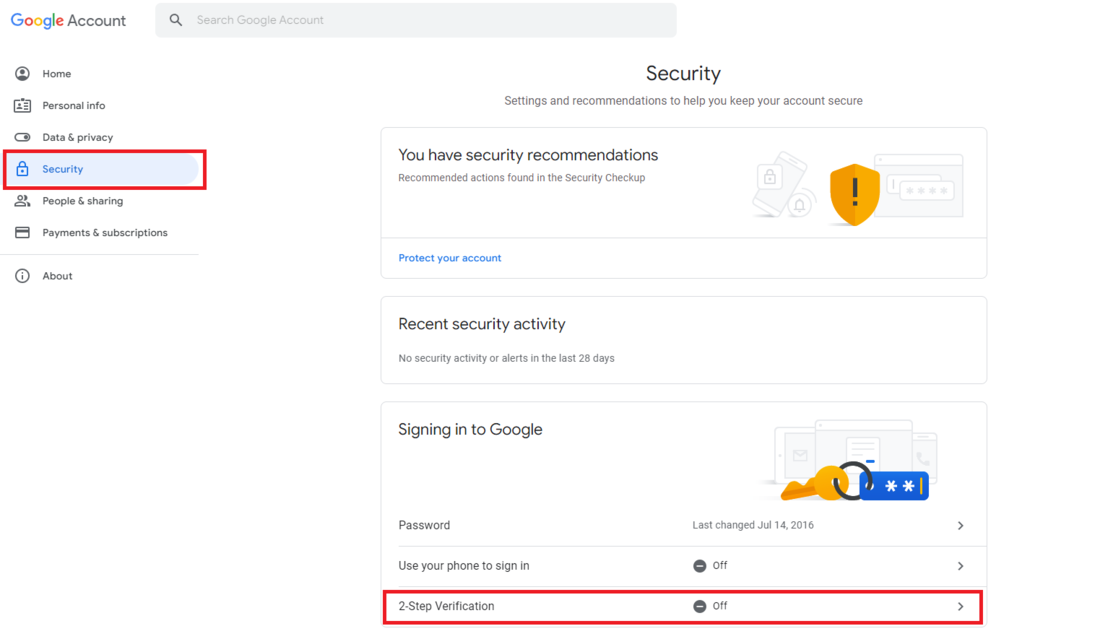
Select Security from the list on the left
If 2-Step Verification is already setup on your account, you will see it listed as "On". If that is the case, skip to Step 7.
If 2-Step Verification is off, click the arrow to the right of 2-Step Verification under "Signing in to Google"
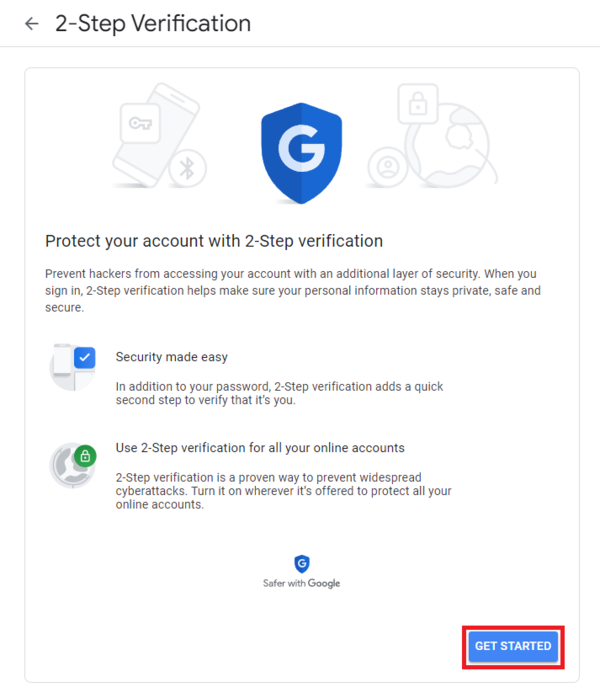
Select Get Started and then follow through all the steps to setup 2-Step Verification for your Gmail account
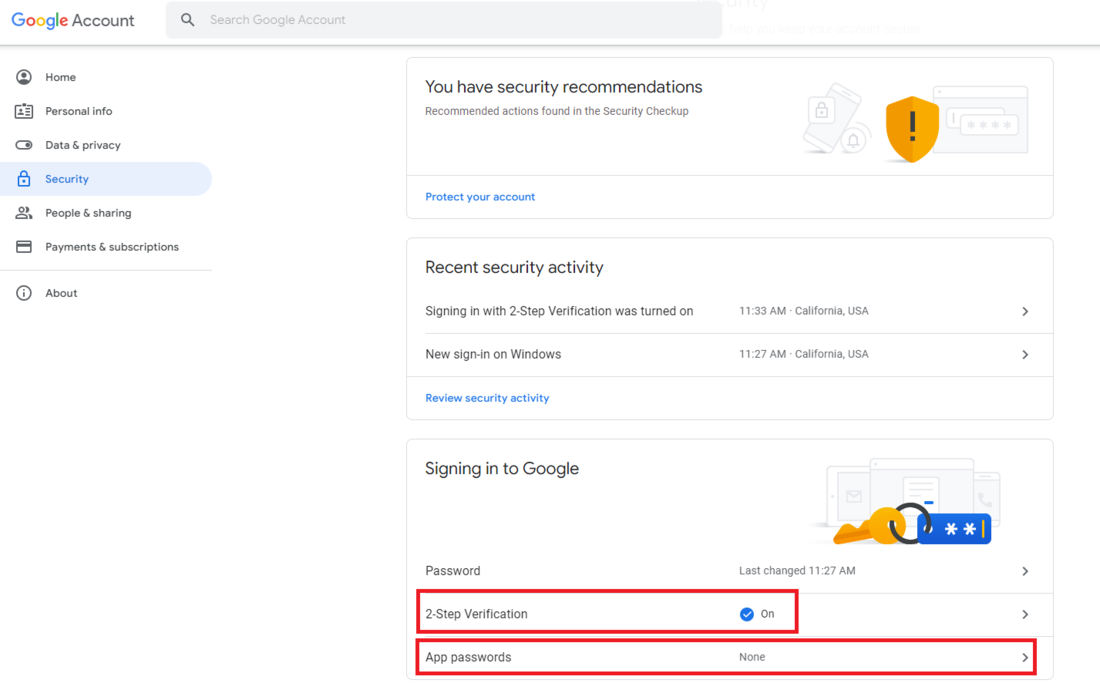
2-Step Verification should now show "On" under "Signing in to Google". Select the arrow to the right of App passwords
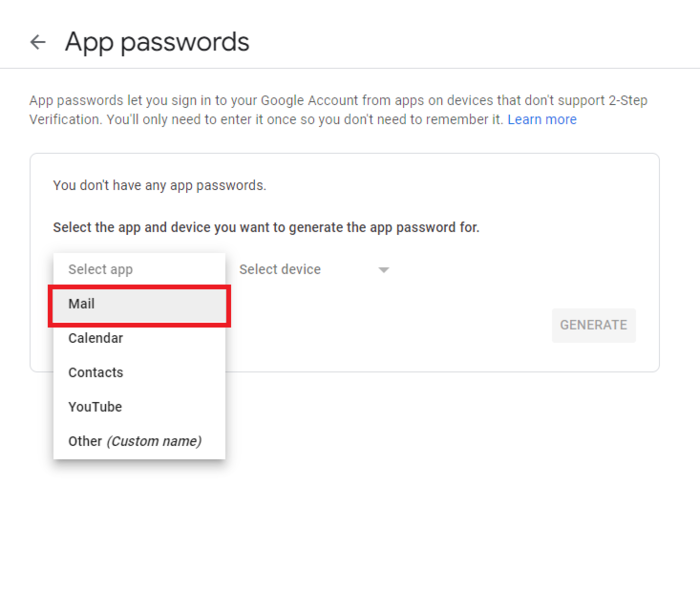
Click on Select app
Then select Mail from the drop-down
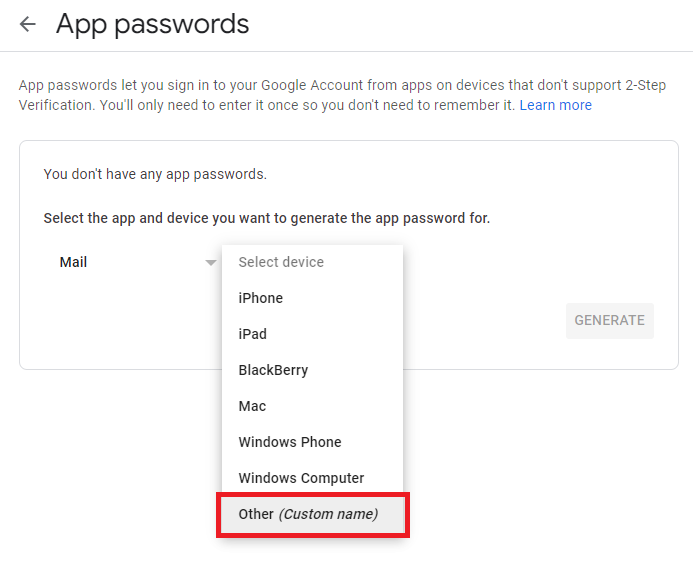
Click on Select device
Then select Other (Custom name) from the drop-down
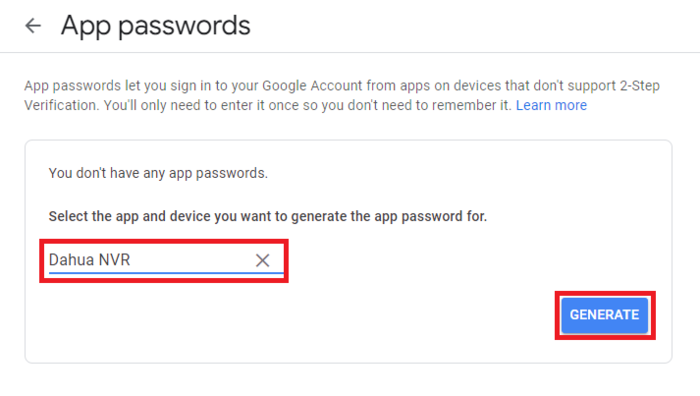
Click on the field and type in "Dahua NVR" or another name that will help you associate this password with your NVR then select Generate
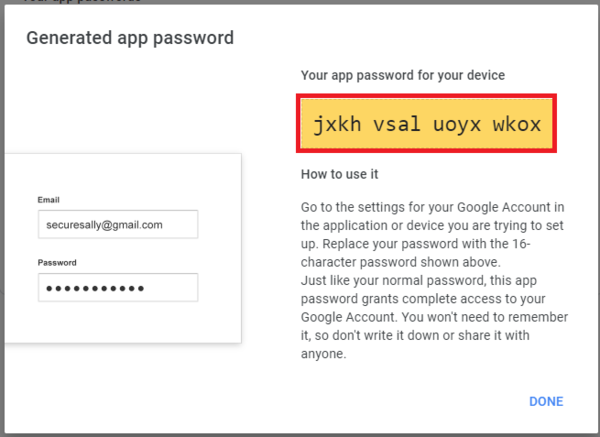
You will see a unique password that was generated for use with your NVR.
Note this password for use in the next step
Go back to your NVR's web interface, where you left off in Step 3. Enter the password that you got from Step 11 in the Password field
Make sure TLS is selected for Encryption Type if it is not already
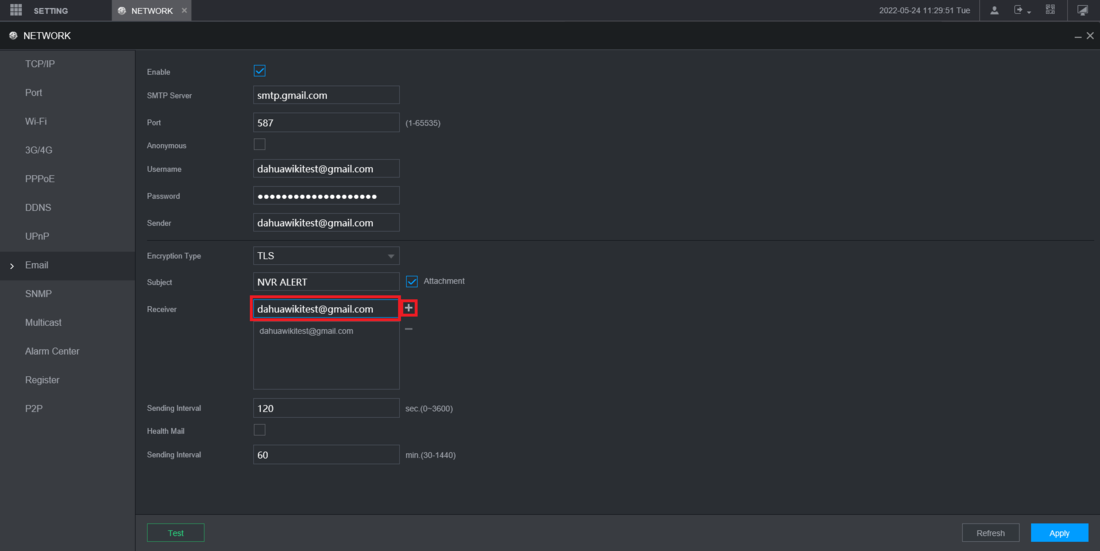
Enter the email address you want to send these notifications to next to Receiver and then press the + button to the right (The reciever email address(es) can be the same as the sending address or different). Repeat this process for all email addresses you want notifications sent to
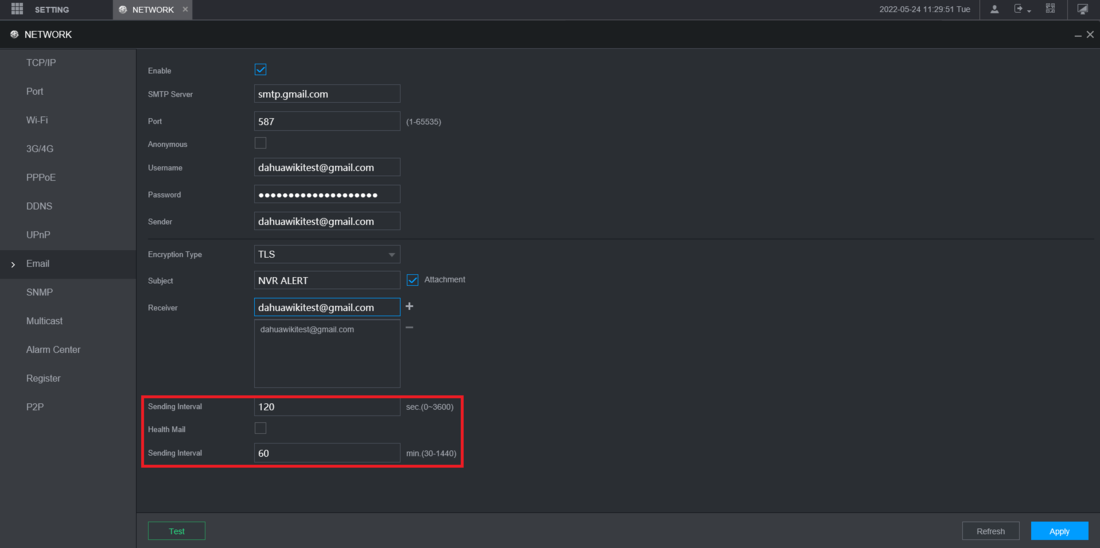
Enter the amount of seconds you want between each email notification in the field next to Sending Interval
If you want to recieve emails to verify the email notification system is still working, check the box next to Health Mail and enter how often you want those emails in the field next to Sending Interval
Click Apply at the bottom right to save your changes
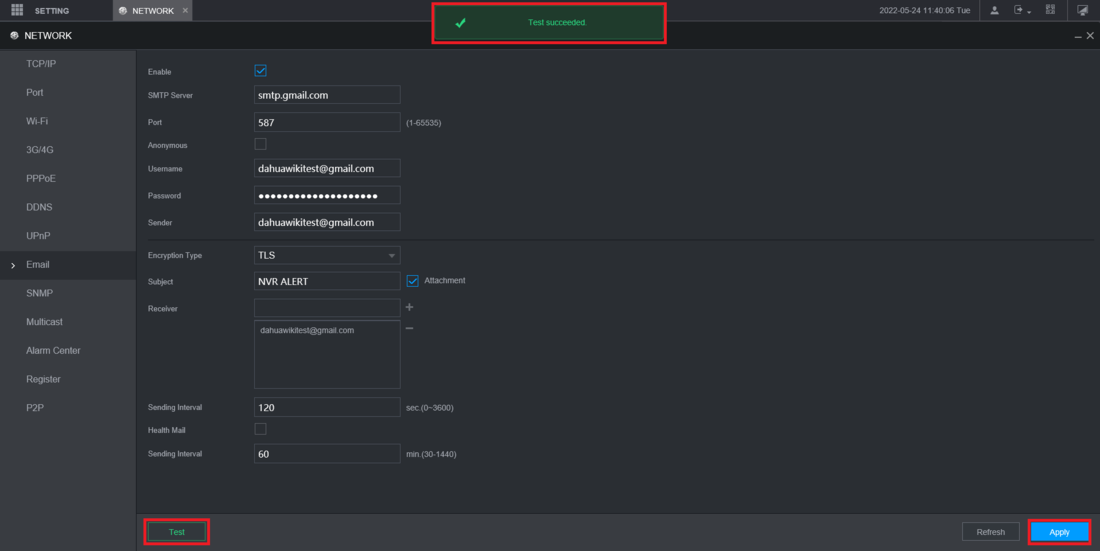
Press the Test button on the bottom left to test notifications with the information you entered above
If the test is successful you will see a message at the top that says "Test succeded" and you will recieve a test email
If it says "Test Failed", check all the information you entered above