You can configure a tour of selected channels to repeat playing videos. The videos display in turn according to the channel group configured in tour settings. The system displays one channel group for a certain period and then automatically changes to the next channel group
Step 1 Select Main Menu > DISPLAY > Tour.
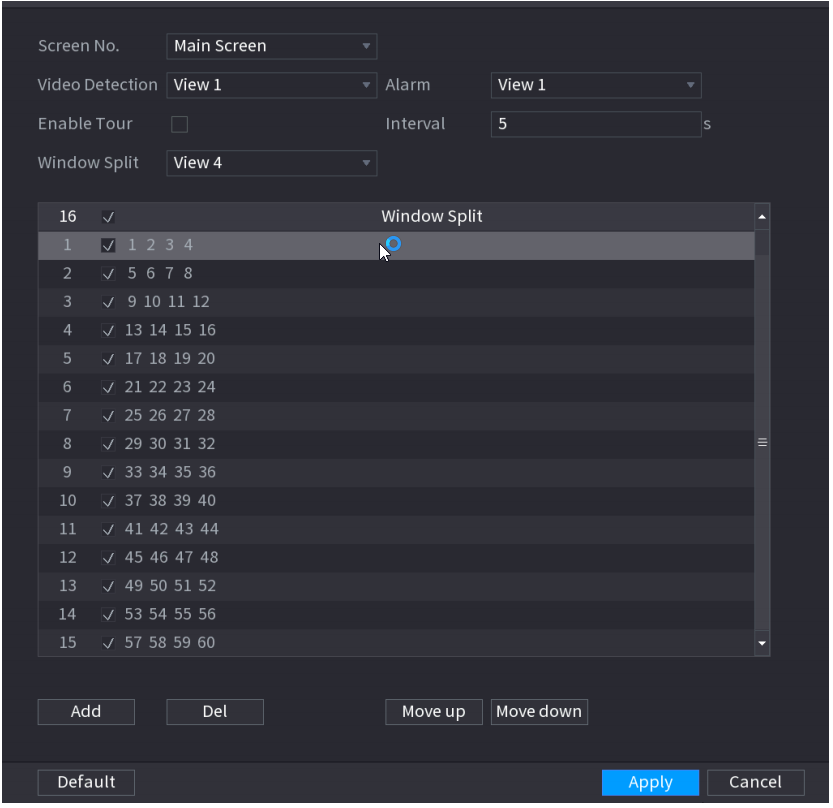
The Tour interface is displayed. See Figure
On the top right of the live view screen, use the left mouse button or press Shift to switch  and
and  to turn on/off the tour function
On the navidation bar,click  to enable the tour and click
  {height="" width=""} to disable it
Step 2 Configure the settings for the tour parameters. See Table
| Parameter | Description |
|---|---|
| Enable | Enable tour function |
| Interval (Sec.) | Enter the amount of time that you want each channel group displays on the screen. The value ranges from 5 seconds to 120 seconds, and the default value is 5 seonds |
| Video Detect, Alarm | Select the View 1 or View 8 for Motion Detect tour and Alarm Tour (system alarm events). |
| Window Split | In the Window Split list, select View 1, View 4, View 8, or other modes that are supported by the Device. |
| Channel Group | Display all channel groups under the current Window Split setting.
|
Step 3 Click Apply to save the settings.