Description:
This article provides step-by-step instructions for configuring email notifications via Gmail on an AiBase recorder or stand-alone IP camera.
Note: The steps for stand-alone IP cameras are the same as those for the recorder.
Compatible List:
Model | Version | |
NVR | NVR3104-4P | V8.2.4.1-20240914 |
NVR3108-8P | ||
NVR3216-16P | ||
NVR3216-16P-AI | ||
NVR3432-16P-AI | ||
NVR3432(No POE) | ||
XVR | XVR-3104-AI | V8.2.4.1-20240925 |
XVR-3108-AI | ||
XVR-3216-AI | 20240618 | |
XVR-3432-AI | ||
IP Cameras | CAM-IP3058-180-PV-AI | V31.35.8.2.4.1_240807 |
CAM-IP3135W-A-SI-28-AI | ||
CAM-IP3135B-A-SI-28-AI | ||
CAM-IP3135W-AA-SI-Z-AI | ||
CAM-IP3735W-AA-SI-Z-AI | ||
CAM-IP3335W-AA-SI-Z-AI | ||
CAM-IP3155B-PV-28-AI | ||
CAM-IP3155B-PV-Z-AI | ||
CAM-IP3155W-PV-28-AI | ||
CAM-IP3155W-PV-Z-AI | ||
CAM-IP3335W-28-AI | ||
CAM-IP3138W-A-SI-28-AI | ||
CAM-IP3138B-A-SI-28-AI | ||
CAM-IP3138W-AA-SI-Z-AI | ||
CAM-IP3158W-PV-28-AI | ||
CAM-IP3174-PV-28-AI | ||
CAM-IP3178B-PV-28-AI | ||
CAM-IP3178-PV-Z-AI | ||
CAM-IP3338W-AA-SI-Z-AI | ||
CAM-IP3338W-28-AI | ||
CAM-IP3355W-PV-28-AI | ||
CAM-IP3355W-PV-Z-AI | ||
CAM-IP3358W-PV-28-AI | ||
CAM-IP3358W-PV-Z-AI | ||
CAM-IP3638-PV-4X-AI | ||
CAM-IP3635-33X-AI | ||
CAM-IP3738W-AA-SI-Z-AI | ||
CAM-IP3755W-PV-Z-AI | ||
CAM-IP3758W-PV-Z-AI | ||
CAM-IP3778-PV-28-AI |
Related question:
- How do I receive email notifications?
- What are the SMTP settings for Gmail?
Set Up Email Notifications on the Device’s Web Interface
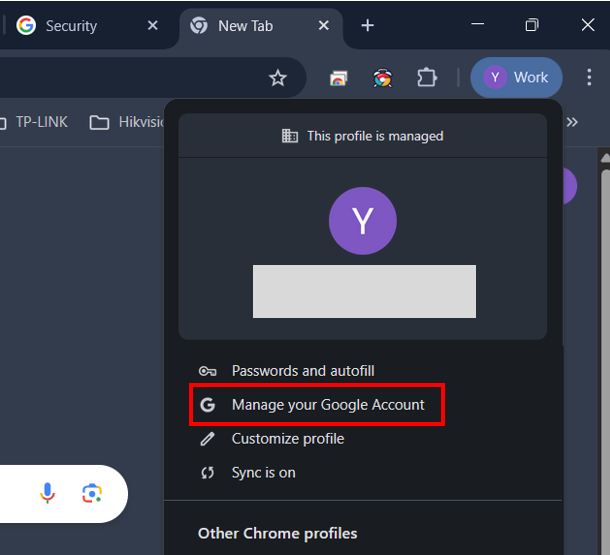
- Open a web browser and log in to your Gmail account. Click your profile icon in the top-right corner. Select "Manage your Google Account" from the dropdown menu.
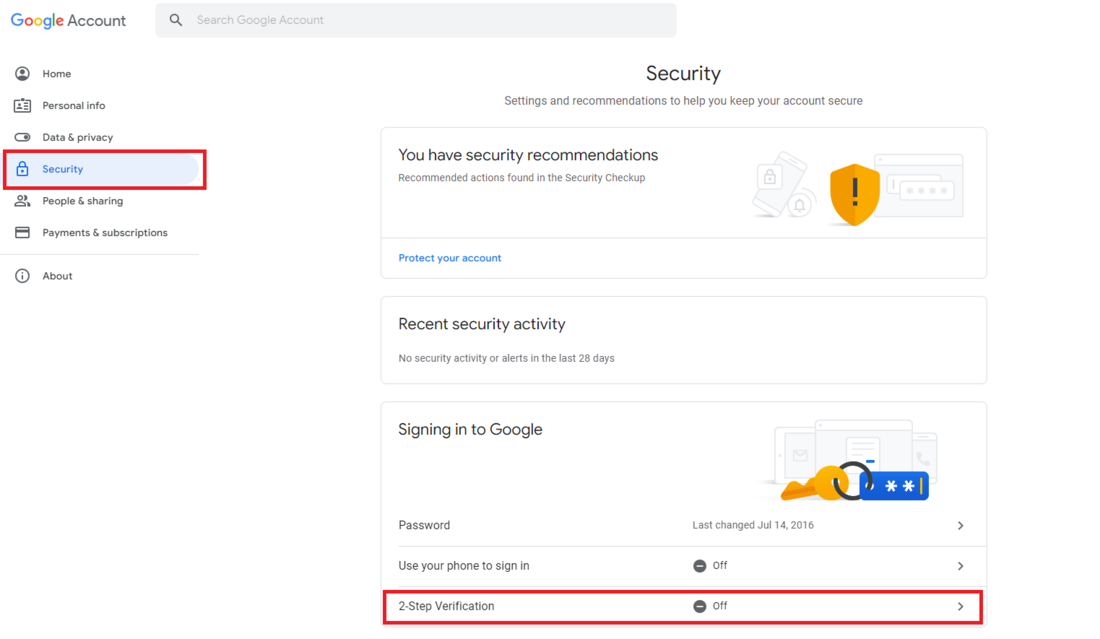
2. Select Security from the menu on the left. Under the "Signing in to Google" section, check the status of 2-Step Verification
— if it’s already On, skip to Step 4.
— if it’s Off, click the arrow next to 2-Step Verification to begin the setup.
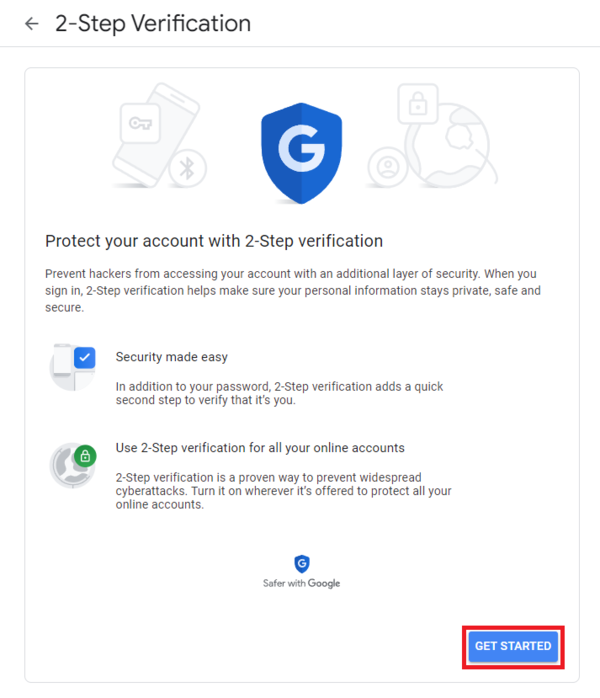
3. Select Get Started and then follow through all the steps to setup 2-Step Verification for your Gmail account.
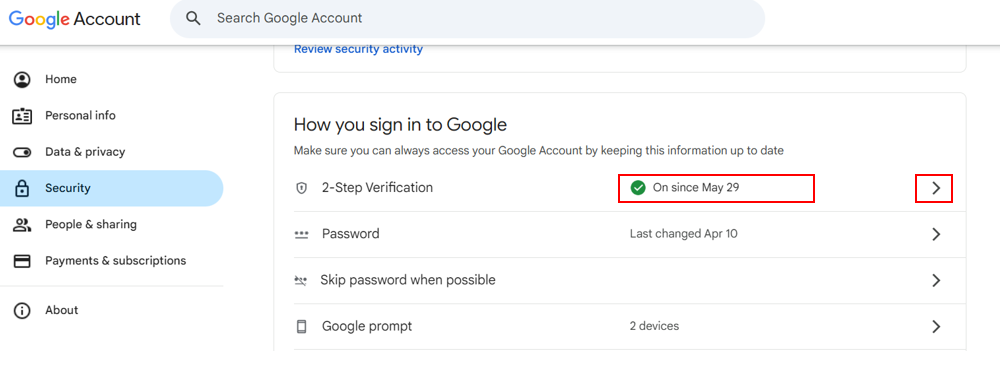
4. After enabling 2-Step Verification, it should now display as “On”.
Click the arrow to continue.
5. Click the arrow in App passwords to continue.
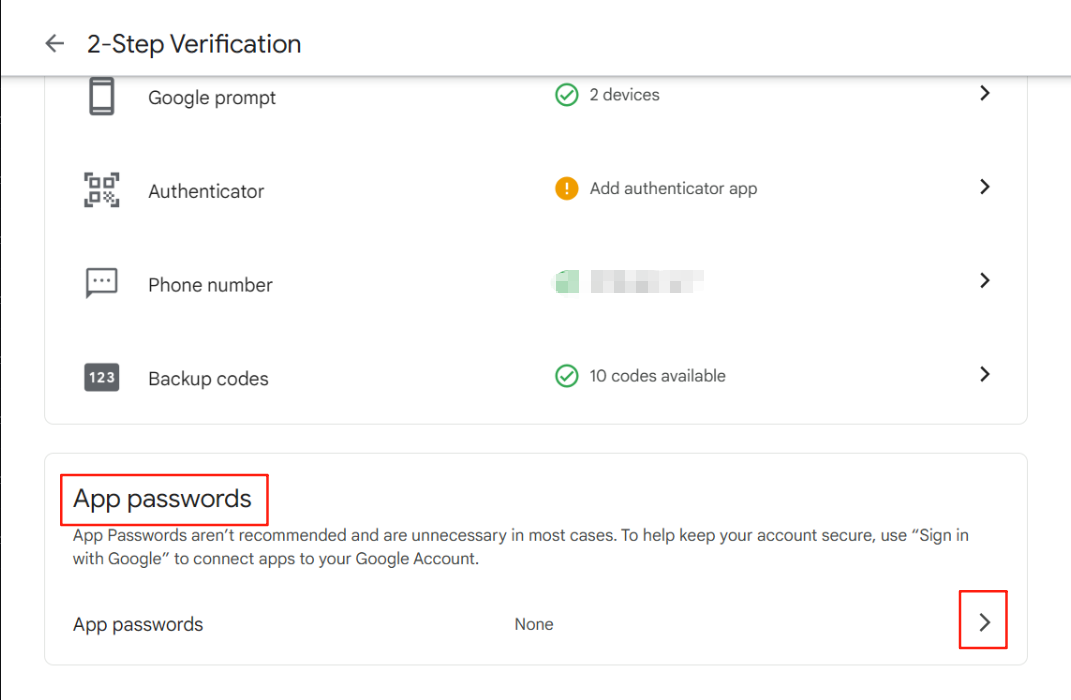
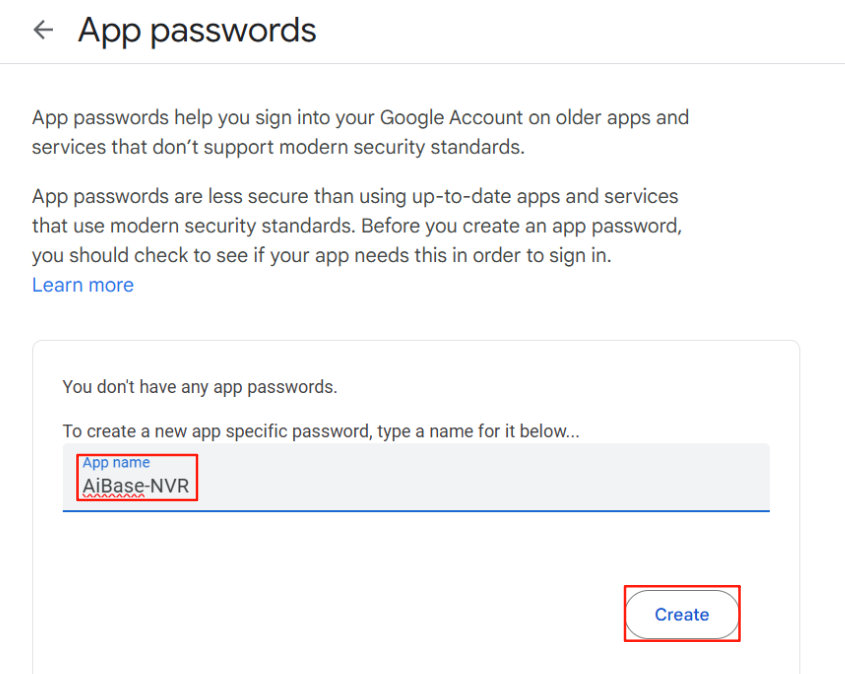
6. Enter a name for the app, then click Create.
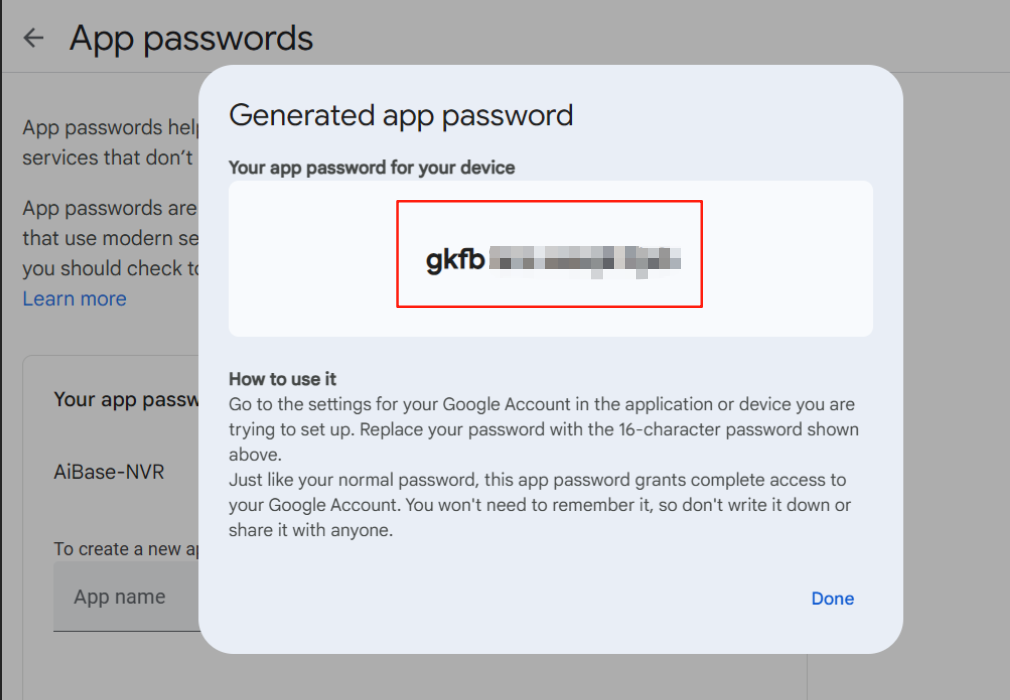
7. Copy the generated app password — you will need it for the device’s email settings page.
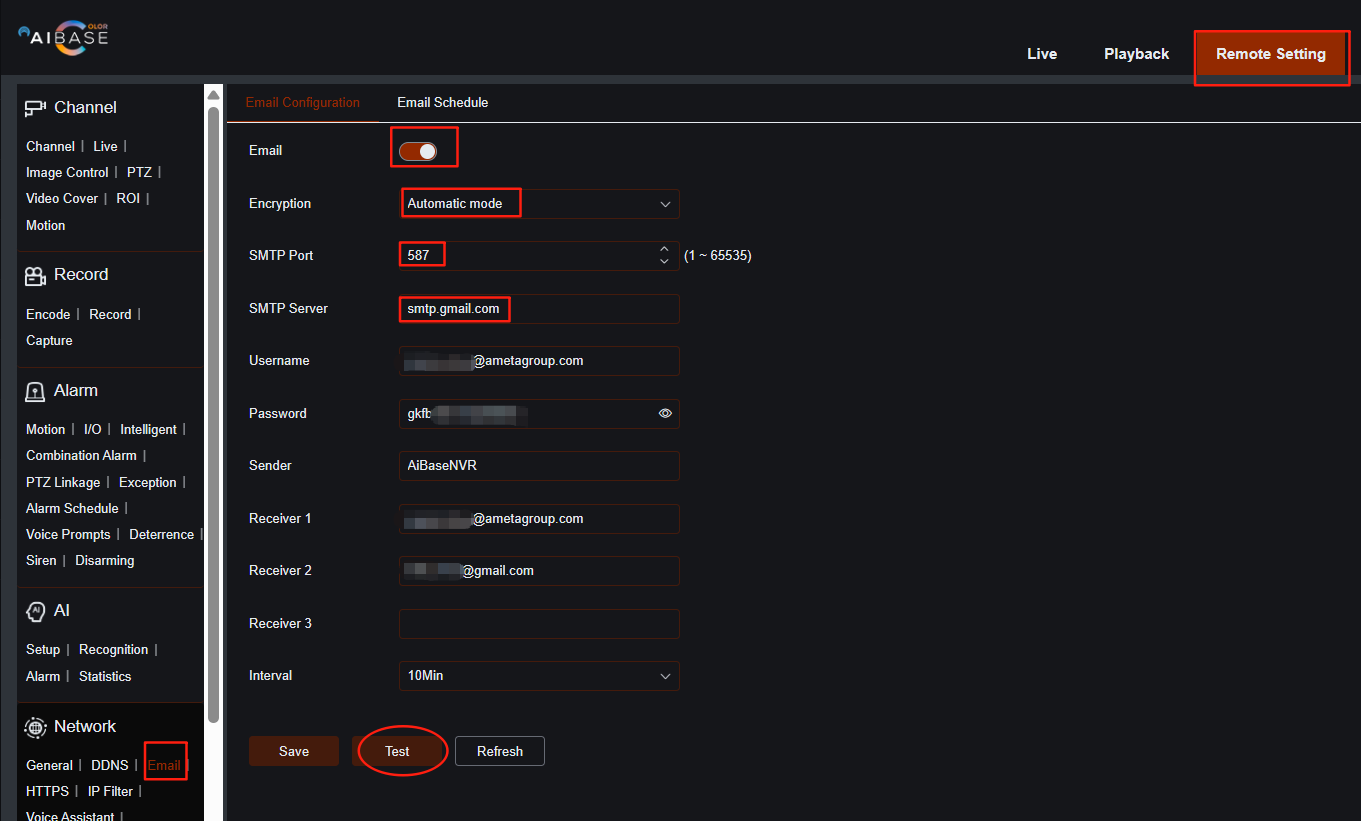
8. On the device’s webpage, click Remote Setting, and select Email from the Network section.
- Toggle the switch to enable email notifications.
- Encryption: Automatic.
- SMTP Port: 587.
- SMTP Server: smtp.gmail.com.
- Username: your full Gmail email address.
- Password: generated in Step 7.
- Set Sender to your device’s name (can be any name).
- Enter the Receiver email address(es) to receive notifications (up to 3 recipients).
- Set the Interval for sending notifications (time between alerts).
Finally, click the Test button to verify the setup.
9. Click Email Schedule at the top to configure the notification schedule for different event types.
- Select the desired channel.
- Choose the event type from the list on the right.
- Use your mouse to left-click and drag on the timetable to define the active time periods for notifications.
