Compatible device list:
Aibase color:
| Model | Version |
|---|---|
| CAM-IP3768W-0832-SI-LPR-V2 | VC48.55.1.1.1-250819(above) |
Akuvox:
| Model | Version | Model | Version |
|---|---|---|---|
| X910 | 2910.30.11.28 | X912 | 912.30.11.34 |
| X915 V2 | 2915.30.10.420 | X916 | 916.30.10.346 |
| R29 | 29.30.10.404 | R28 V2 | 228.30.10.231 |
| R25 | 25.30.10.117 | R20 | 320.30.11.30 |
| E18 | 18.30.10.247 | E16 V2 | 216.30.10.208 |
| A08 | 108.30.11.8 | A01/A02 | 101.30.10.206 |
| A03 | 103.30.10.204 | A094 | 92.30.10.205 |
| A095 | 95.30.10.110 | S539 | 539.30.10.403 |
Akuvox setup:
- Enter the device IP address and enter the device webUI
- Setting -> enable HTTP API
- Input the following information
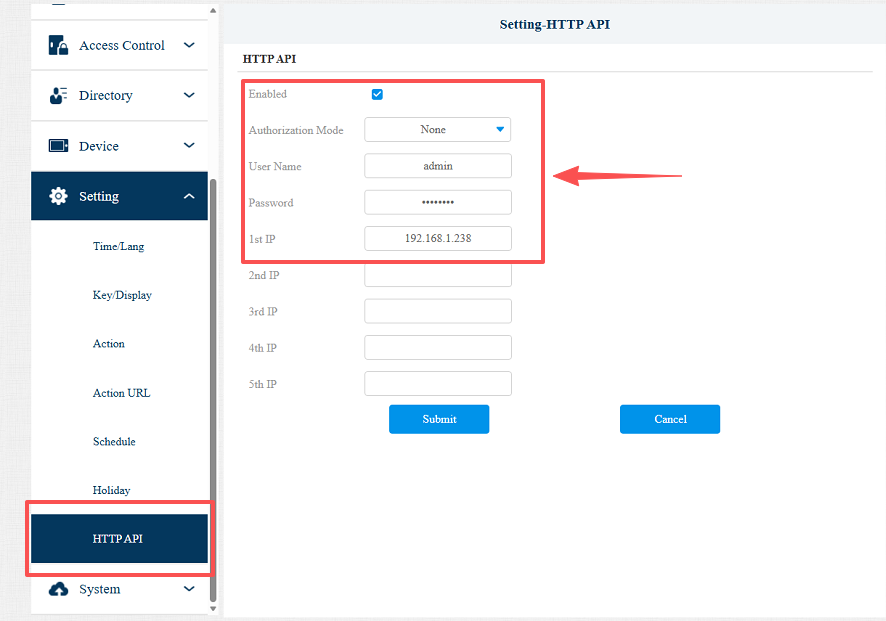
a. Authorize mode: NONE
b. User name: LPR camera username
c. LPR camera password
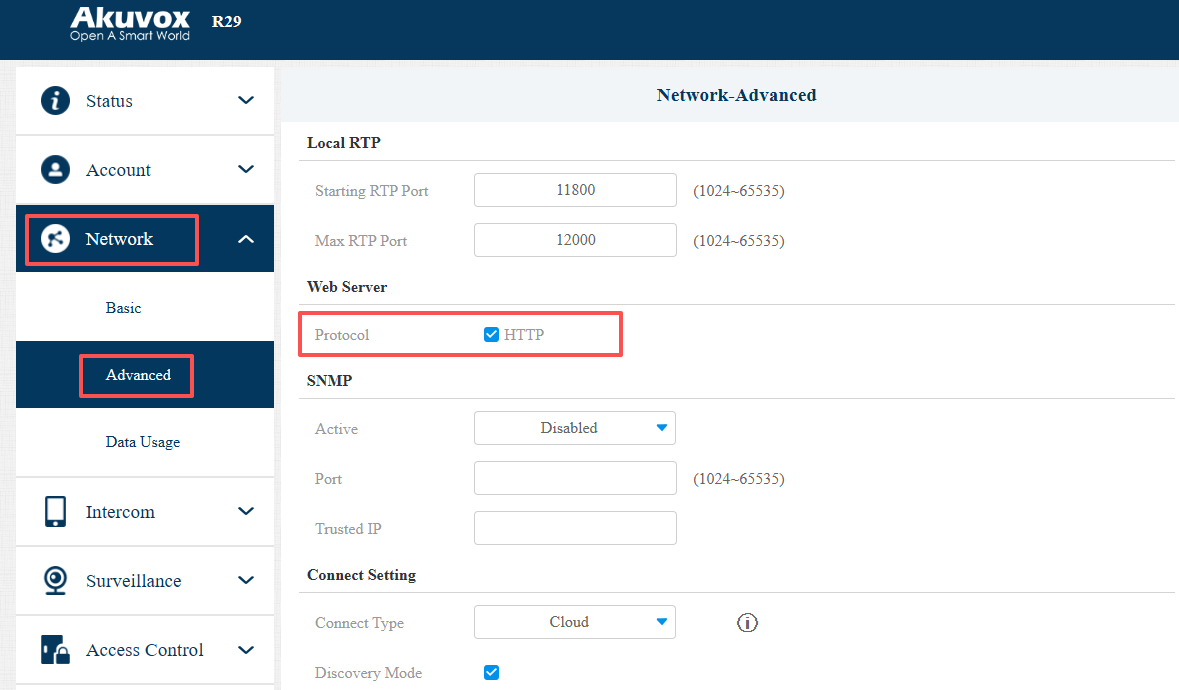
d. 1st IP: IP address of the LPR. - Go to Network → Advanced → Web Server and enable HTTP Protocol.
Note: On some Akuvox doorphone or access control models, you may see an “HTTP Redirect” option. If so, please disable it. If both HTTP and HTTPS are enabled, please disable HTTPS and keep HTTP enabled.
LPR setup:
-
Use the IP address to login to LPR camera webUI
-
Remote setting -> Network -> Platform access ->event push platform
-
Set it like the following
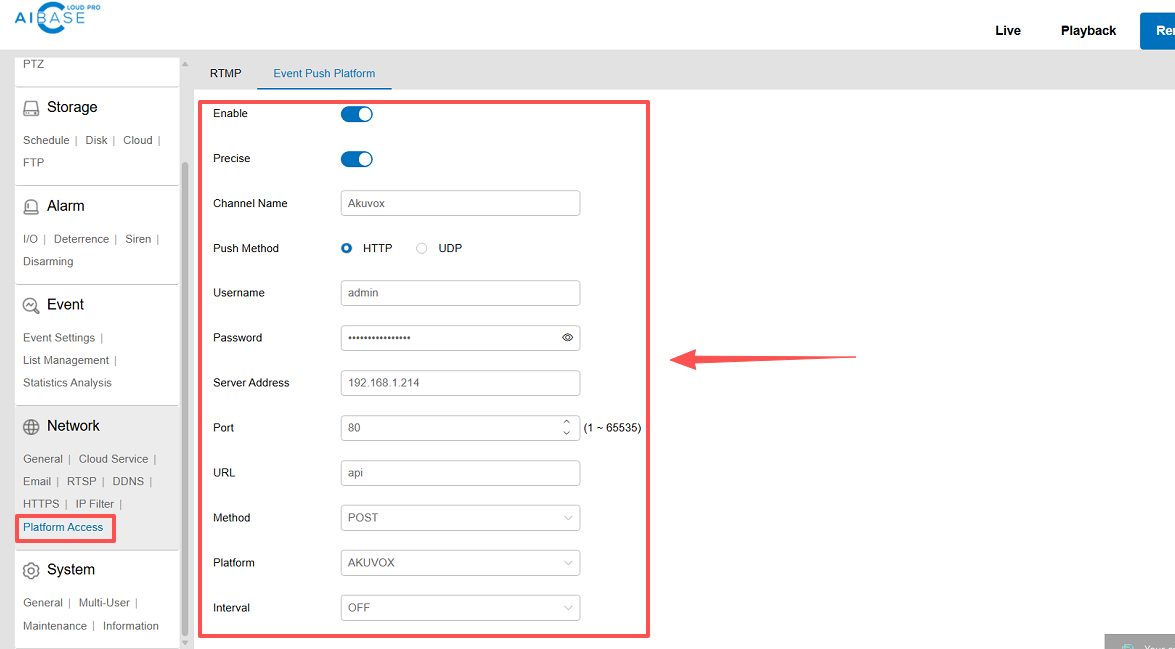
a. Enable the switch
b. Enable precise
c. Enter the channel name
d. Enter the Akuvox device username
c. Enter the akuvox device password
d. Enter the akuvox device IP address
e. Port enter 80
f. URL enterapi
g. method choose post
h. Platform choose akuvox
i. Interval: You can choose one or more; it will affect how often the message is sent. -
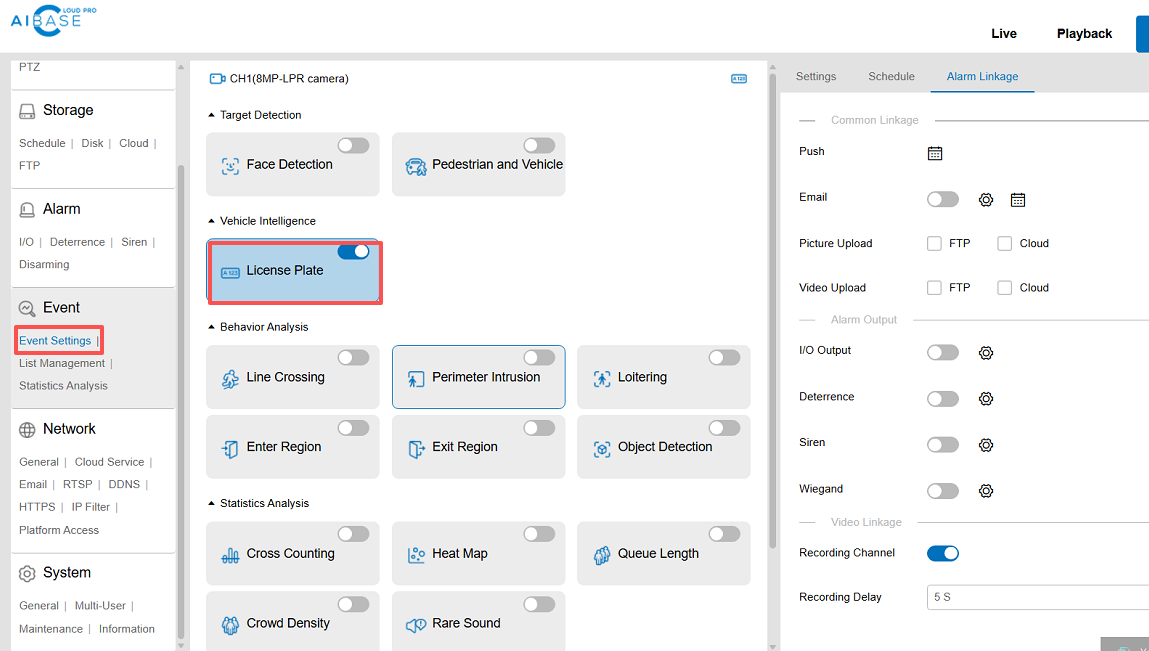
Enable LPR function. Event -> Event setting -> License plate.
Test
Trigger the LPR camera. And your Akuvox intercom will have the following record:
Status -> access log.
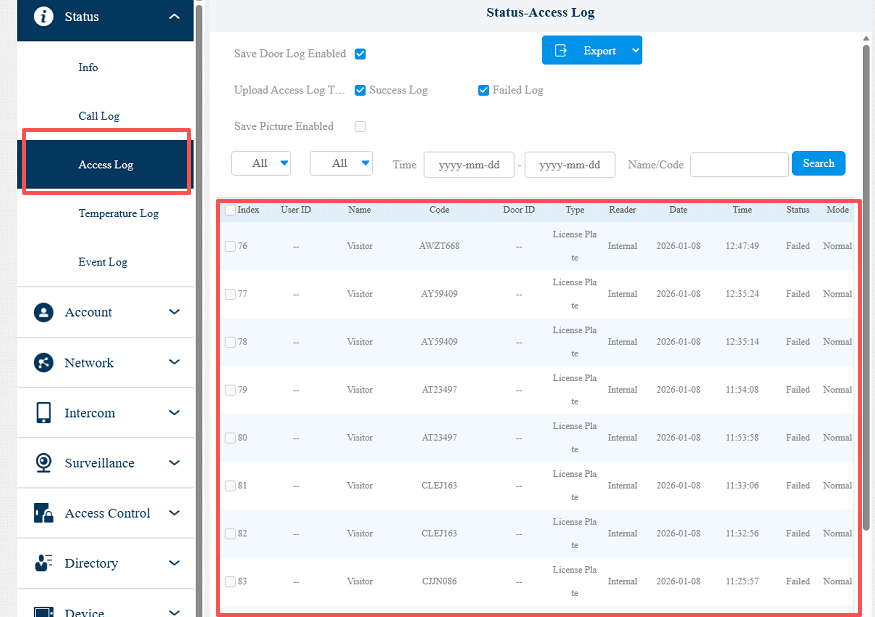
The setup is done.
For the rest of cloud project setup. Please refer to this FaQ