How to Setup Access control ADC-EG4-ASC3202B
Step by Step Instructions
Step 1: Initialization via ConfigTool
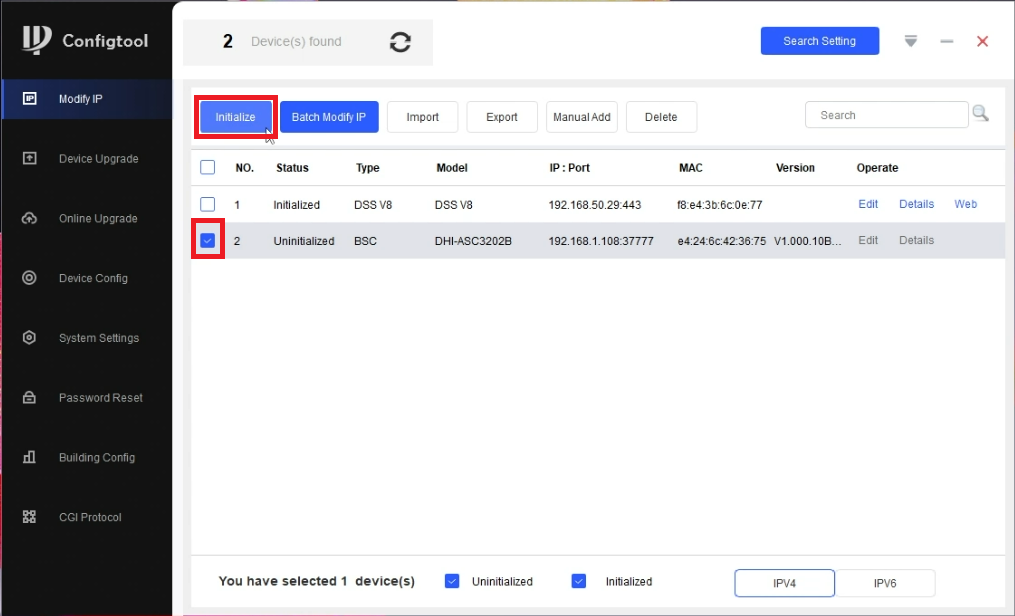
- Open the Dahua ConfigTool.
Check the box next to the ASC3202B in the list.
Click on Initialize
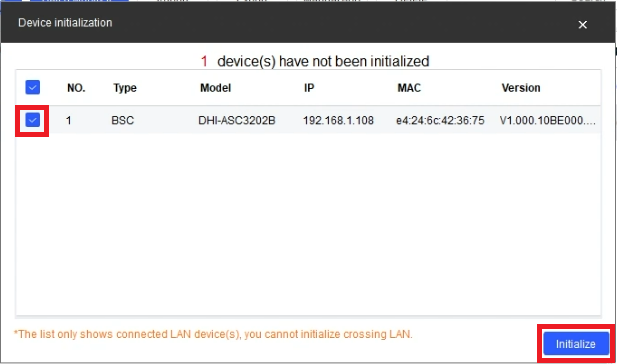
- Make sure the box is checked next to the ASC3202B in the list.
Then click on Initialize
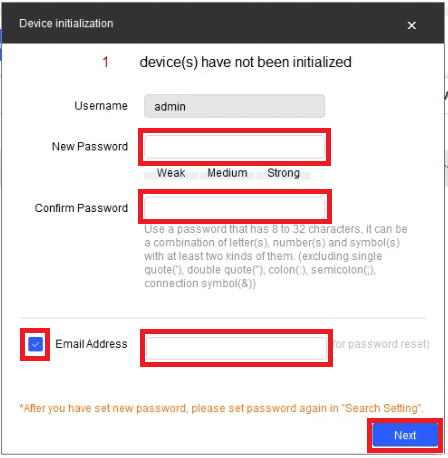
- Enter a password that meets the criteria listed in the New Password and Confirm Password fields.
Then either check the box next to** Email Address** and enter an email address for password recovery, or uncheck the box to skip that step.
Click on Next
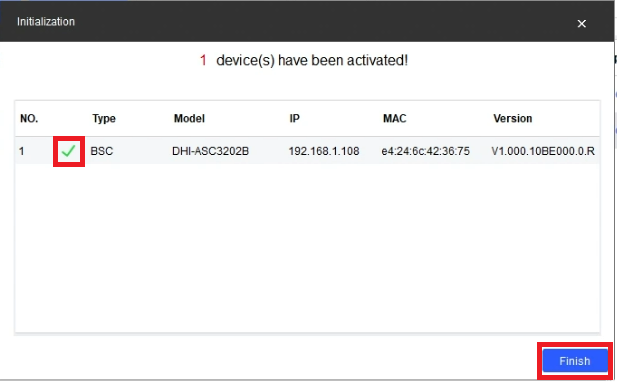
- Once the ASC3202B has be successfully initialized, it will show a green check mark next to it in the list.
Click on Finish
-
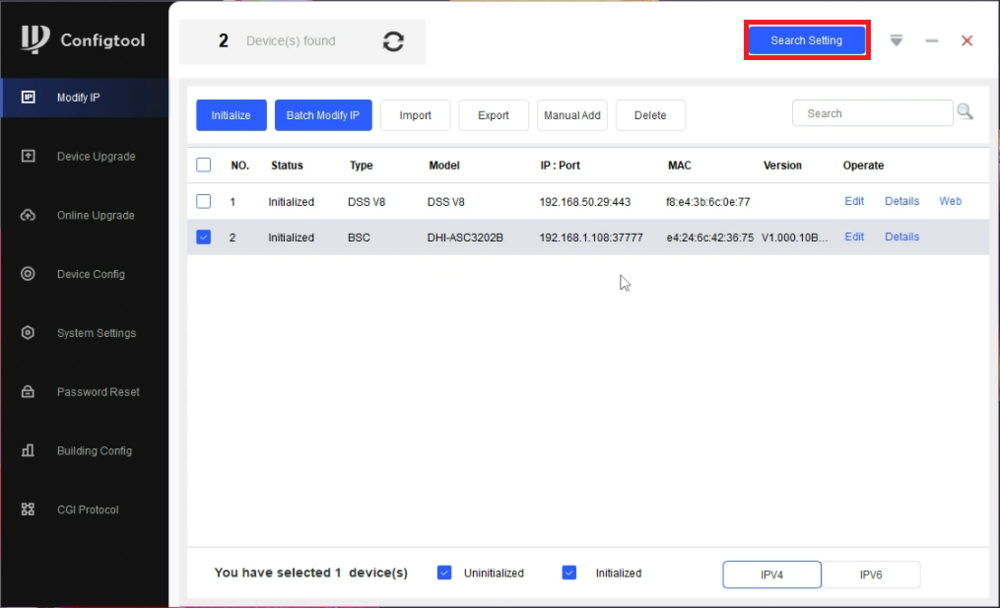
Click on Search Setting at the top
-
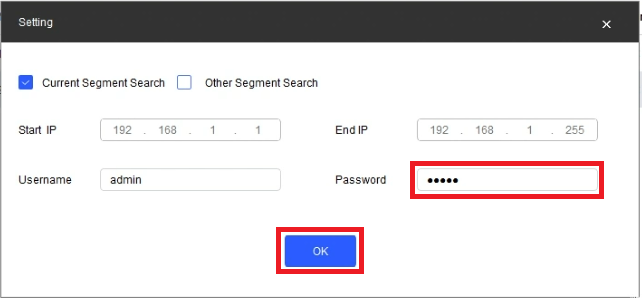
Enter the password you just set in Step 3 above, in the Password field.
Then click on OK
-
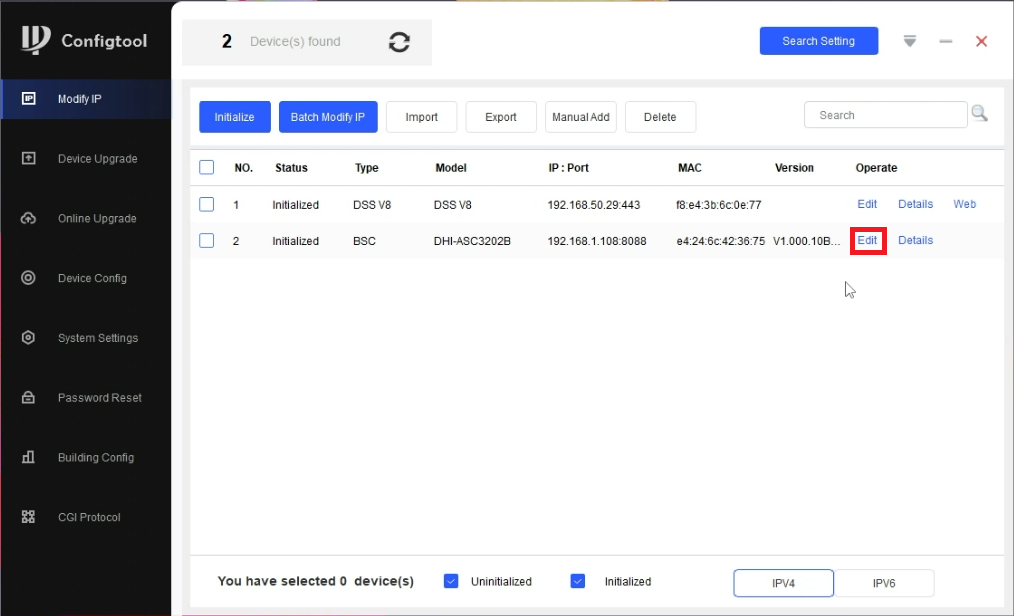
Select Edit next to the ASC3202B
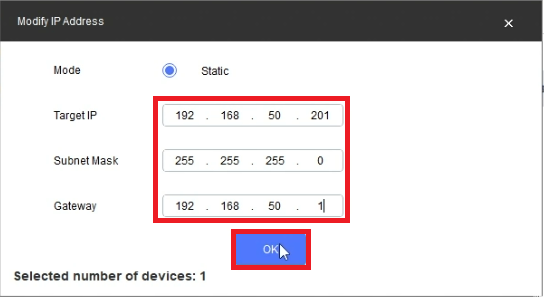
- Enter the IP, Subnet Mask, and Gateway you want to set on the ASC3202B, making sure it's an available IP address on the network.
Then click on OK
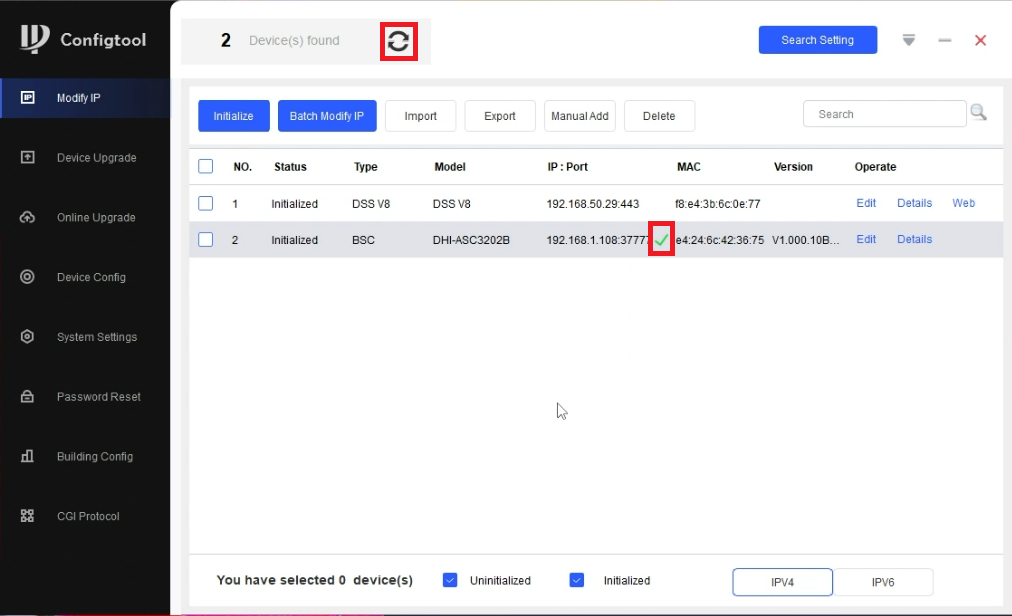
- Once the IP scheme of the ASC3202B has changed successfully, you will see a green checkmark next to it in the list.
Click on the Refresh button at the top to varify the new IP address
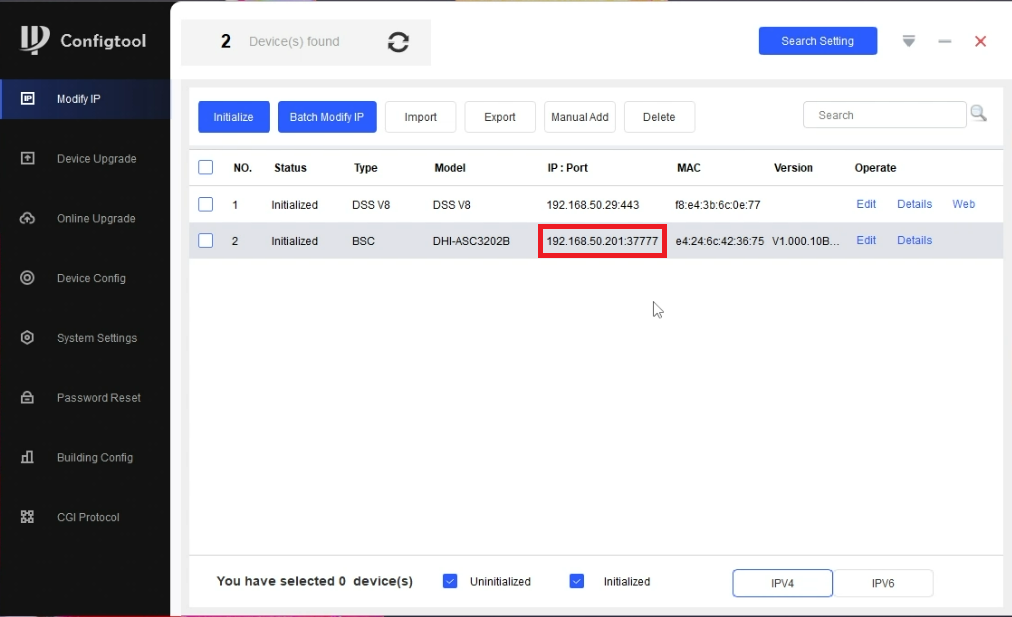
- You will see the new IP address of the ASC3202B in the list
Step2: Setup
- Open a web browser and enter the IP address of the ASC3202B in the URL field.
Once the browser connects to the ASC3202B. Enter "admin" in the Username field and then enter the password for the ASC3202B in the Password field.
Then click on Login

- If this is a standalone access controller or the first of multiple ASC3202B units you are setting up, select Main Control.
If you already setup 1 Main ASC3202B controller and are setting this up as a secondary access controller on the same network, select Sub Control.
Then click on Next

- If you plan to use this as a single door access controller, select Single Door.
If you plan to use this as a 2 door access controller, select Double Door.
Type in the name(s) of the door(s) in the field(s) to the right.
Then click on Next

- For each door, check the boxes for which devices you plan to wire up to the ASC3202B.
If you plan to have a card reader connected, check Entry Card Reader. Then choose the wiring connection the reader will use: Wiegand, OSDP, or RS-485. (OSDP is a more secure version of RS-485 and uses the same wiring.)
If you plan to have an exit button connected, check Exit Button.
If you plan to have a door sensor connected, check Door Detector.
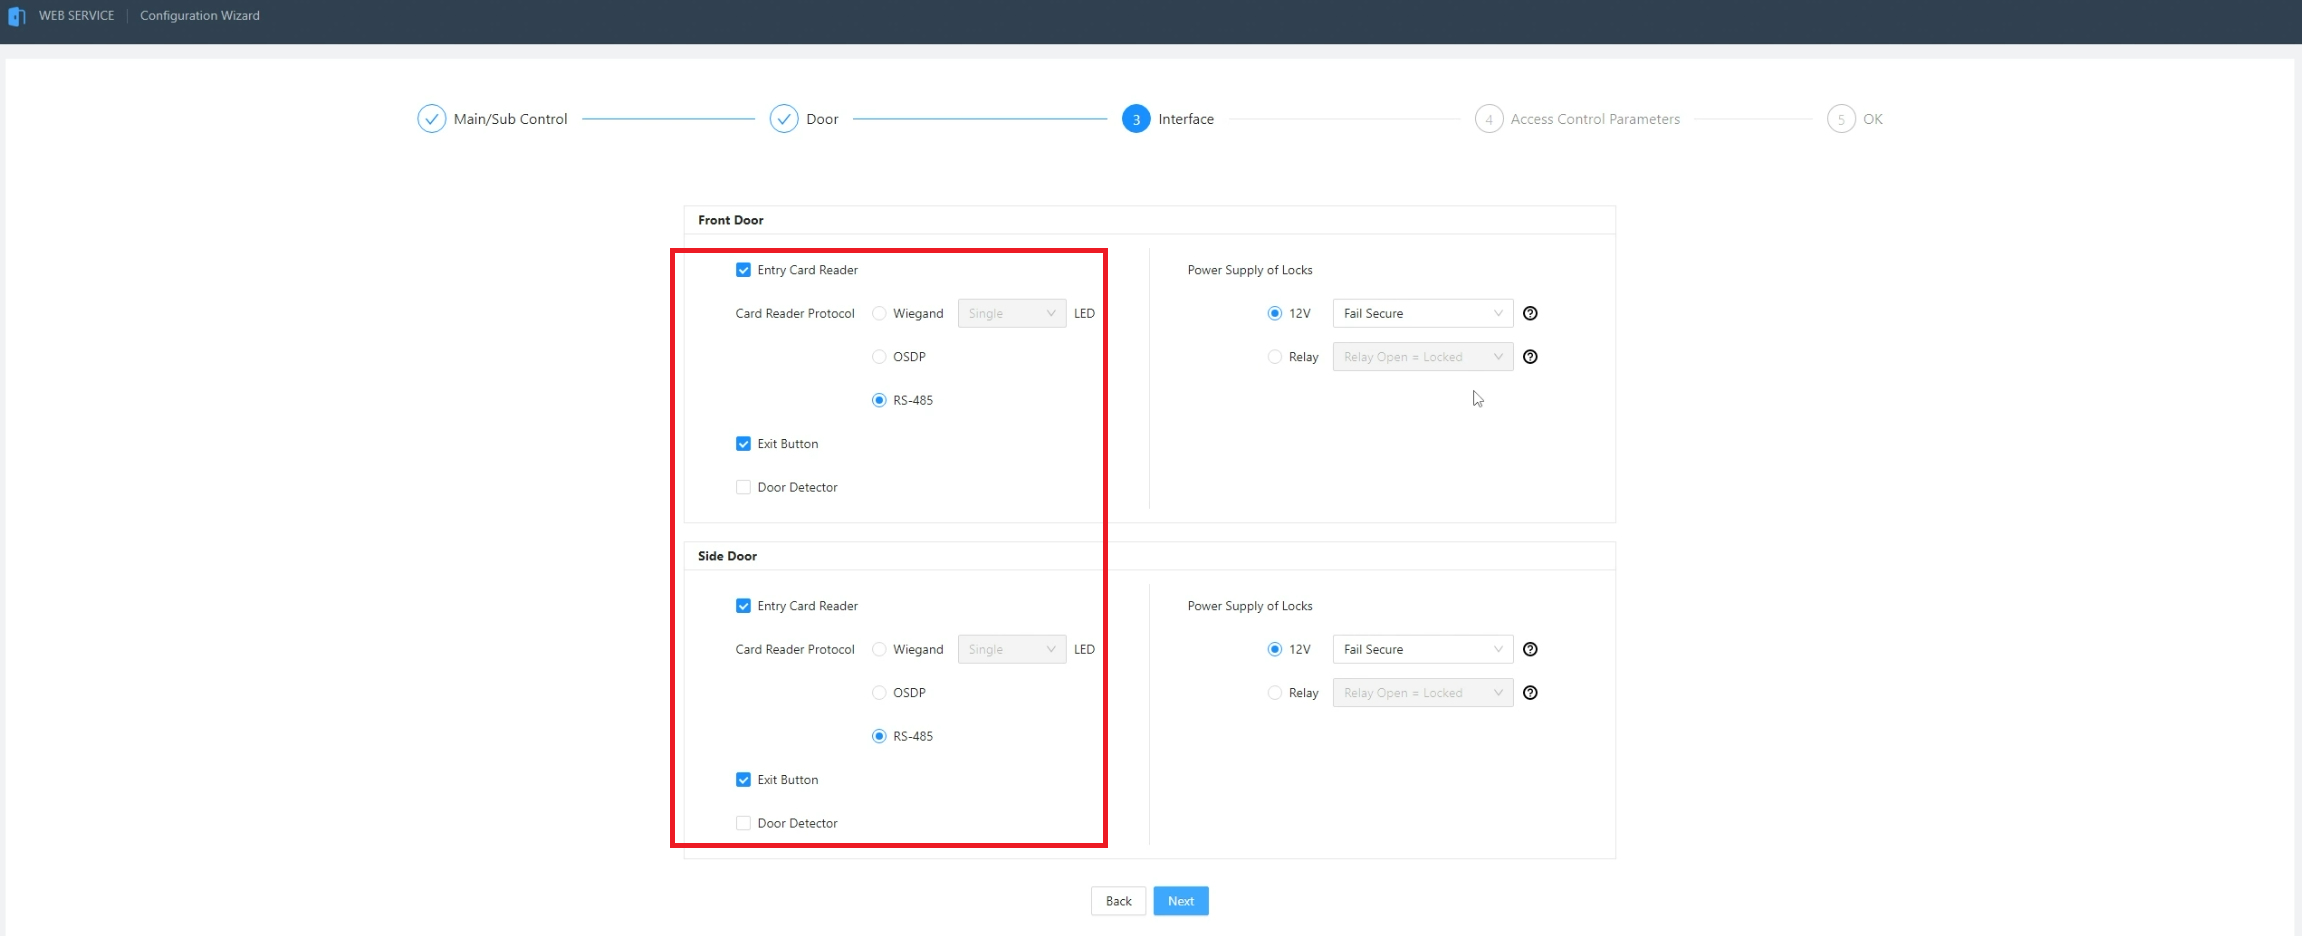
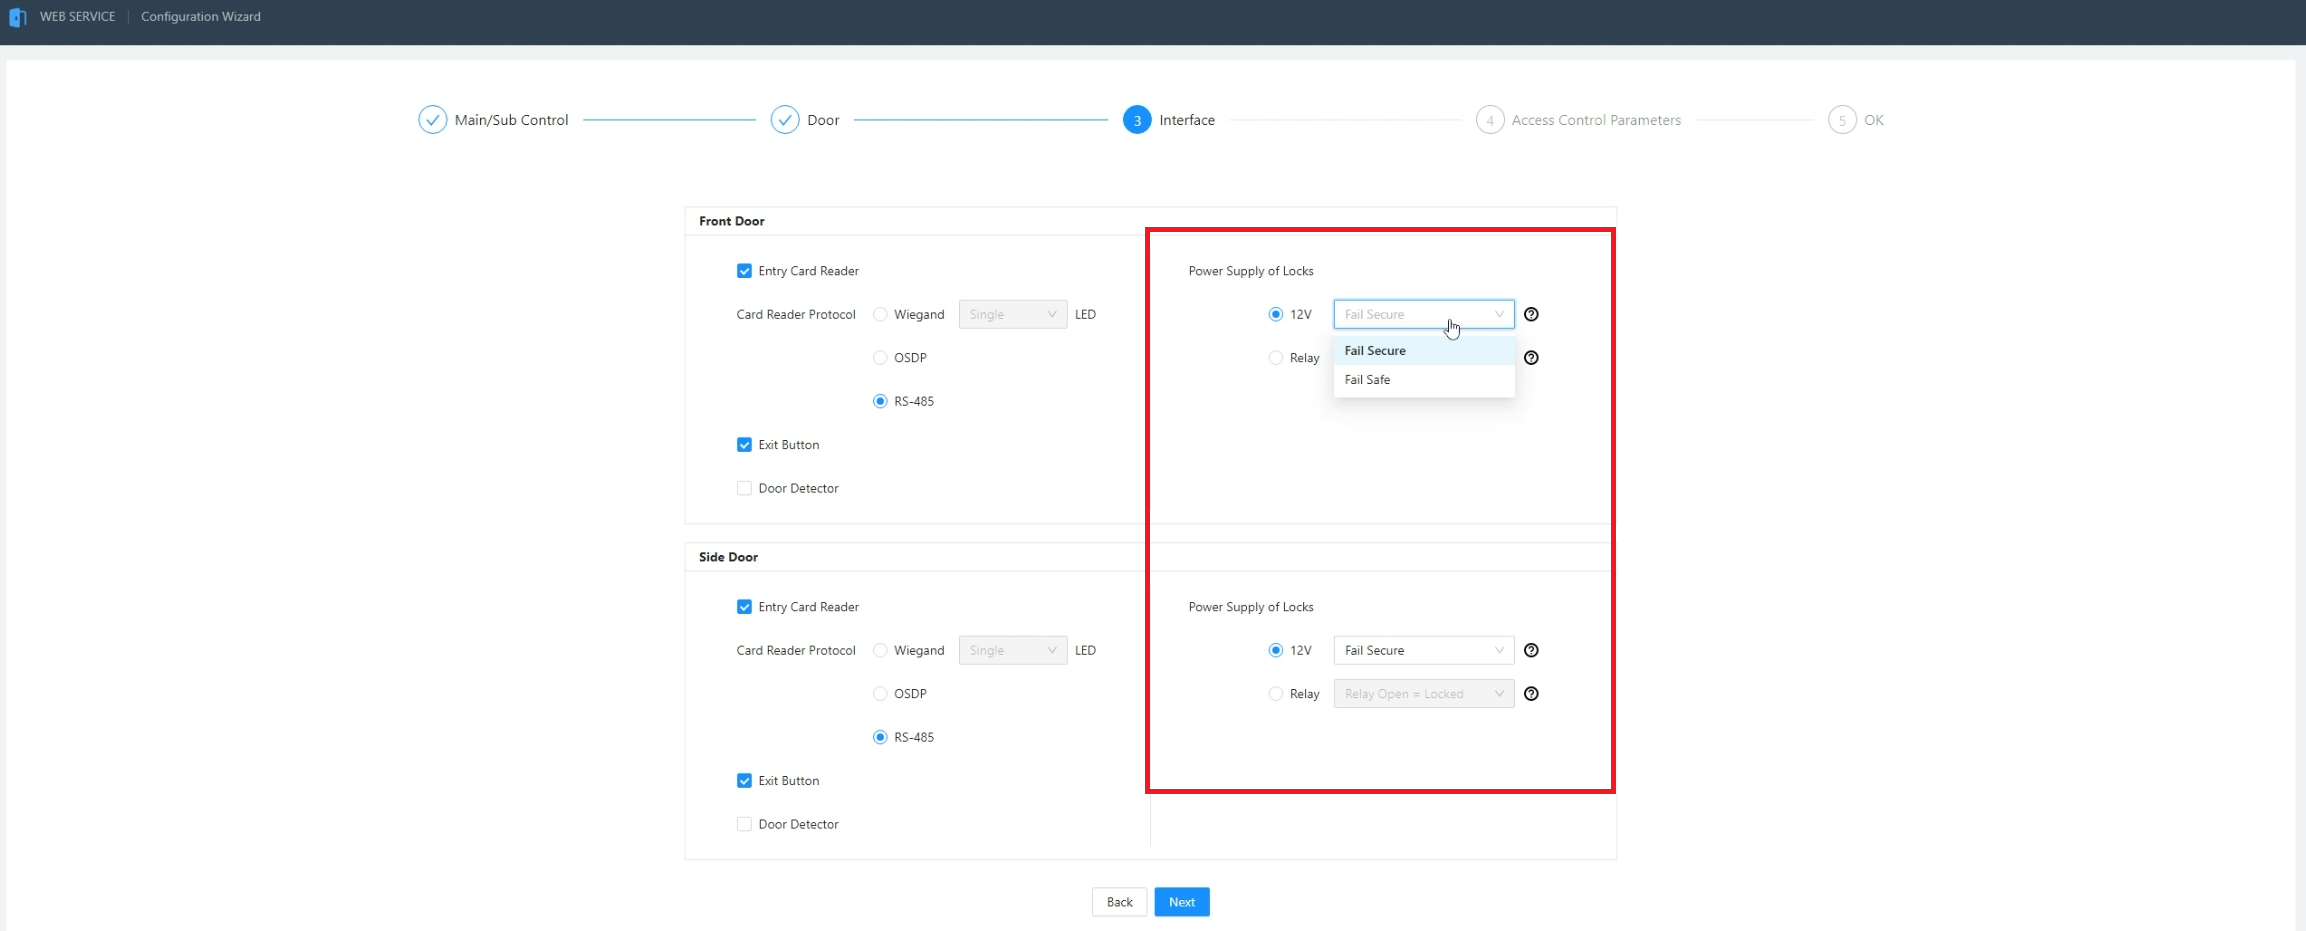
5, For each door, set how the locks will be powered.
If you plan to have the lock use the ASC3202B's built in 12V power, select 12V. Then select either Fail Secure from the drop-down if it's a normally closed lock or Fail Safe if it's a normally open lock.
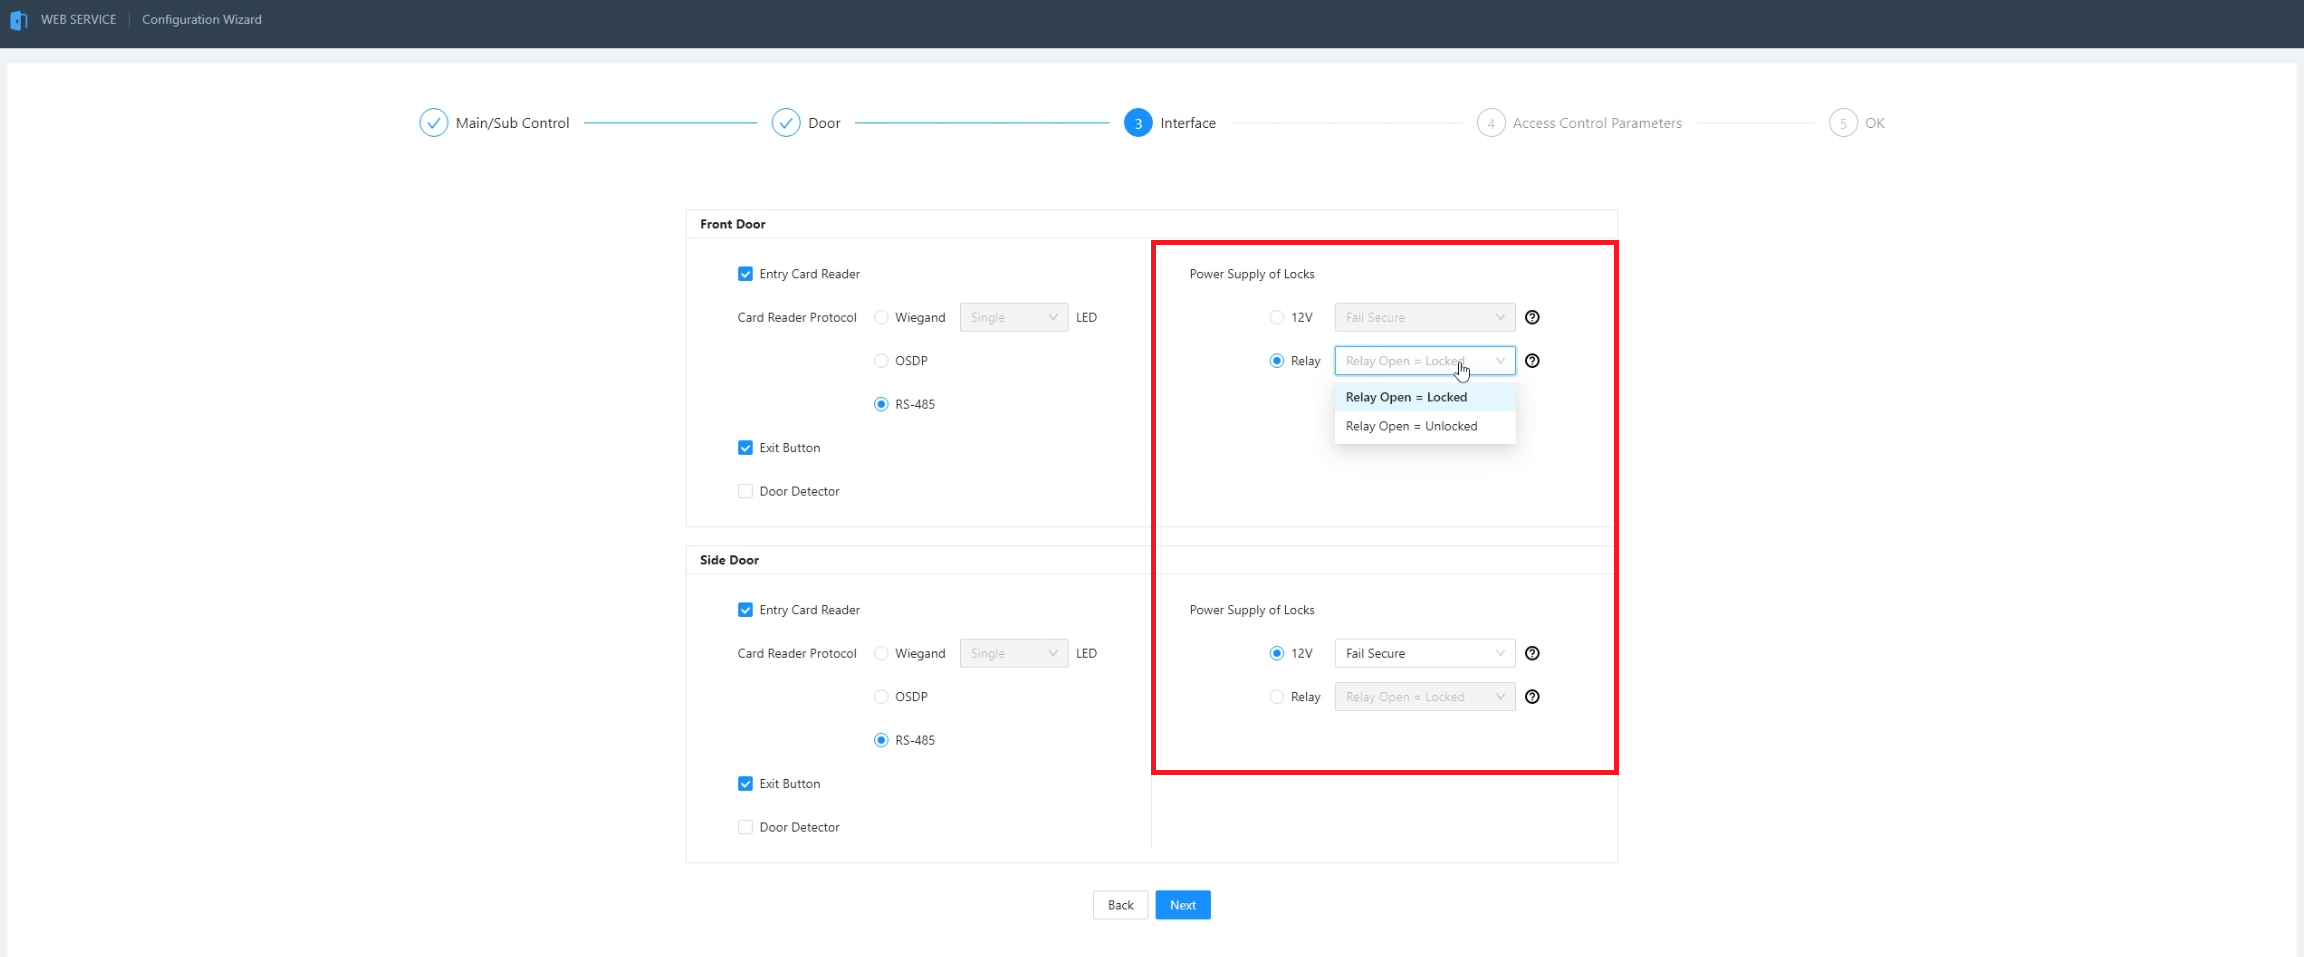
If you plan to have the lock use an external power supply, select Relay. Then select either Relay Open = Locked from the drop-down if it's a normally closed lock or Relay Open = Unlocked if it's a normally open lock.
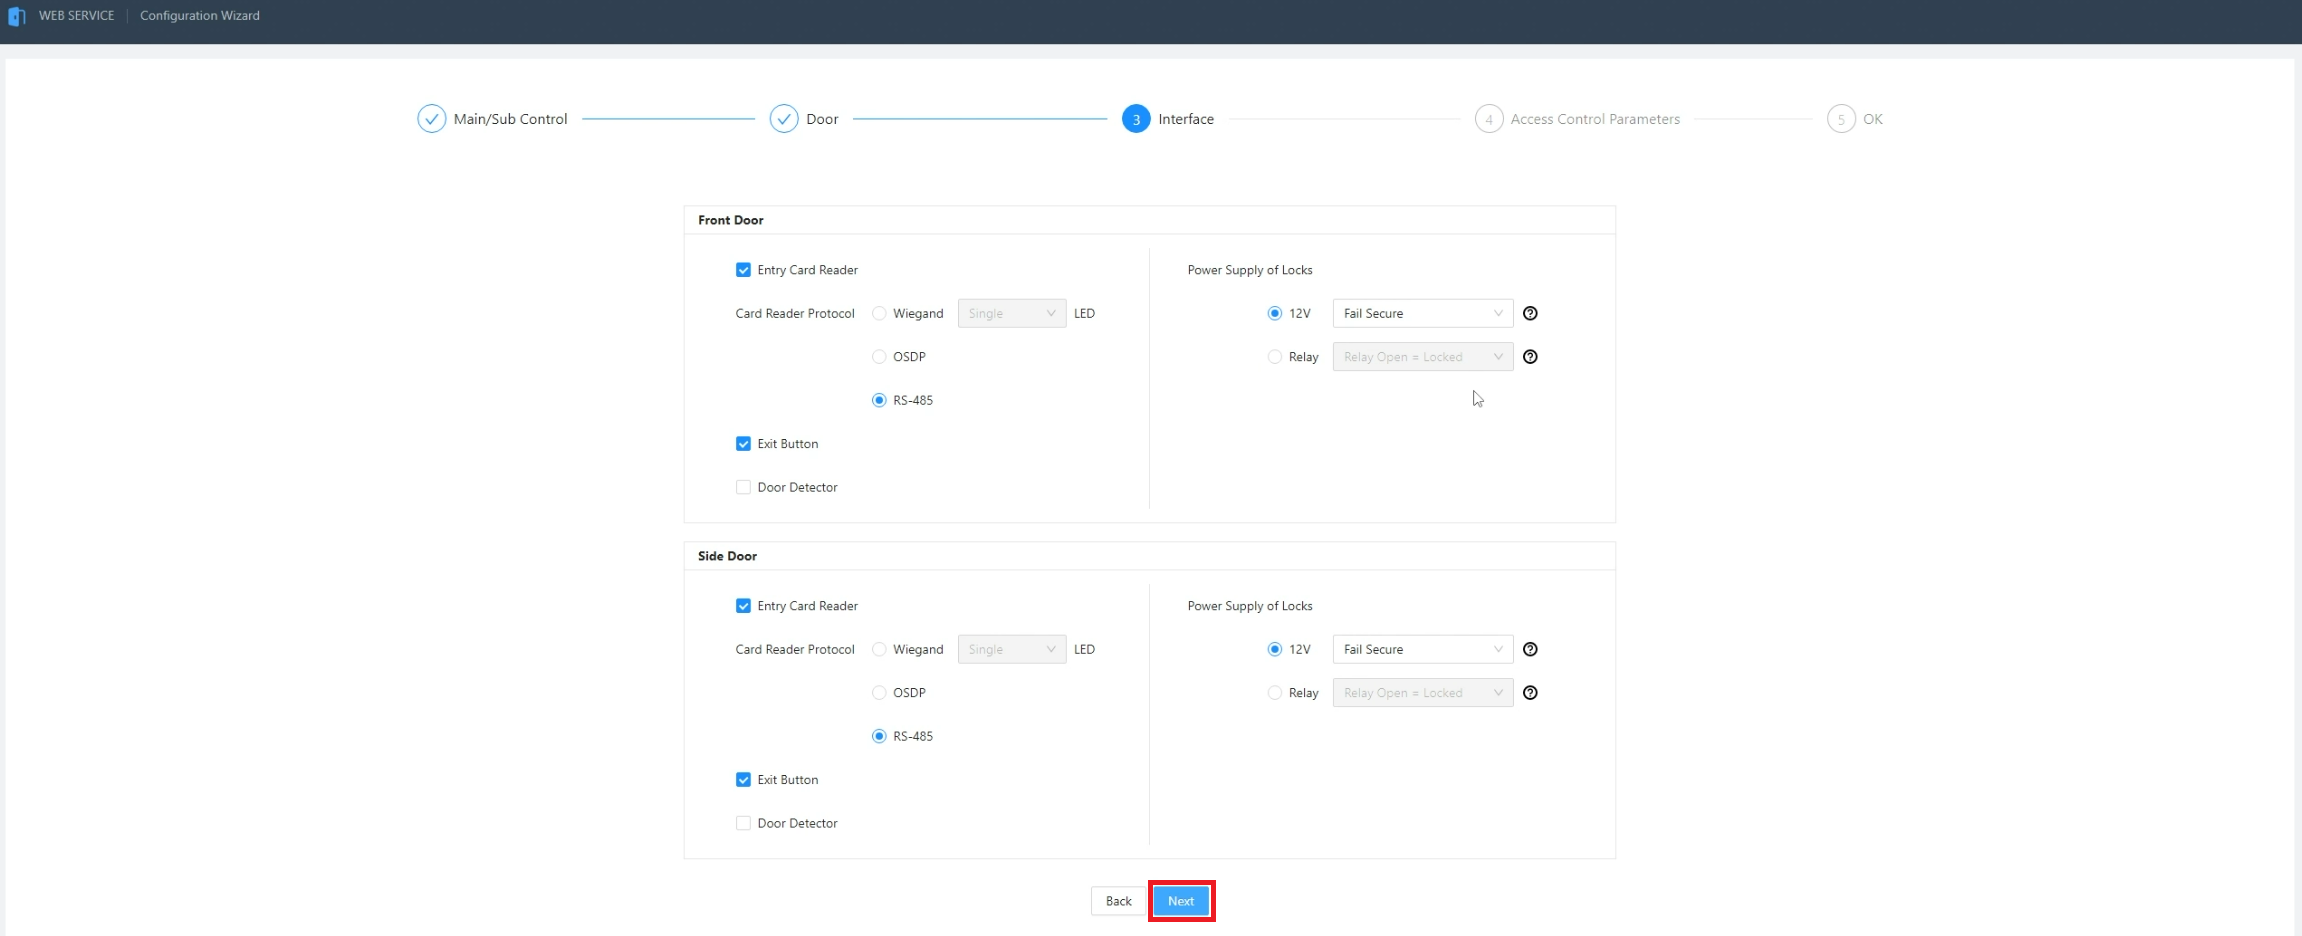
-
When you are done making changes click on Next
-
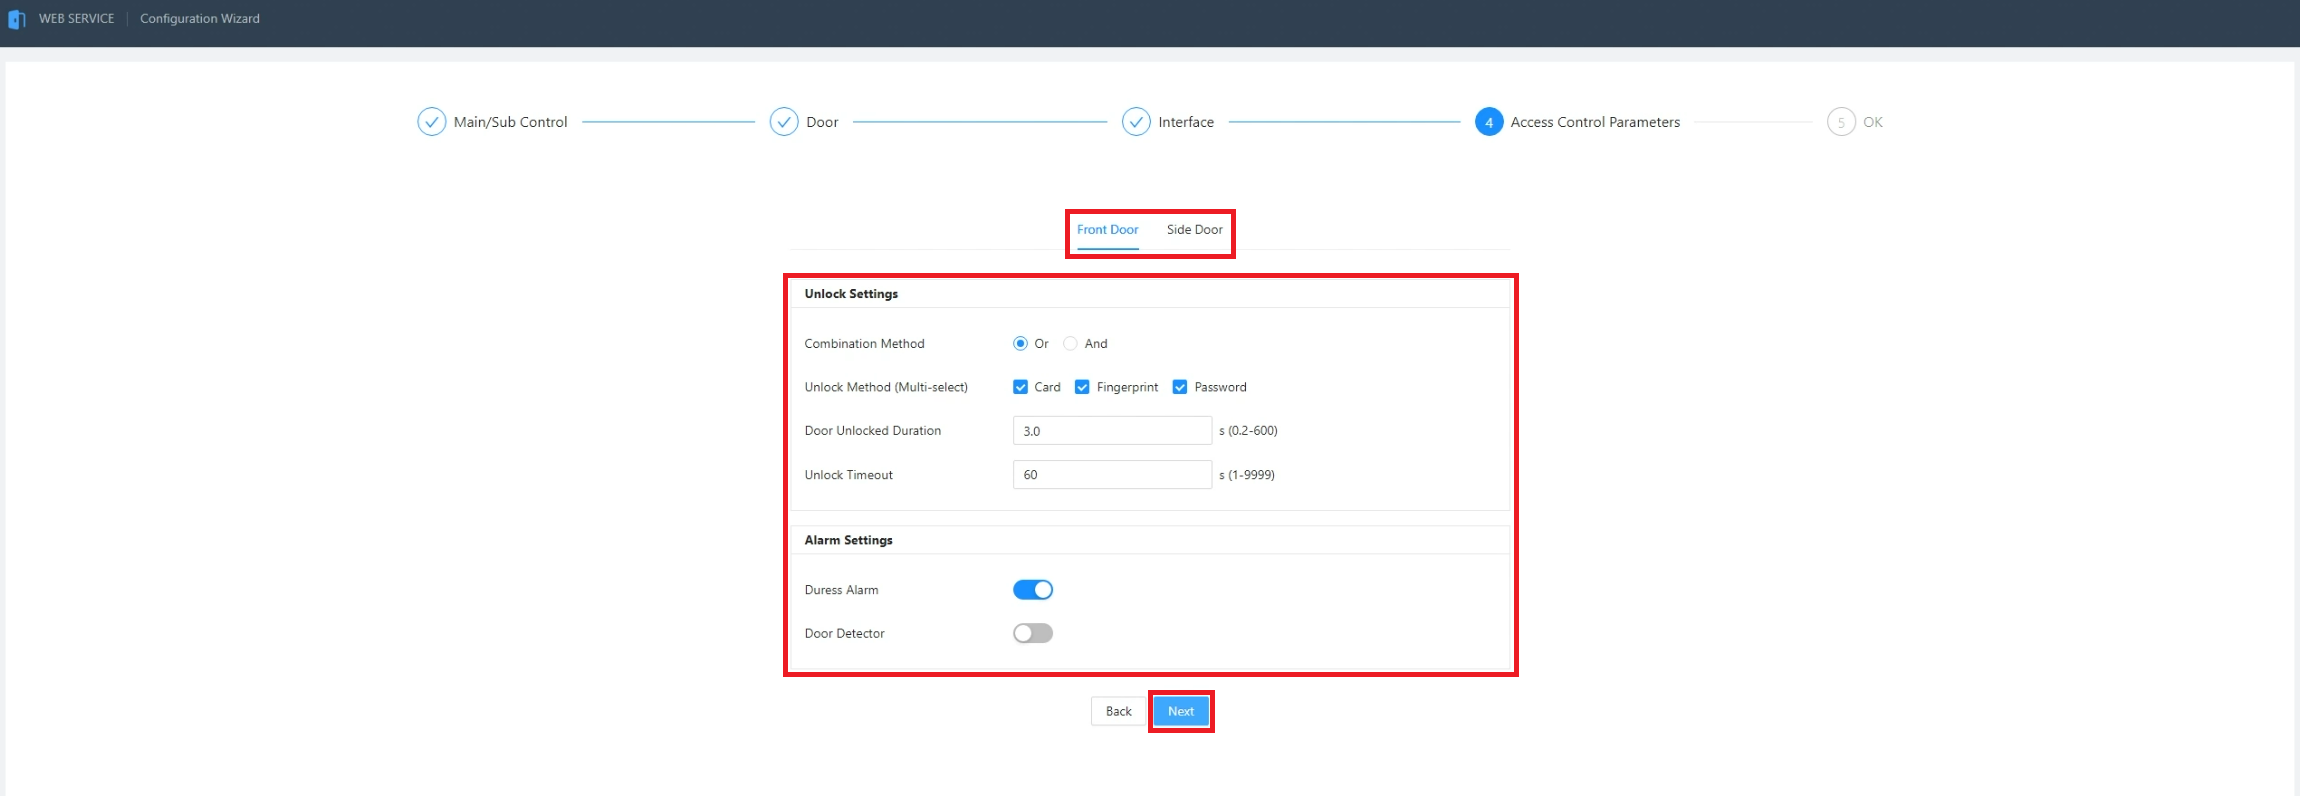
Set the settings for how you want each door to be unlocked and which alarms are enabled.
Set Combination Method to either Or if you want users to be able to unlock the door with just one method (Card, Fingerprint, or Password), or set it to And if you want users to have to use multiple methods.
Check the boxes next to Unlock Method (Multi-select) for which methods users will be allowed to use to unlock the door.
Enter the amount of time, in seconds, you want the door to stay unlocked once it has been unlocked in the field next to Door Unlocked Duration.
Enter the amount of time, in seconds, you want for when an alarm goes off if the door is kept open in the field next to Unlock Timeout.
Enable the slider next to Duress Alarm if you want to allow this door to trigger alarms with cards that are set as duress cards.
Enable the slider next to Door Detector if you want to allow alarms via a door sensor.
Repeat this process for the second door.
When you are done making changes click on Next
-
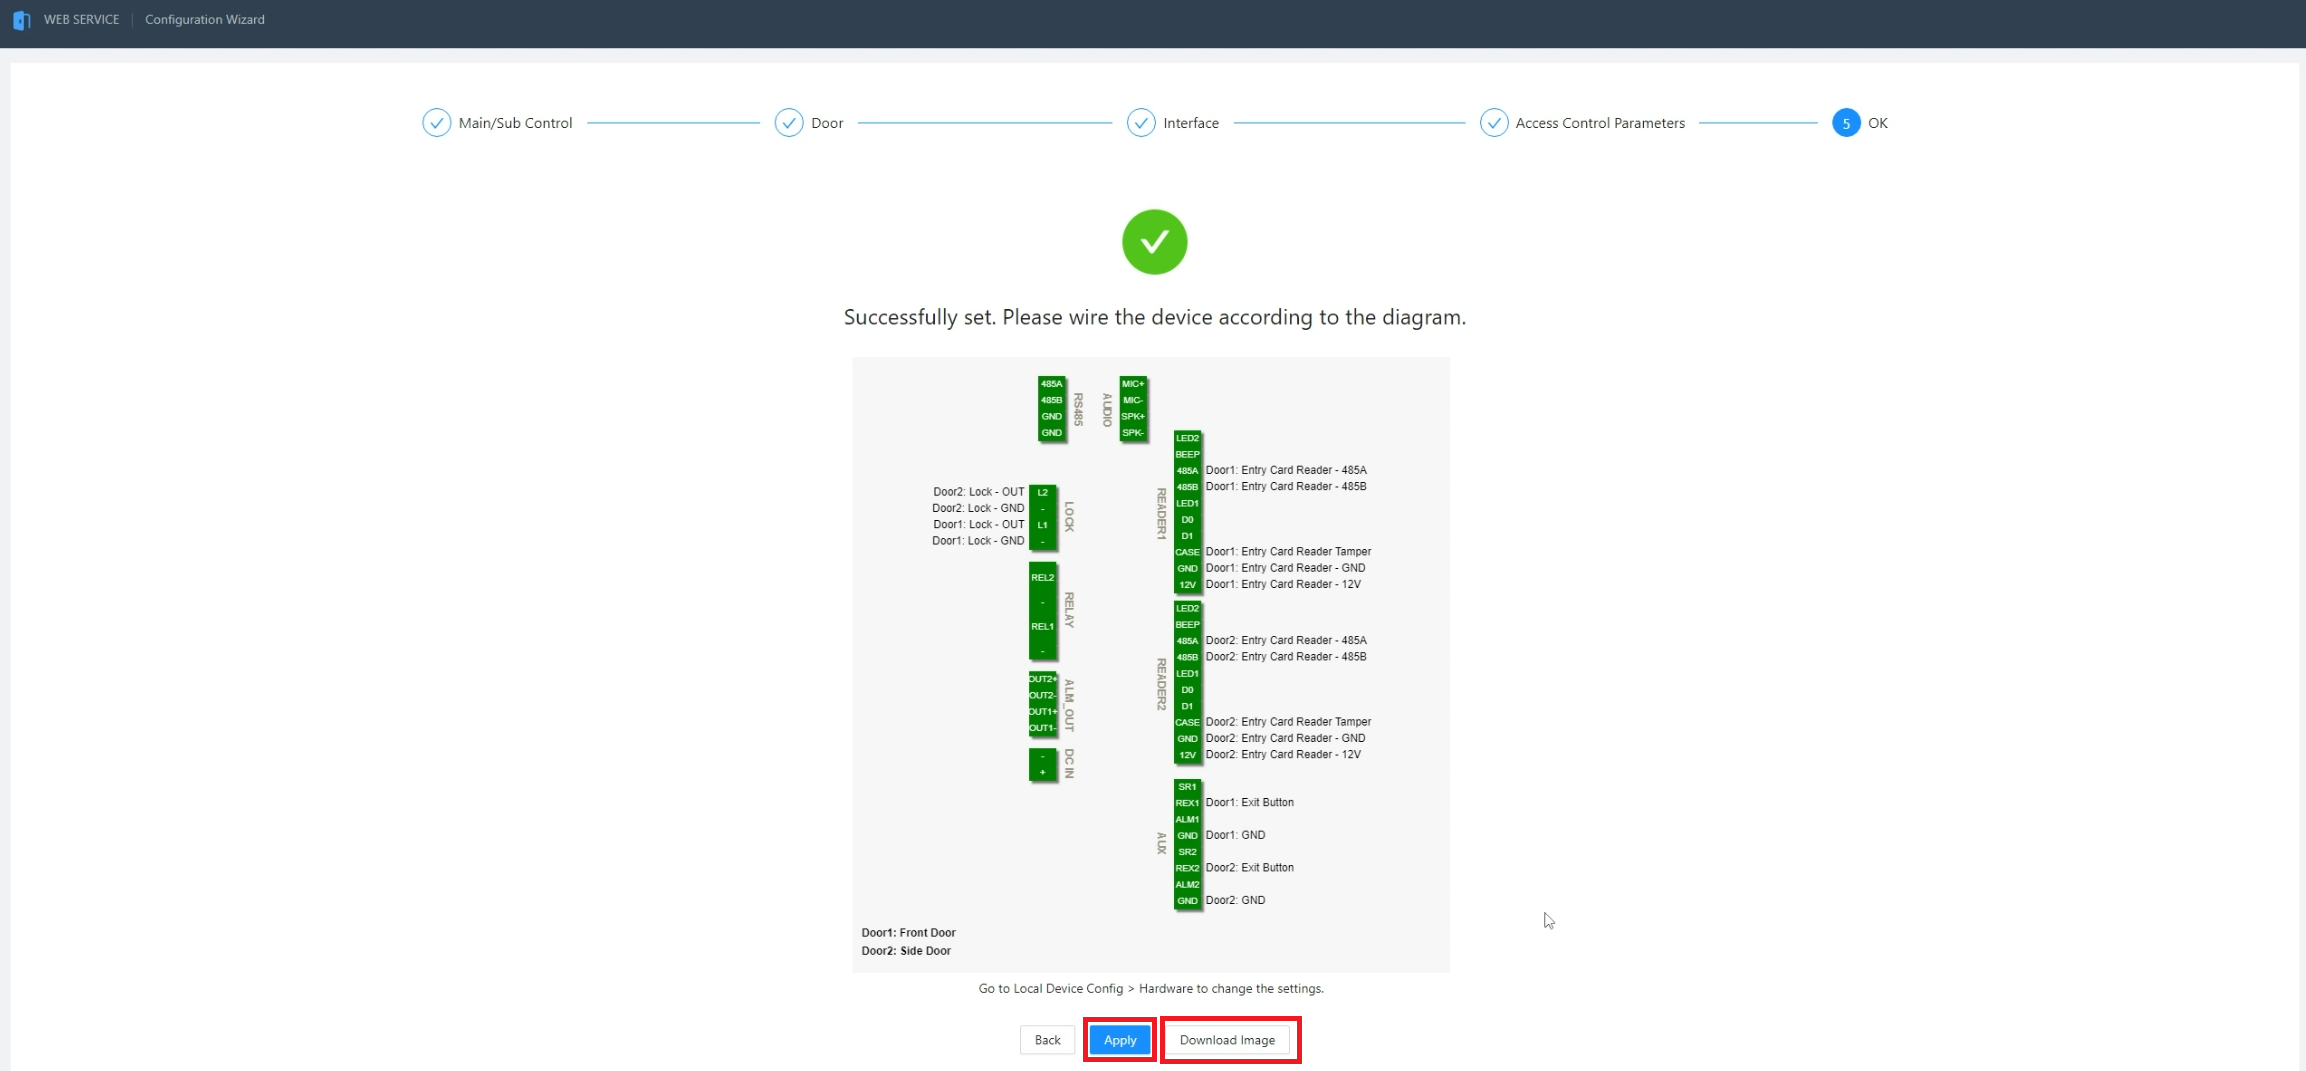
This page shows the wiring diagram for you ASC3202B based on the settings you chose in the previous steps.
If you want to download an image of the diagram for reference, click on Download Image.
When you are done, click on Apply
-
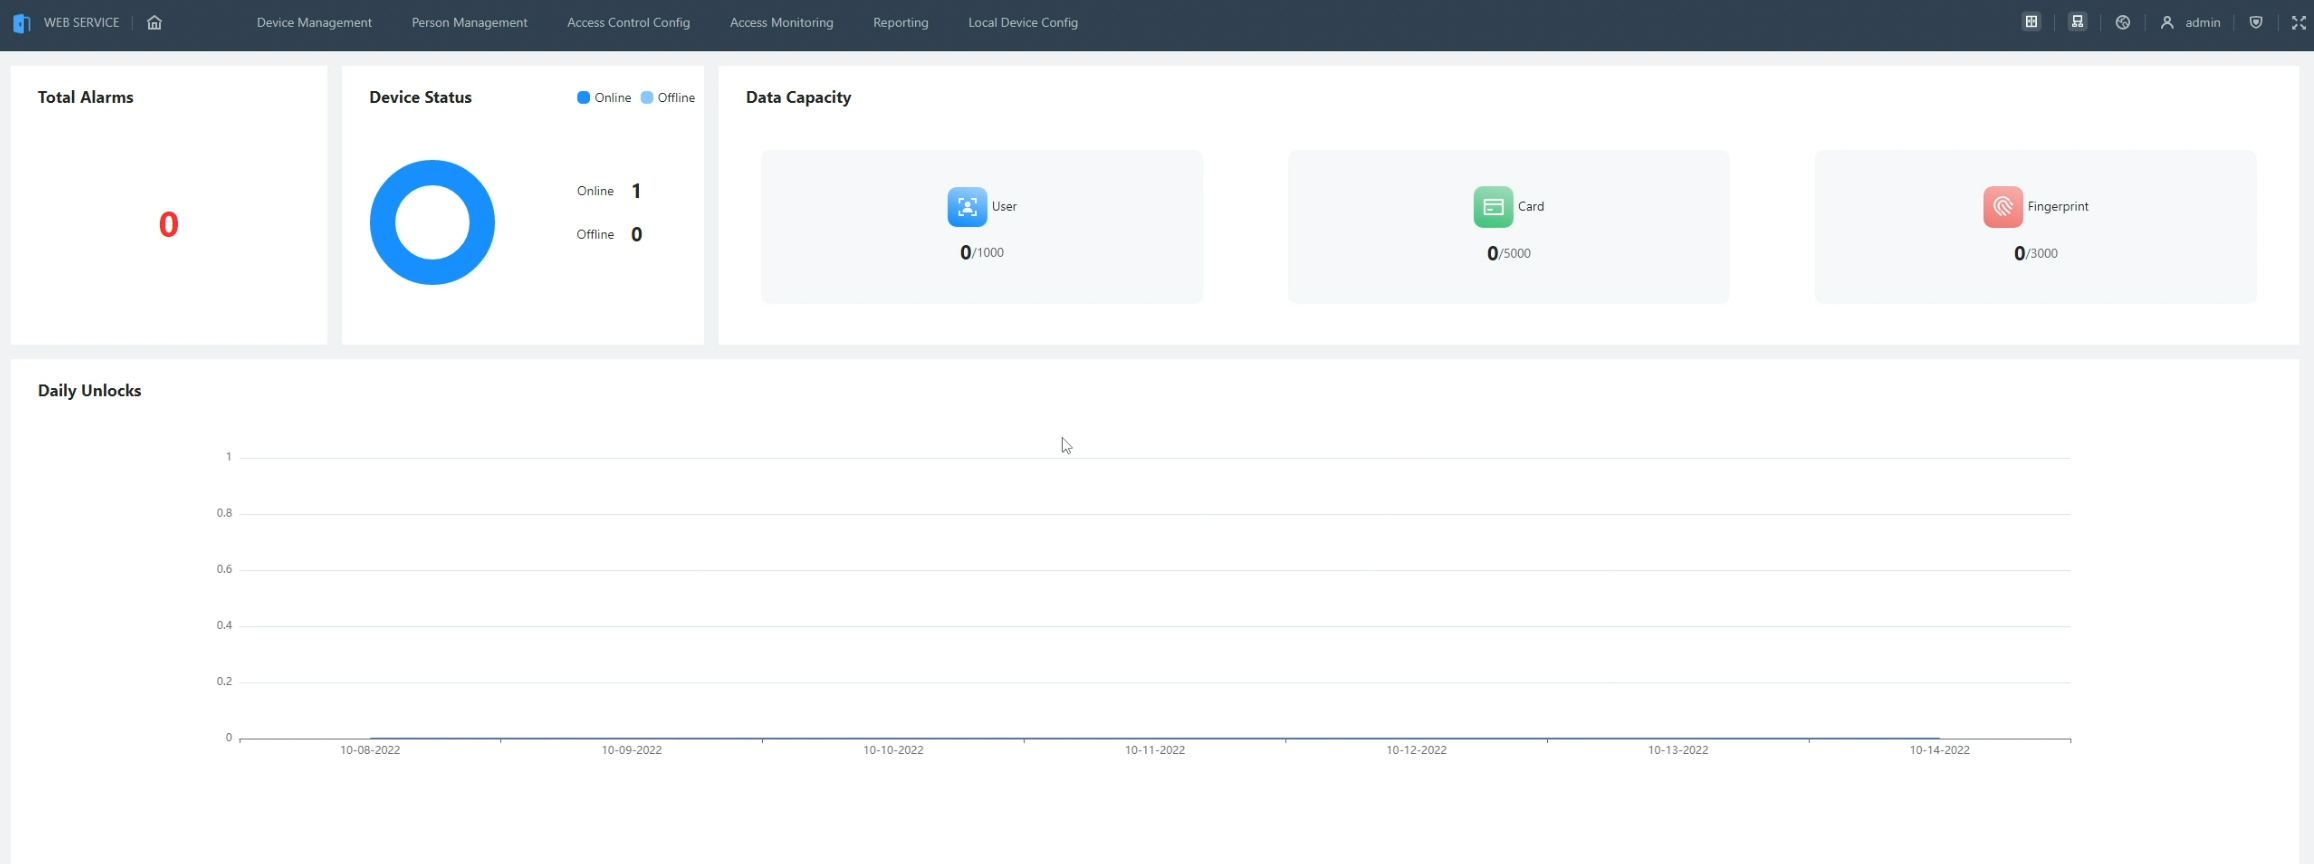
Once all the settings are applied, you will see the Statistics page with all the general information about the ASC3202B
Creating New Users and Departments
-
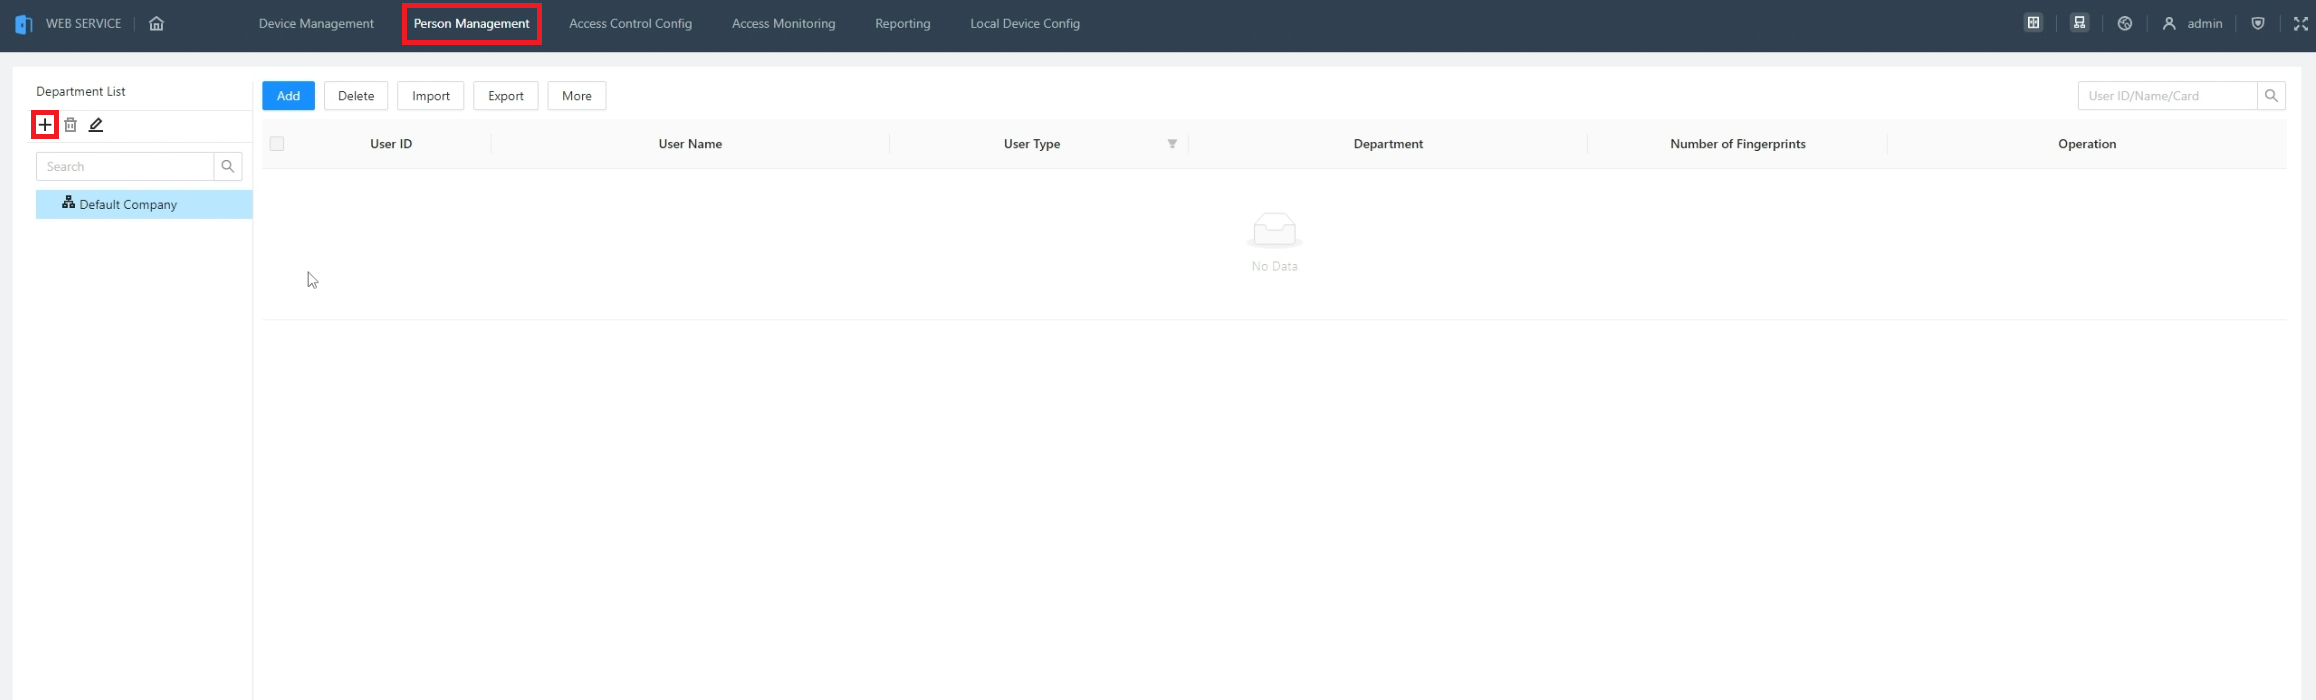
Click on Person Management at the top of the web interface.
Then click on the + symbol to create a new Department
-
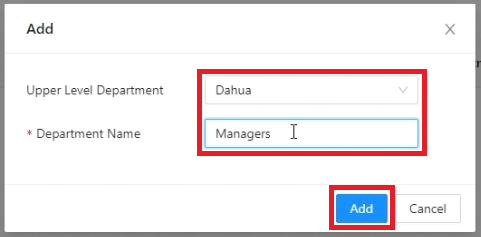
Click on the drop-down next to Upper Level Department to choose which department this new department will fall under.
Then click on Add
- The new department will show up in the list on the left.
To add a user, select the department you want to add them to from the list, then click on Add

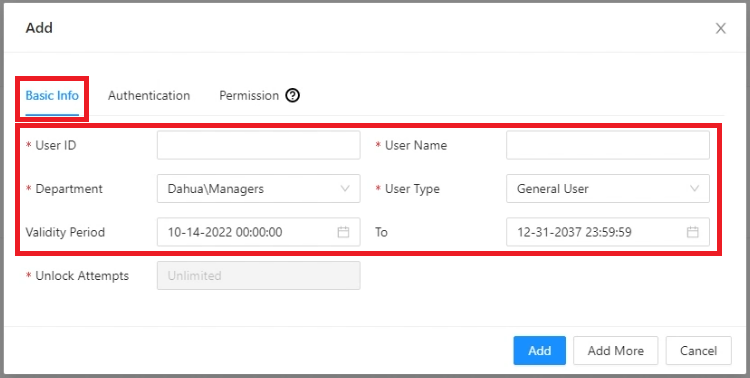
- Enter a numerical user ID in the field next to User ID, making sure it is unique from any other exiting User ID on the ASC3202B.
Enter the name of the user in the field next to User Name.
Verify the department you are adding the user to in the drop-down next to** Department**.
Choose what type of user this will be from the drop-down next to User Type.
Verify the Dates and Times the user will have access via the fields next to Validity Period
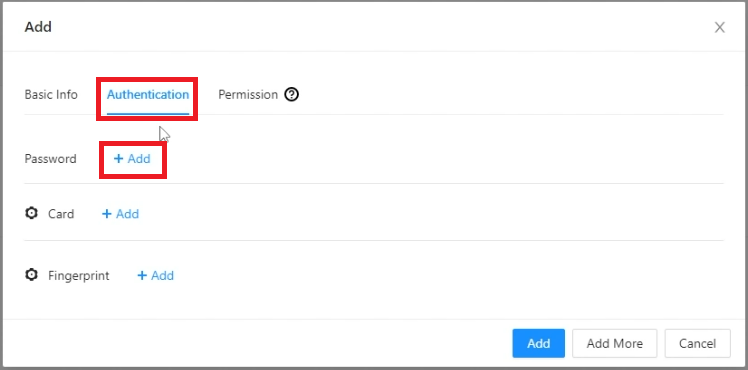
- Click on Authentication at the top.
To add a PIN password, click on + Add next to Password.
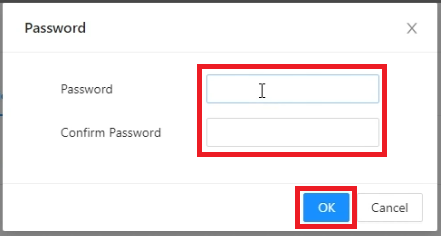
- Enter the PIN password for the user in the Password and Confirm Password fields.
Then click on** OK**.
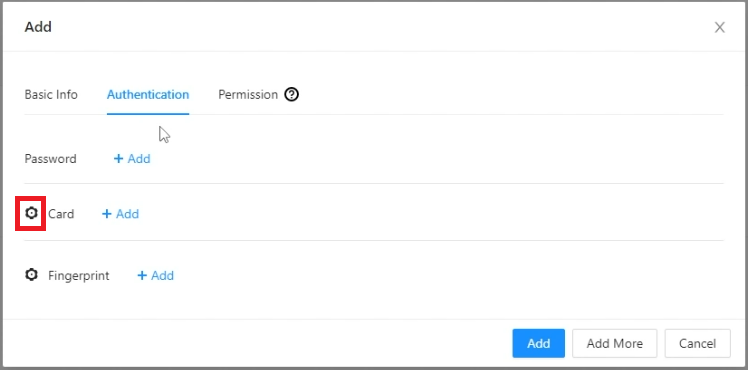
- To configure the connected device that will capture the card number, first click on the Gear icon to the left of Card.
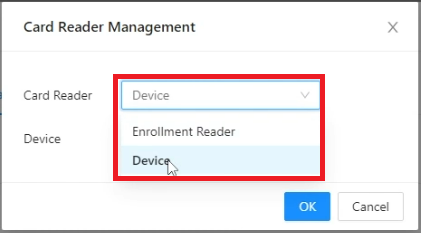
- Click on the drop-down next to Card Reader and either select Enrollment Reader if you are using a USB card enrollment device connected to your computer, or Device if you are using a card reader that is already wired to the ASC3202B
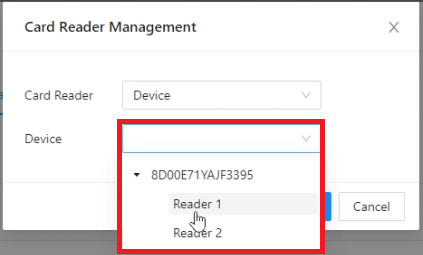
- If you selected Device in the previous step, click on the drop-down next to Device and select which reader you plan to use to scan in the card for this user.
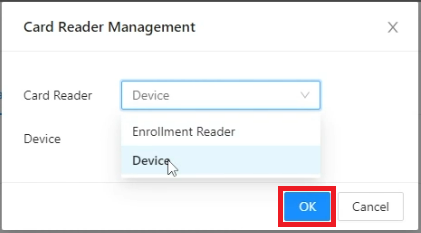
- Click on OK at the bottom
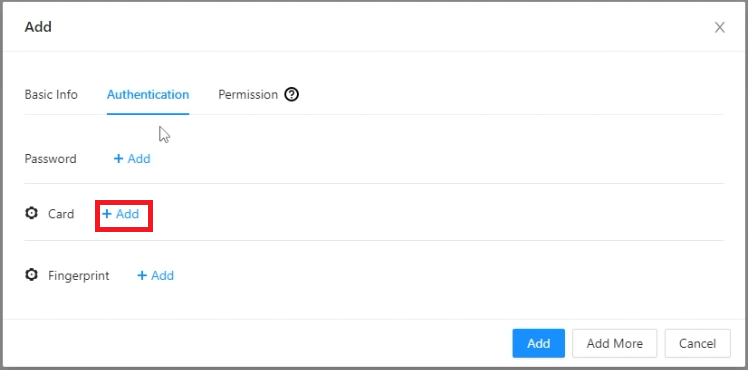
- Click on + Add next to Card
- While the timer counts down on the right, scan the card on the physical reader connected to the connections on the ASC3202B associated with your selection from Step 9 above
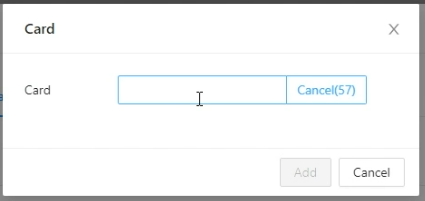
- Once the card number appears in the field, click on Add

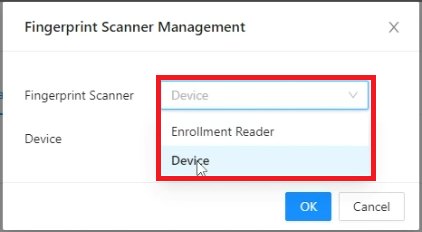
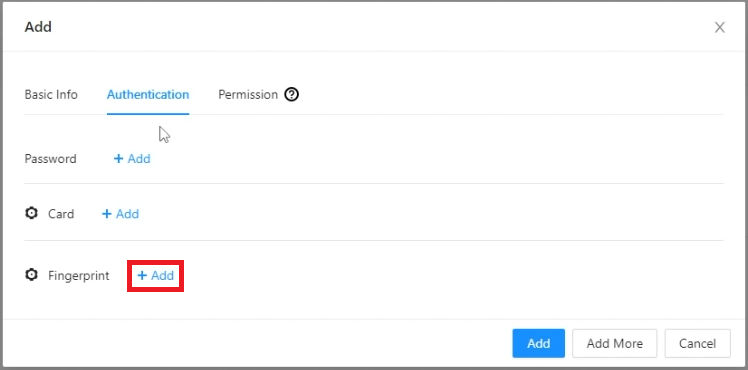
- To configure the connected device that will capture a fingerprint, first click on the Gear icon to the left of Fingerprint

- Click on the drop-down next to Fingerprint Scanner and either select Enrollment Reader if you are using a USB fingerprint enrollment device connected to your computer, or Device if you are using a fingerprint reader that is already wired to the ASC3202B
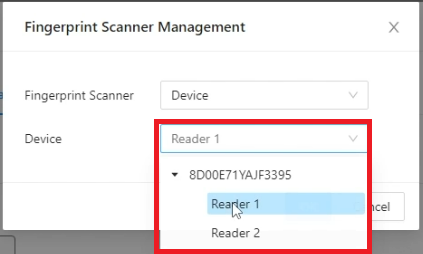
- If you selected Device in the previous step, click on the drop-down next to Device and select which reader you plan to use to scan the fingerprint for this user.
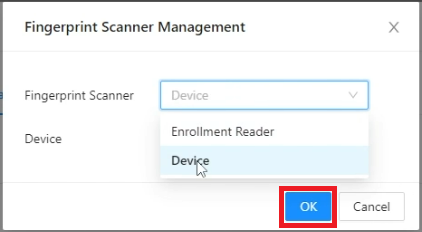
- Click OK at the bottom
- Click on + Add next to Fingerprint
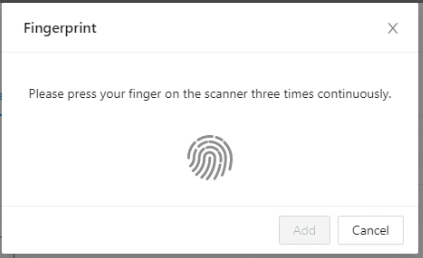
- Have the user press their finger to the fingerprint scanner connected to the connections on the ASC3202B associated with your selection from Step 16 above.
Have the user lift up their finger and press it back down 3 times
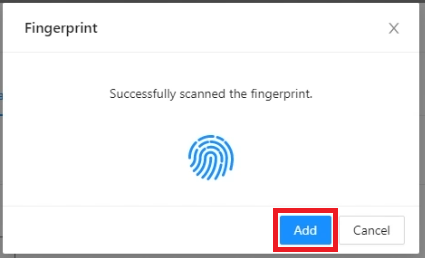
- Once the user has scanned their fingerprint enough times successfully, it will show Successfully scanned the fingerprint.
Click on Add at the bottom
- When you have added all cards, fingerprints, and the password that you want for this user, click on Add
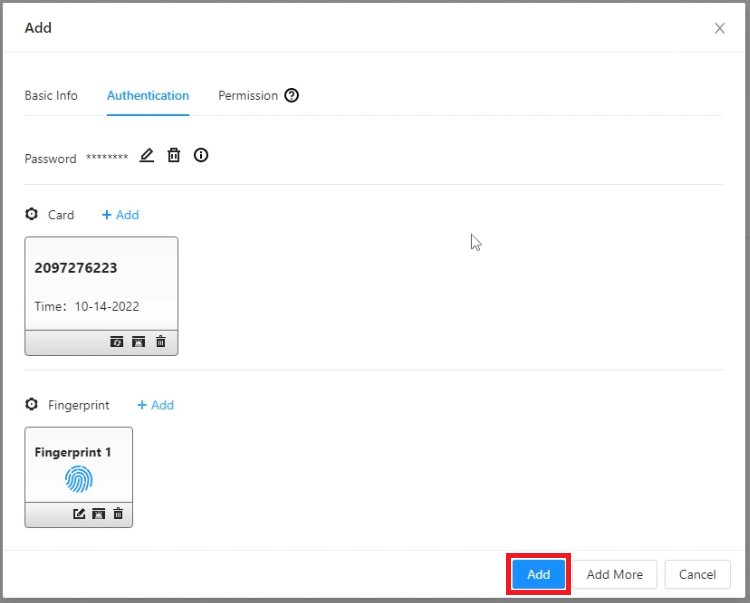
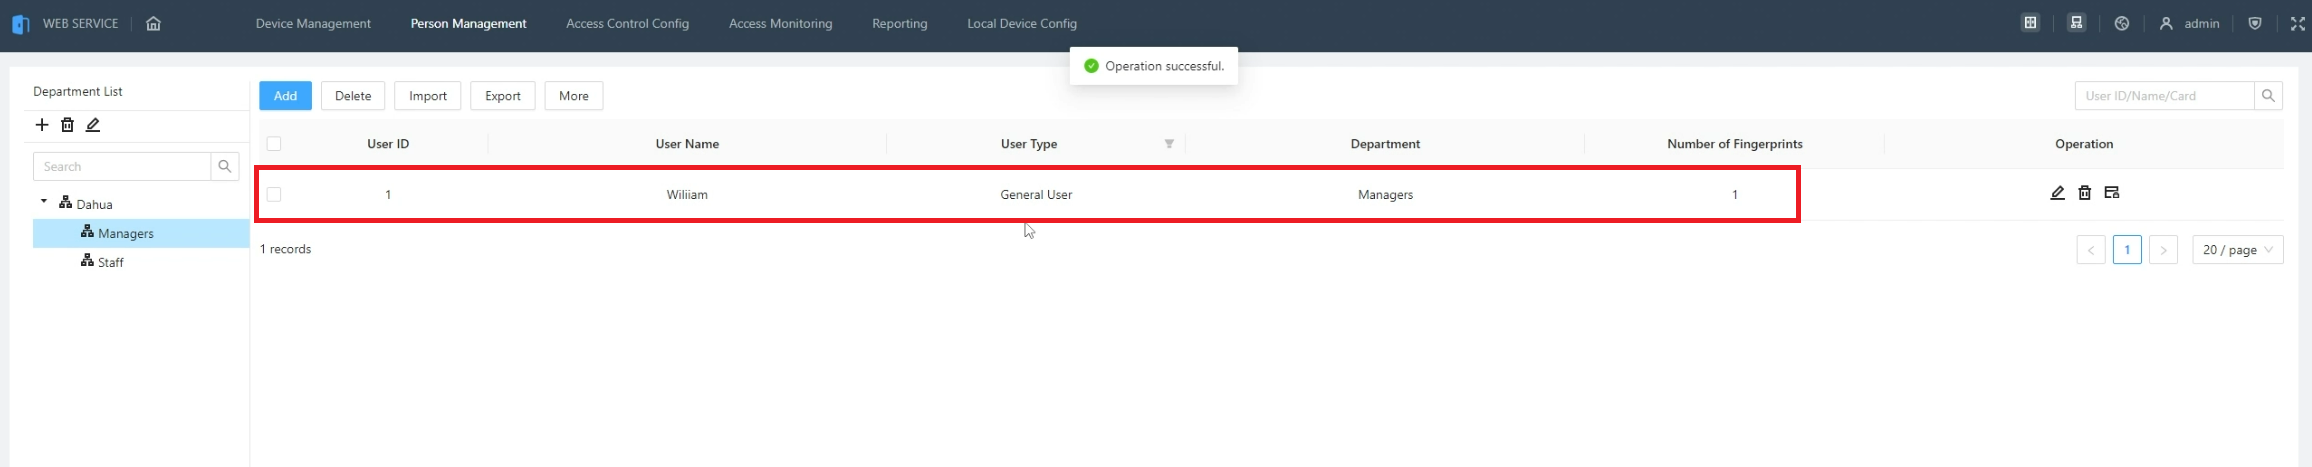
- Now that the user has been added, you will see them in the list
Step3: Configuring User Permissions
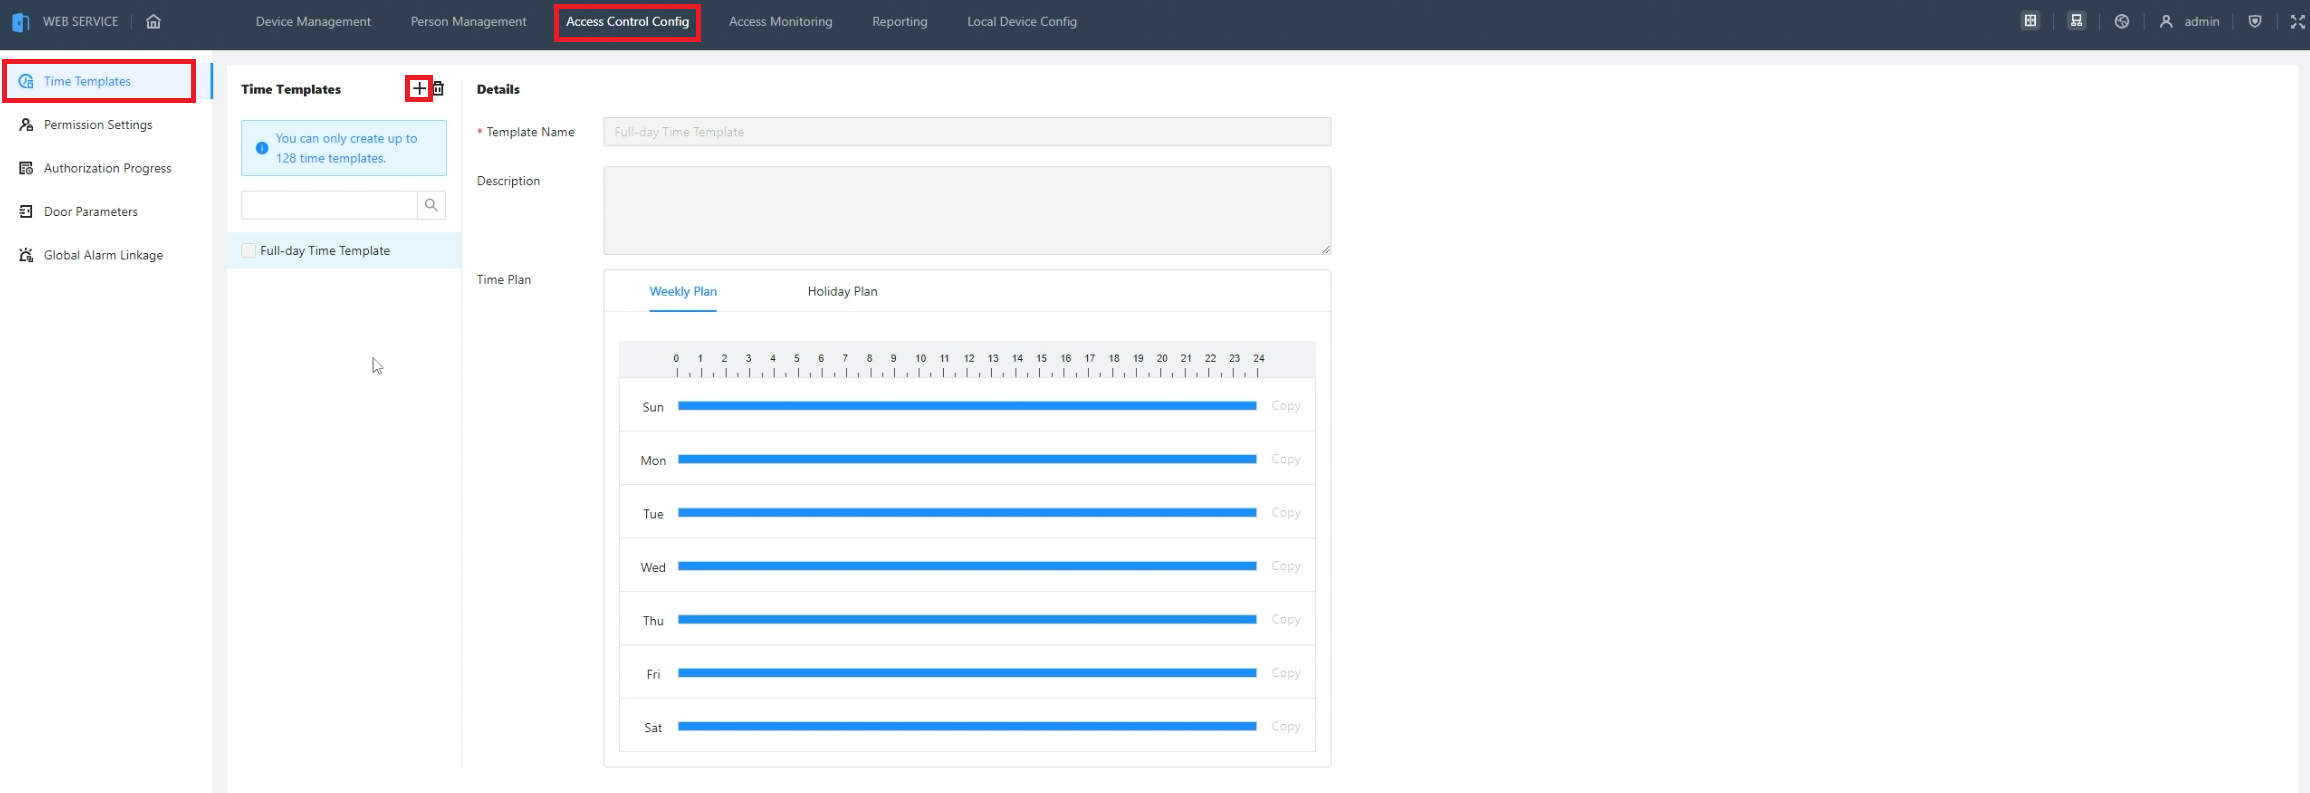
- Click on Access Control Config at the top of the web interface.
Select Time Template on the left.
Then click on the + symbol to create a new Time Template.
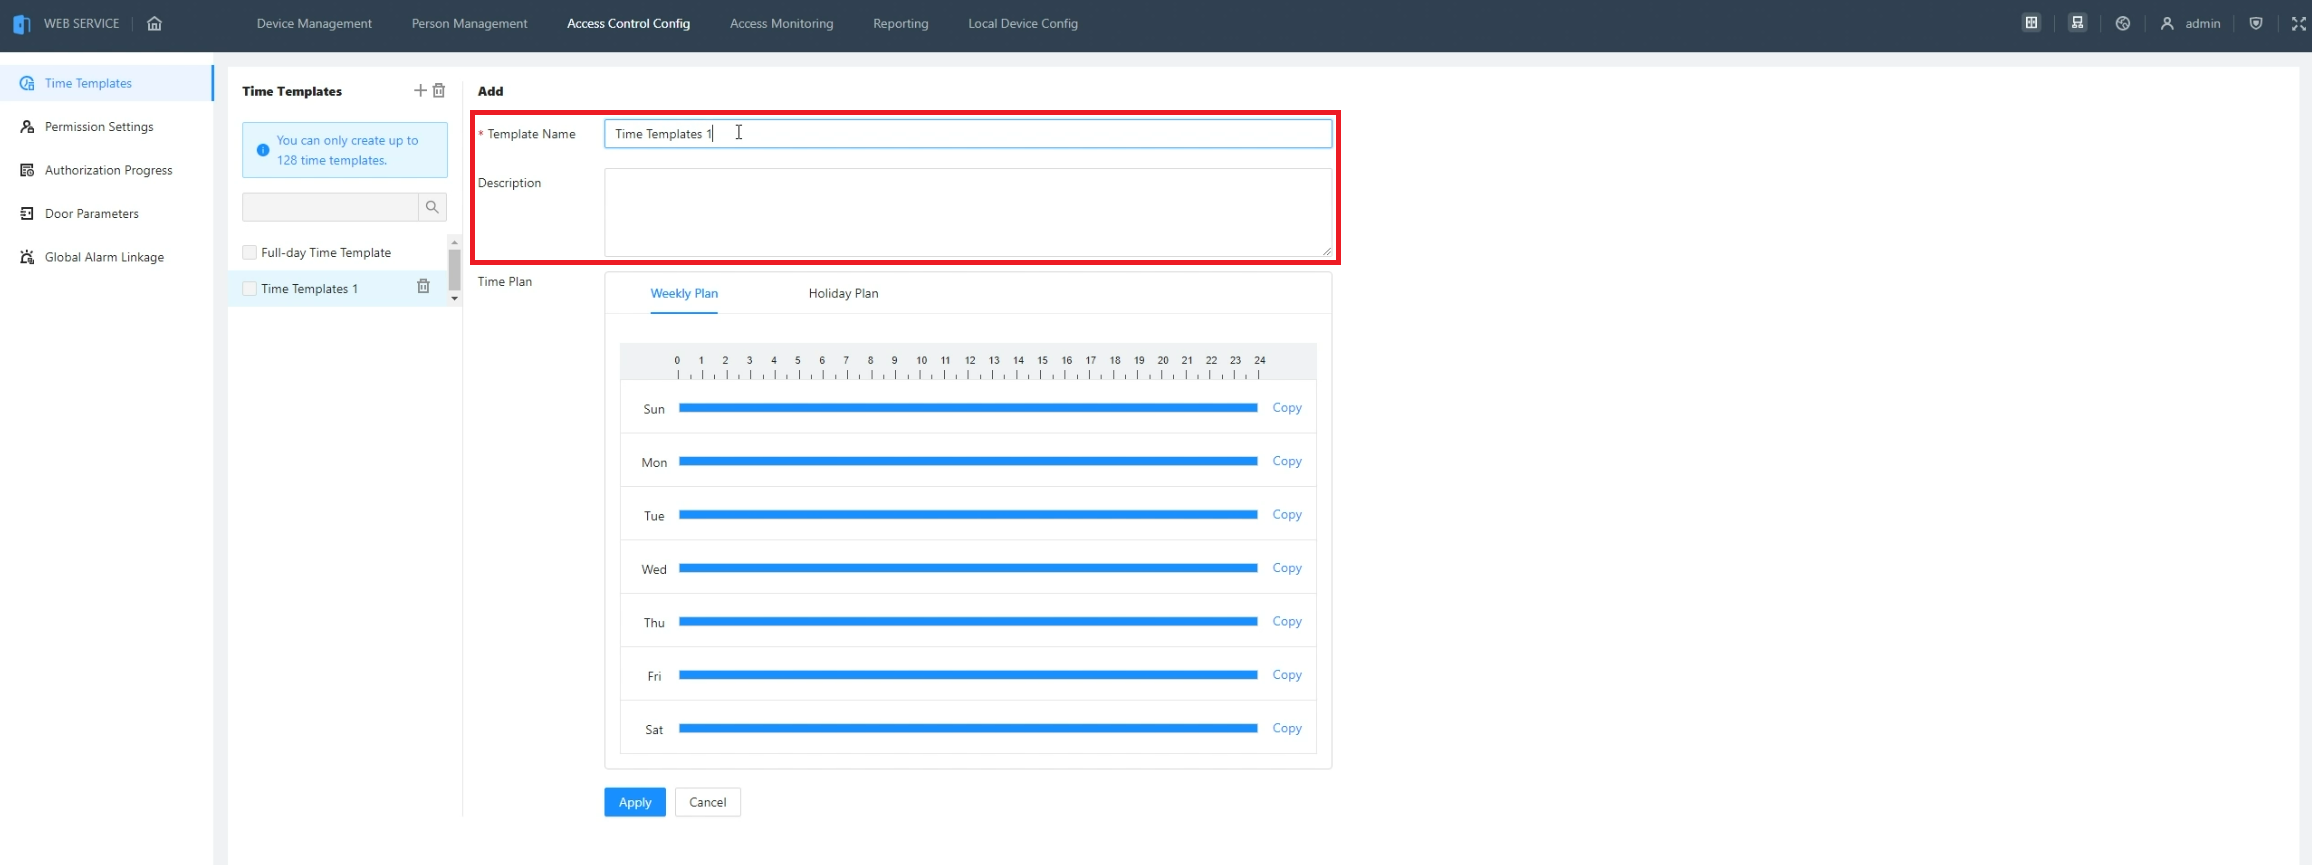
- Enter a name for the Time Template you are creating in the field next to Template Name.
Optionally, put in any other extra information in the Description field
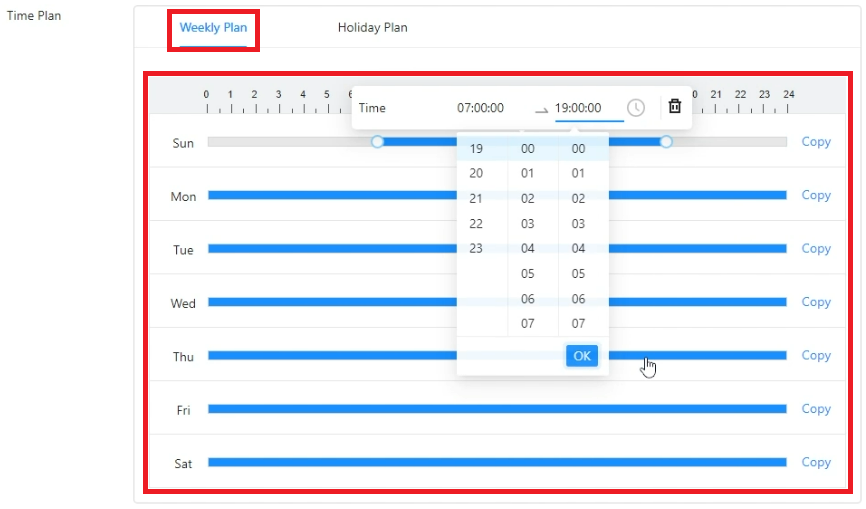
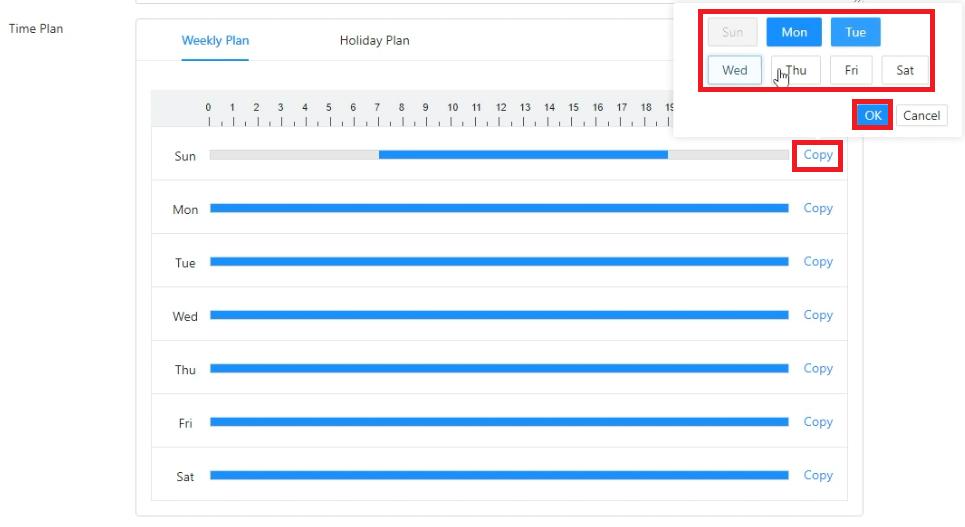
- Select Weekly Plan at the top of the Time Plan section.
Then use the sliders or choose from the drop-downs to adjust the start and end time for the schedule for each day of the week
- If you want to copy the time settings from one day to another, click on Copy to the right of that day and then select the days of the week to copy it to.
Then click on OK to push those changes to those days
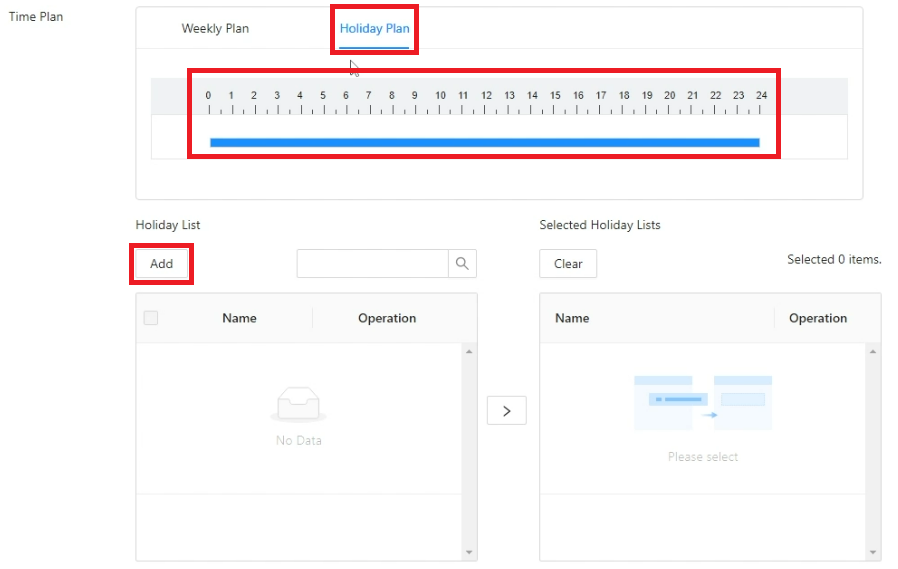
- To set the Holiday schedule for this time template, click on Holiday Plan at the top of the Time Plan section.
Then adjust the access schedule for holidays. (If you don't want anyone to have access during holidays, you can clear out the holiday schedule.)
Select Add below Holiday List to add a specific day as a holiday
- Enter the name of this holiday in the field next to Name.
Select the drop-down next to Start Time and set it to the day this holiday will start.
Then enter a number in the field next to** Duration** for how many days the holiday will last.
Click on OK at the bottom

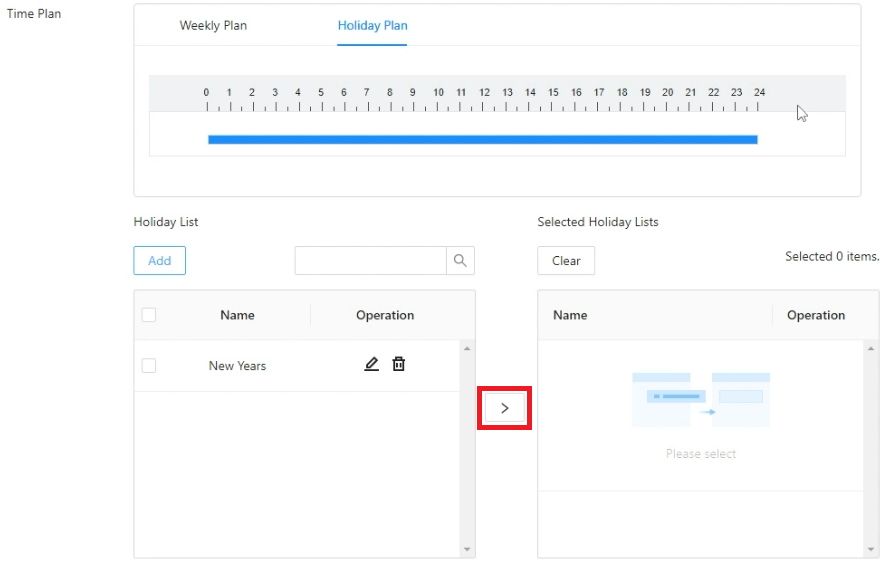
- The holiday you just created will appear in the list on the left.
You can repeat the process from Steps 5-6 above for more holidays.
Once you have all the holidays you want in the list on the left, click on the > button to make them active on this Time Template

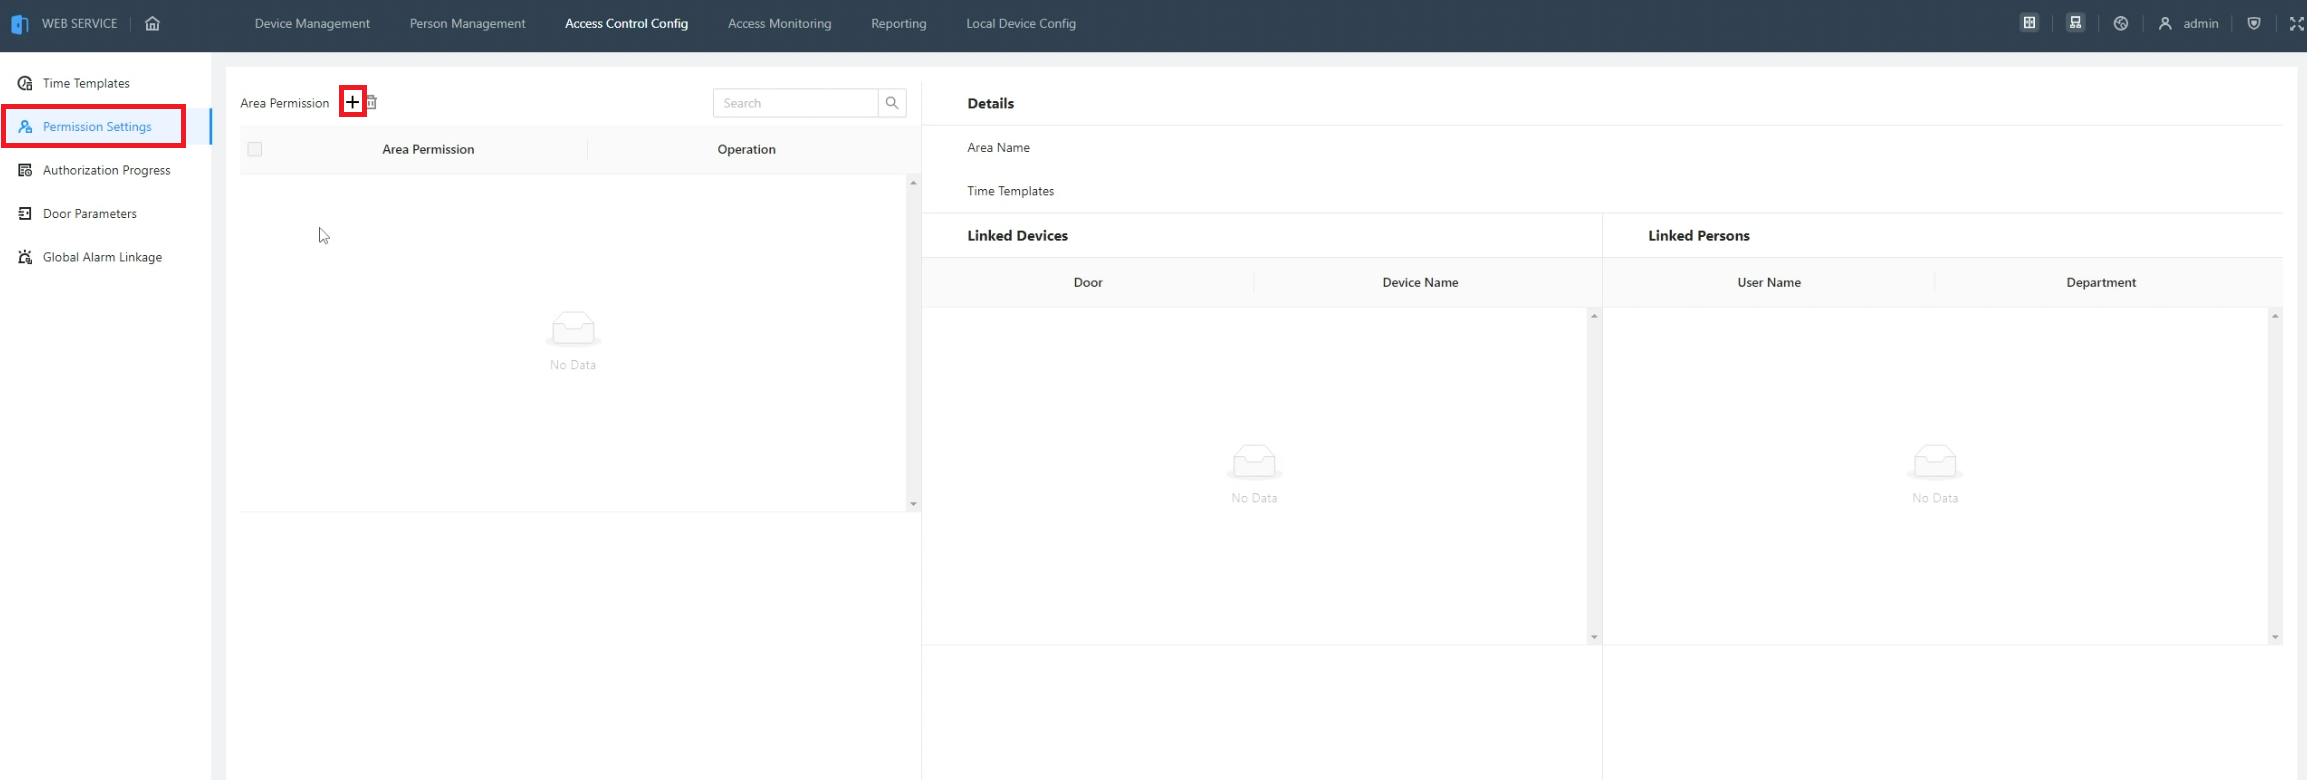
- Select Permission Settings on the left.
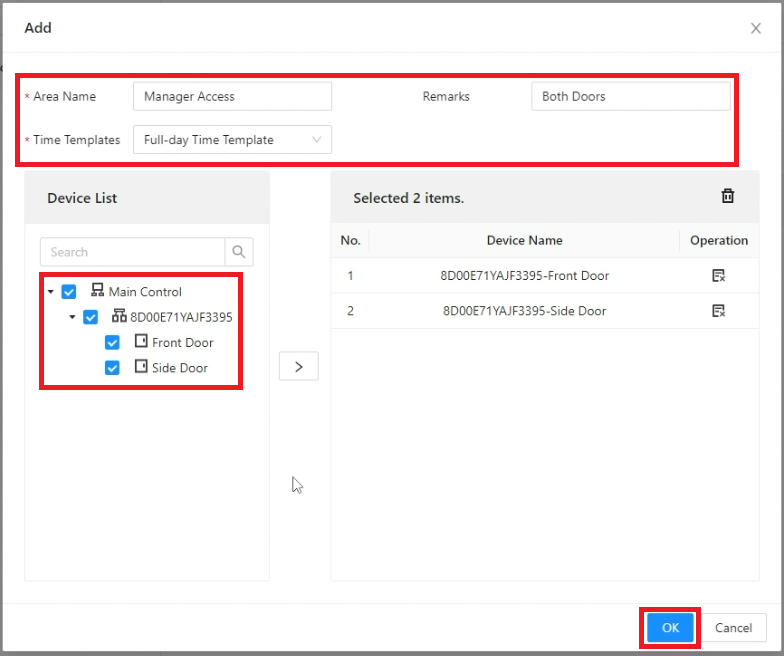
Then click on **+ **next to Area Permission.
- Enter the name of the permission group in the field next to Area Name.
Choose a Time Template from the drop-down next to Time Templates.
Add any notes about this permission group in the field next to Remarks.
Then check the boxes next to the doors you want this permission group to have access to.
Click on OK.
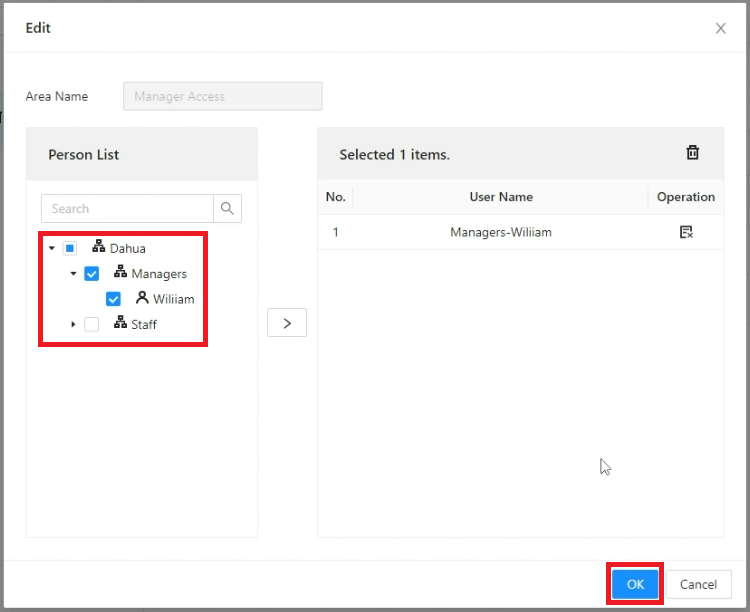
- Click on the Users icon under Operation for the permission group you just created
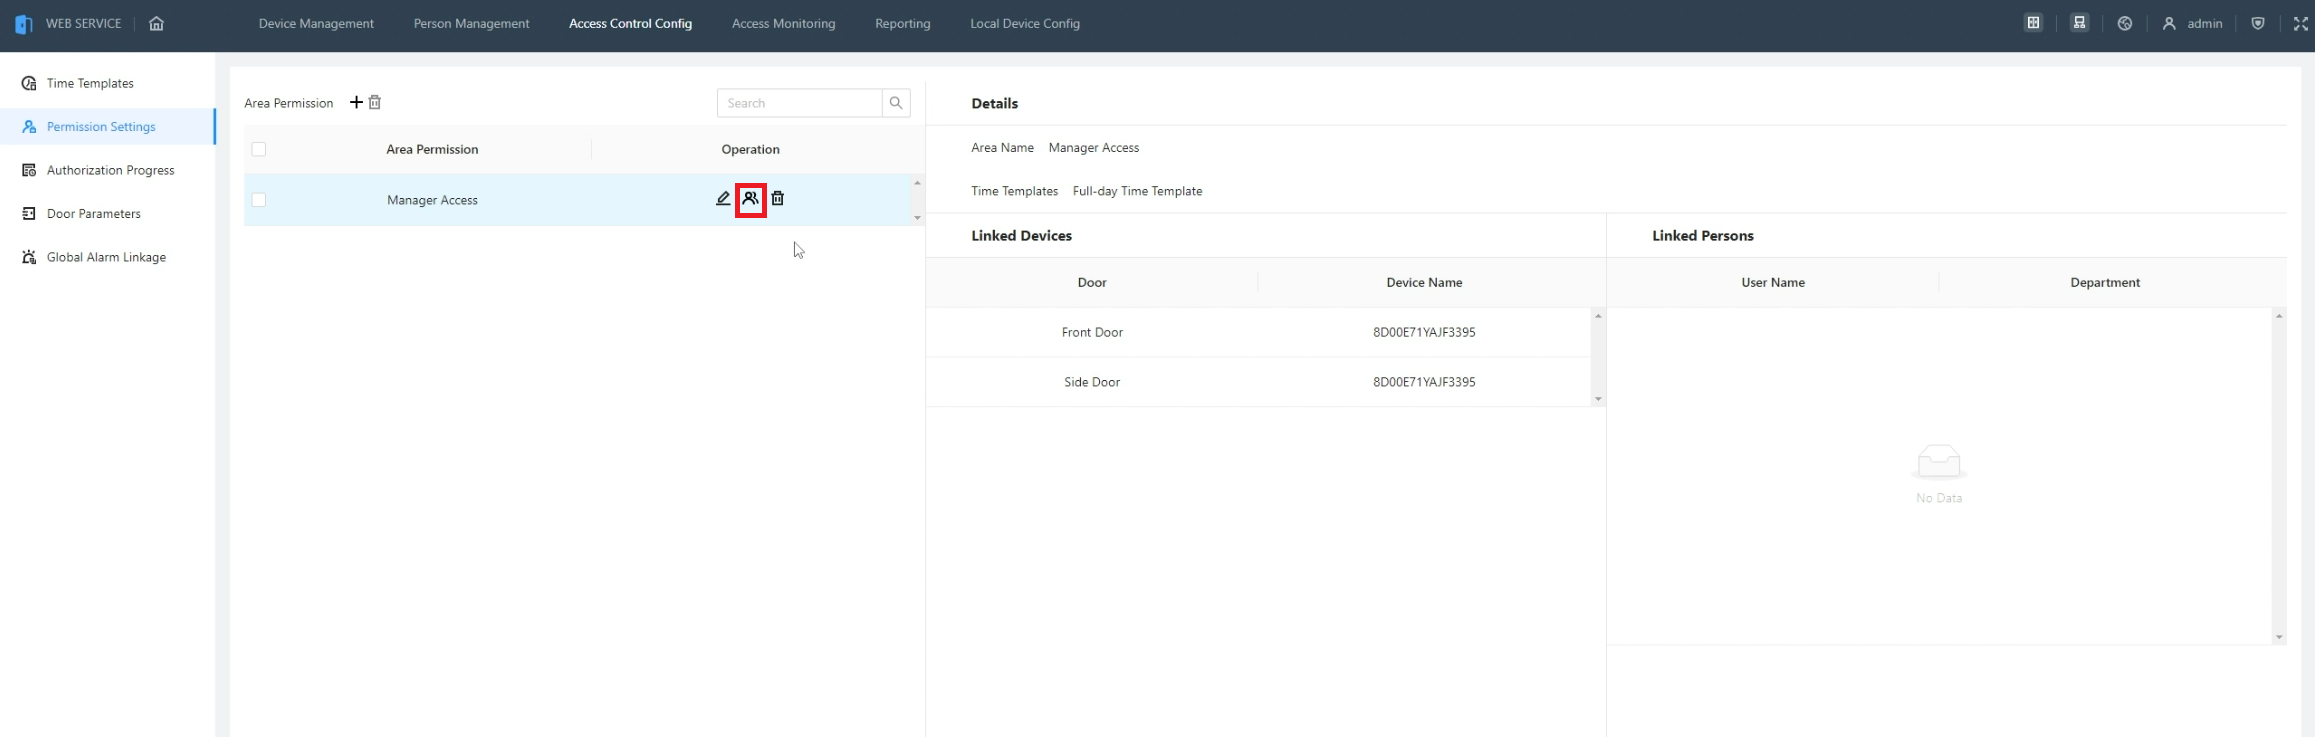
- Check the boxes next to the Users and/or Departments you want to add to this permission group.
Then click on OK to save the changes