How to Modify the IP Address of the Camera
Topic:
- How to Modify the IP Address of the Camera on the Local Monitor
- How to Modify the IP Address of the Camera on the NVR’s Web Page
- How to Modify the IP Address of the Camera on the Camera’s Web Page
- How to (Batch) Modify the IP Address of the Camera Using AI Color Search Tool
Compatible List :
Model | Version | |
NVR | NVR3104-4P | V8.2.4.1-20240914 |
NVR3108-8P | ||
NVR3216-16P | ||
NVR3216-16P-AI | ||
NVR3432-16P-AI | ||
NVR3432(No POE) | ||
IP Cameras | CAM-IP3058-180-PV-AI | V31.35.8.2.4.1_240807 |
CAM-IP3135W-A-SI-28-AI | ||
CAM-IP3135B-A-SI-28-AI | ||
CAM-IP3135W-AA-SI-Z-AI | ||
CAM-IP3735W-AA-SI-Z-AI | ||
CAM-IP3335W-AA-SI-Z-AI | ||
CAM-IP3155B-PV-28-AI | ||
CAM-IP3155B-PV-Z-AI | ||
CAM-IP3155W-PV-28-AI | ||
CAM-IP3155W-PV-Z-AI | ||
CAM-IP3335W-28-AI | ||
CAM-IP3138W-A-SI-28-AI | ||
CAM-IP3138B-A-SI-28-AI | ||
CAM-IP3138W-AA-SI-Z-AI | ||
CAM-IP3158W-PV-28-AI | ||
CAM-IP3174-PV-28-AI | ||
CAM-IP3178B-PV-28-AI | ||
CAM-IP3178-PV-Z-AI | ||
CAM-IP3338W-AA-SI-Z-AI | ||
CAM-IP3338W-28-AI | ||
CAM-IP3355W-PV-28-AI | ||
CAM-IP3355W-PV-Z-AI | ||
CAM-IP3358W-PV-28-AI | ||
CAM-IP3358W-PV-Z-AI | ||
CAM-IP3638-PV-4X-AI | ||
CAM-IP3635-33X-AI | ||
CAM-IP3738W-AA-SI-Z-AI | ||
CAM-IP3755W-PV-Z-AI | ||
CAM-IP3758W-PV-Z-AI | ||
CAM-IP3778-PV-28-AI |
Related question :
- How to Enable or Disable DHCP for Cameras?
- My IP camera can not be online on the switch, how to solve it?
- How to Set Up Static IP Addresses for Cameras?
- How do I batch modify the IP addresses for cameras?
How to Modify the IP Address of the Camera on the Local Monitor
Note: Cameras using back POE ports will be assigned IP addresses automatically by the NVR
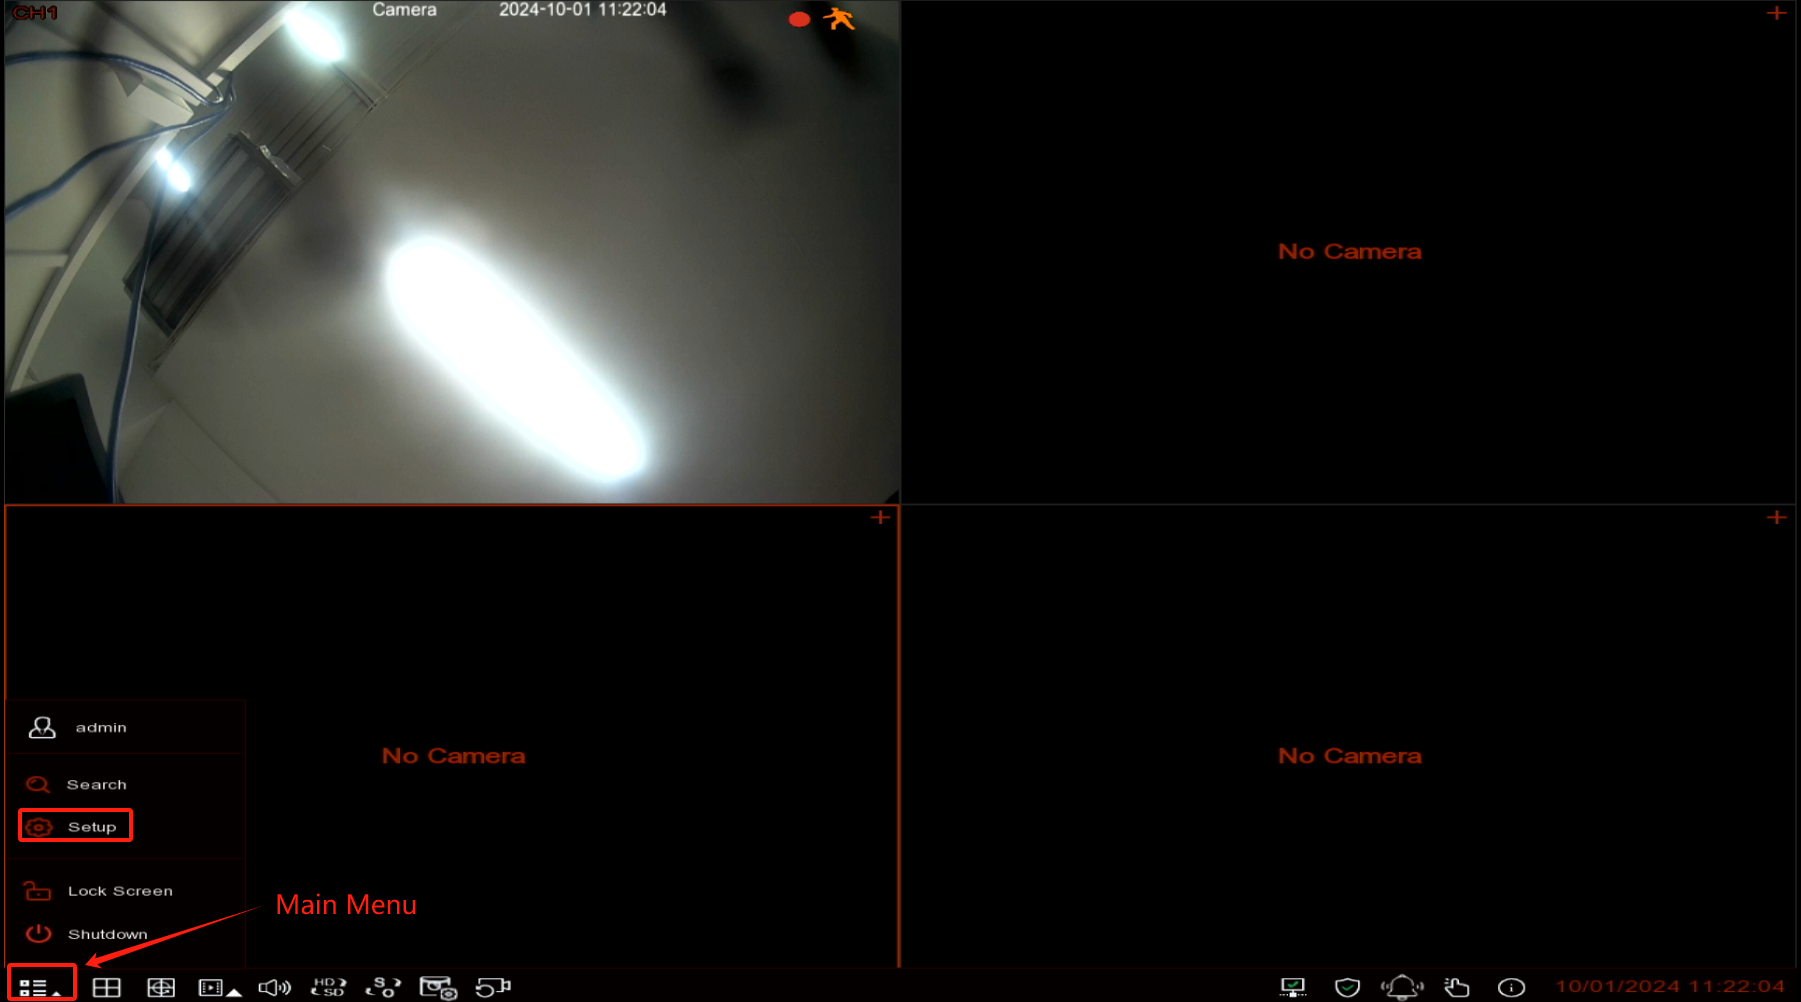
- Click on Main Menu icon in the bottom left corner and click on Setup button.
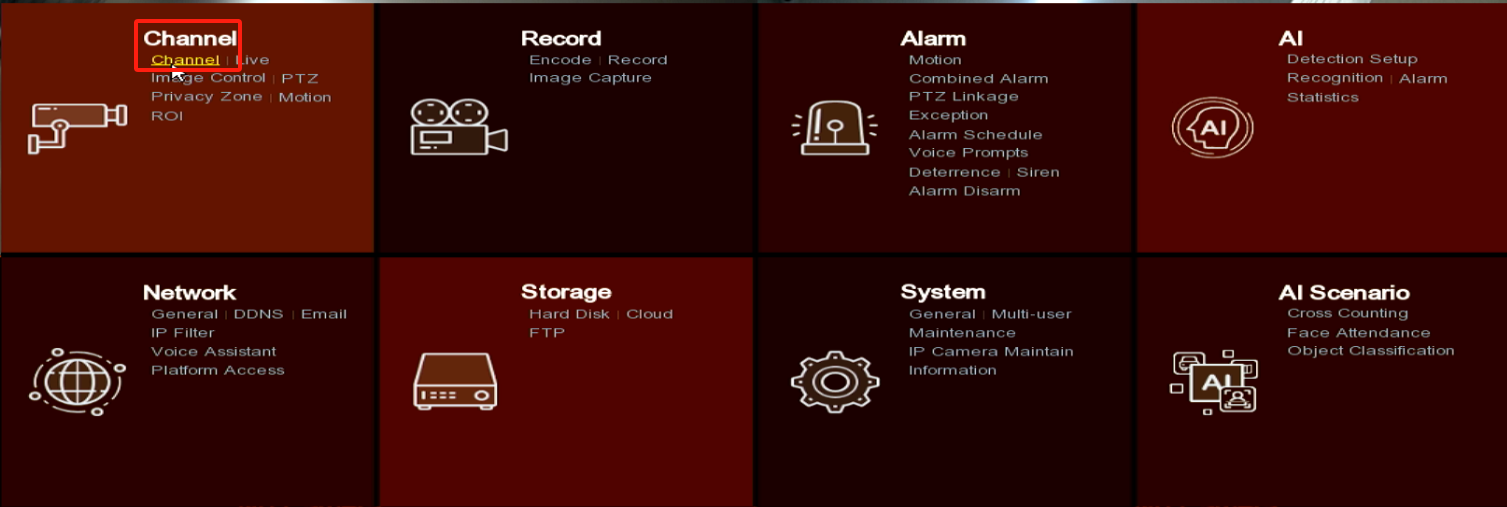
- Select Chanel in the Channel Section.
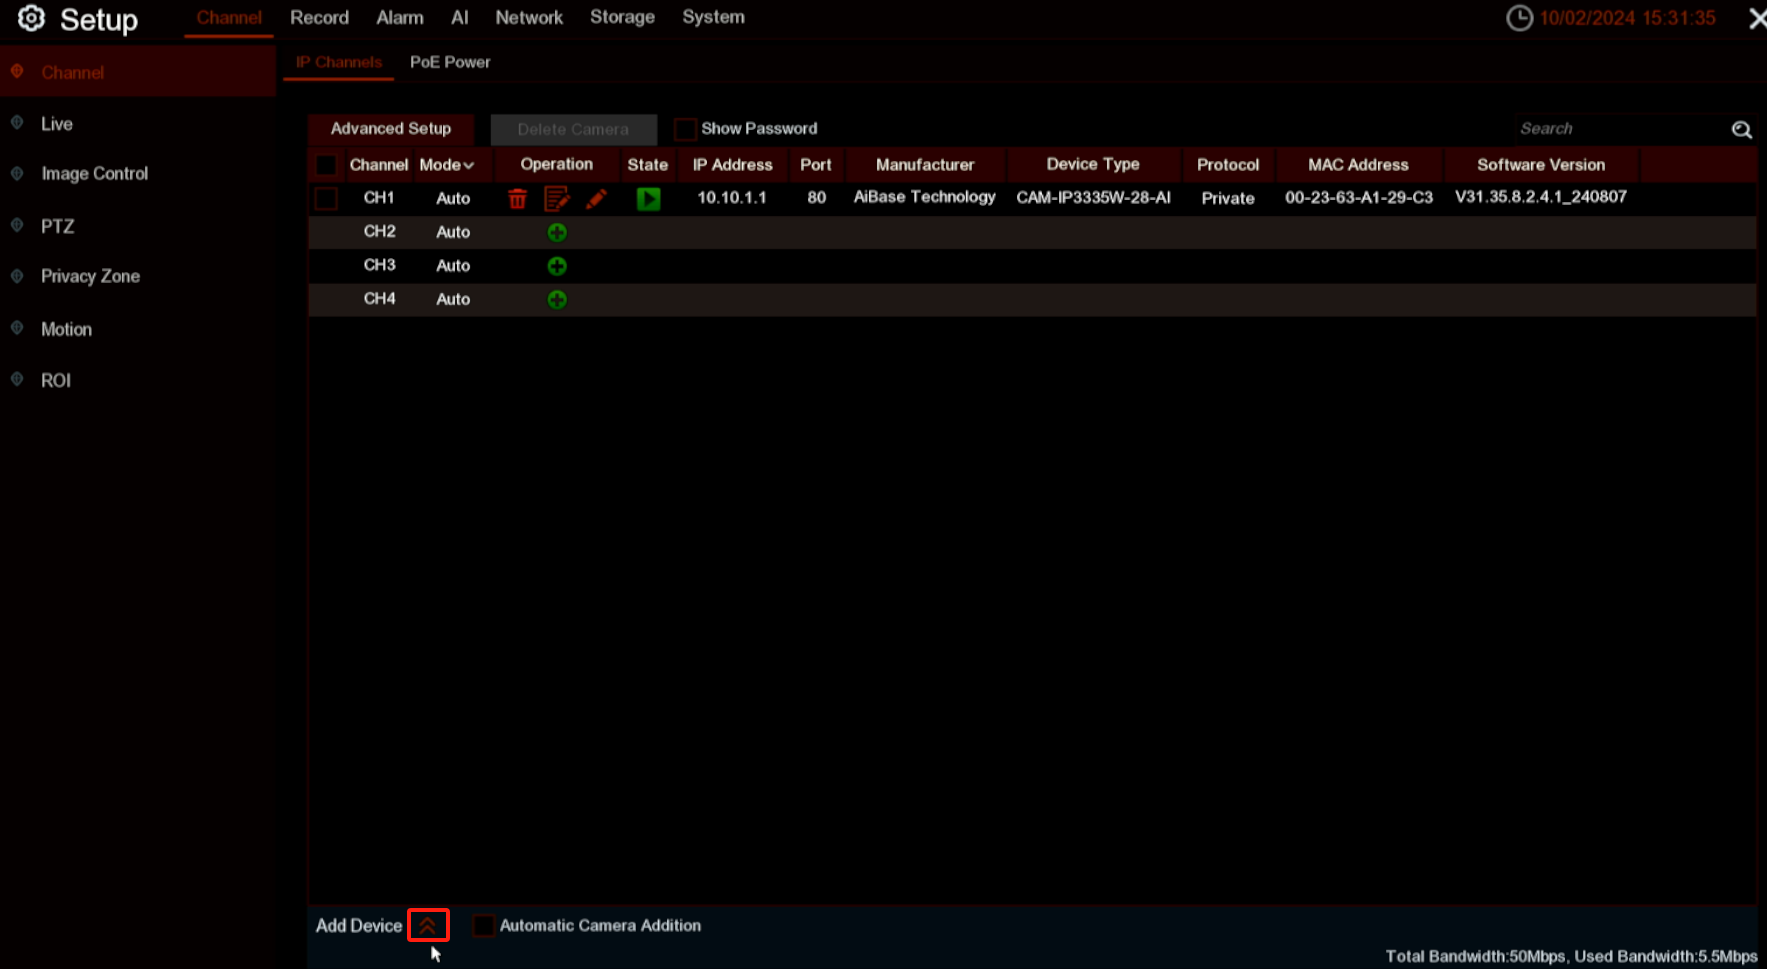
2. Click Add Device icon at the bottom of the screen.
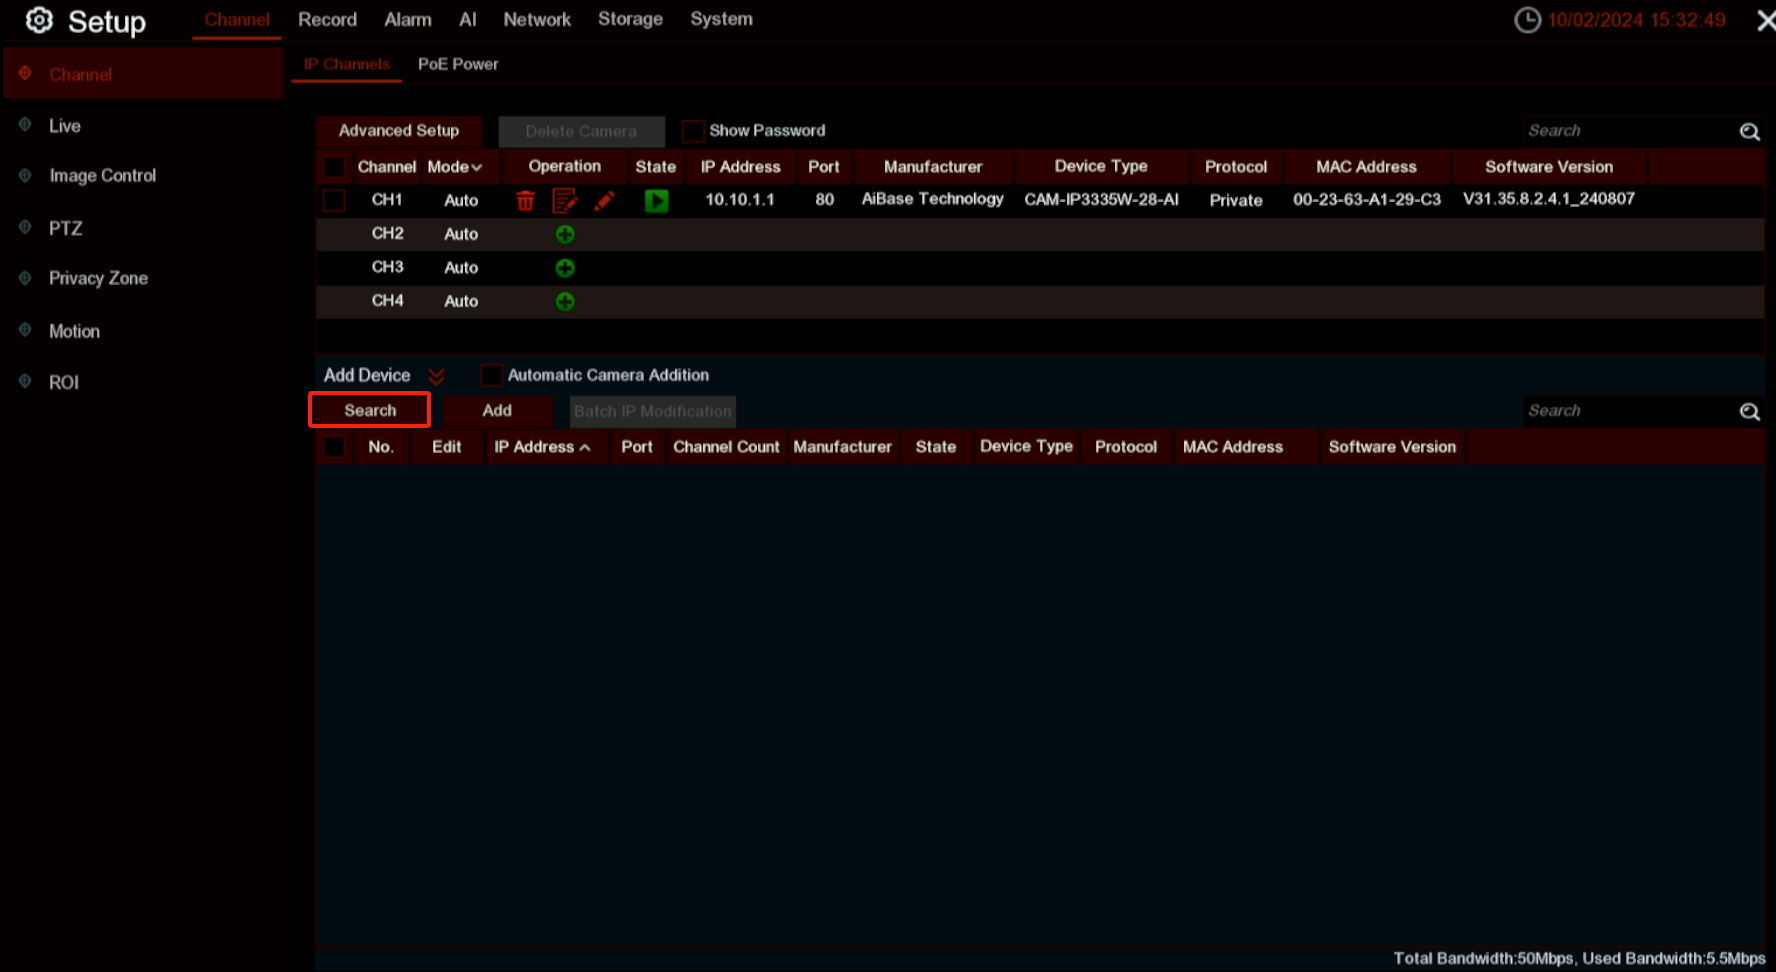
3. Click on the Search button.
4. If your cameras are inactive, you need to activate them first. Click the pencil icon for the camera, then click the OK button to activate it. Repeat this step for all inactive cameras.

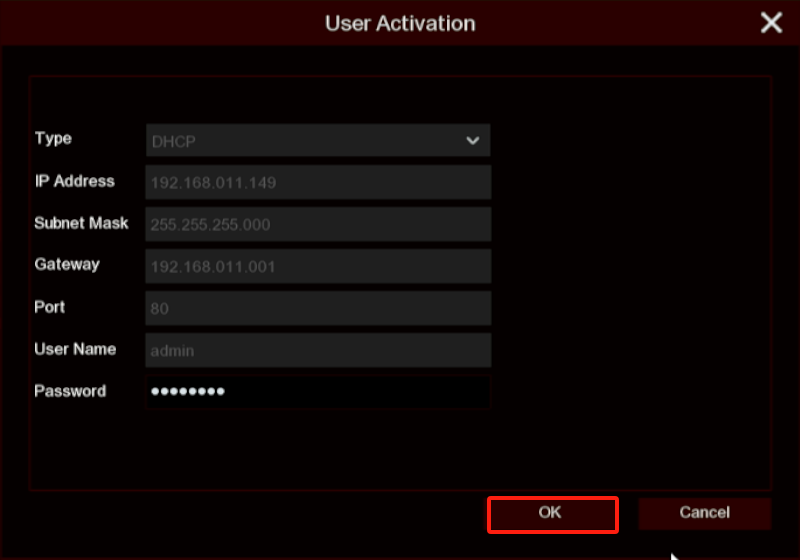
5. Click the Search button to refresh the page, and you will see that the state of your cameras is now Activated.

6. Check the boxes of the cameras, then click the Batch IP Modification button.

7. It is recommended to use static IP for IP cameras connected via a PoE switch. Enter the start IP and end IP for all your cameras, then click the OK button.
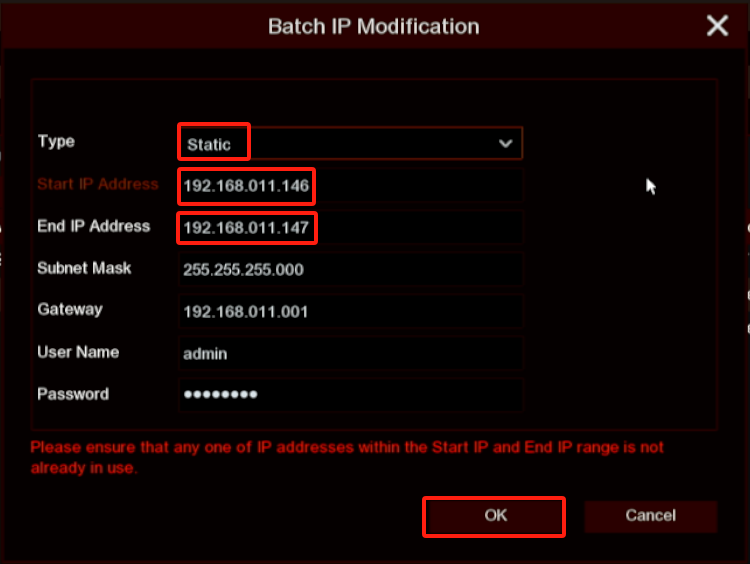
8. After the Batch IP Modification process is complete, click the Add button.

9. Leave the username and password as default(recommended), or assign new ones for your cameras, then click the Add button.
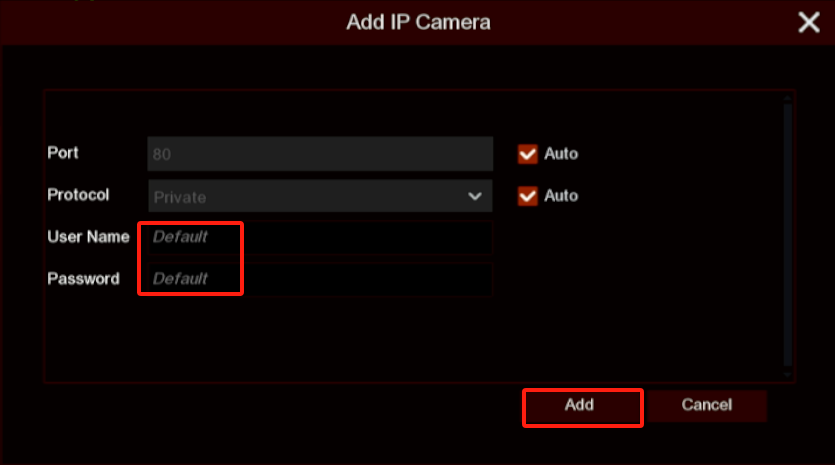
10. The cameras will be displayed in your channel list, as shown in the image below.

11. Click the Edit icon (not the pencil icon) for any camera if you want to modify its IP address in the future.

How to Modify the IP Address of the Camera on the NVR's Web Page
- Click on Remote Setting, then click the Quick Add button.
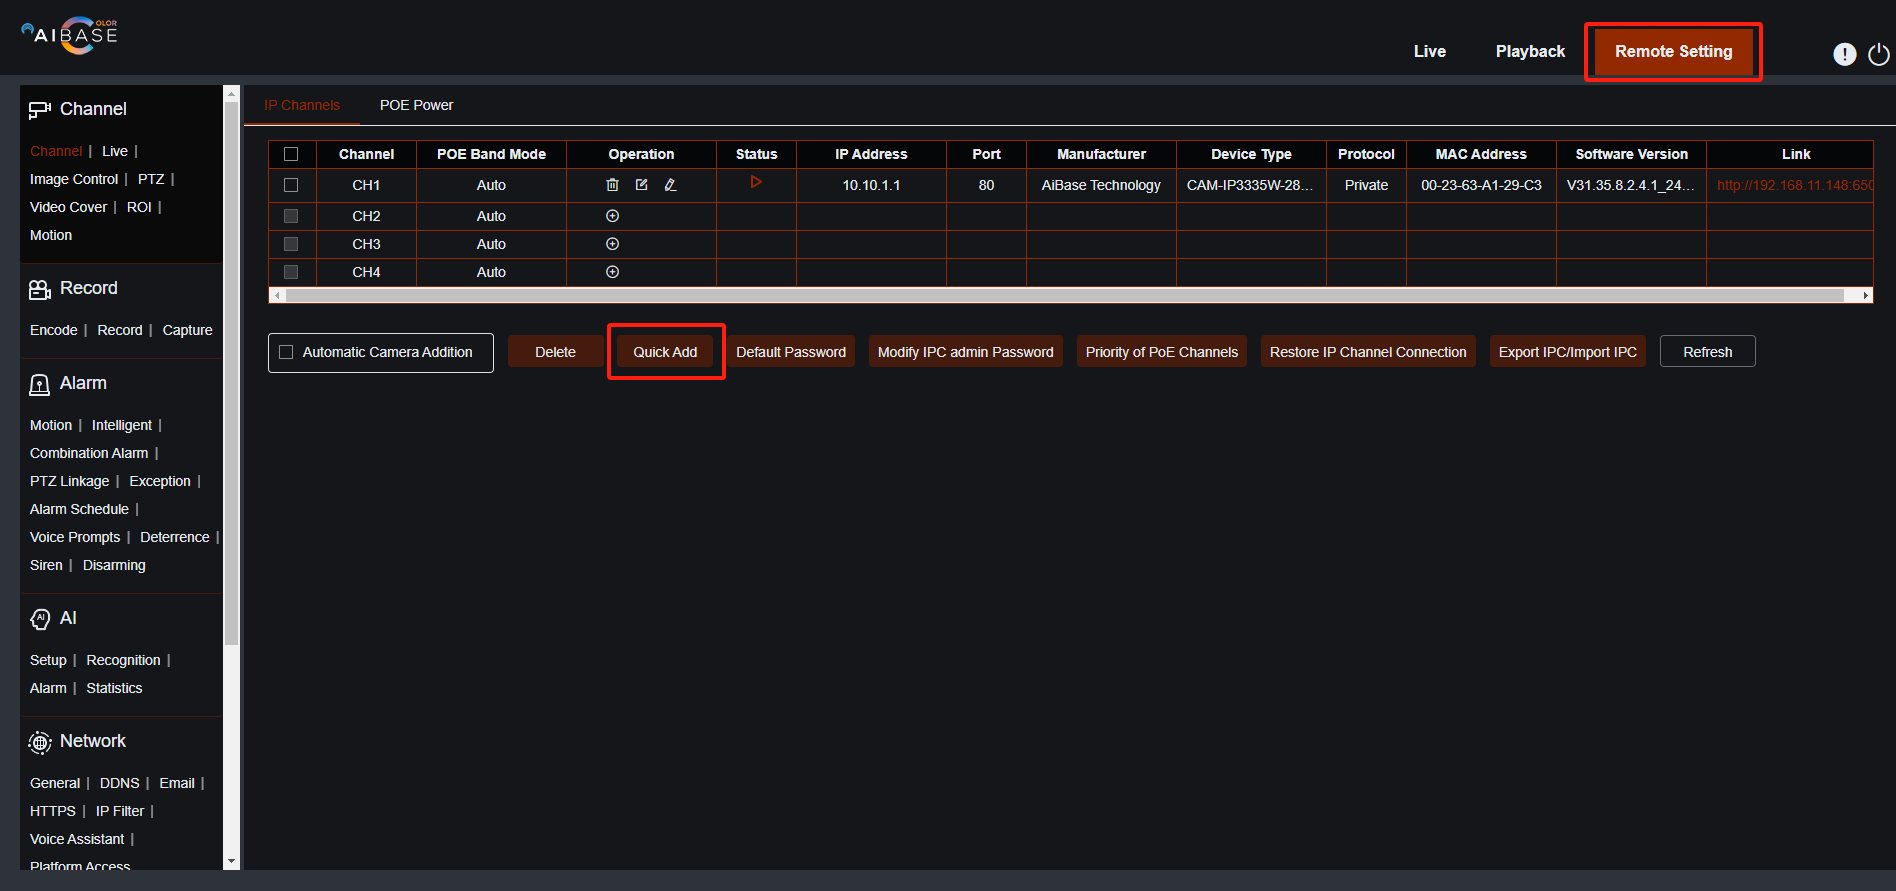
- If your cameras are inactive, you need to activate them first. Click the pencil icon for the camera, then click the OK button to activate it. Repeat this step for all inactive cameras.

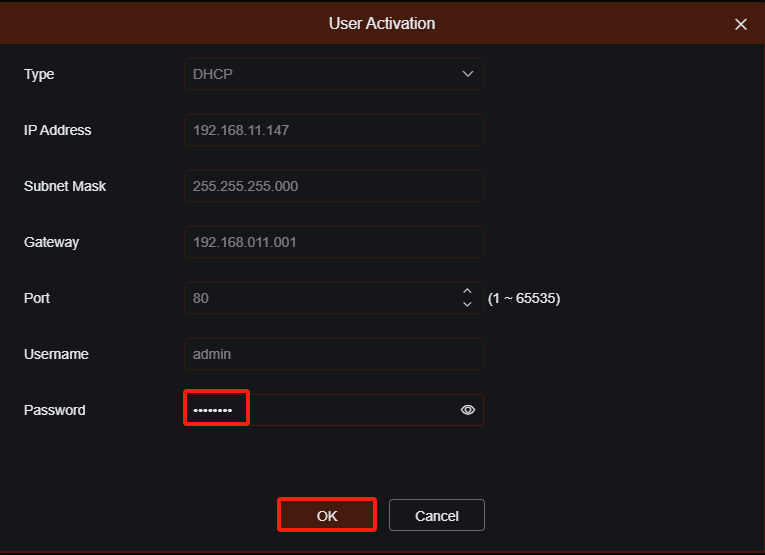
- Check the boxes of the cameras, then click the Batch IP Modification button.
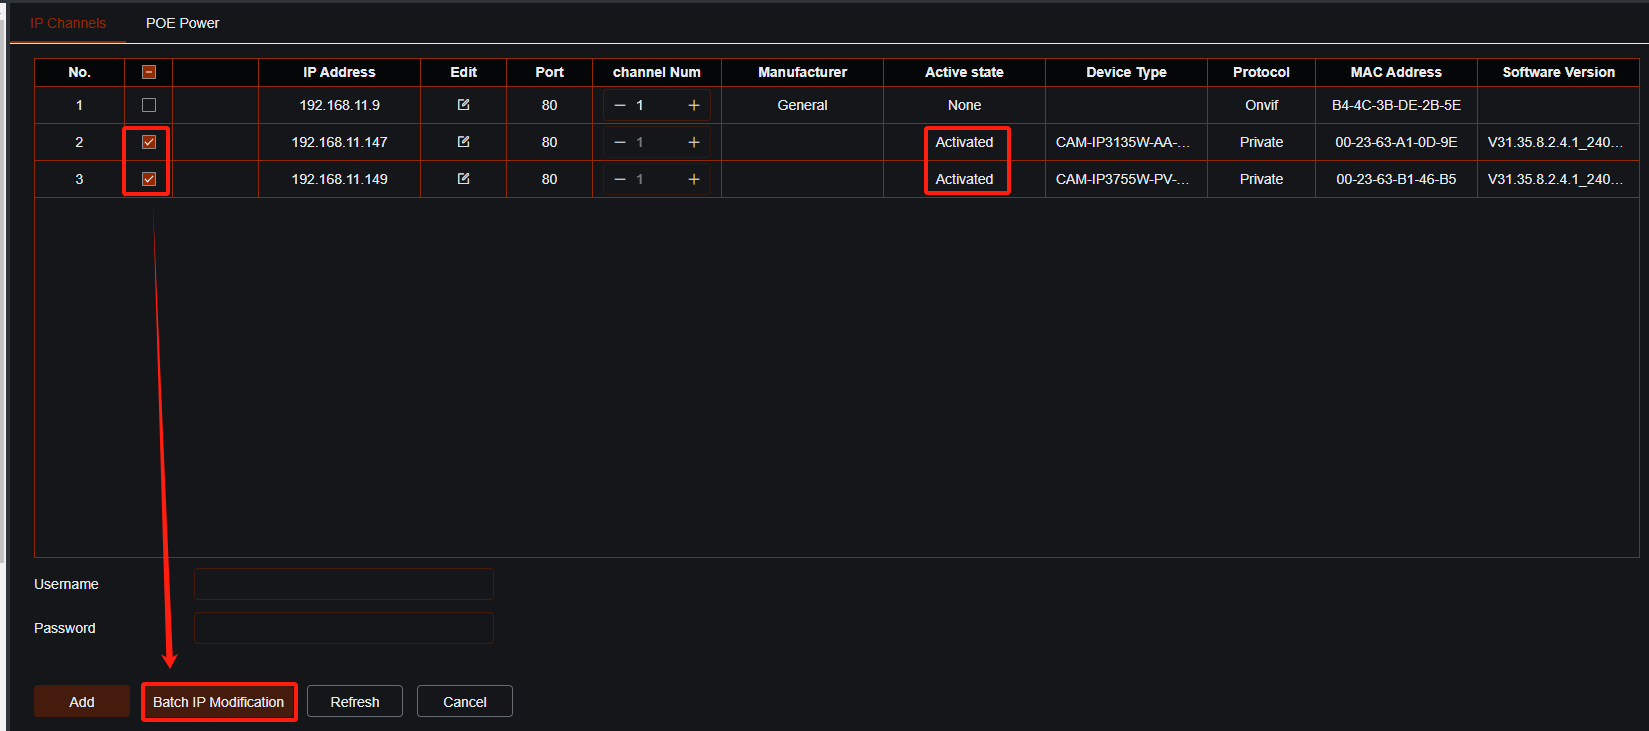
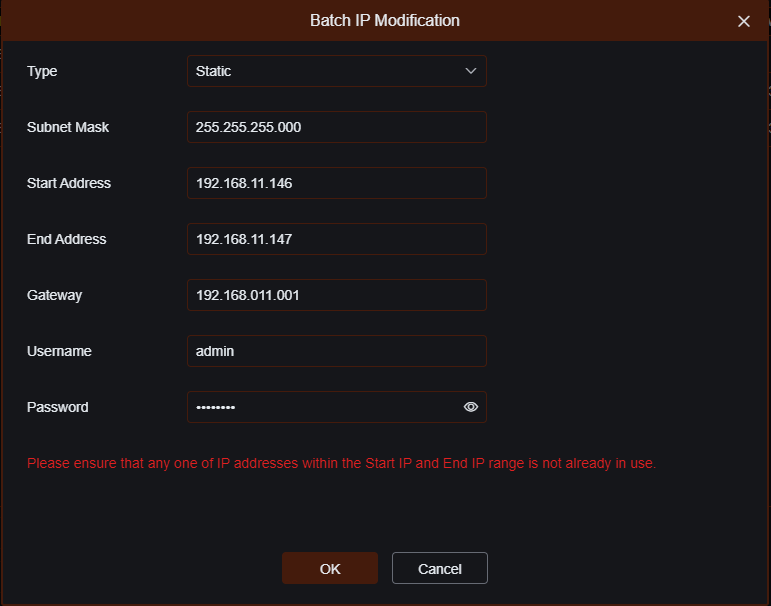
- It is recommended to use static IP for IP cameras connected via a PoE switch. Enter the Start IP, End IP, Username and Password for all your cameras, then click the OK button.
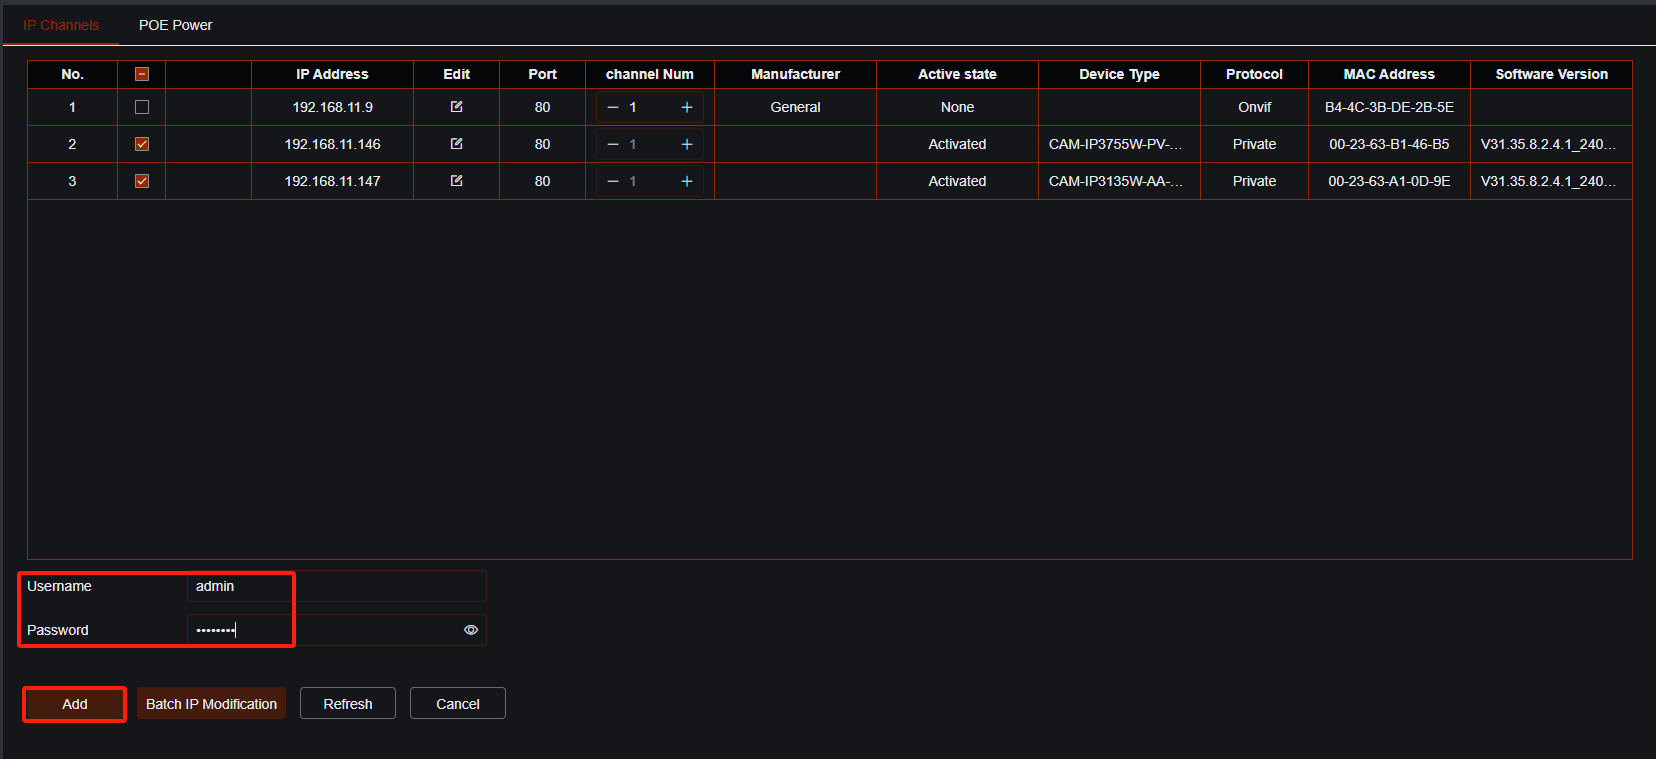
- Enter the Username and Password, click the Add button.
- Click the Cancel button to close this window. Your cameras will be displayed in your channel list.

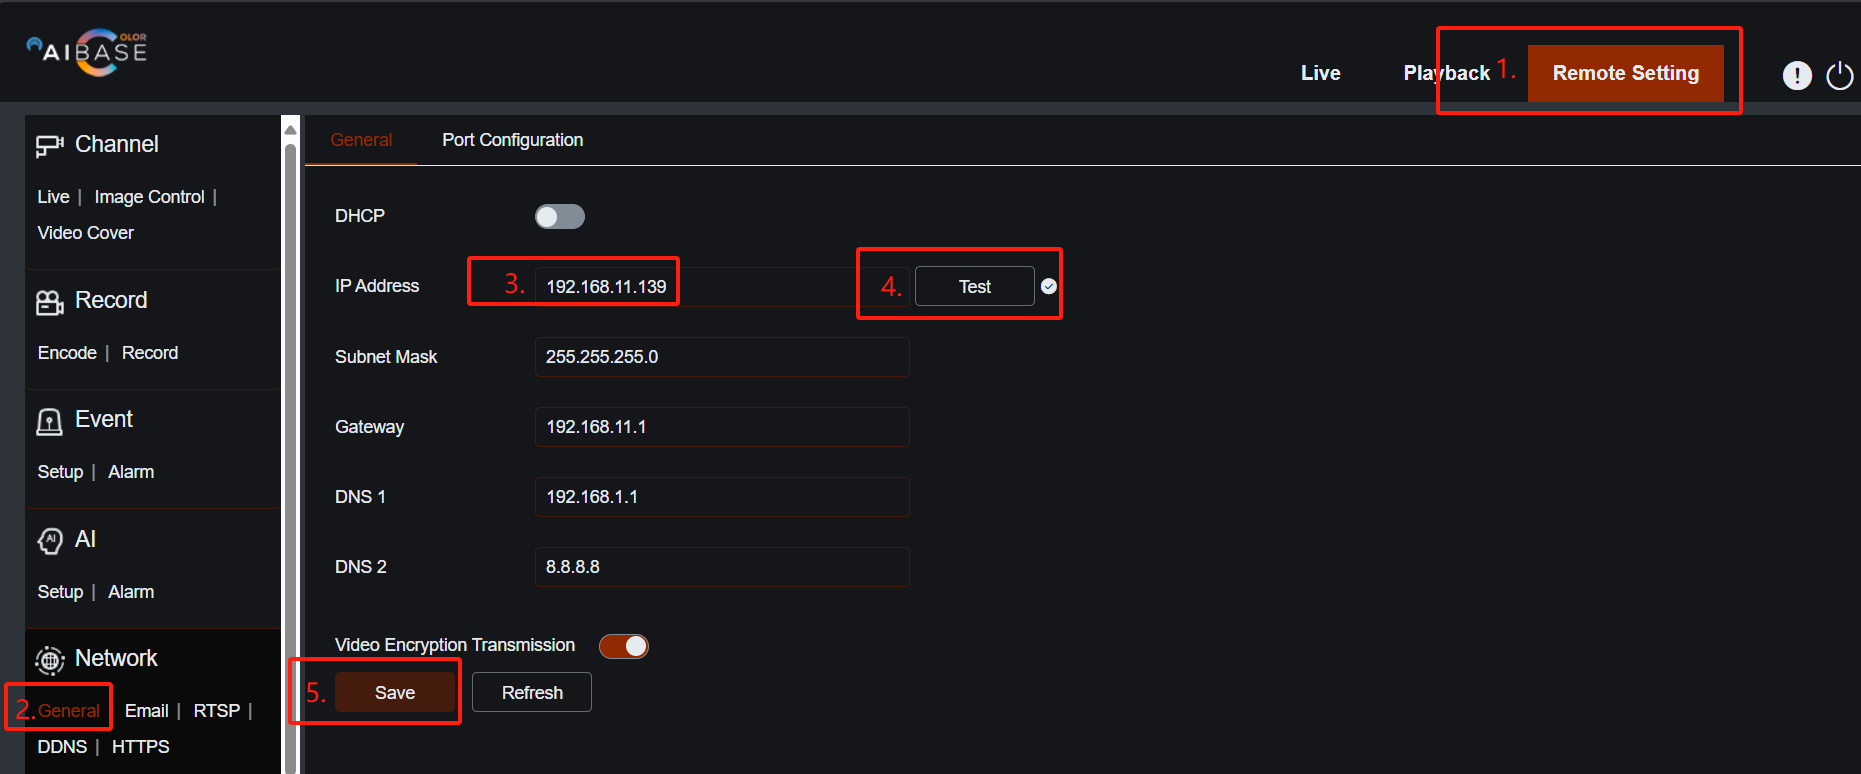
How to Modify the IP Address of the Camera on the Camera's Web Page
- Click on Remote Setting, then go to the General tab in the Network section.
- After assigning a static IP address to the camera, click the Test button to ensure there are no IP address conflicts.
- Once everything is confirmed, click the Save button to finalize the changes.
How to Modify the IP Address of the Camera Using AI Color Search Tool
- Launch the AI Color Search software, click here to download.

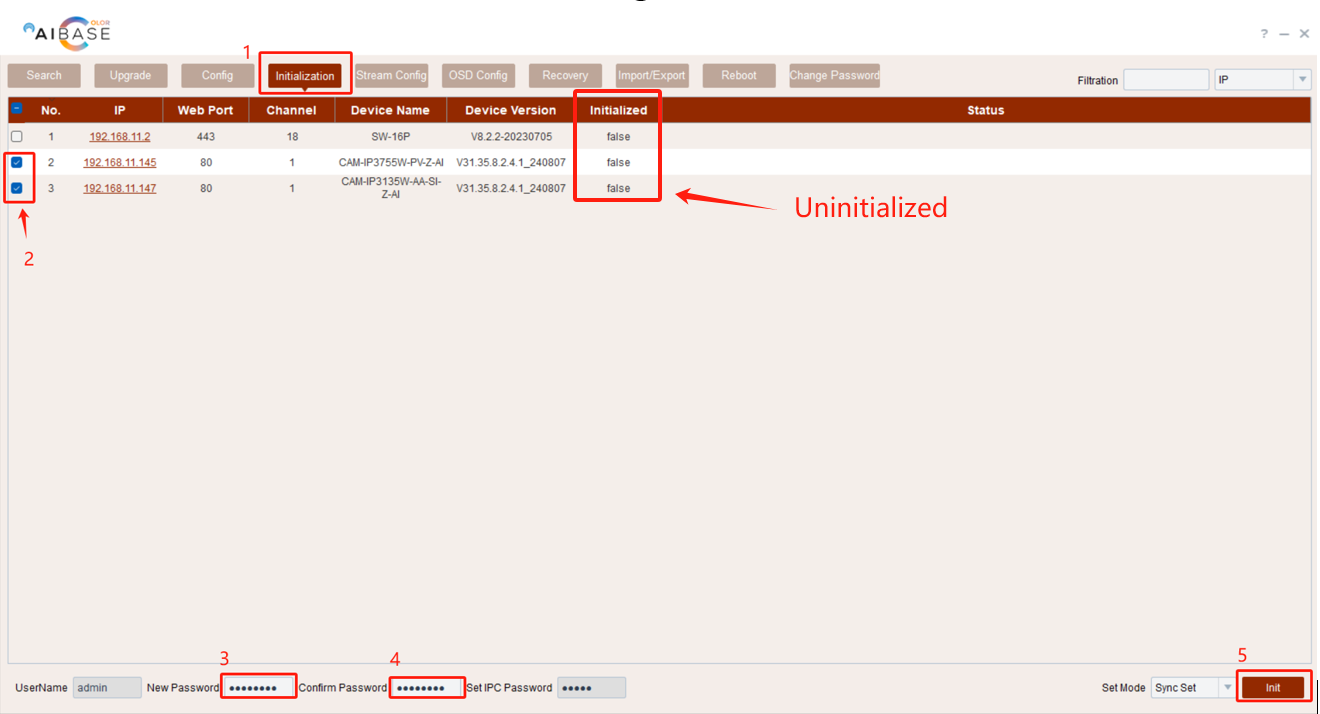
- If your cameras are Uninitialized, you need to initialize them first.

- Click the 'Initialization' button, select all uninitialized cameras, set a password, and then click the 'Init' button in the bottom right corner.
- Click the Search button, check the boxes for the cameras you want to modify, enter the initialization password, input the device information, change the Net Mode to Static, and then click the Modify button.
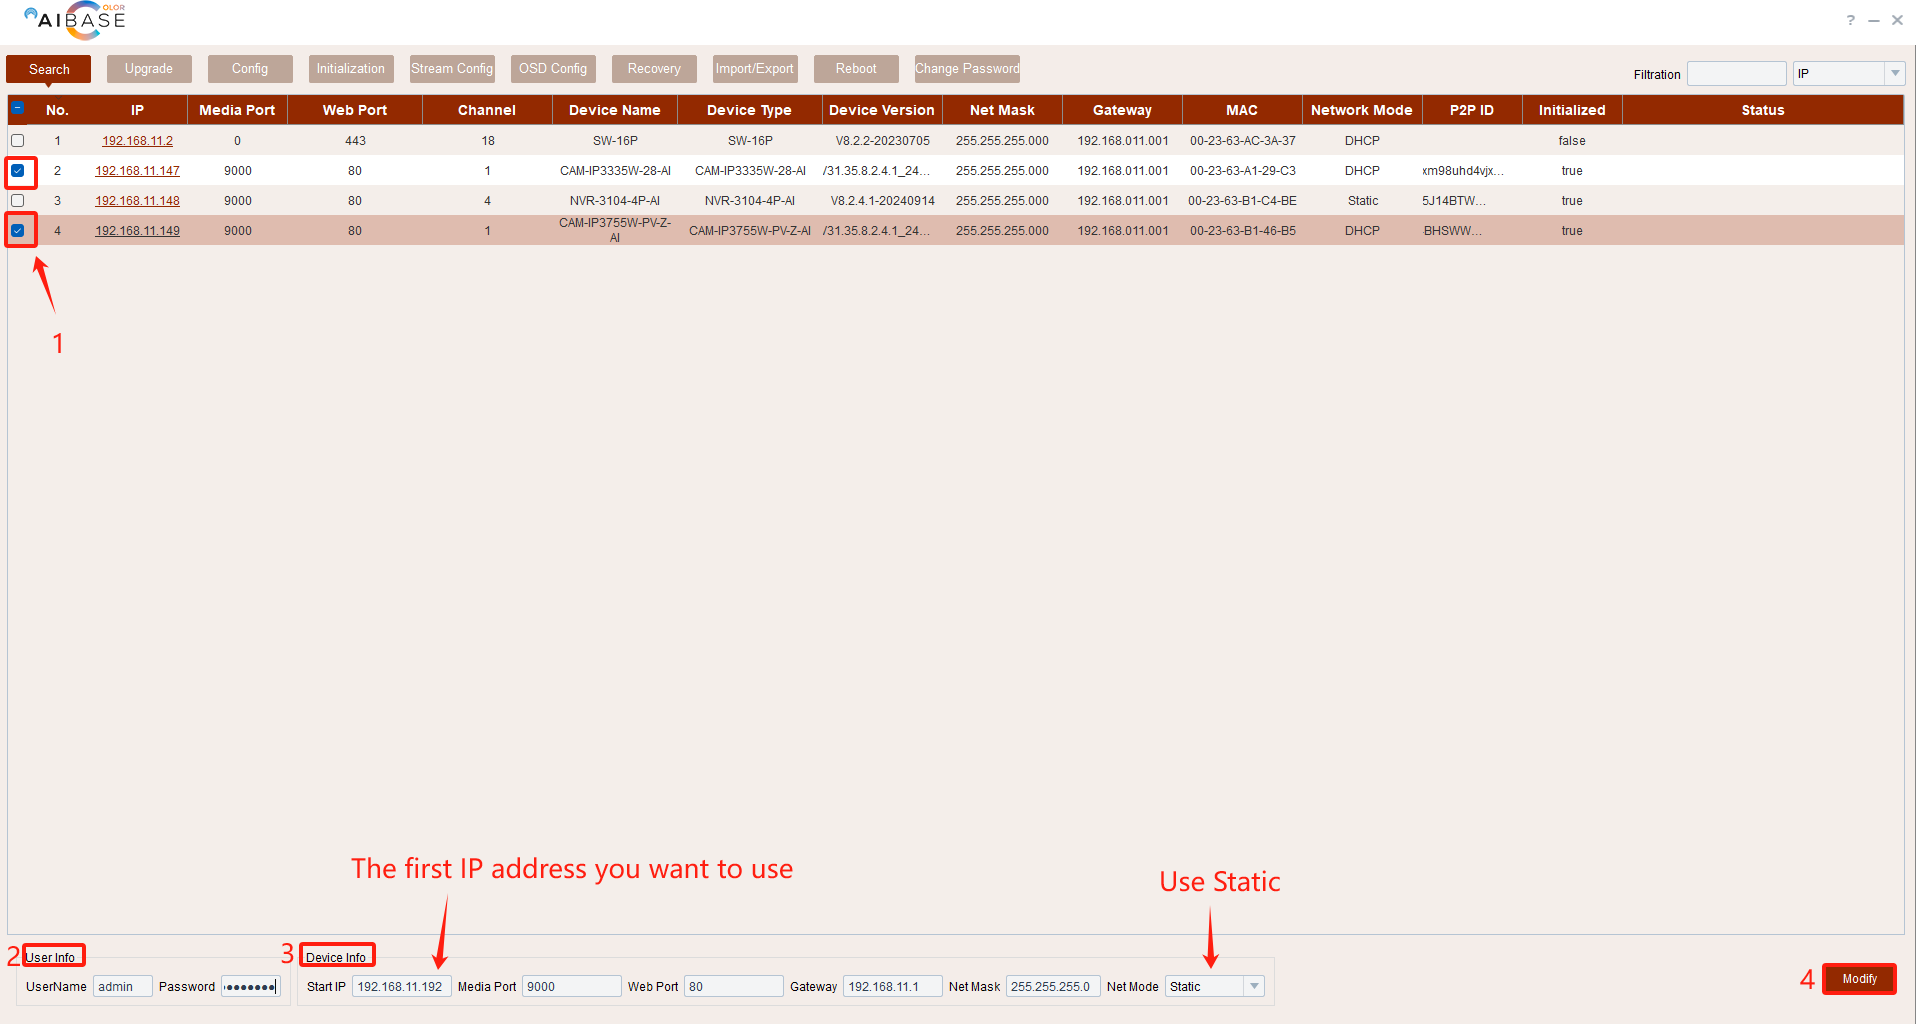
- Check the Status. If it fails, repeat step 4.
