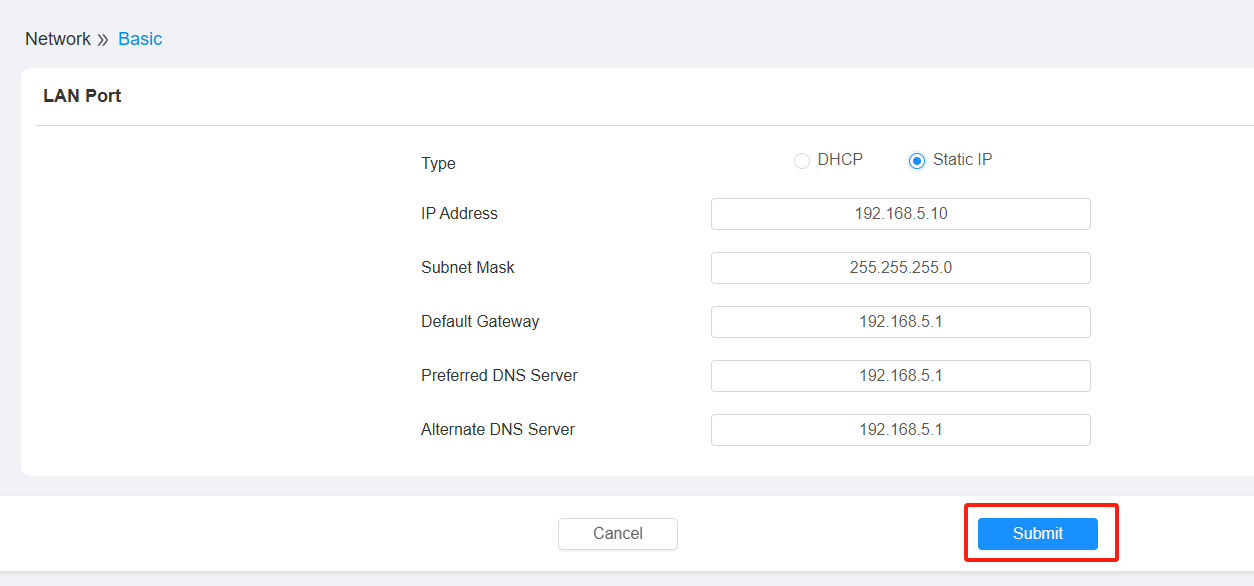
Modify the IP Address on the Akuvox Cloud
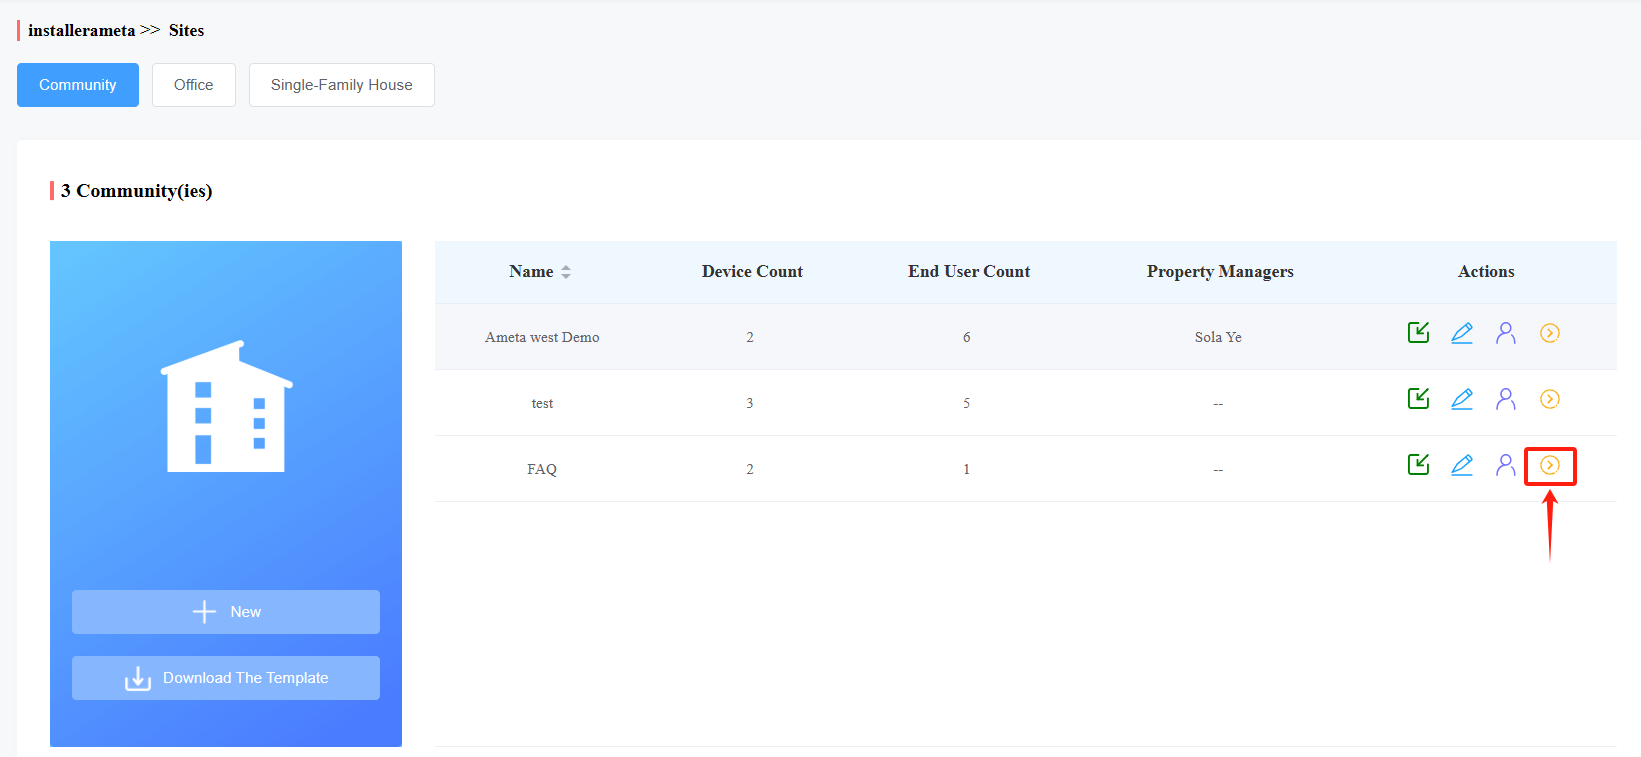
1. Click  for the site you want to configure.
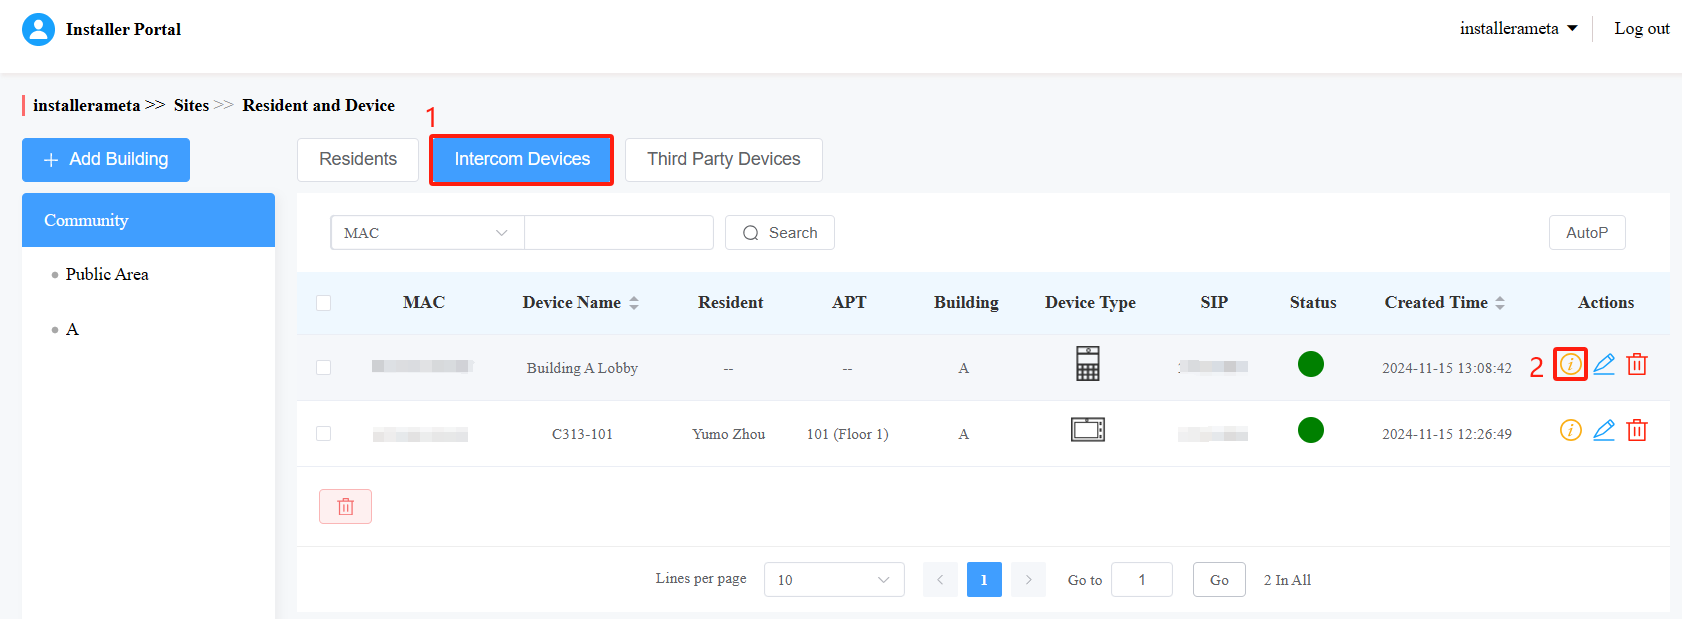
2. Click the 'Intercom Devices' button, then click  for the doorphone you want to configure.
3. Click the 'Remote Control' button on the Detail page.

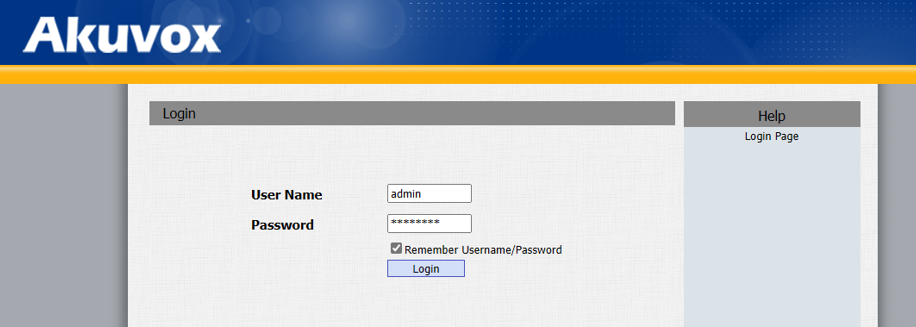
4. On the device's web portal (you may need to press the ‘F5’ key to refresh the page), the default username and password are both 'admin'. After entering the username and password, click the login button.
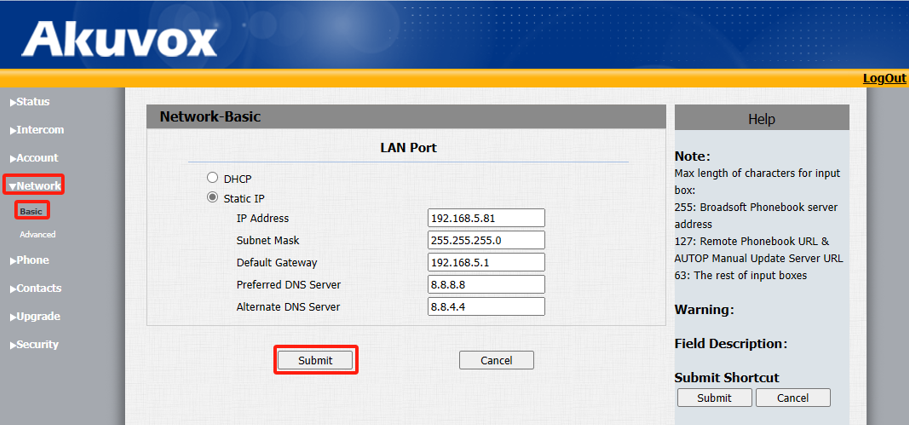
5. Click on 'Network' and select 'Basic' from the sidebar. Modify the IP address and click the 'Submit' button.
Modify the IP Address via IPScanner
1. Launch the Akuvox IPScanner software, click here to download.

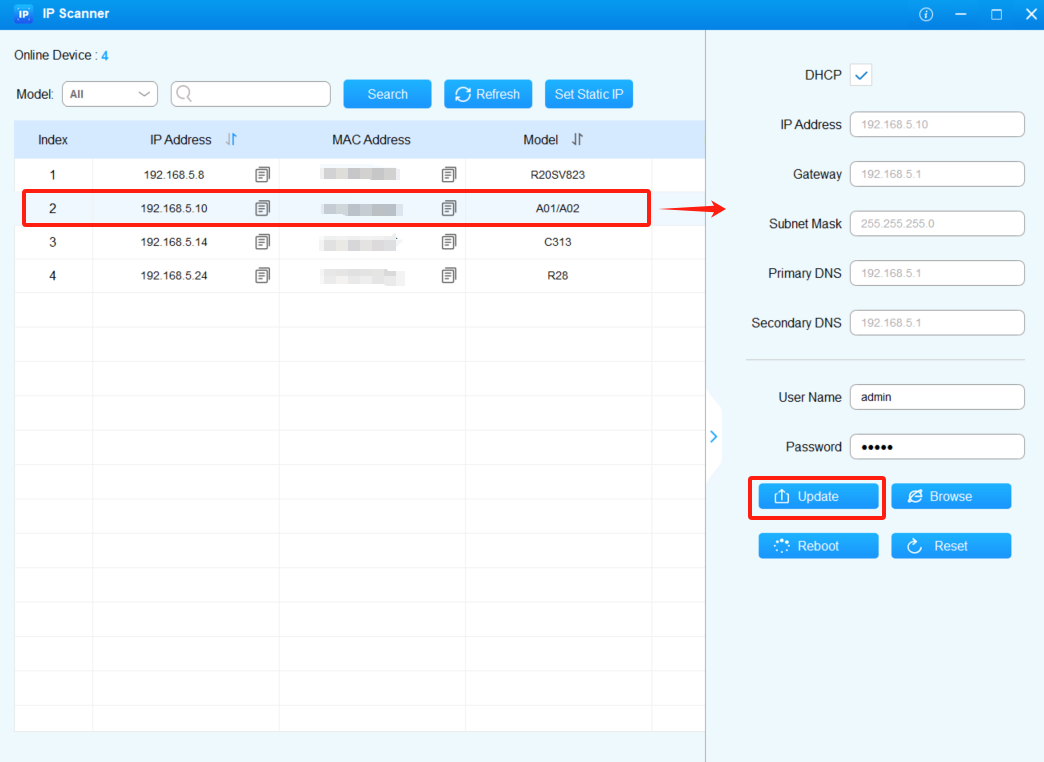
2. Use the search bar and search button to find the exact model number you are looking for or leave it as default (this will display all devices on the same network). Click on the desired device to access the IP settings page, the default username and password are both 'admin', then click the 'Update' button to save the changes.
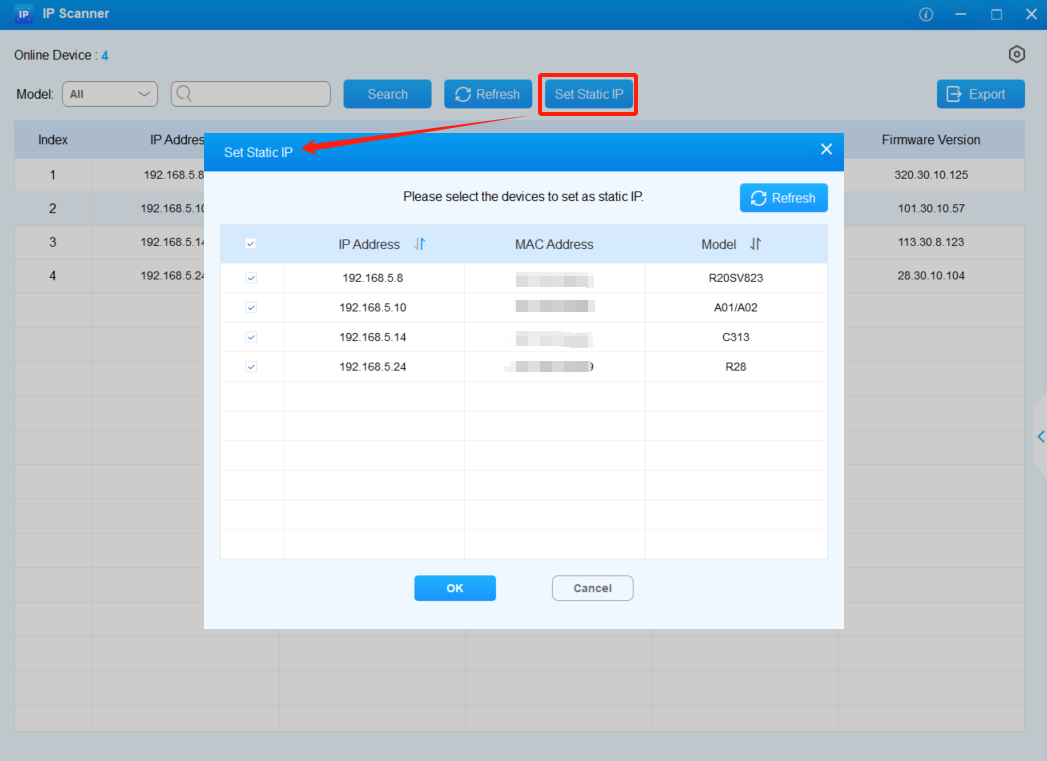
3. The 'Set Static IP' button allows you to batch assign static IPs to multiple devices.
Modify the IP address through the device's web portal
1. Launch the Akuvox IPScanner software, click here to download.

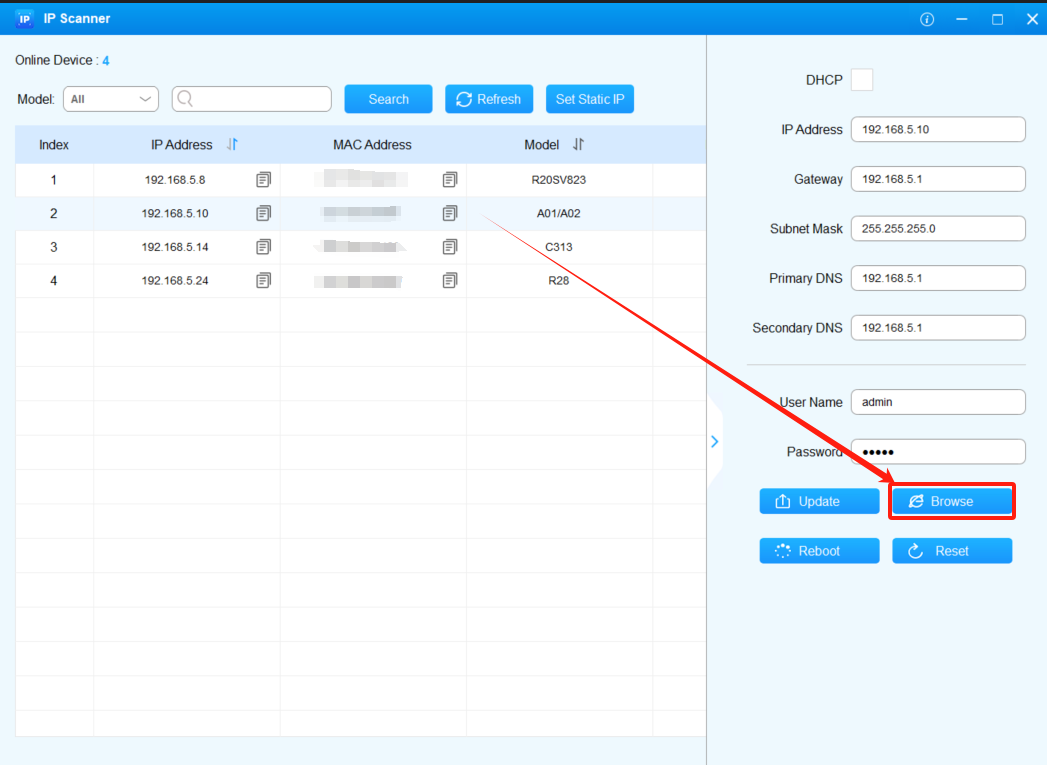
2. Use the search bar and search button to find the exact model number you're looking for, or leave it set to default (this will display all devices on the same network). Click on the desired device to access the IP settings page, then click the Browse button to access the device's web portal.
3. On the web portal, click the 'Network' button.

4. Click the 'Submit' button to save your changes.
