About This Manual
Control4 develops smart home automation systems to control lighting, entertainment, security, energy, and other connected devices. The company's 2013 initial public offering was considered to be the first pure-play home automation IPO ever.
This manual is intended for guiding dealers of configuring and adding Akuvox smart intercoms to a Control4 solution. It will introduce how dealers can make video calls between Akuvox smart intercoms and Control4 T3 10'' dock tablet, and manage the door lock connected to the Akuvox smart intercoms. Akuvox door phone can send video stream via MJPEG codec or H264 codec which dealers need to enable RTSP server in Akuvox door phone. Control4 will open the door via HTTP command which dealers need to enable open relay via HTTP feature in Akuvox door phone.
1.2. Connection Diagram

1.3 Setting
-
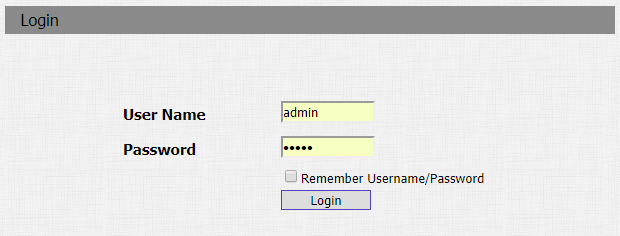
Login to the intercom's web interface
-
Go to Intercom - RTSP interface to enable the RTSP stream in door phone.

-
Go to Intercom - Relay interface to enable the Unlock via HTTP command feature.

2.1 Add Drivers in Composer
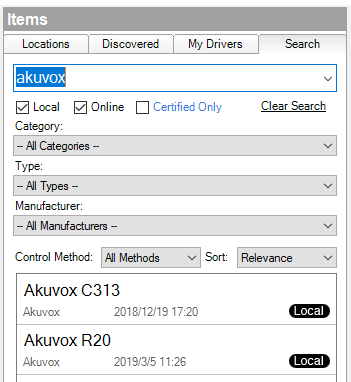
Run the Composer software, and go to Items - Search interface to find the door phone driver which users can enter Akuvox to search.
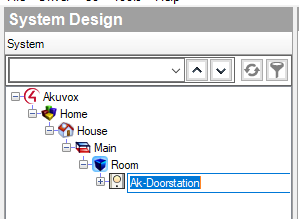
Double click to add drivers (Depend on which model users use, here we take R20 for an example) to the project which users can see in the System Design interface and rename the driver to identify.
Note: If the drivers cannot be found online, please contact Akuvox technical support for it.

2.2 Bind Drivers to Devices
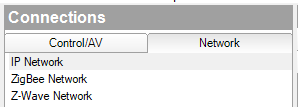
Go to Connections - Network - IP Network Connections interface to bind the driver to device via directly moving item from Available Devices interface.

2.3 SIP and HTTP Unlock Settings
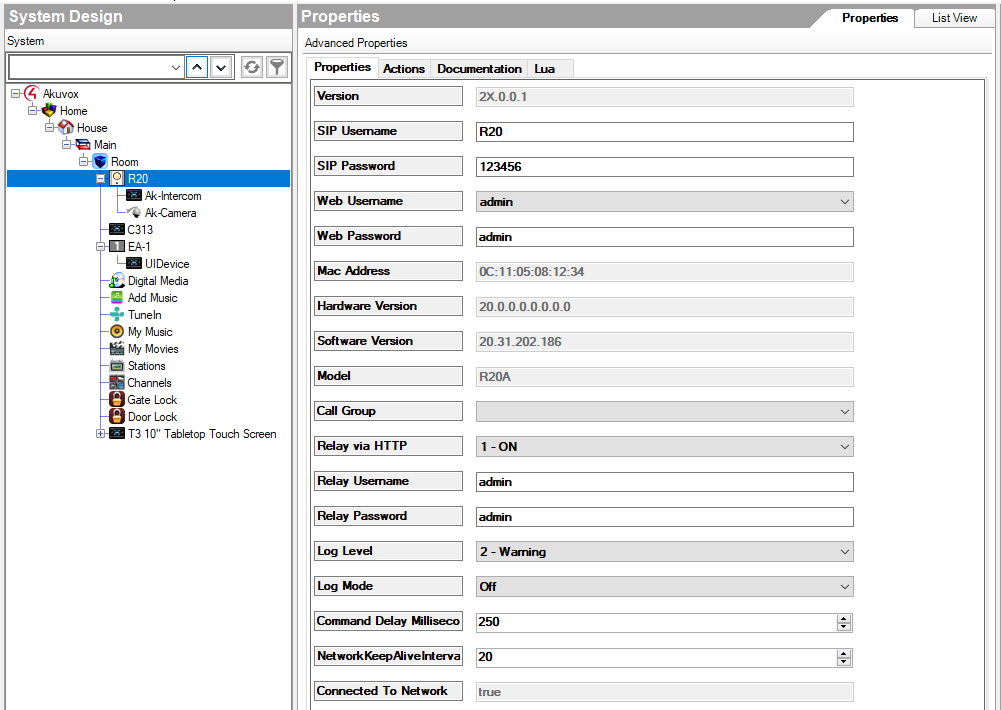
Go to System Design interface to select the door phone first.
Go to Properties interface to configure SIP account, SIP password, enable the Relay via HTTP option and configure its username and password. Every row needs to be confirmed by clicking on the Set button.
Back to door phone’s website, and go to Status - Basic - Account Information interface to check whether the SIP account is registered or not.
Note: If the SIP account is not registered, users can
-
Check whether the Communication agents is added or not;
-
If added, reboot the controller to try to active the SIP server again.
2.7. Lock Manipulation
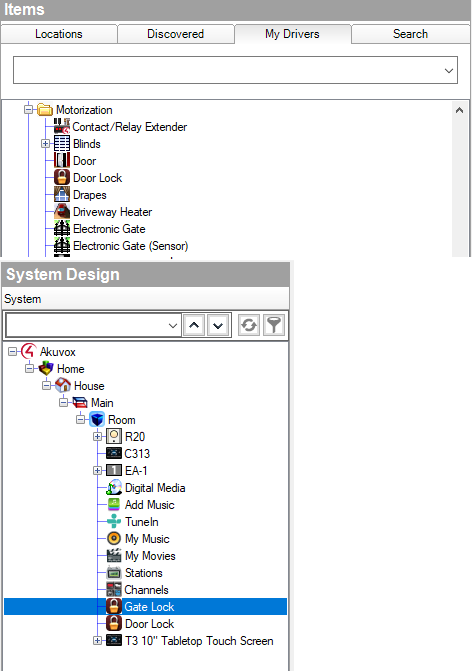
Go to Items - My Drivers interface to find the door lock driver.
Double click to add drivers to the project and rename them.
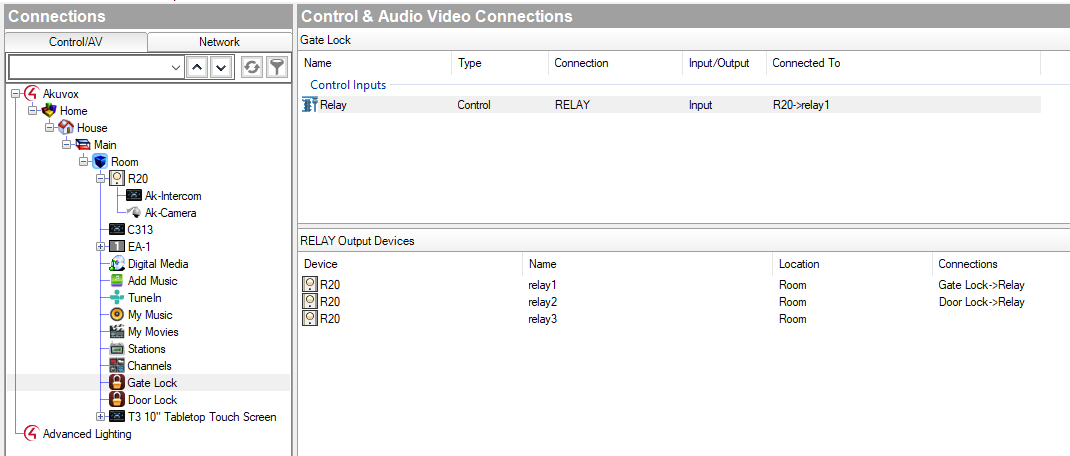
Go to Connections - Control/AV interface and select door lock.
Go to Control&Audio Video Connections interface bind the driver to device’s relay port via directly moving item to Relay Output Devices interface.
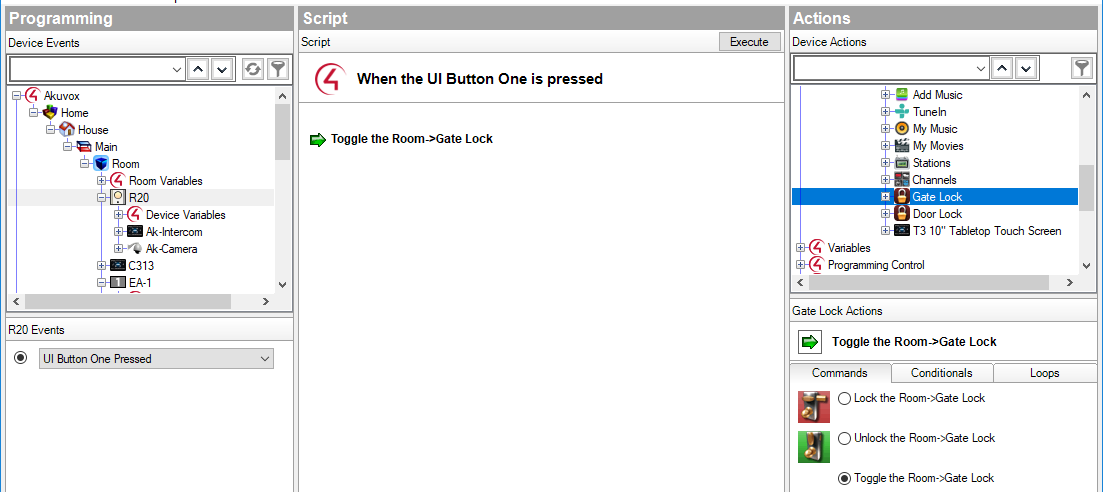
Go to Programming interface, select door phone and select door phone event to be UI Button One/Two Pressed.
Go to Actions interface, select door lock, select the lock actions to be Toggle the room->Lock and move the lock action to Script interface.
Go to System Design interface to select the door phone - Intercom.
Go to Properties - Custom Buttons interface to tick to enable two UI buttons which can be used as the trigger for sending HTTP command to door phone to unlock doors and rename them.

2.8. Communication Settings
- Call group
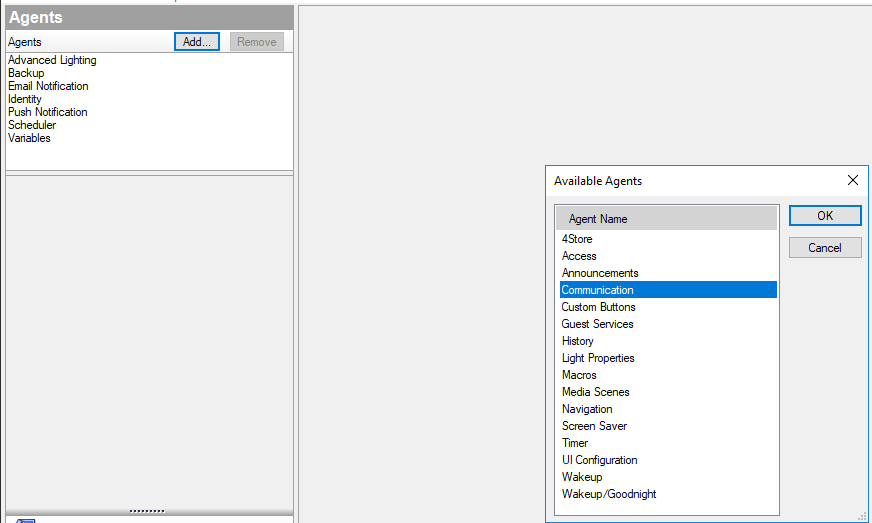
Go to Agents interface and add Communication agent first.
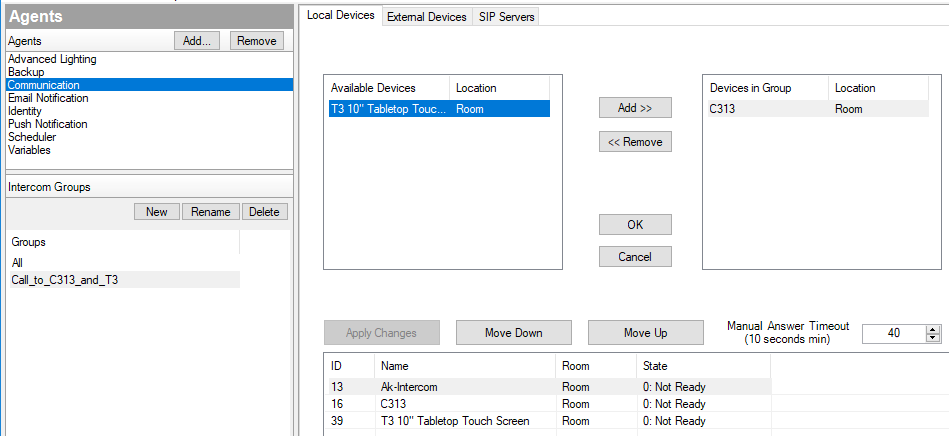
The default All call group is only with Control4 devices, like T3.
Users can add new call group, like Call_to_C313_and_T3, and add C313 and T3 to it.
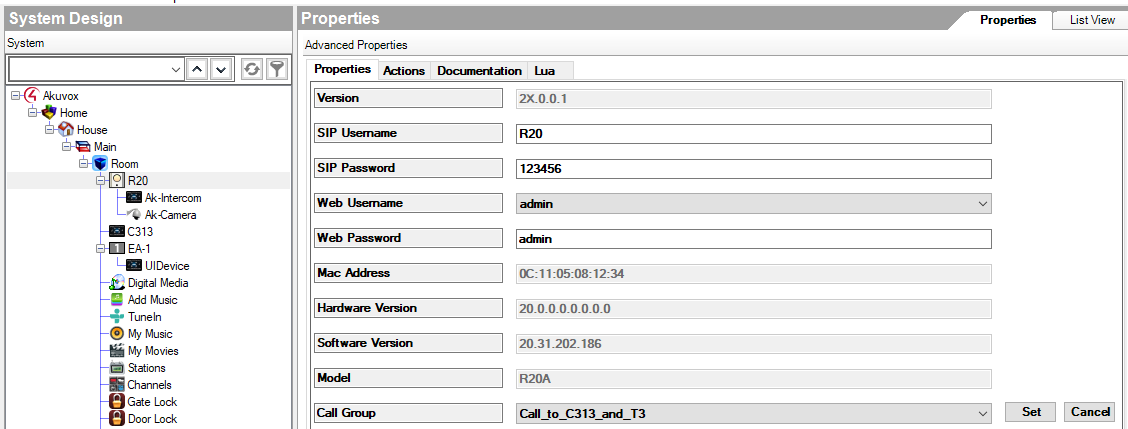
Go to System Design interface to select door phone.
Go to Properties interface to select which group the door phone should call.
- Call volume settings from composer
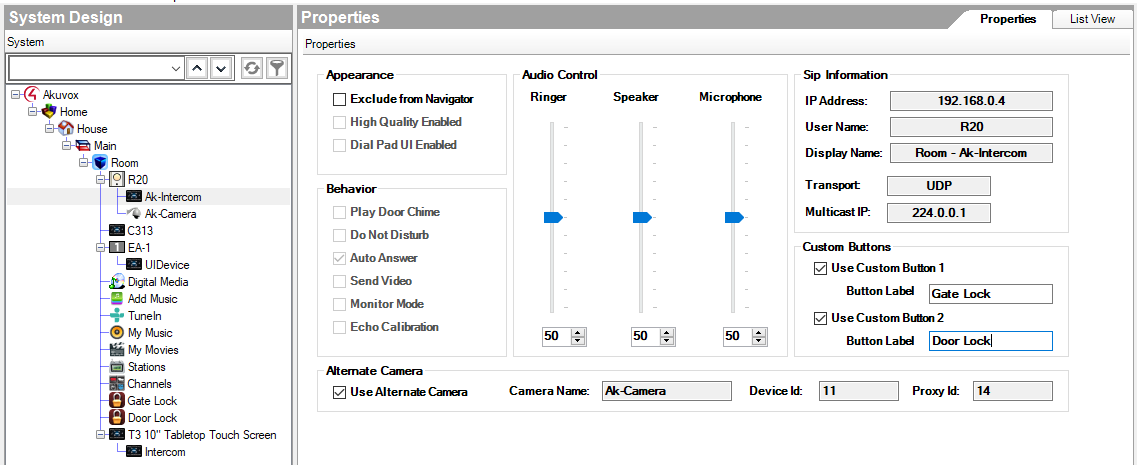
Go to System Design interface to select the door phone - Intercom, and then users can configure call volume settings.
Note: The call volume cannot be muted from composer.
After each setting is done, upload this project to Controller (File/ Refresh Navigators).
3.1; 3.2 Indoor monitor C313 basic setting
same as 2.1; 2.2
3.3 Indoor monitor C313 SIP setting
Go to System Design interface to select the indoor monitor first.
Go to Properties interface to configure SIP account and SIP password. Every value need to be confirm by a Set button.
Back to indoor monitor’s website, and go to Status - Basic - Account Information interface to check whether the SIP account is registered or not.
Note: If the SIP account is not registered, users can
-
Check whether the Communication agents is added or not;
-
If added, reboot the controller to try to active the SIP server again.
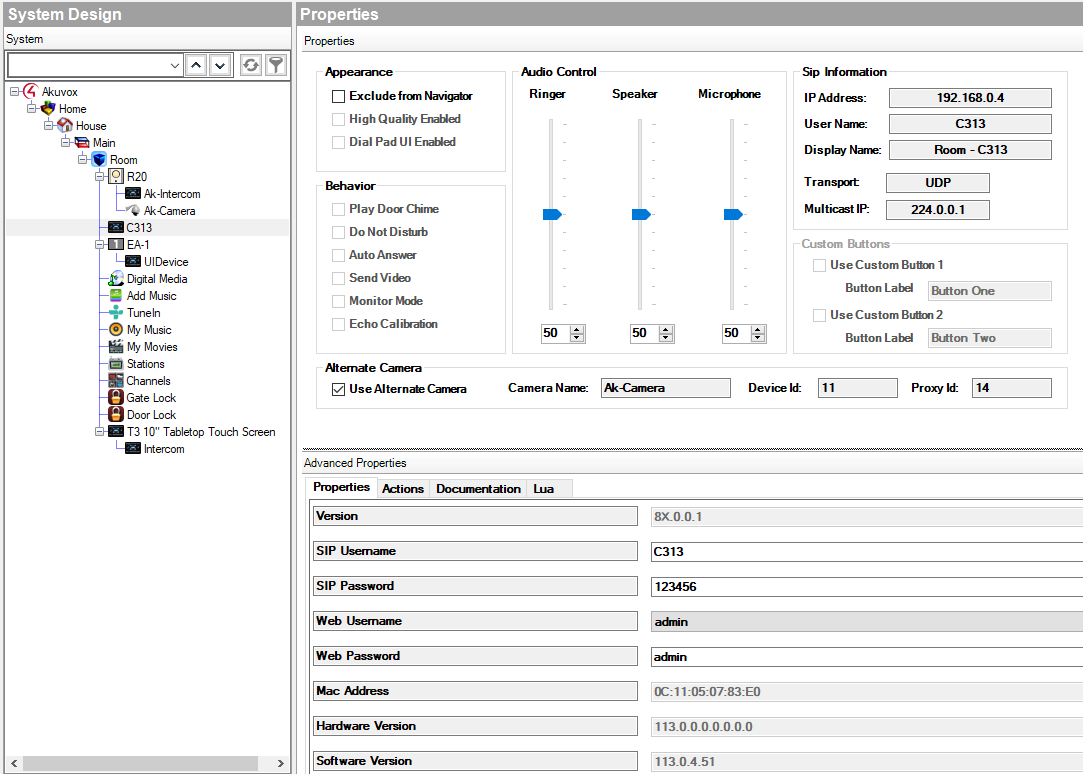
3.4. Communication Settings
- Call volume settings from composer
Go to System Design interface to select the door phone - Intercom, and then users can configure call volume settings.
Note: The call volume cannot be muted from composer.
After each setting is done, upload this project to Controller (File/ Refresh Navigators).
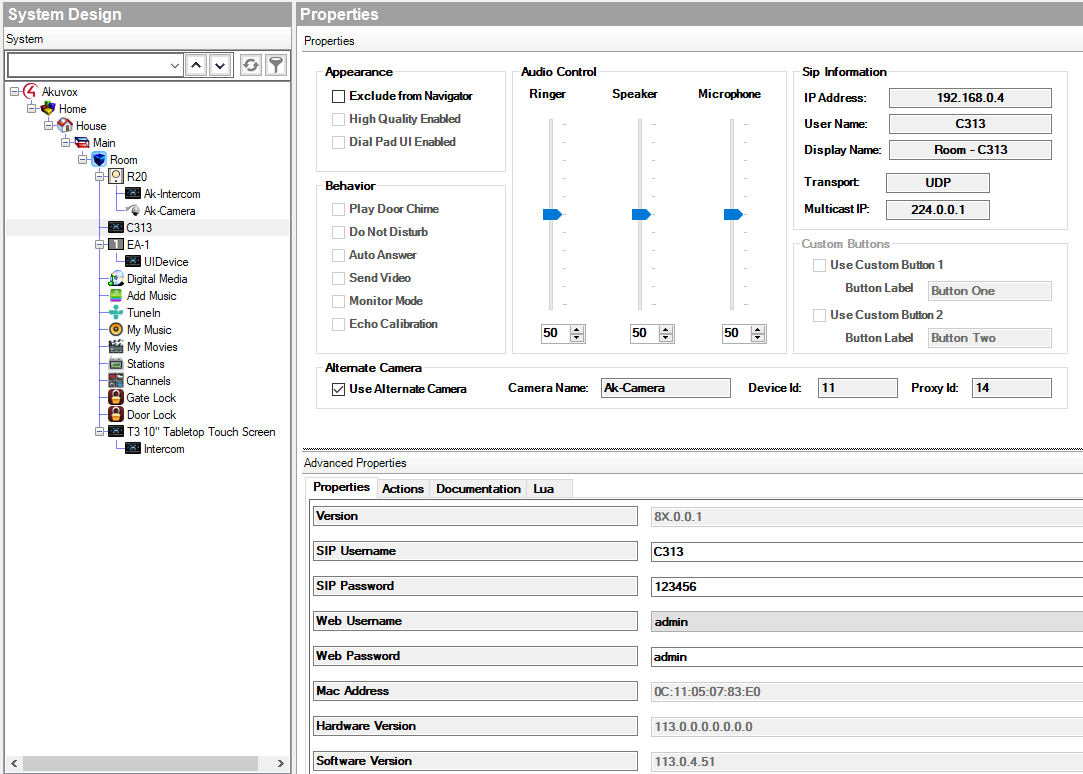
Appendix: Limitation in Akuvox Drivers
1. Supported features from Composer:
SIP settings, unlock via HTTP command settings, video preview settings, Call group (The default All call group is only with Control4 devices, like T3), Ringer, Speaker, Mic sliders (The call volume cannot be muted from composer), Custom Buttons, Alternate Camera
2. Unsupported features from Composer:
Play Door Chime, Do Not Disturb, Auto Answer, Send Video, Stop Video, Pause/Resume Call, Monitor Mode, Current Session, API Calls, set show main/mirror video