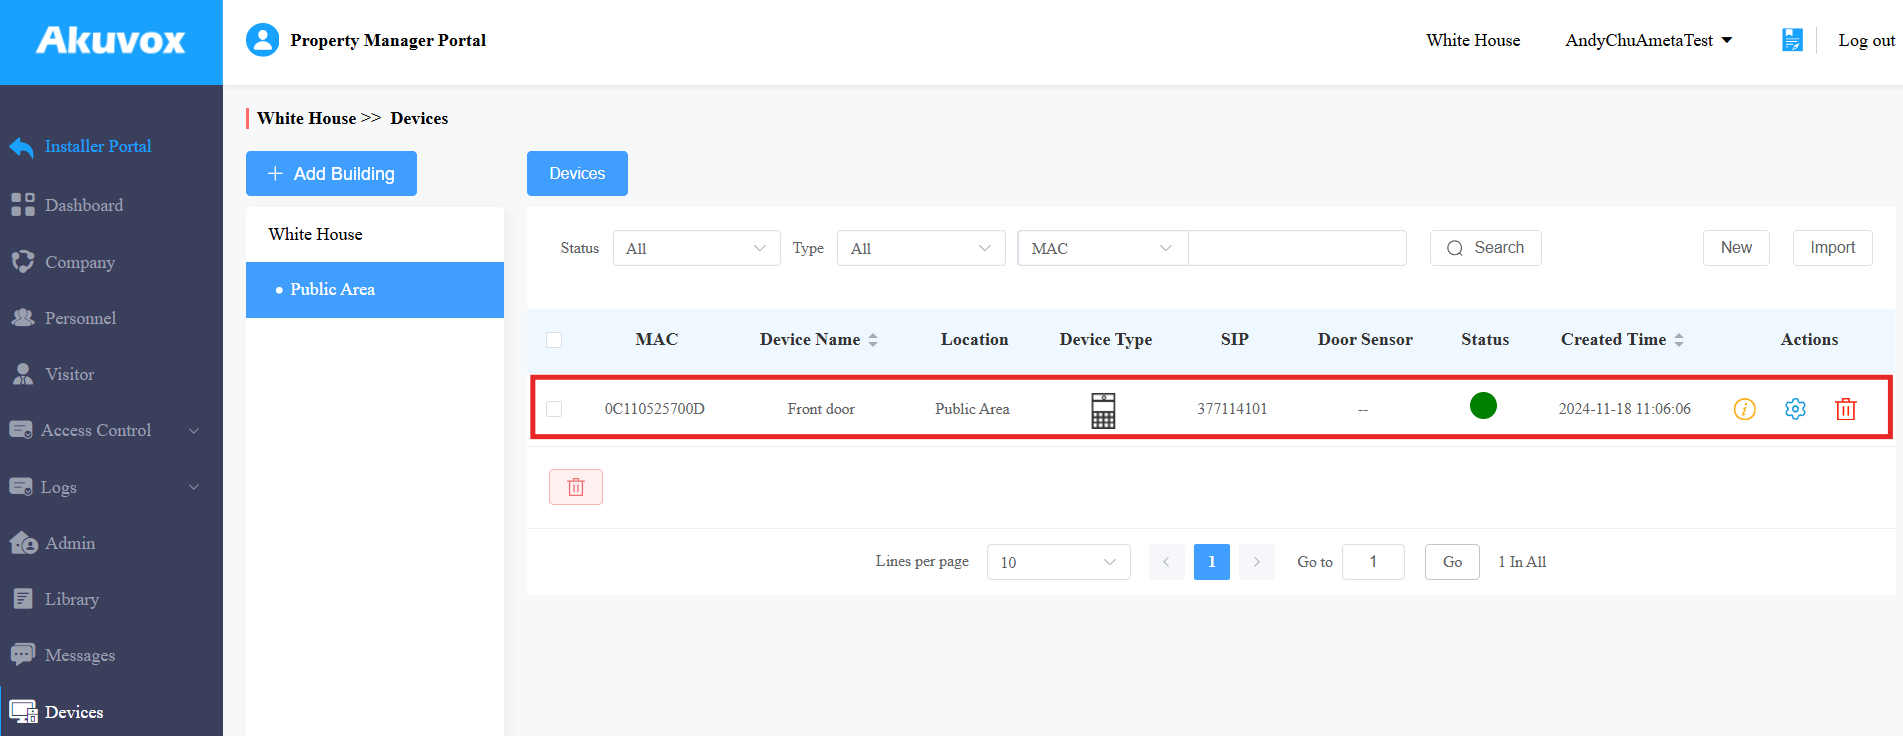
Description
- This tutorial demonstrates how installers can establish an office project by creating office, company, personnel and add devices into the project on the Akuvox cloud platform.
- If you are using the Akuvox Cloud Platform for the first time, please contact your Ameta sales representative to obtain an installer account.
- If you need to active the license, please contact to our tech team.
Step by Step Instructions:
Create Office
1. Sign in your Akuvox Cloud by using the installer account information
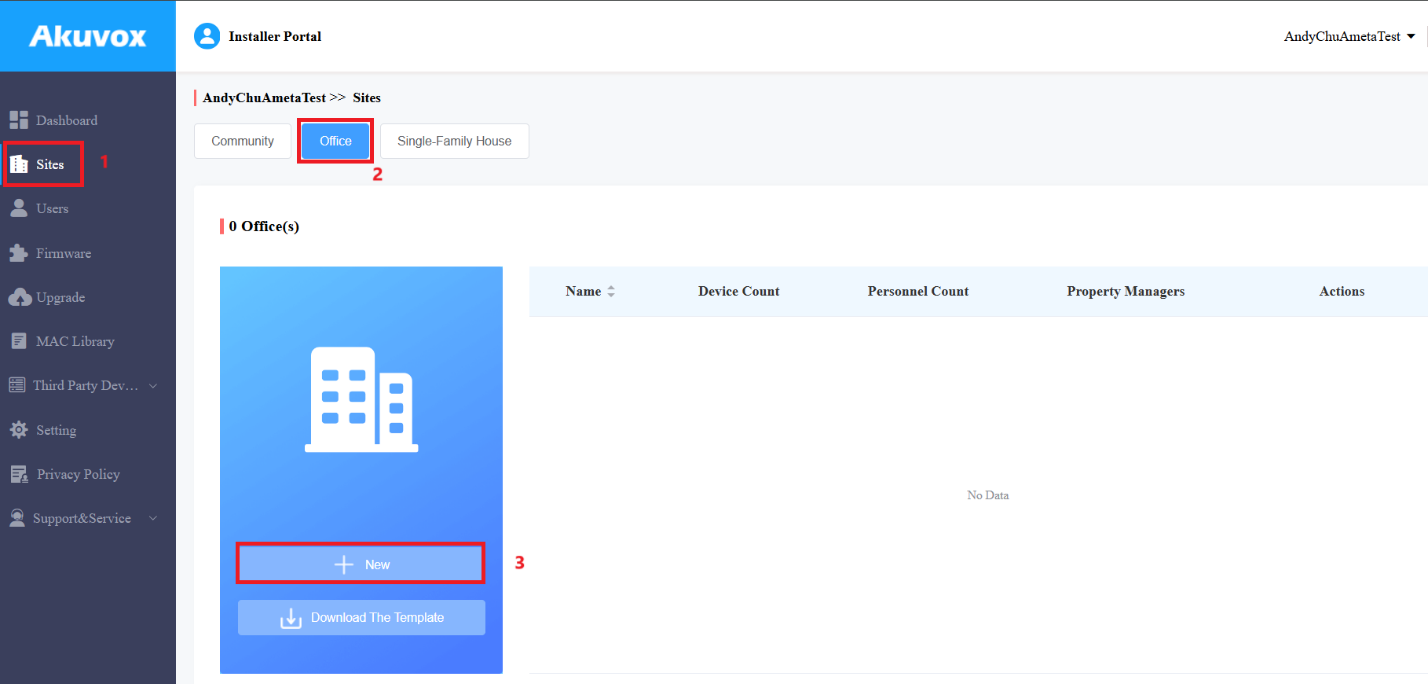
2. Add Office Site to create a new office project

3. You may add a new site at Sites section as well
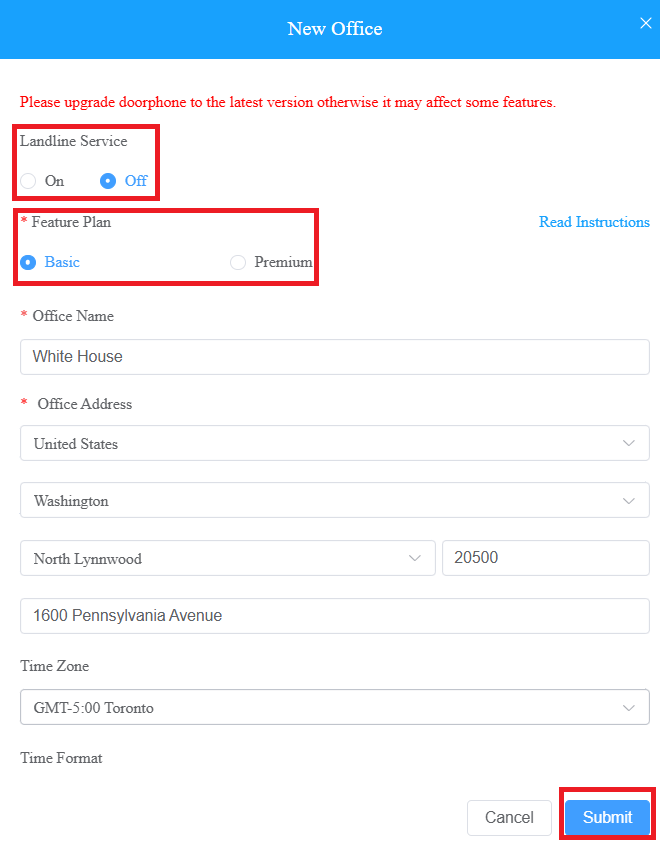
4. Fill out the information for your new office.
- Landline Service is for SIP call and needs purchase license
- Feature Plan Premium is for license purchase only (See the Read Instruction to compare Basic and Premium)
Create Company
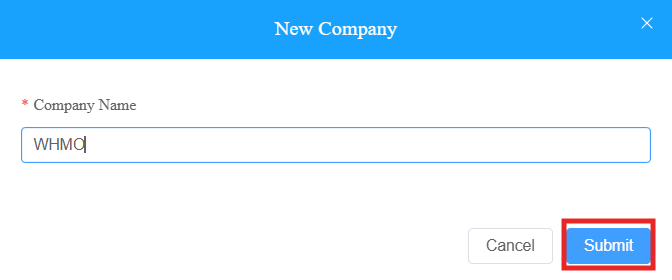
1. Select the Company section and click New

2. Type your Company Name and click submit
Create Personnel
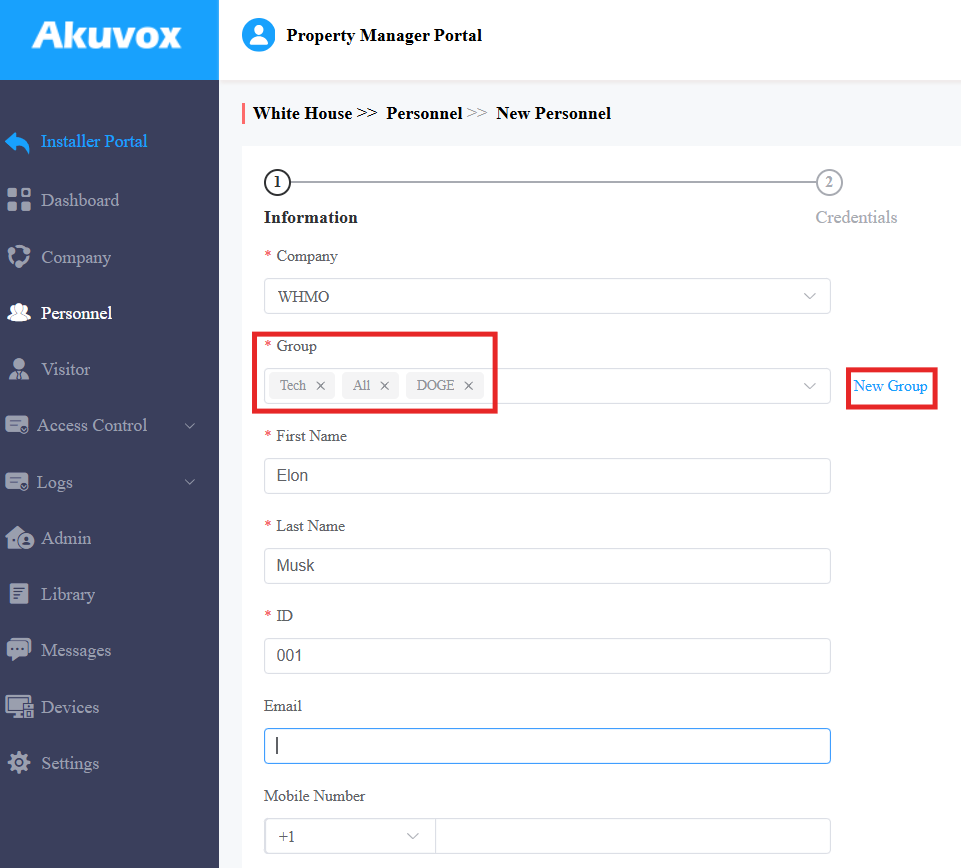
1. Select the Personnel section and choose the Company Name you created previously, and click New Personnel

2. Make sure to create New Group before selecting Groups
3. Click Next to manually input the PIN code for users. RF Card can only manually add the card number.
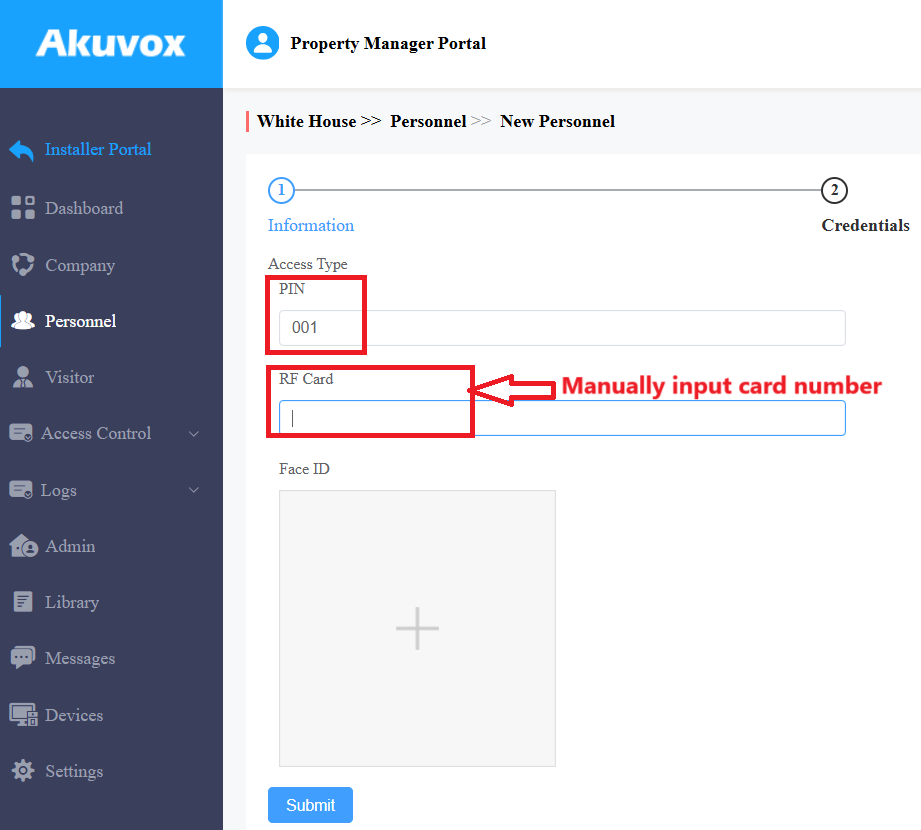
4. You will have all the information concluded.

Add Device
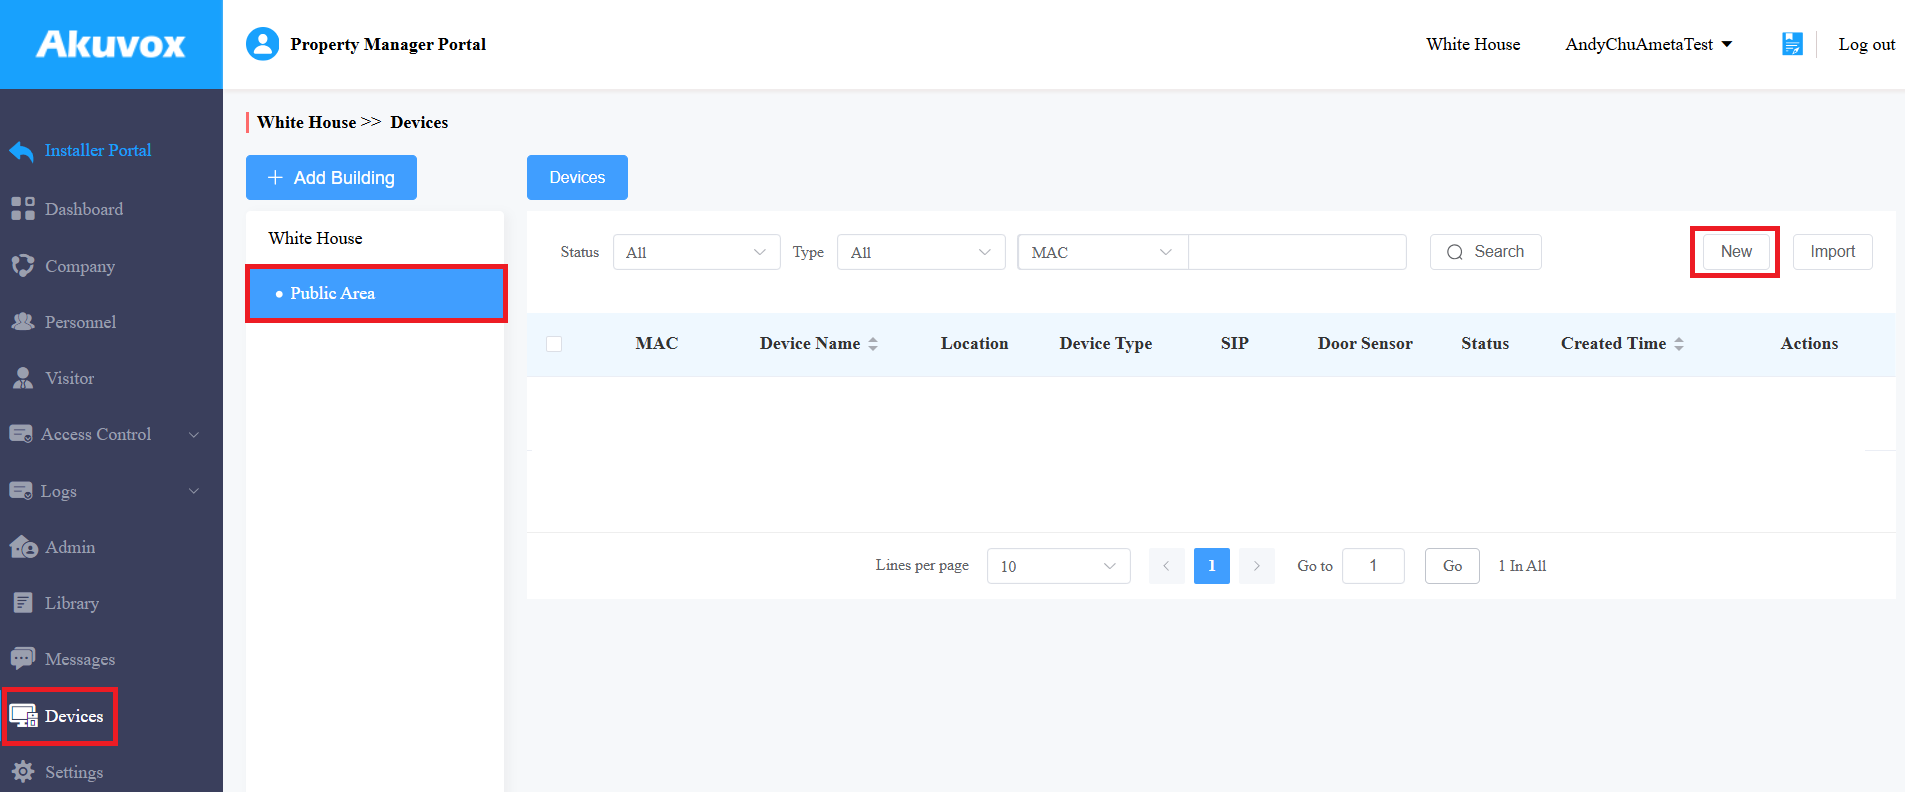
1. Select the Devices section, click Public Area and click New to add your devices
2. Make sure you put the correct MAC address here
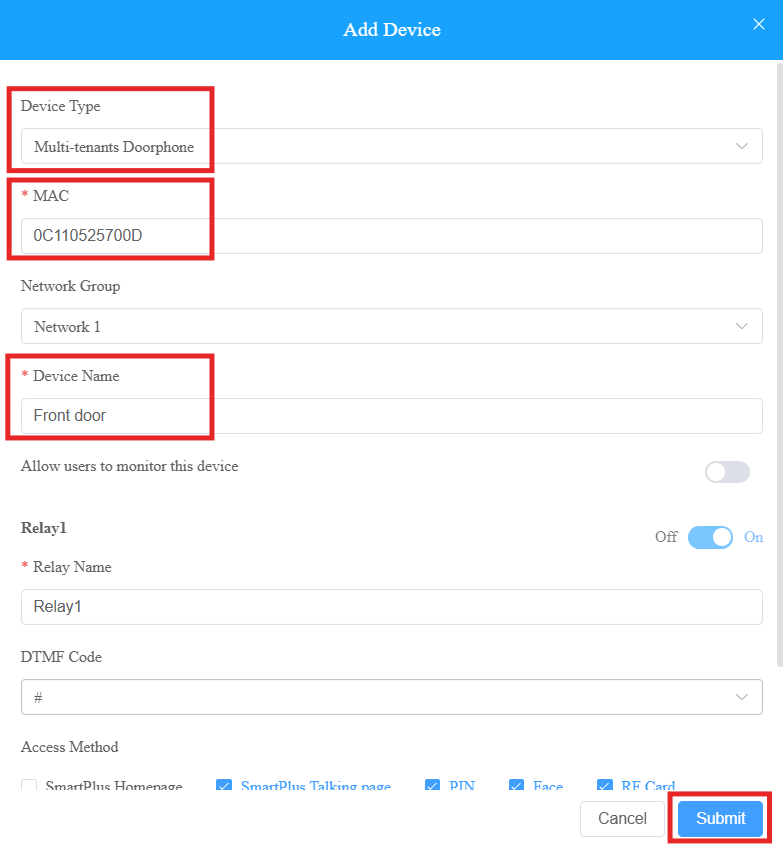
- If any error message occurs while filling out MAC address, please contact to our support team
3. The device will automatically go online
