Description
This article explains how installers can create community projects and add devices on the Akuvox Cloud Platform.
Create a community
1. Log into the Akuvox Cloud Platform with your installer account. You can choose to click on:
- Add Community: to create a new community site.
- Add Office Site: to set up an office site.
- Add Single-Family Site: to configure a site for a single-family residence.
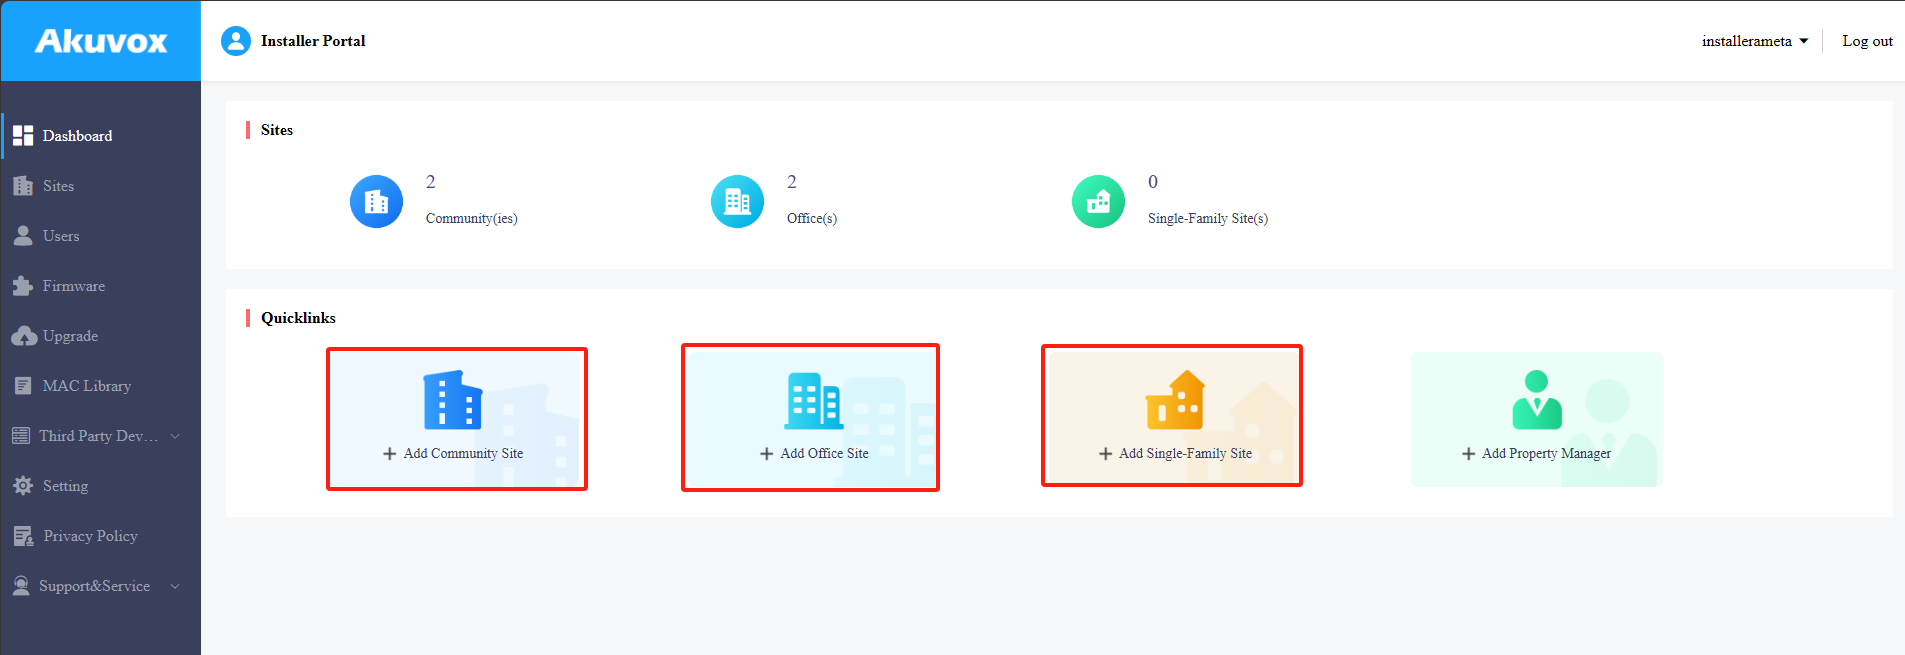
2. I will use Add Community Site as an example. Click 'Add Community' and fill in the form with the basic information for the new site, then click the 'Submit' button.
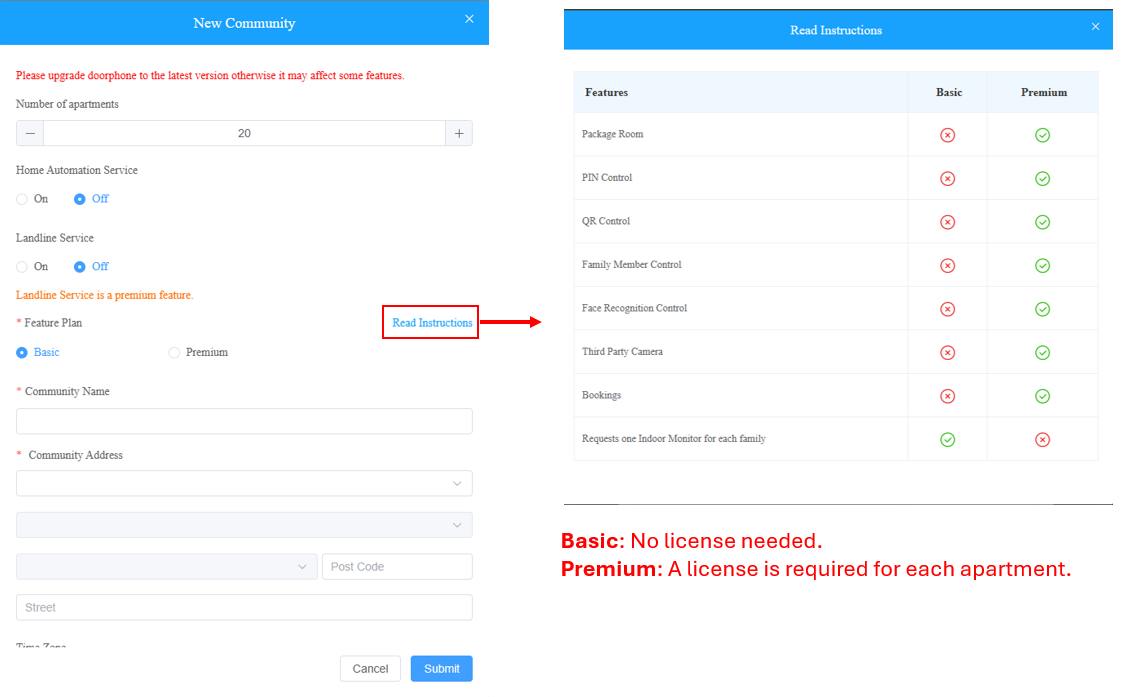
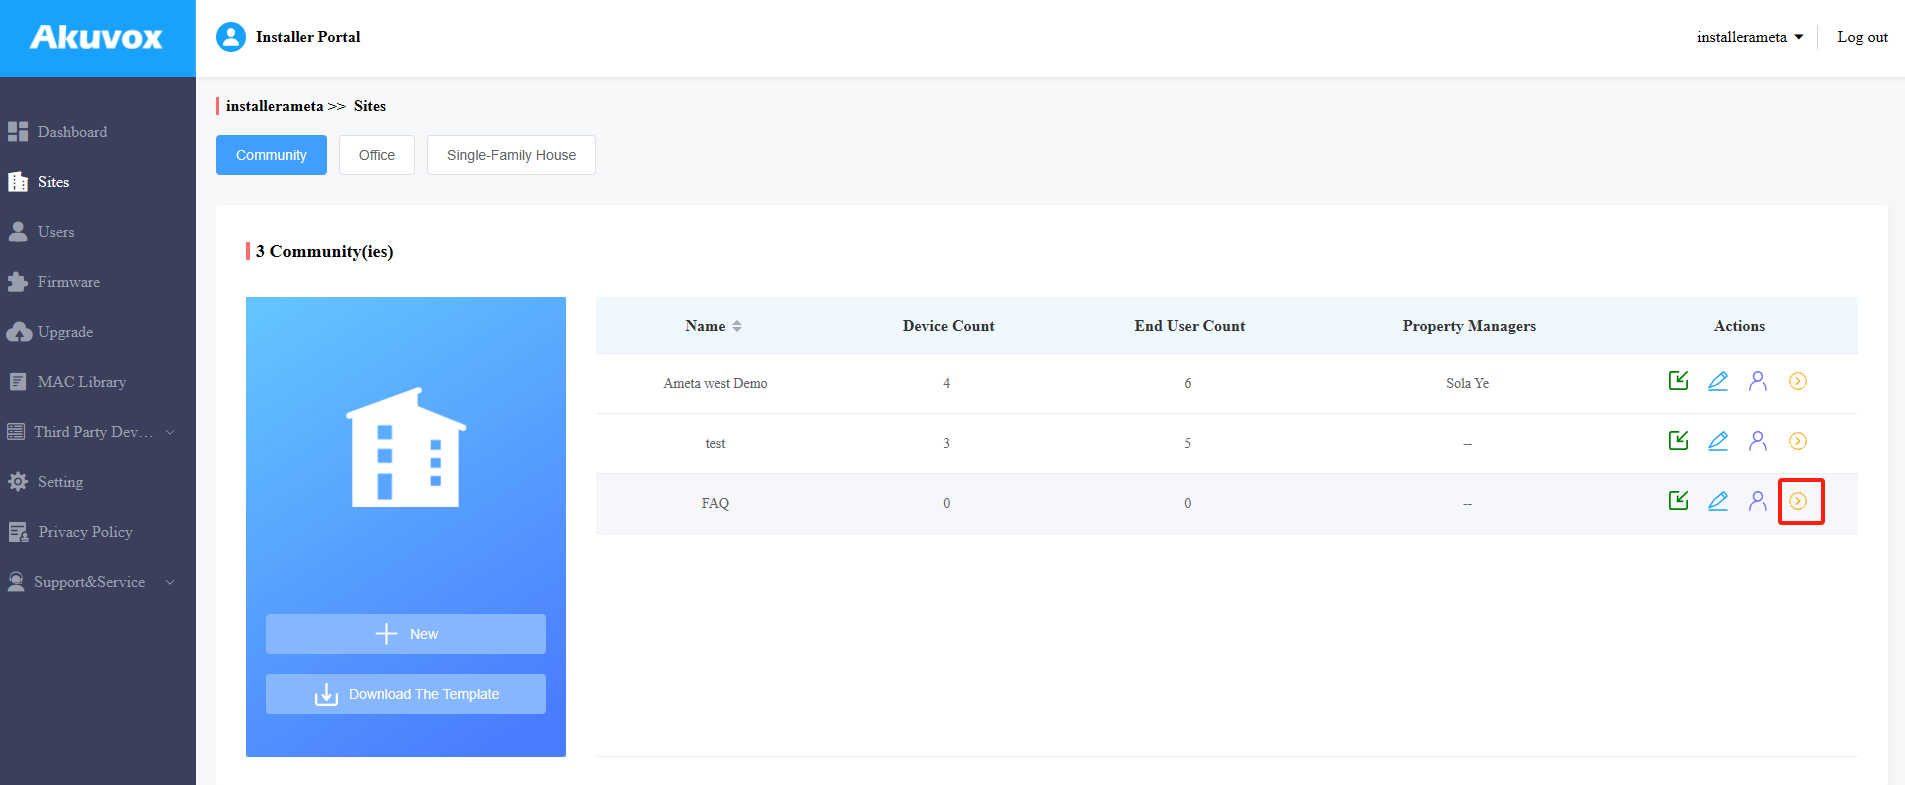
3. Your new site will appear in the community list. Click  to access the Resident and Device pages of the site.
4. The Public Area is created by default. You can click the 'Add Building' button to add new buildings to the site.
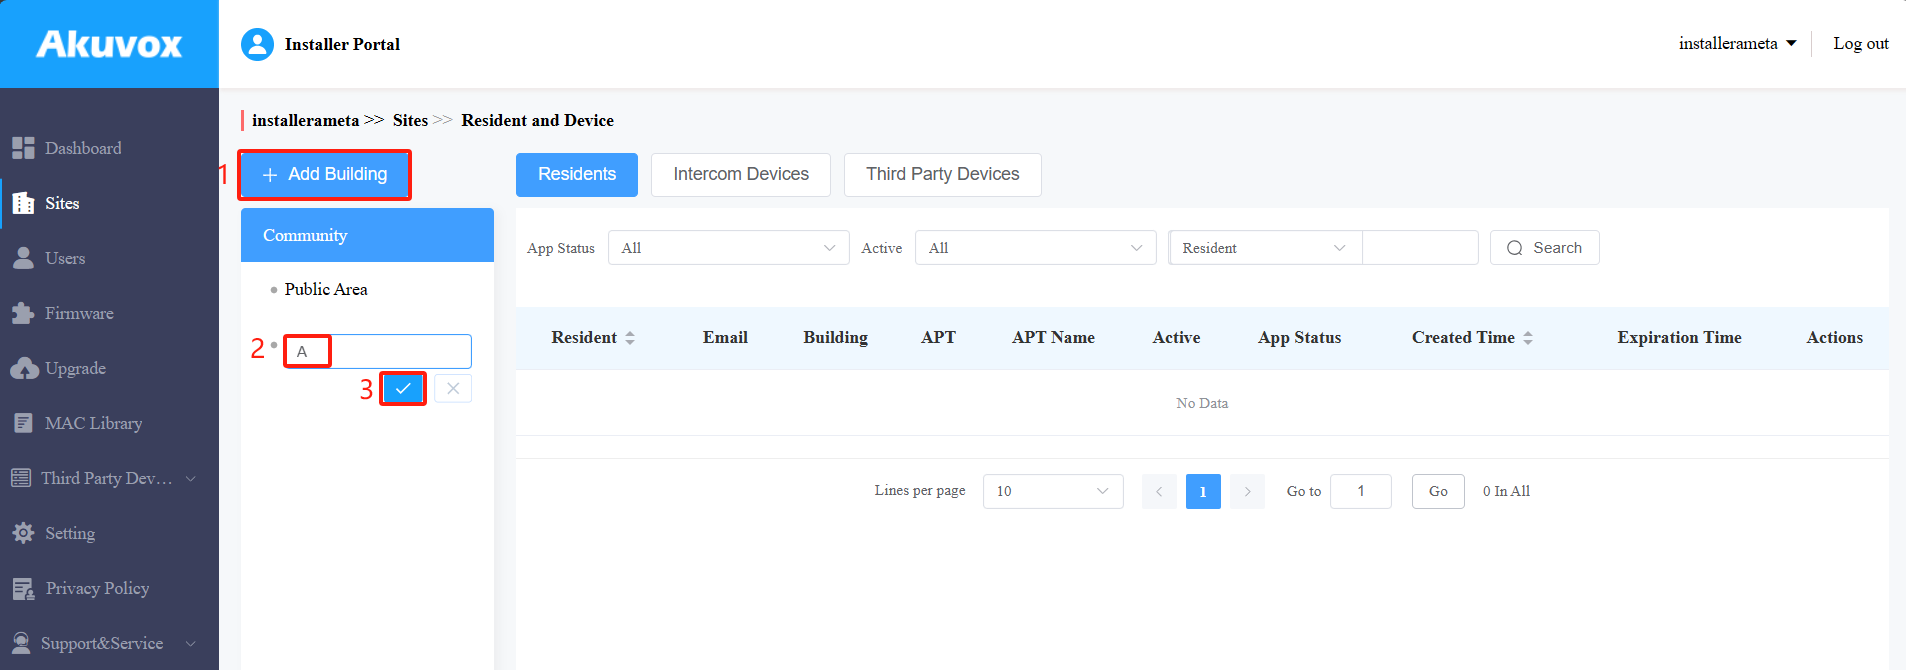
5. After the new building is created, click the 'New' button to add new apartments to this building on the APT page.

6. Fill in the form and click the 'Submit' button. You can choose to add a resident at the same time by clicking the 'Add Resident' button at the bottom the window, or you can add a resident later.
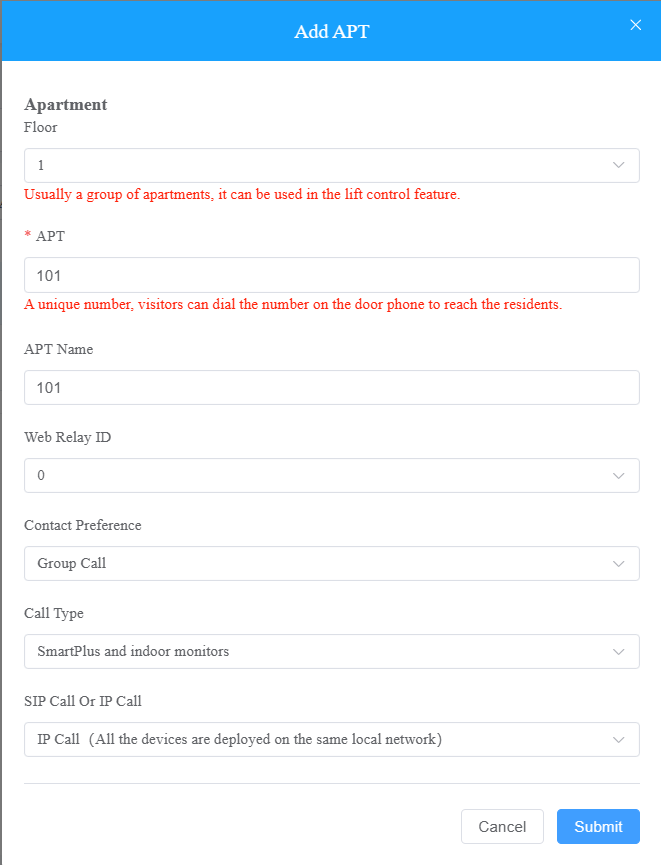
7. The new apartment will appear in the list as inactive and will be activated once the license is paid or after a monitor is added for the Basic plan.

Add devices
You can add devices to the Public Area, a building, or an apartment. I will use a door phone for Building A as an example to show how to add a device.
1. Go to the Intercom Devices page and click the 'New' button to add a device for the entire building (not for a single apartment).

2. Fill in the form and click the 'Submit' button. The DTMF code is the button the residents will use to unlock the door in the app in the future.
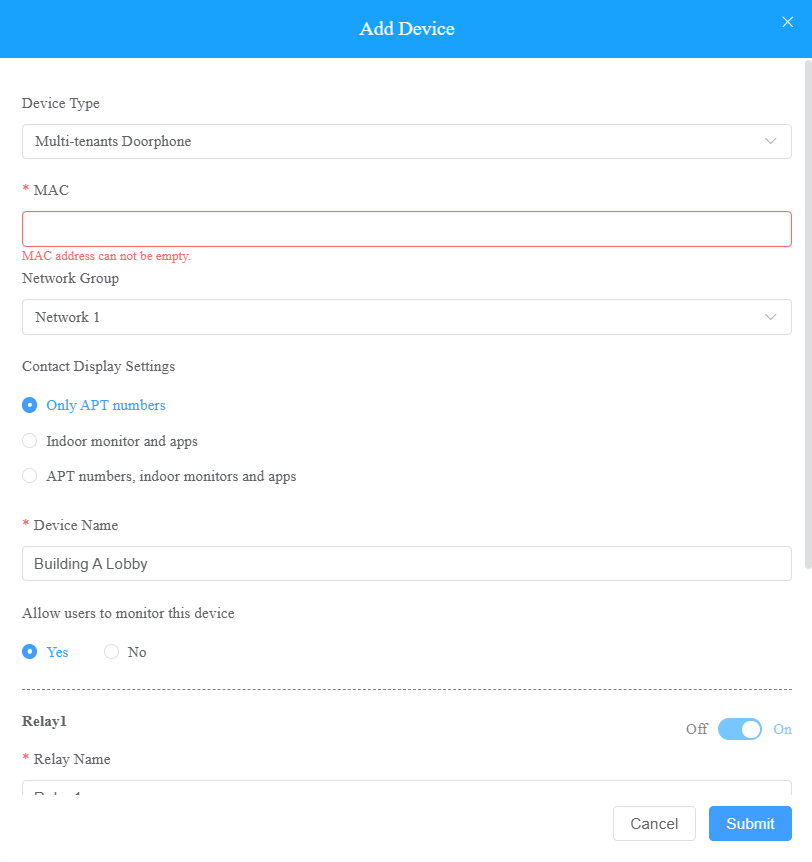
3. The green status under the 'Status' column indicates that the device is connected to the Akuvox cloud.
