Step by Step Instructions:
- Launch the ConfigTool software on your computer. Click here to download.

- Find the uninitialized VTO and VTHs and initialize them.
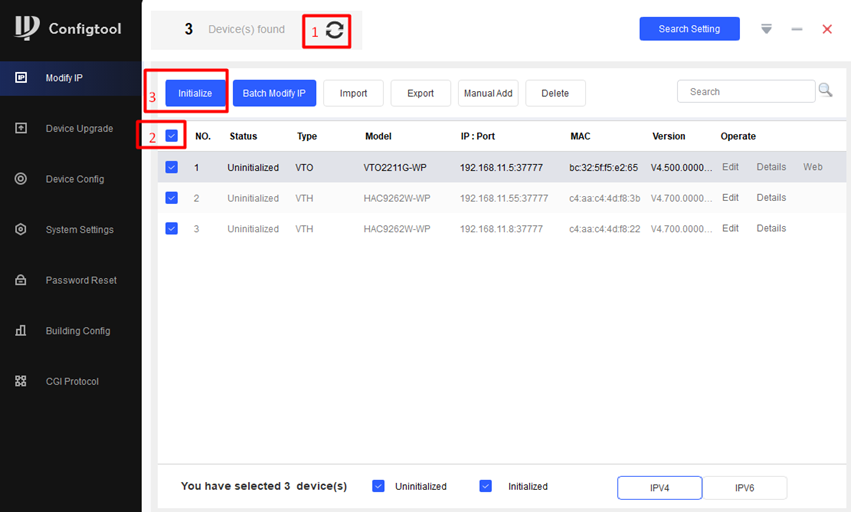
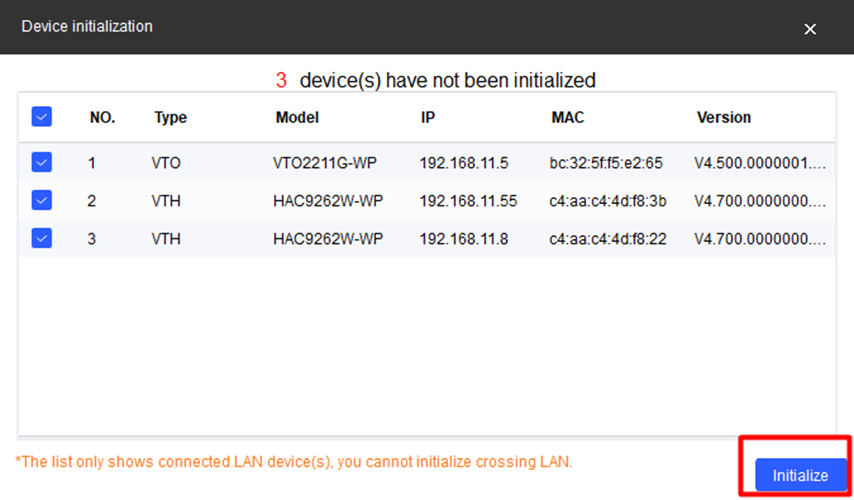
- Click on the "Initialize" button.
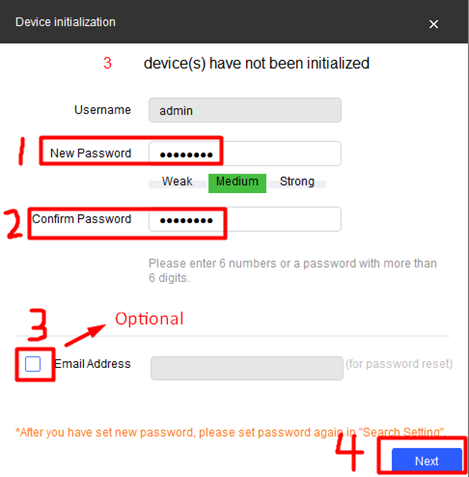
- Input the password you like.
Note:
By doing this will give the VTO and VTHs the same password, which you can change later.
-
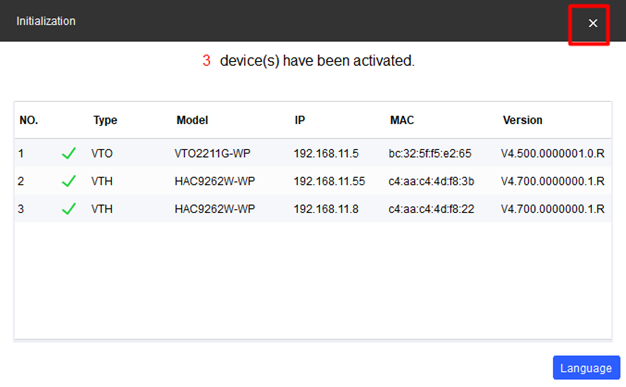
Initialization succeeded. Close this window.
-
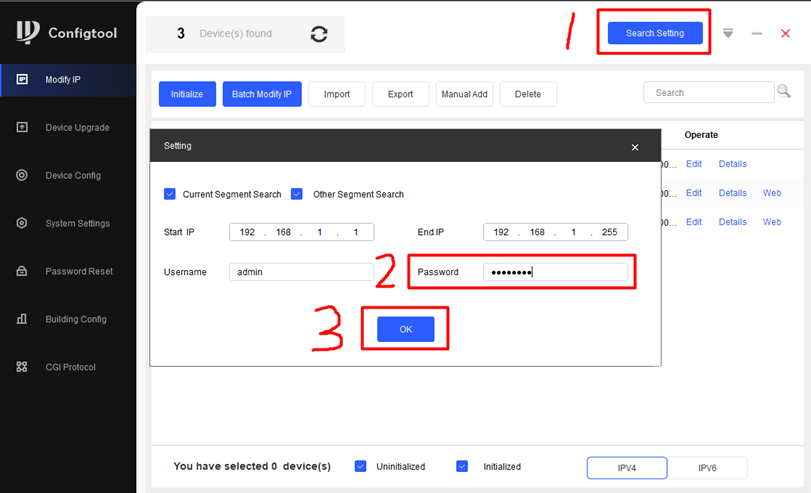
Click the "Search Setting" button, enter the password you used to initialize the devices, and then click the "OK" button
-
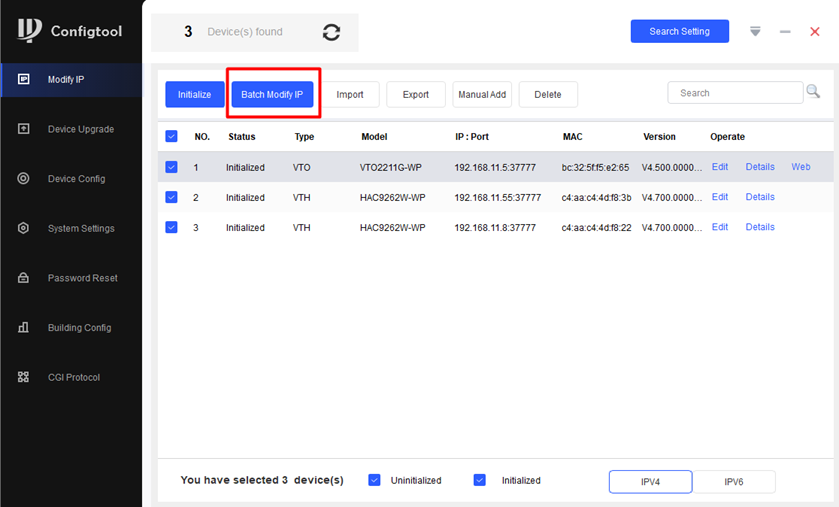
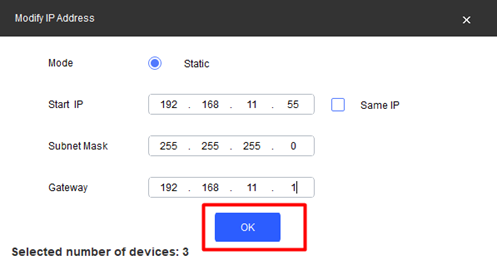
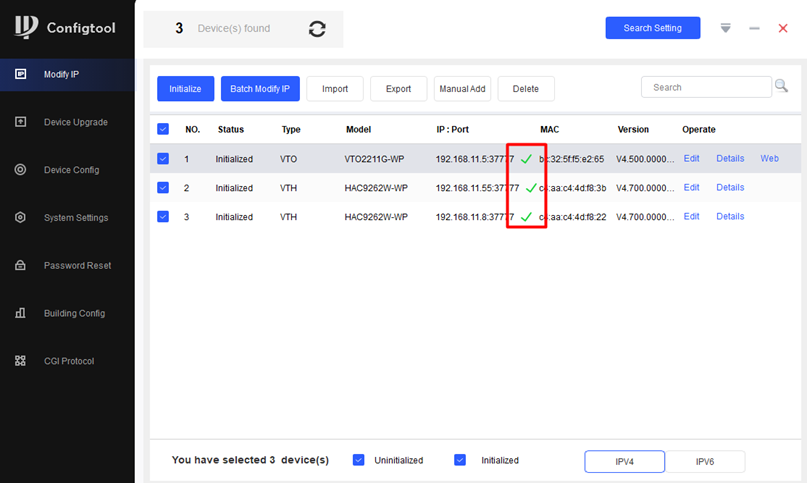
Click the "Batch Modify IP" button to assign static IP addresses. All devices will automatically receive consecutive IP addresses within the same range. The green checks means that the batch modify was successful.
Note:
Make sure the IP addresses do not duplicate with existing devices.
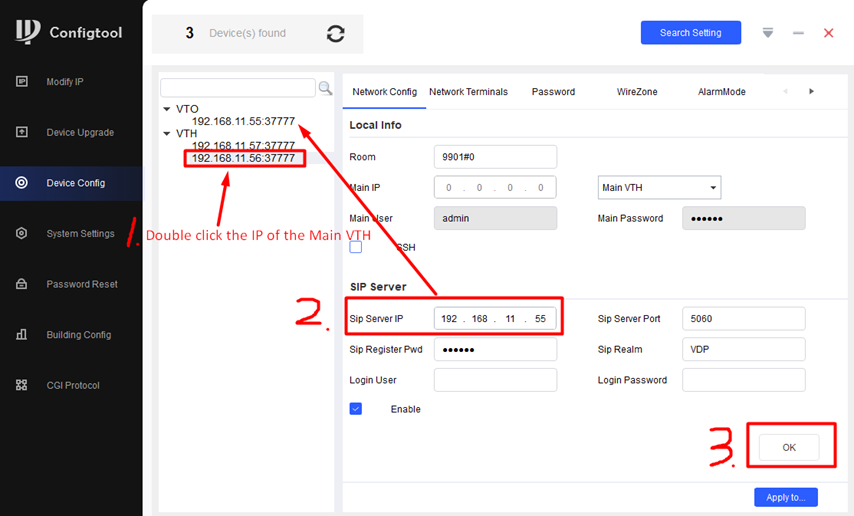
- Click "Devise Config" from the list on the left,
• Double-click the IP address of the main VTH (you can choose either one as the main VTH) to refresh its settings page
• Change the SIP Server IP address to the VTO IP address
• Click the "OK" button
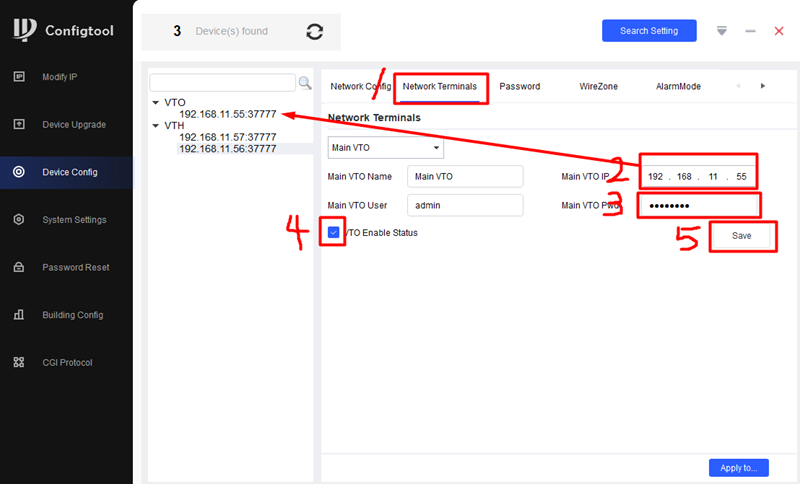
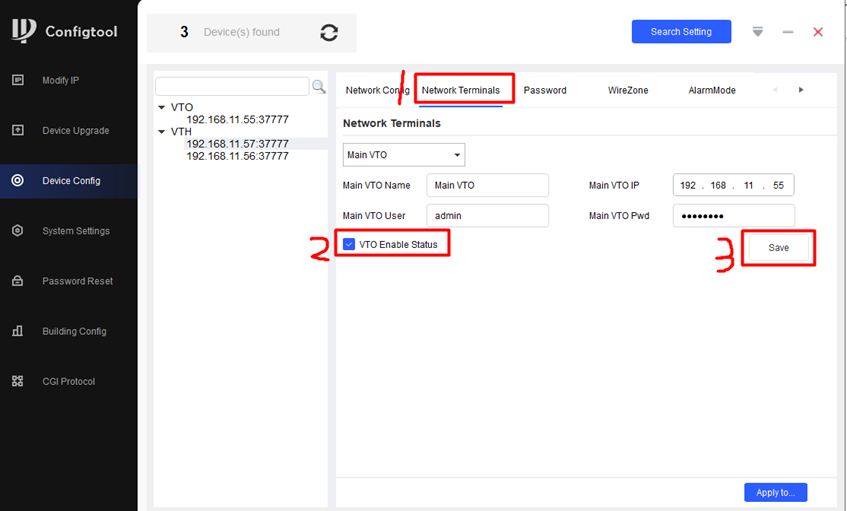
- Negative to the Network Terminals of the main VTH
• Change the Main VTO IP to the VTO IP address you are using
• Enter the password for the VTO
• Check the box for the VTO Enable Status
• Click the "Save" button
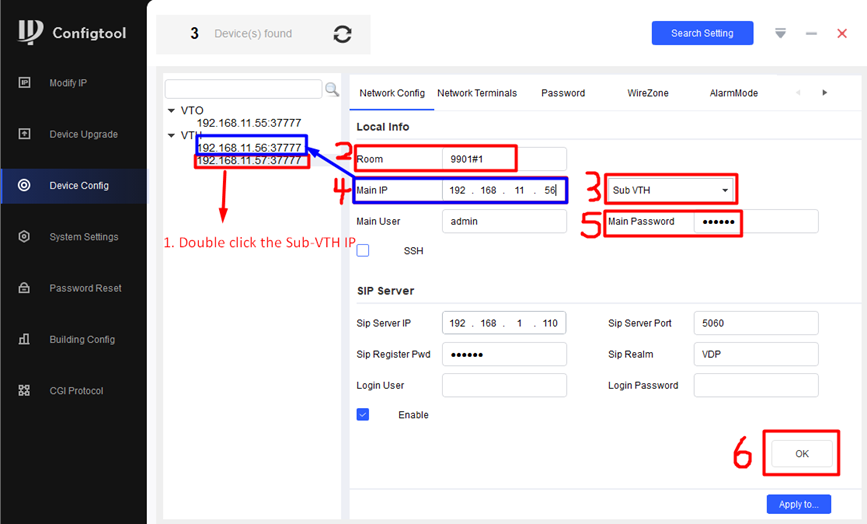
- Config the sub-VTH
• Double-click the IP address of the sub-VTH to refresh its setting page
• Change the Room number
• Select "Sub VTH" from the drop-down box
• Change the Main IP to the main VTH IP
• Enter the password of the main VTH
• Click the "OK" button
- Negative to the Network Terminals of the sub-VTH
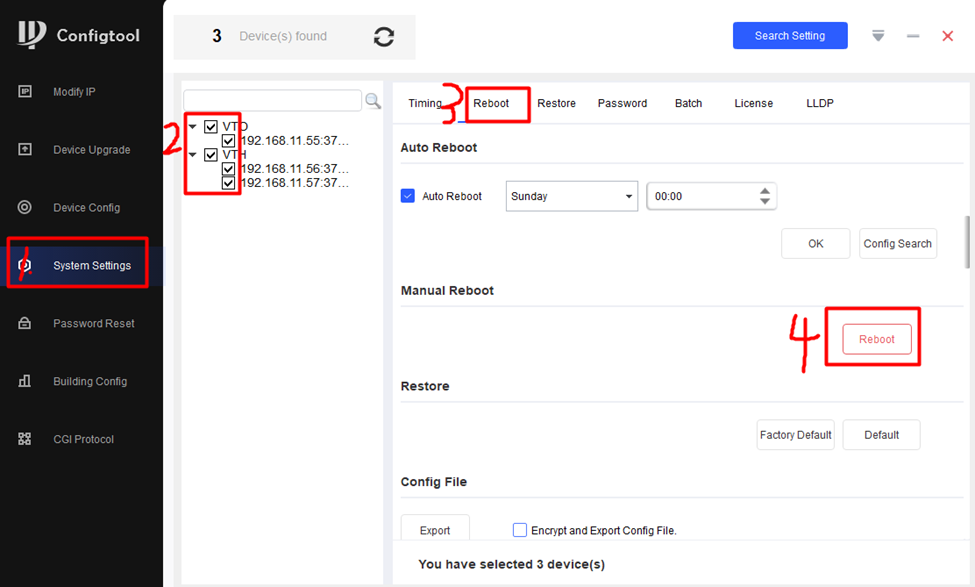
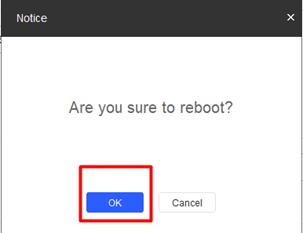
- Select "System Settings" from the list on the left, then negative to "Reboot" and click on the "Reboot" button
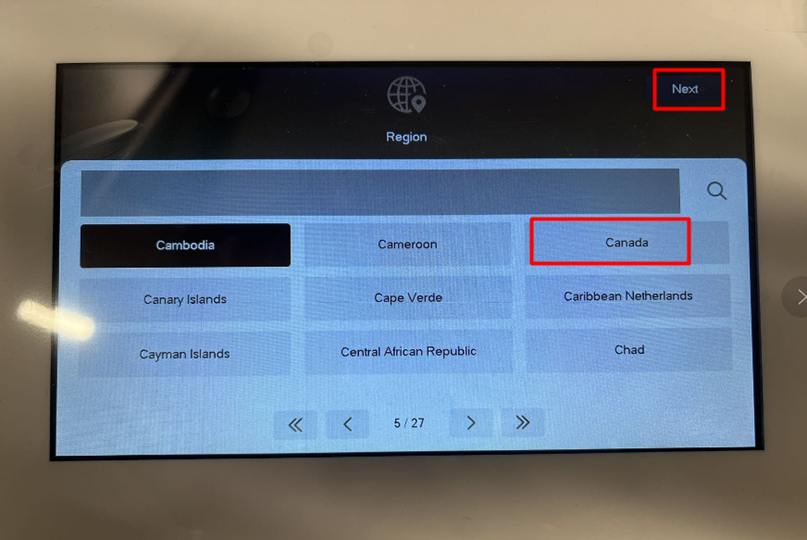
- After all the devices have restarted, we will begin setting up the main VTH and the sub-VTH (Same steps for both VTHs).
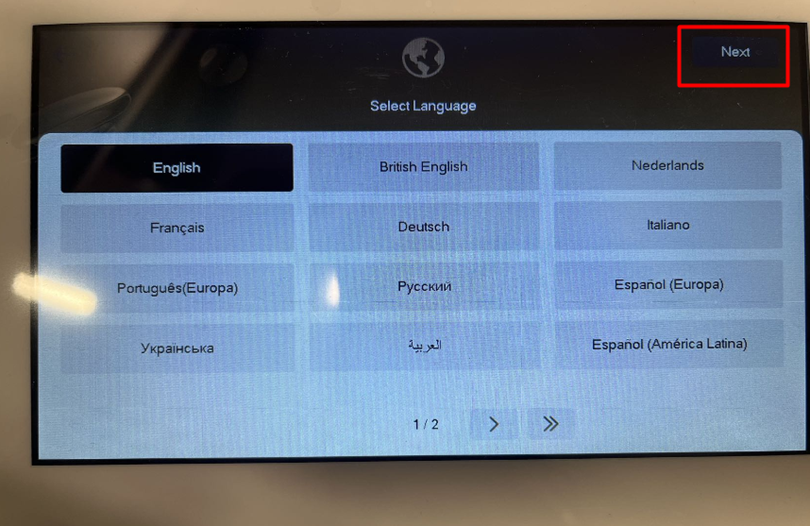
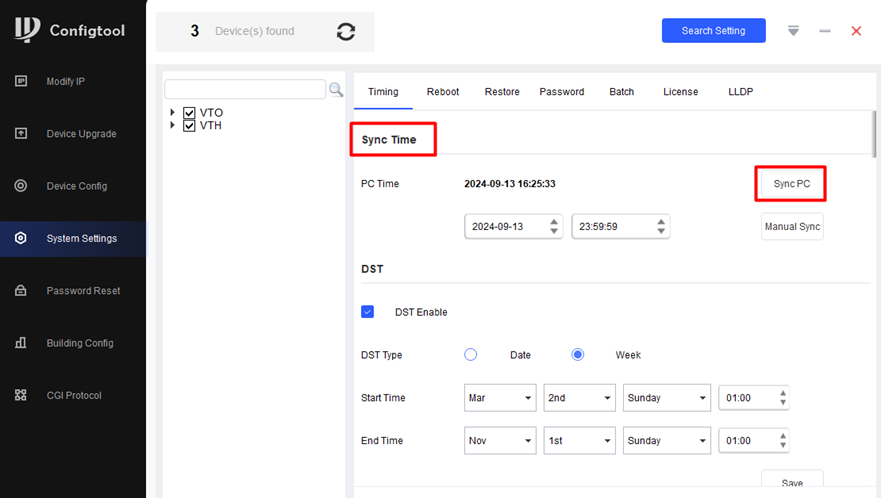
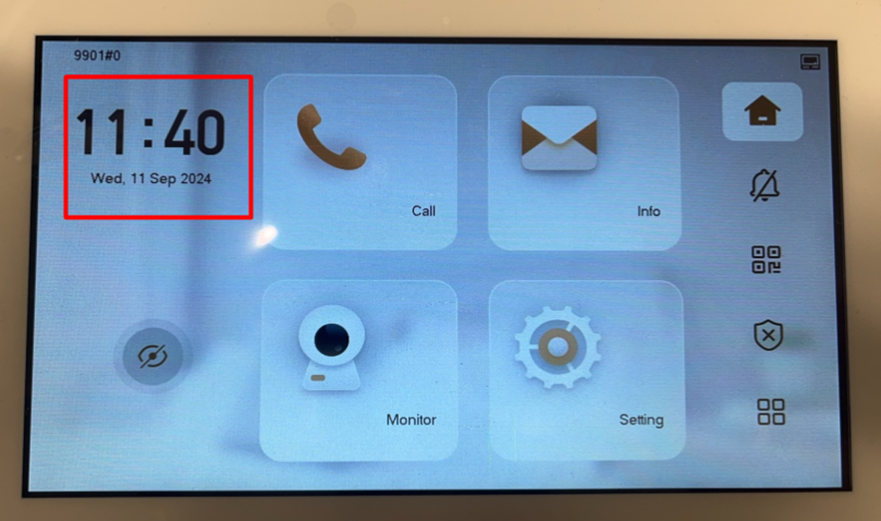
- The monitor's time is incorrect. We need to use the Config Tool to set the correct time.
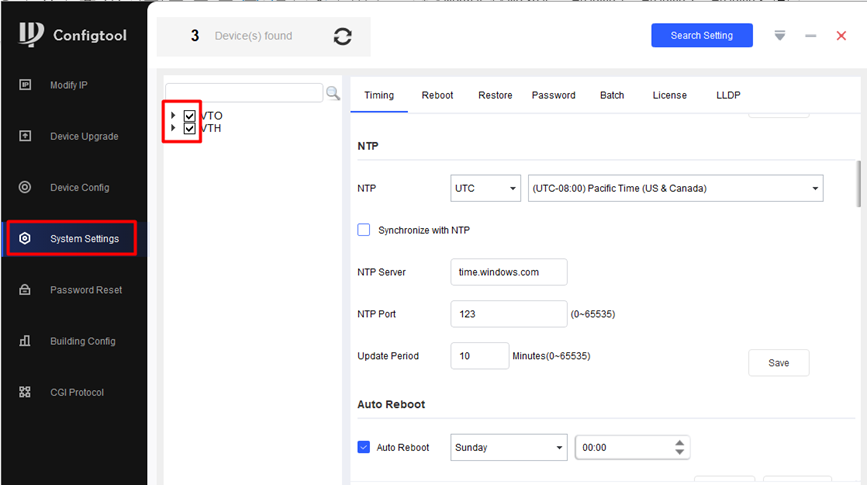
- Click on "System Settings" from the list on the left. Check the boxes for all devices as shown in the image.
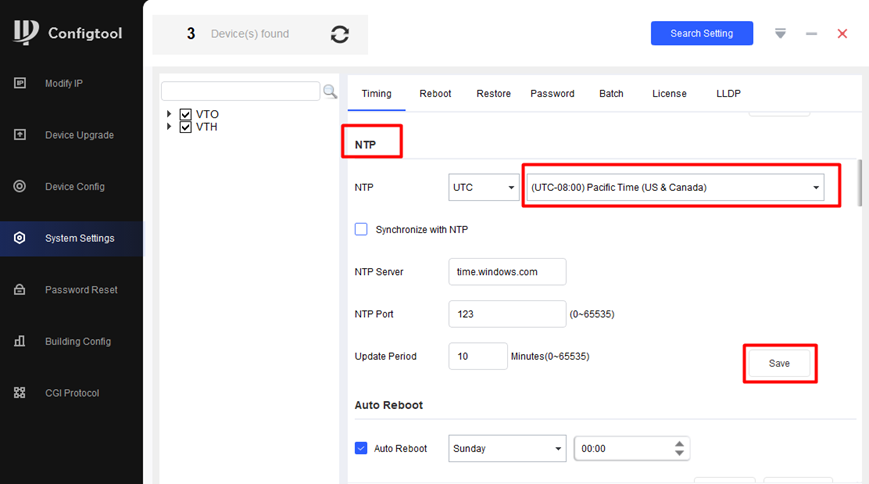
- Configure Time Settings:
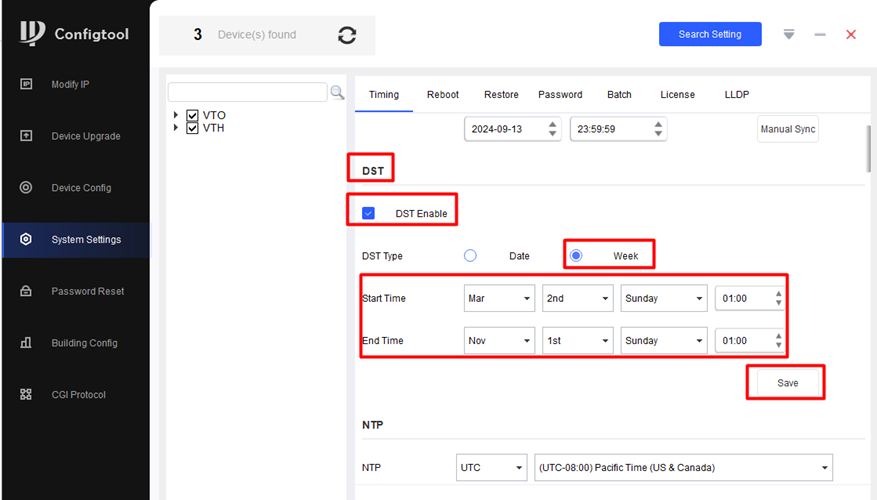
• Under NTP, choose the appropriate time zone from the dropdown (e.g., (UTC-08:00) Pacific Time (US & Canada)). Click on the "Save" button.
• Scroll up to configure DST settings and click on the Save button
• Scroll up and click on the "Sync PC" button
