Record schedule setup guide
Topic:
- How to set up Record Schedule on the Local Monitor
- How to set up Record Schedule on the NVR’s Web Page
Compatible List:
Model | Version | |
NVR | NVR3104-4P | V8.2.4.1-20240914 |
NVR3108-8P | ||
NVR3216-16P | ||
NVR3216-16P-AI | ||
NVR3432(No POE) | ||
IP Cameras | CAM-IP3135W-A-SI-28-AI | V31.35.8.2.4.1_240807 |
CAM-IP3135B-A-SI-28-AI | ||
CAM-IP3135W-AA-SI-Z-AI | ||
CAM-IP3735W-AA-SI-Z-AI | ||
CAM-IP3335W-AA-SI-Z-AI | ||
CAM-IP3155W-PV-28-AI | ||
CAM-IP3335W-28-AI | ||
CAM-IP3138W-A-SI-28-AI | ||
CAM-IP3138B-A-SI-28-AI | ||
CAM-IP3138W-AA-SI-Z-AI | ||
CAM-IP3738W-AA-SI-Z-AI | ||
CAM-IP3338W-AA-SI-Z-AI | ||
CAM-IP3338W-28-AI | ||
CAM-IP3158W-PV-28-AI | ||
CAM-IP3638-PV-4X-AI | ||
CAM-IP3635-33X-AI |
Related question:
- What is Stream Mode?
- Why are my cameras not recording?
On the Local Monitor
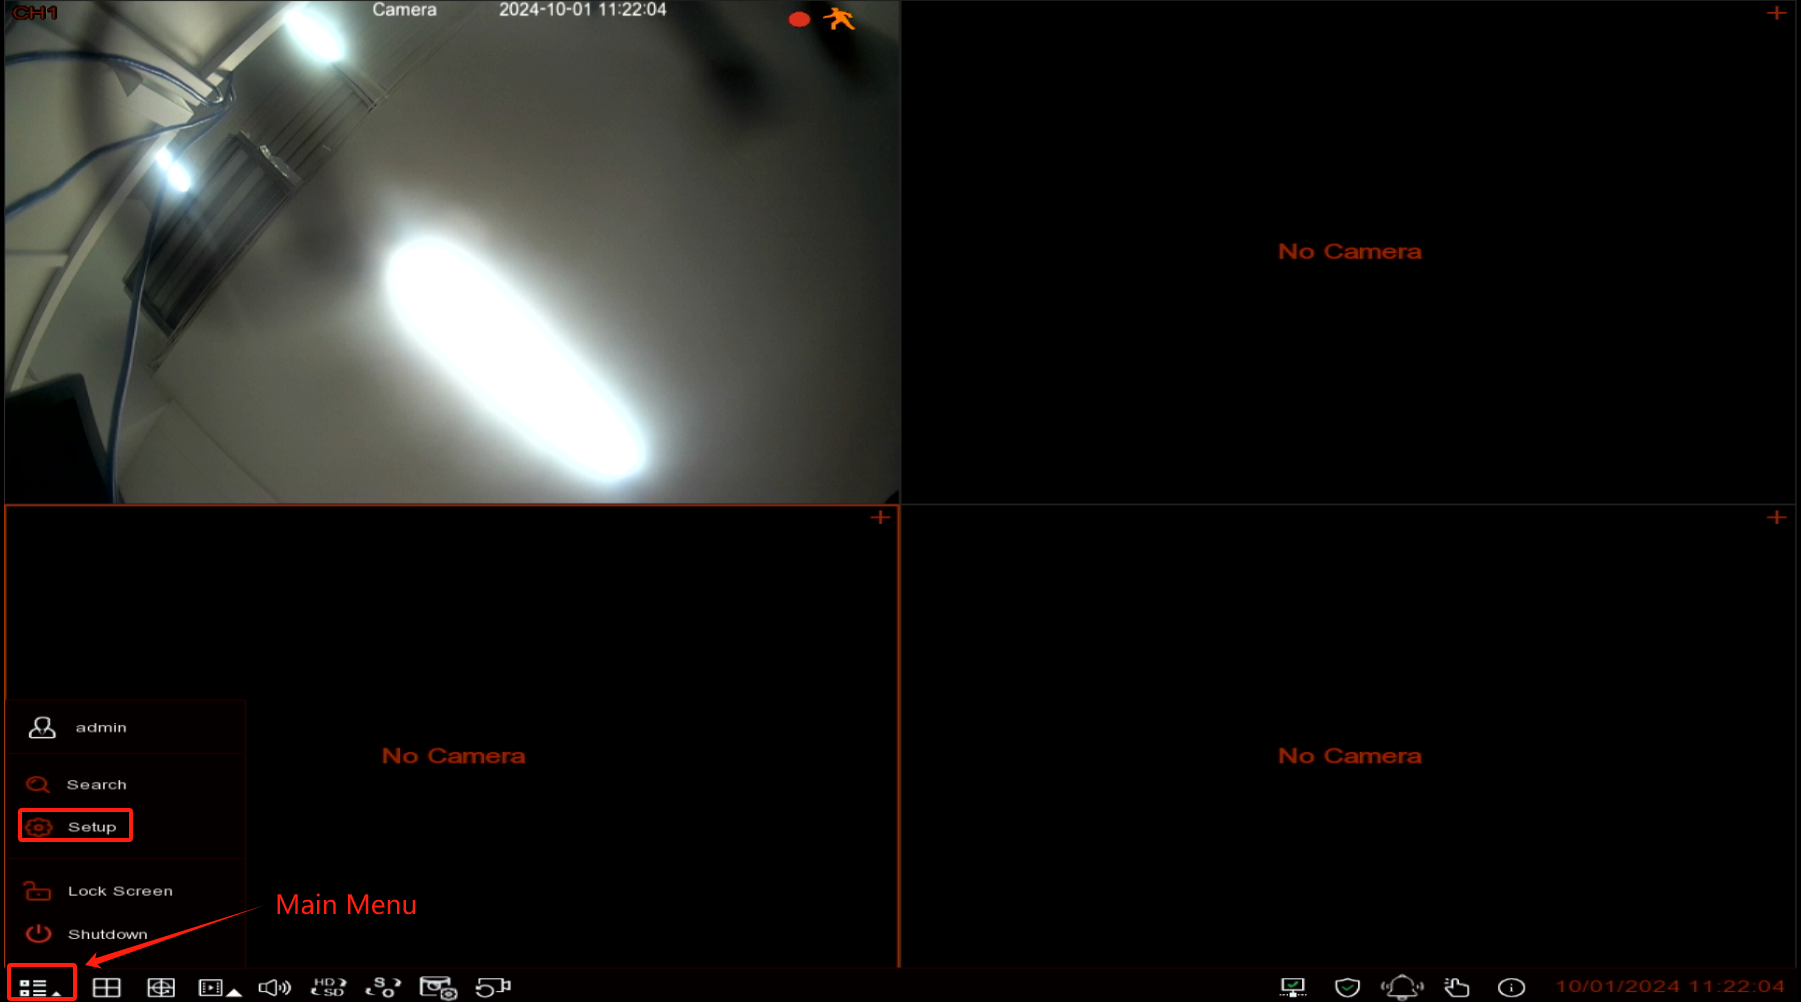
- Click on Main Menu icon in the bottom left corner and click on Setup button.
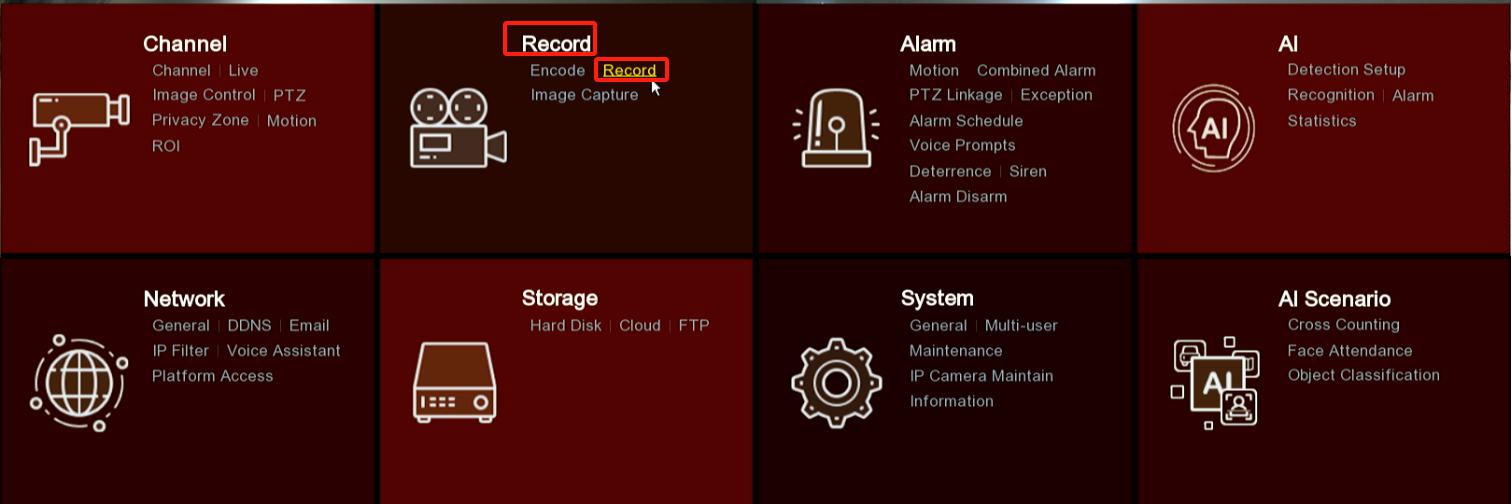
2. Select Record from the Record Section.
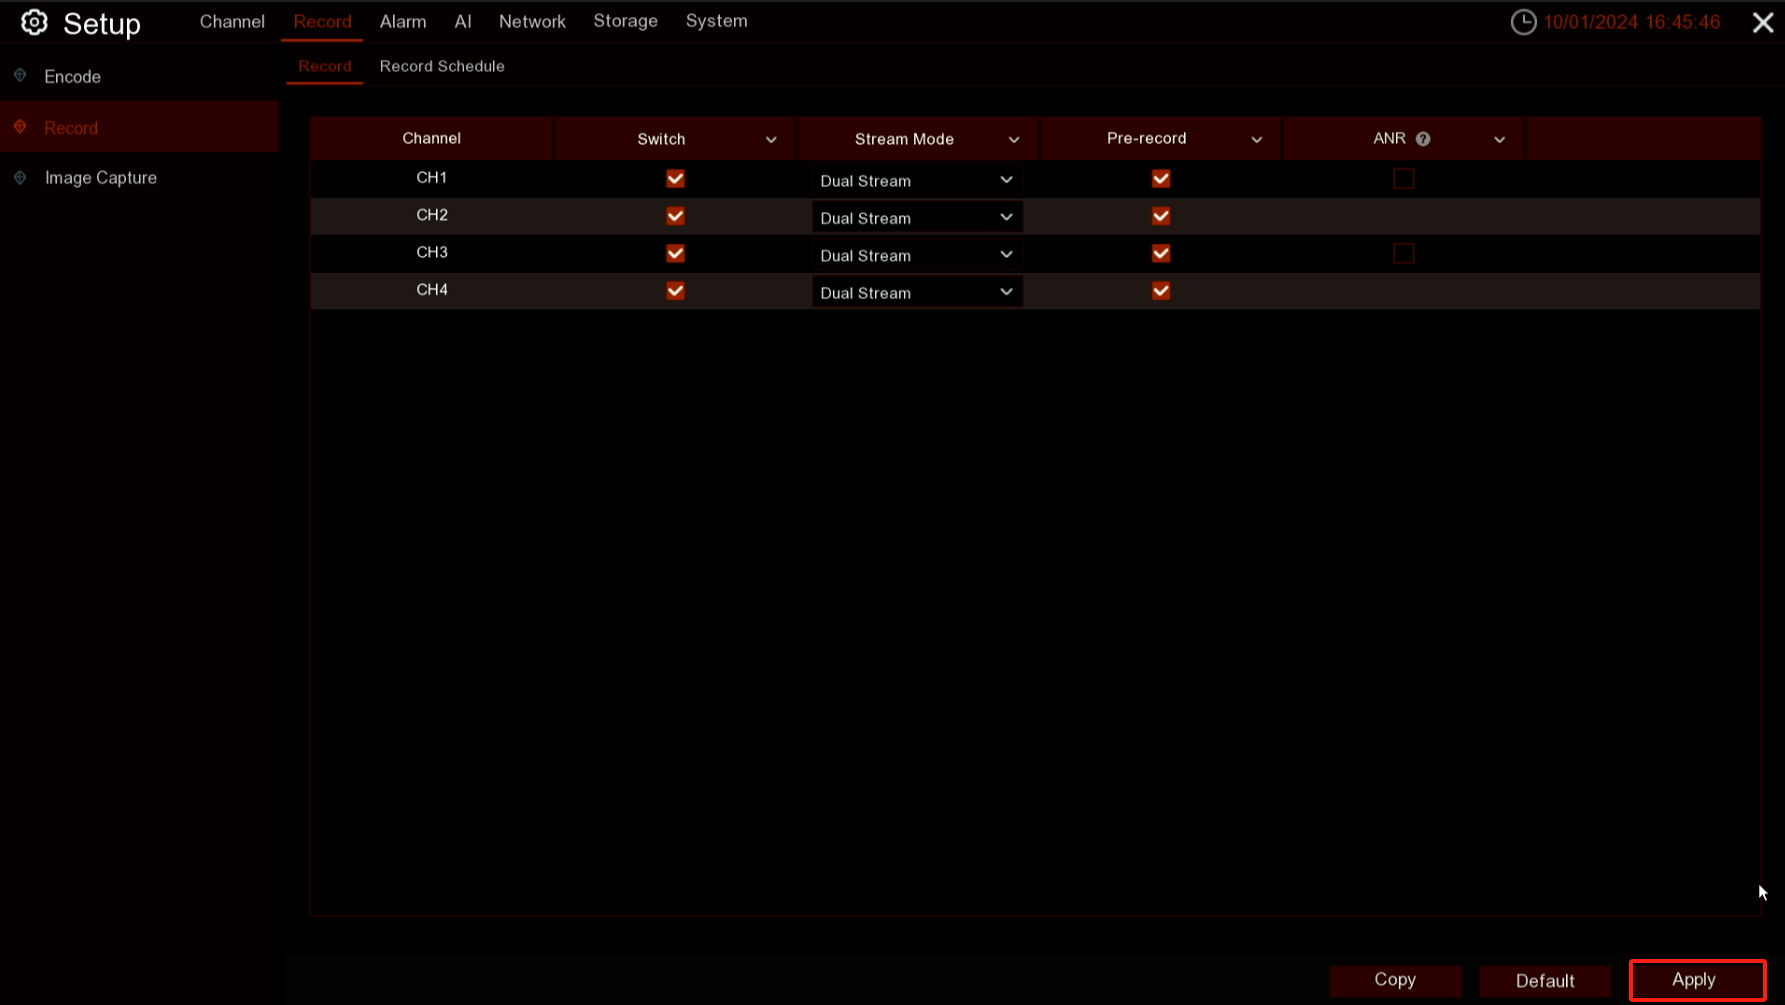
3. The recording function and the pre-record function for all channels are enabled by default, and the stream mode is set to Dual Stream. You can modify these settings and then click the 'Apply' button to save your changes.
Tip: If you want to save HDD storage, you can change the recording stream mode to mainstream only instead of dual stream. However, by doing this, you won't be able to play back many channels simultaneously during playback.
Stream Mode: Select the recording quality. If you choose Dual-Stream, the system will record in both Main-stream and Sub-stream.
PreRecord: When enabled, the NVR will begin recording a few seconds before an alarm event occurs. This feature is particularly useful if your primary recording mode is based on motion detection or I/O alarms
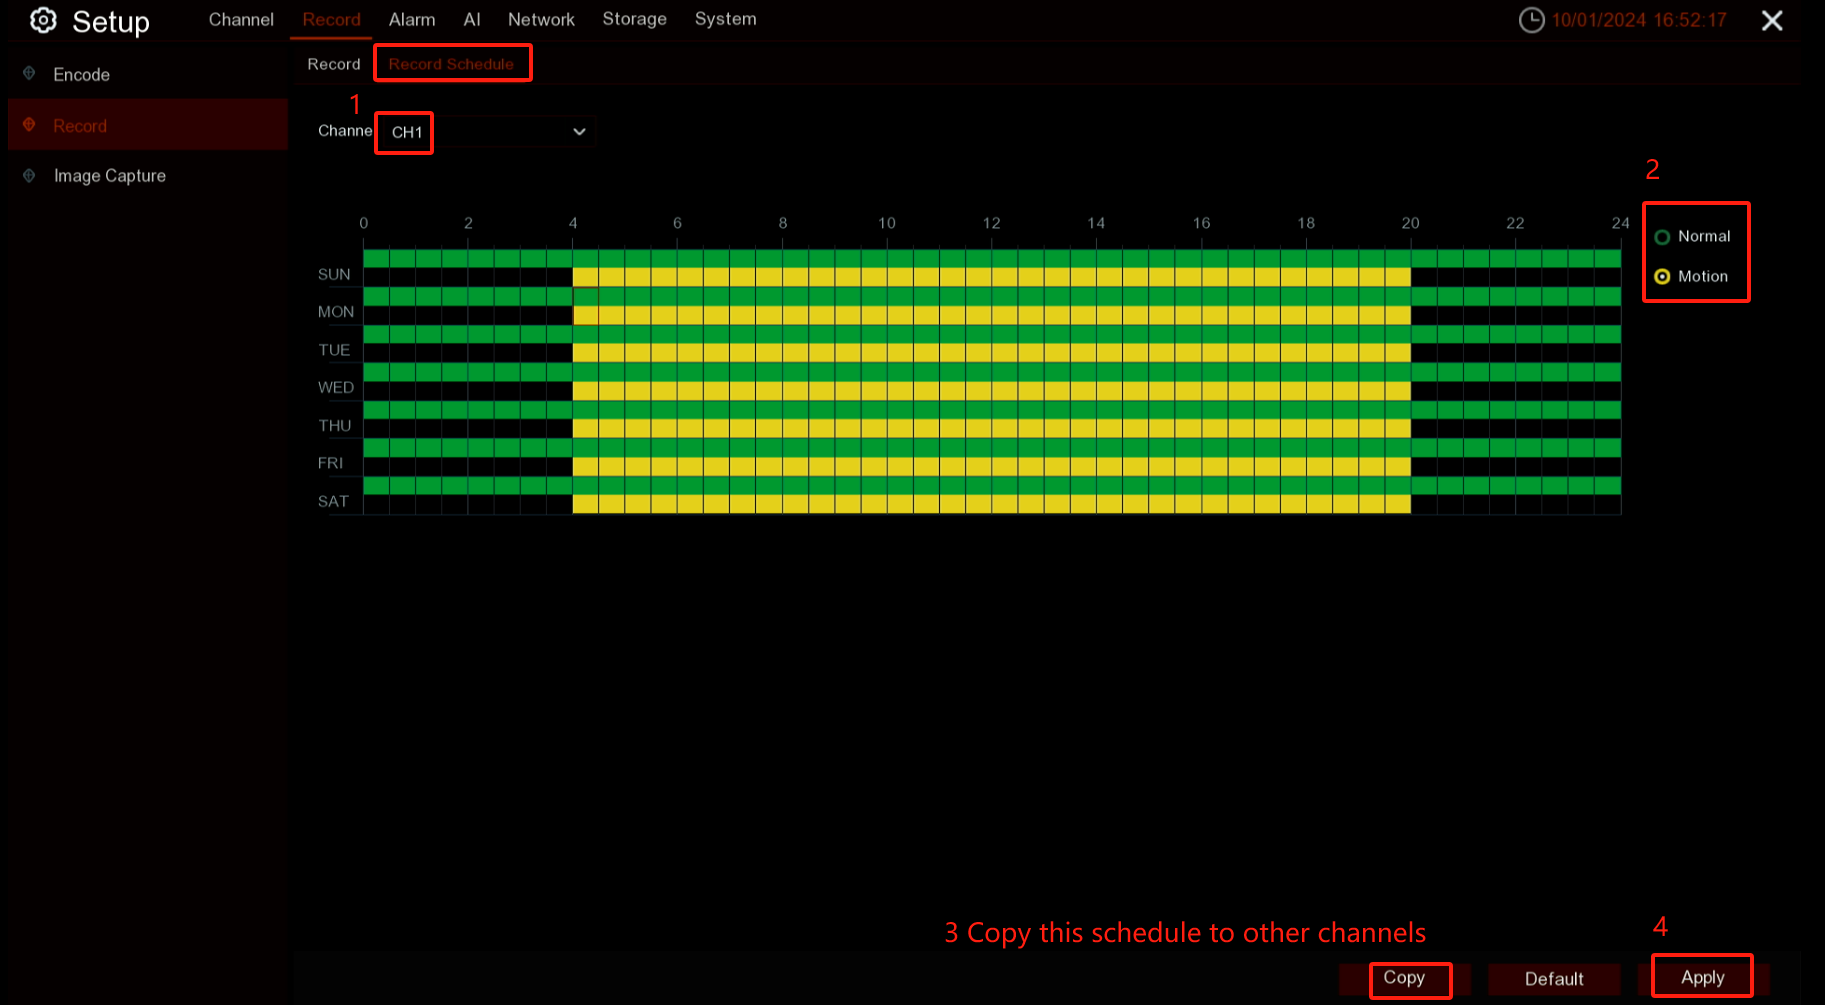
- Click on the Record Schedule, you can configure daily and hourly schedules for different recording types, including continuous (Normal) and motion detection. To set the recording mode, select the desired mode (Normal, Motion) by clicking the corresponding radio button, then drag the cursor to highlight the time slots. The schedule applies to a single channel. To apply the same schedule to other channels, use the Copy function. Click on the Apply button to save your settings.
On the NVR's Web Page
- The recording function and the pre-record function for all channels are enabled by default, and the stream mode is set to Dual Stream.
- Click on the Remote Setting button on the top-right corner of the screen. Choose Record from the Record Section, choose the channel you want to set up, enable the Record function and click on the Save button. To apply the same settings to other channels, use the Copy function.
Tip: If you want to save HDD storage, you can change the recording stream mode to mainstream only instead of dual stream. However, by doing this, you won't be able to play back many channels simultaneously during playback.
Stream Mode: Select the recording quality. If you choose Dual-Stream, the system will record in both Main-stream and Sub-stream.
PreRecord: When enabled, the NVR will begin recording a few seconds before an alarm event occurs. This feature is particularly useful if your primary recording mode is based on motion detection or I/O alarms.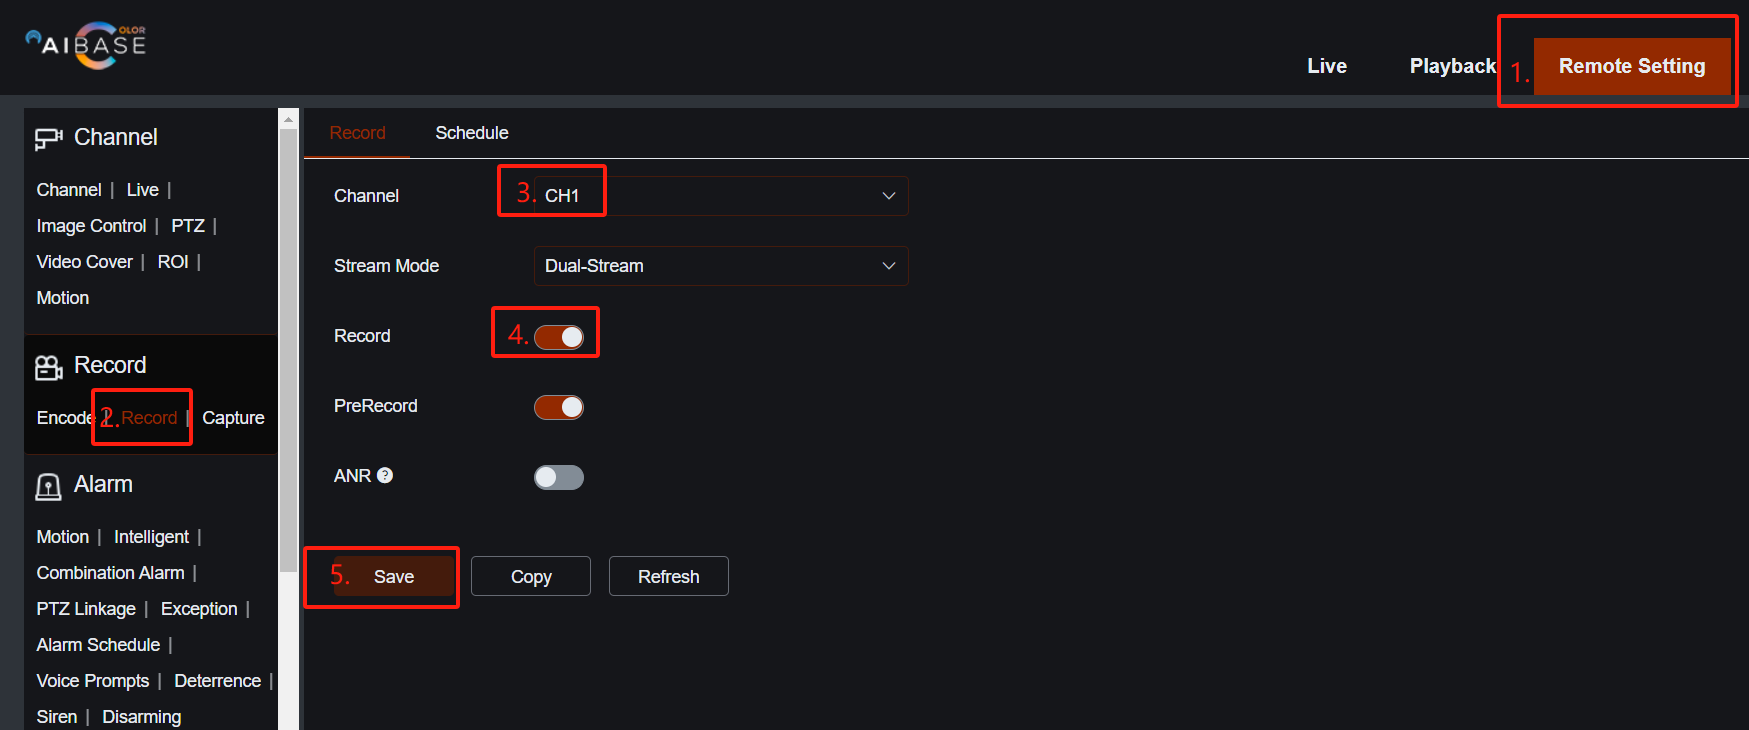
- Click on the Schedule, this menu allows you to define the recording schedule and mode for each channel on the NVR. You can configure daily and hourly schedules for different recording types, including continuous (Normal) and motion detection. To set the recording mode, select the desired mode (Normal, Motion) by clicking the corresponding radio button, then drag the cursor to highlight the time slots. The schedule applies to a single channel. To apply the same schedule to other channels, use the Copy function.
