Description
This artical is a step by step instruction for the SIP server setup process. Please make sure device firmware is the latest one before put device on to cloud
VDP-AK-28RA
VDP-AK-29RC
VDP-AK-916XS
VDP-AK-313CW
VDP-AK-49RG
Please Note: All these device web interface format for ACCOUNT area are the same.
Step by Step instruction
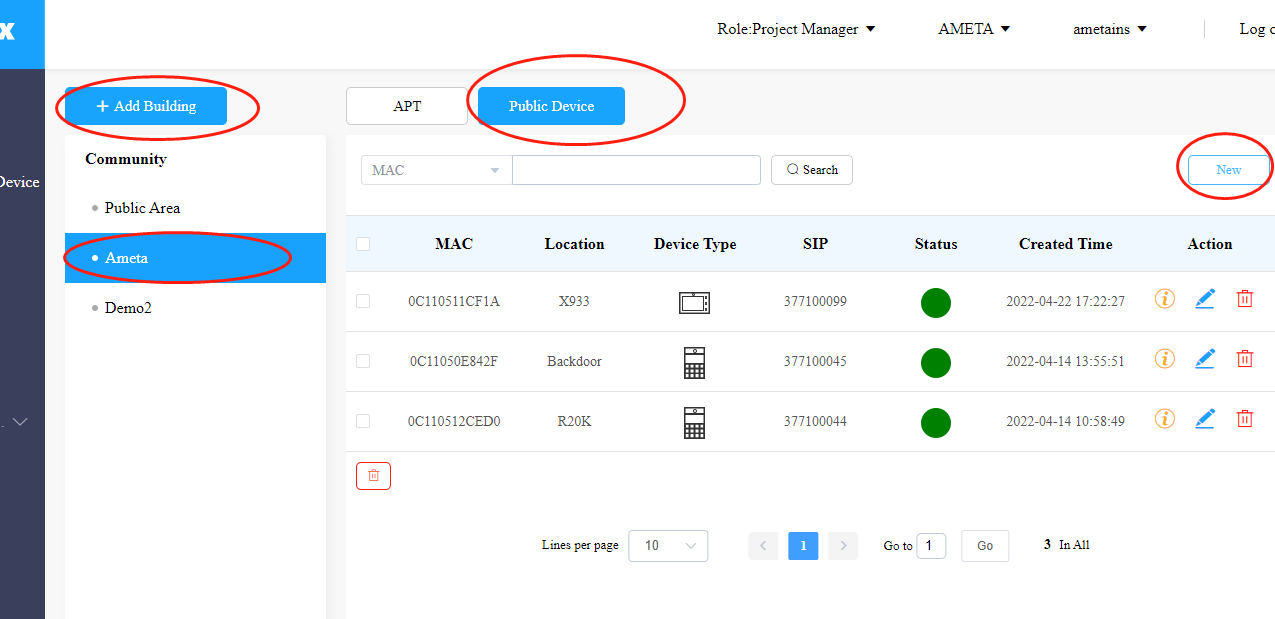
For Akuvox cloud:
- login to your installer account
- select Project Maganer
- select your community's info button

-
select your building--- Public device---** New**
-
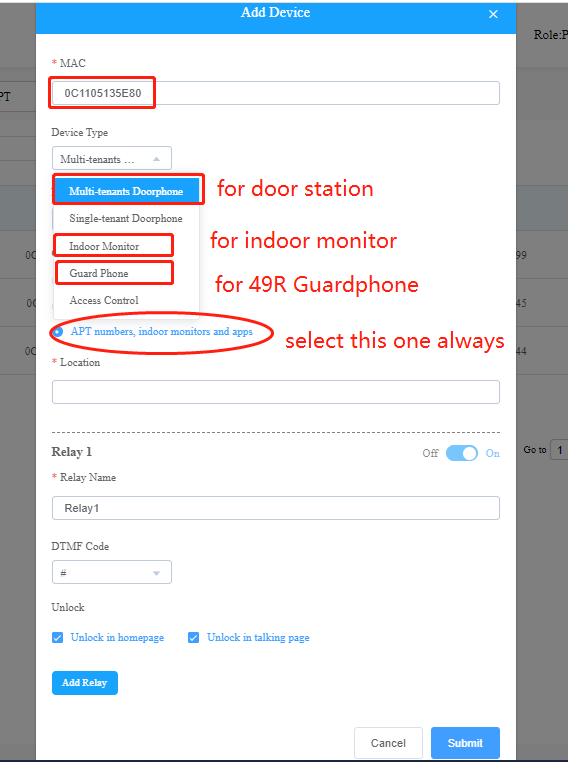
Put in MAC and select device type, Location will be your device name in the cloud. DTMF code using your Relay's DTMF code then submit
-
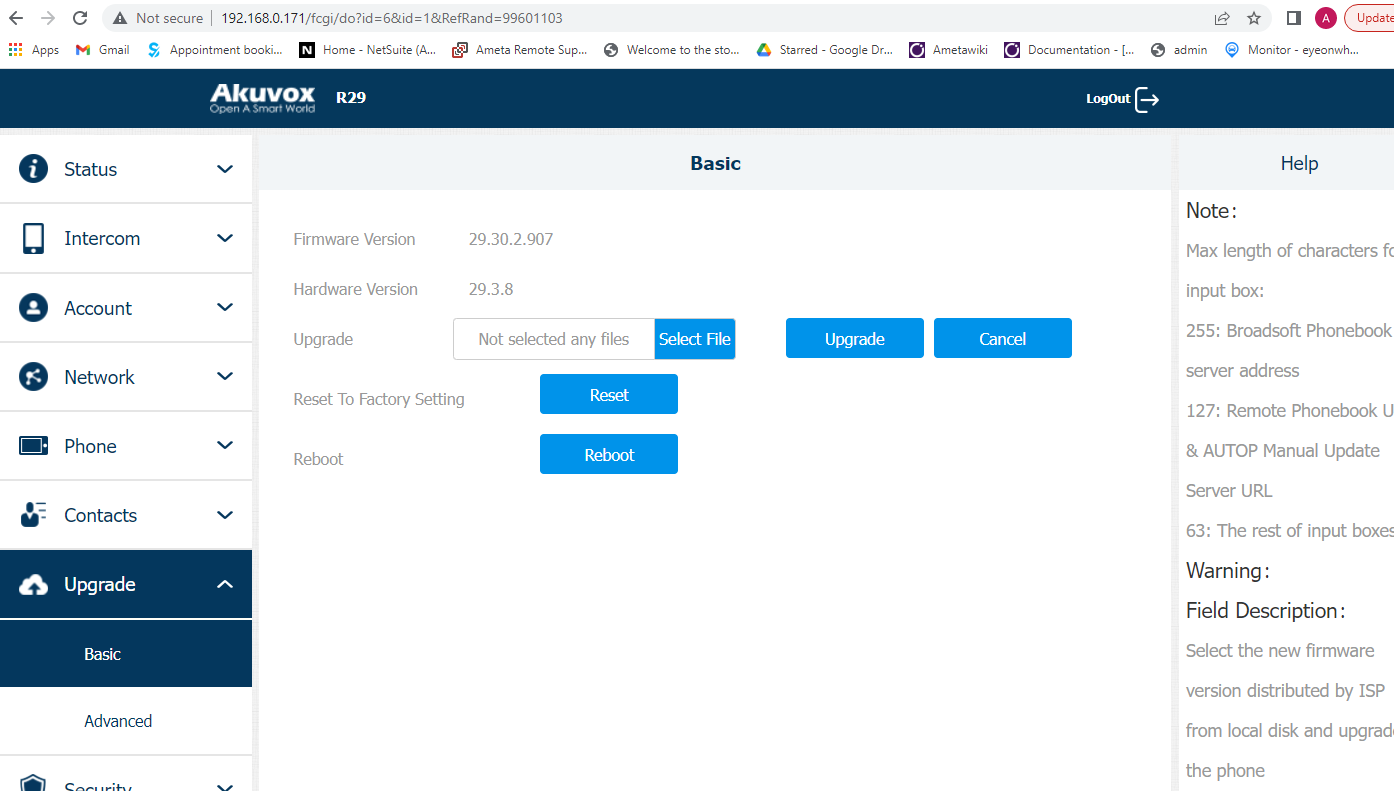
Go to the device's web interface.
go to Upgrade---Reset to Factory Setting-- press Reset
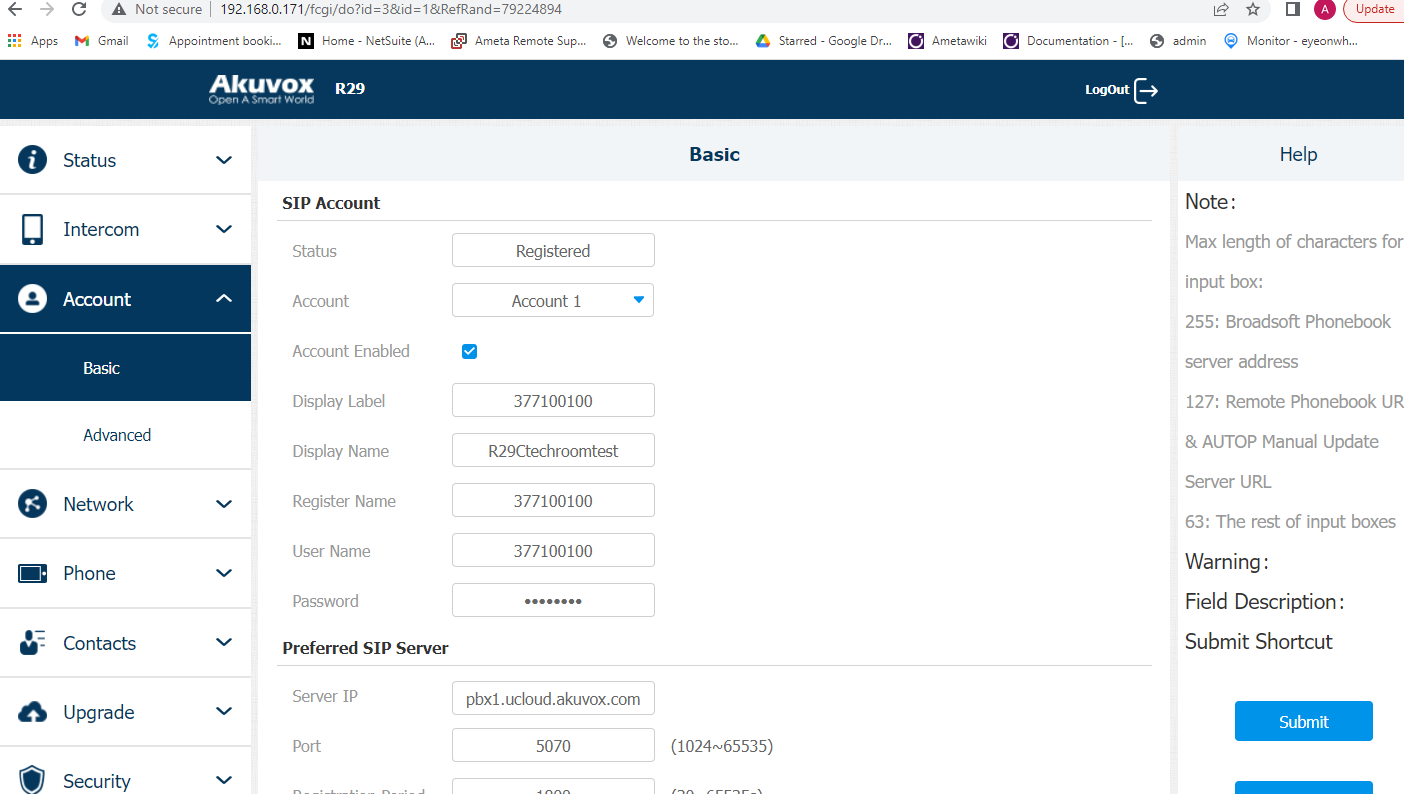
-
After reset, set your IP address and DNS in the wizard, your account will be available in 5 minutes automaticly. you could find the account 1 status in your device's web interface is Registerd.
When you use Akuvox Cloud SIP server call your number, please add 0 and Area Code before your number.
for example:
If your number is: 6476666666, you are in Canada
The number you need to dial is: 016476666666
This also applies when you want to add this number to local phonebook or contact.
For IP Phone Line:
- Go to your Device's web interface---Account---Basic---Select Account 2 in the drop down list
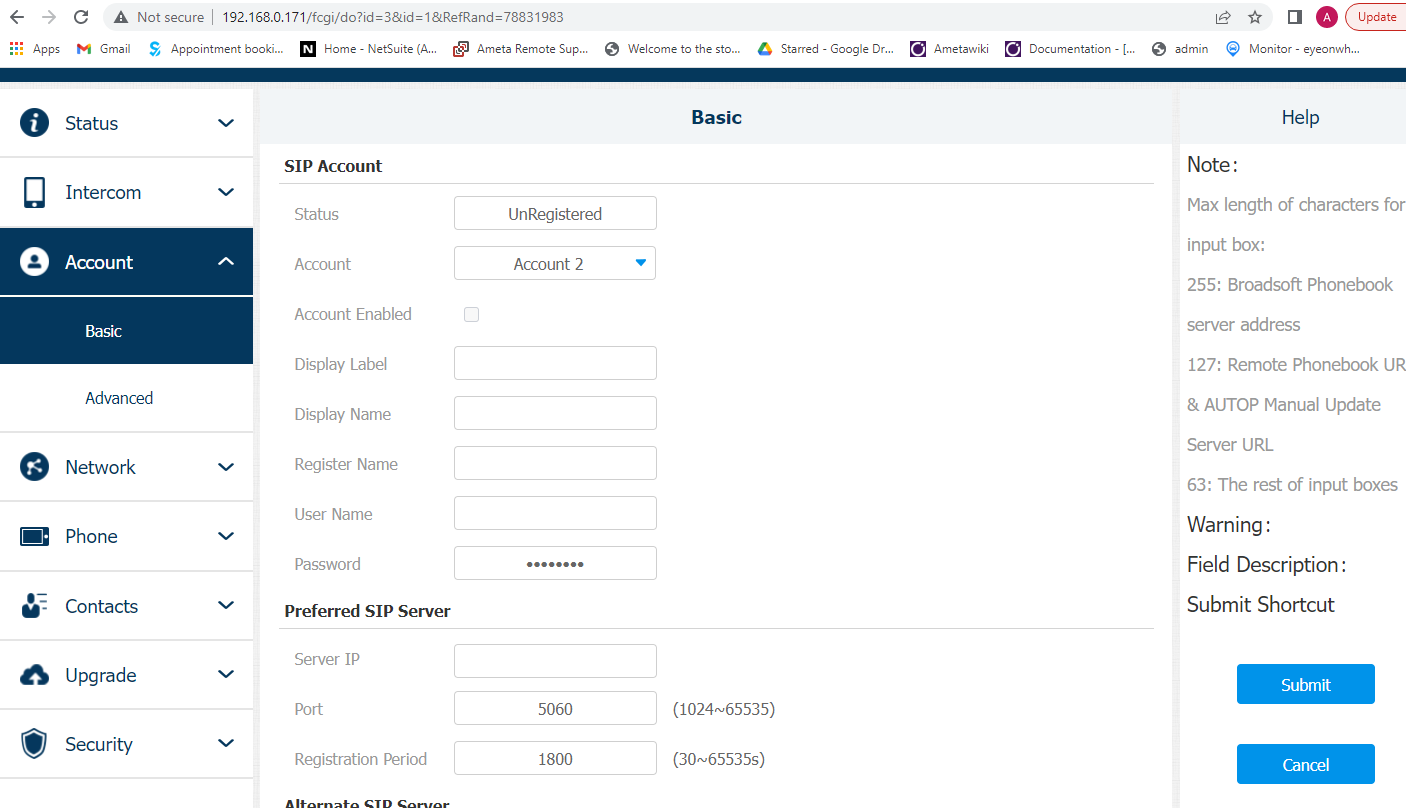
- put in your Aibase phone line SIP information
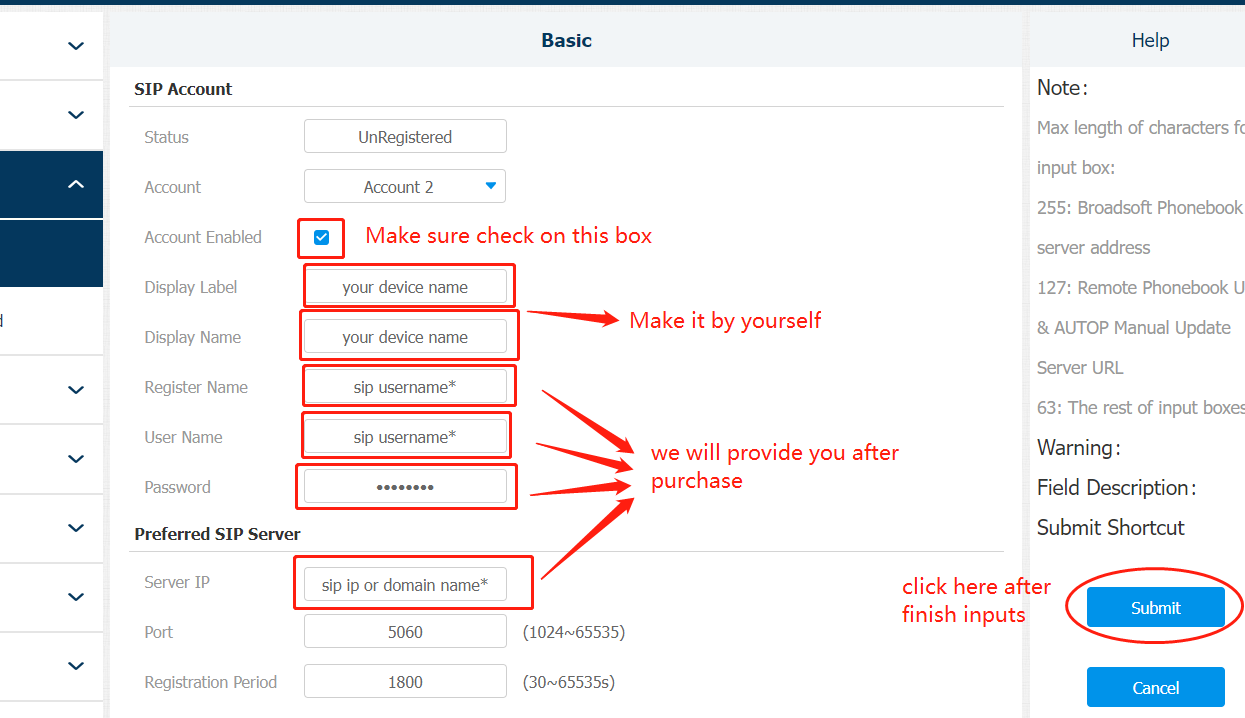
- You are ready to call out now!