Port Configuration Click Start ->Settings ->Network ->Port to go to the interface as shown below. Define the POS port of the NVR, then click “Apply” to save the settings.
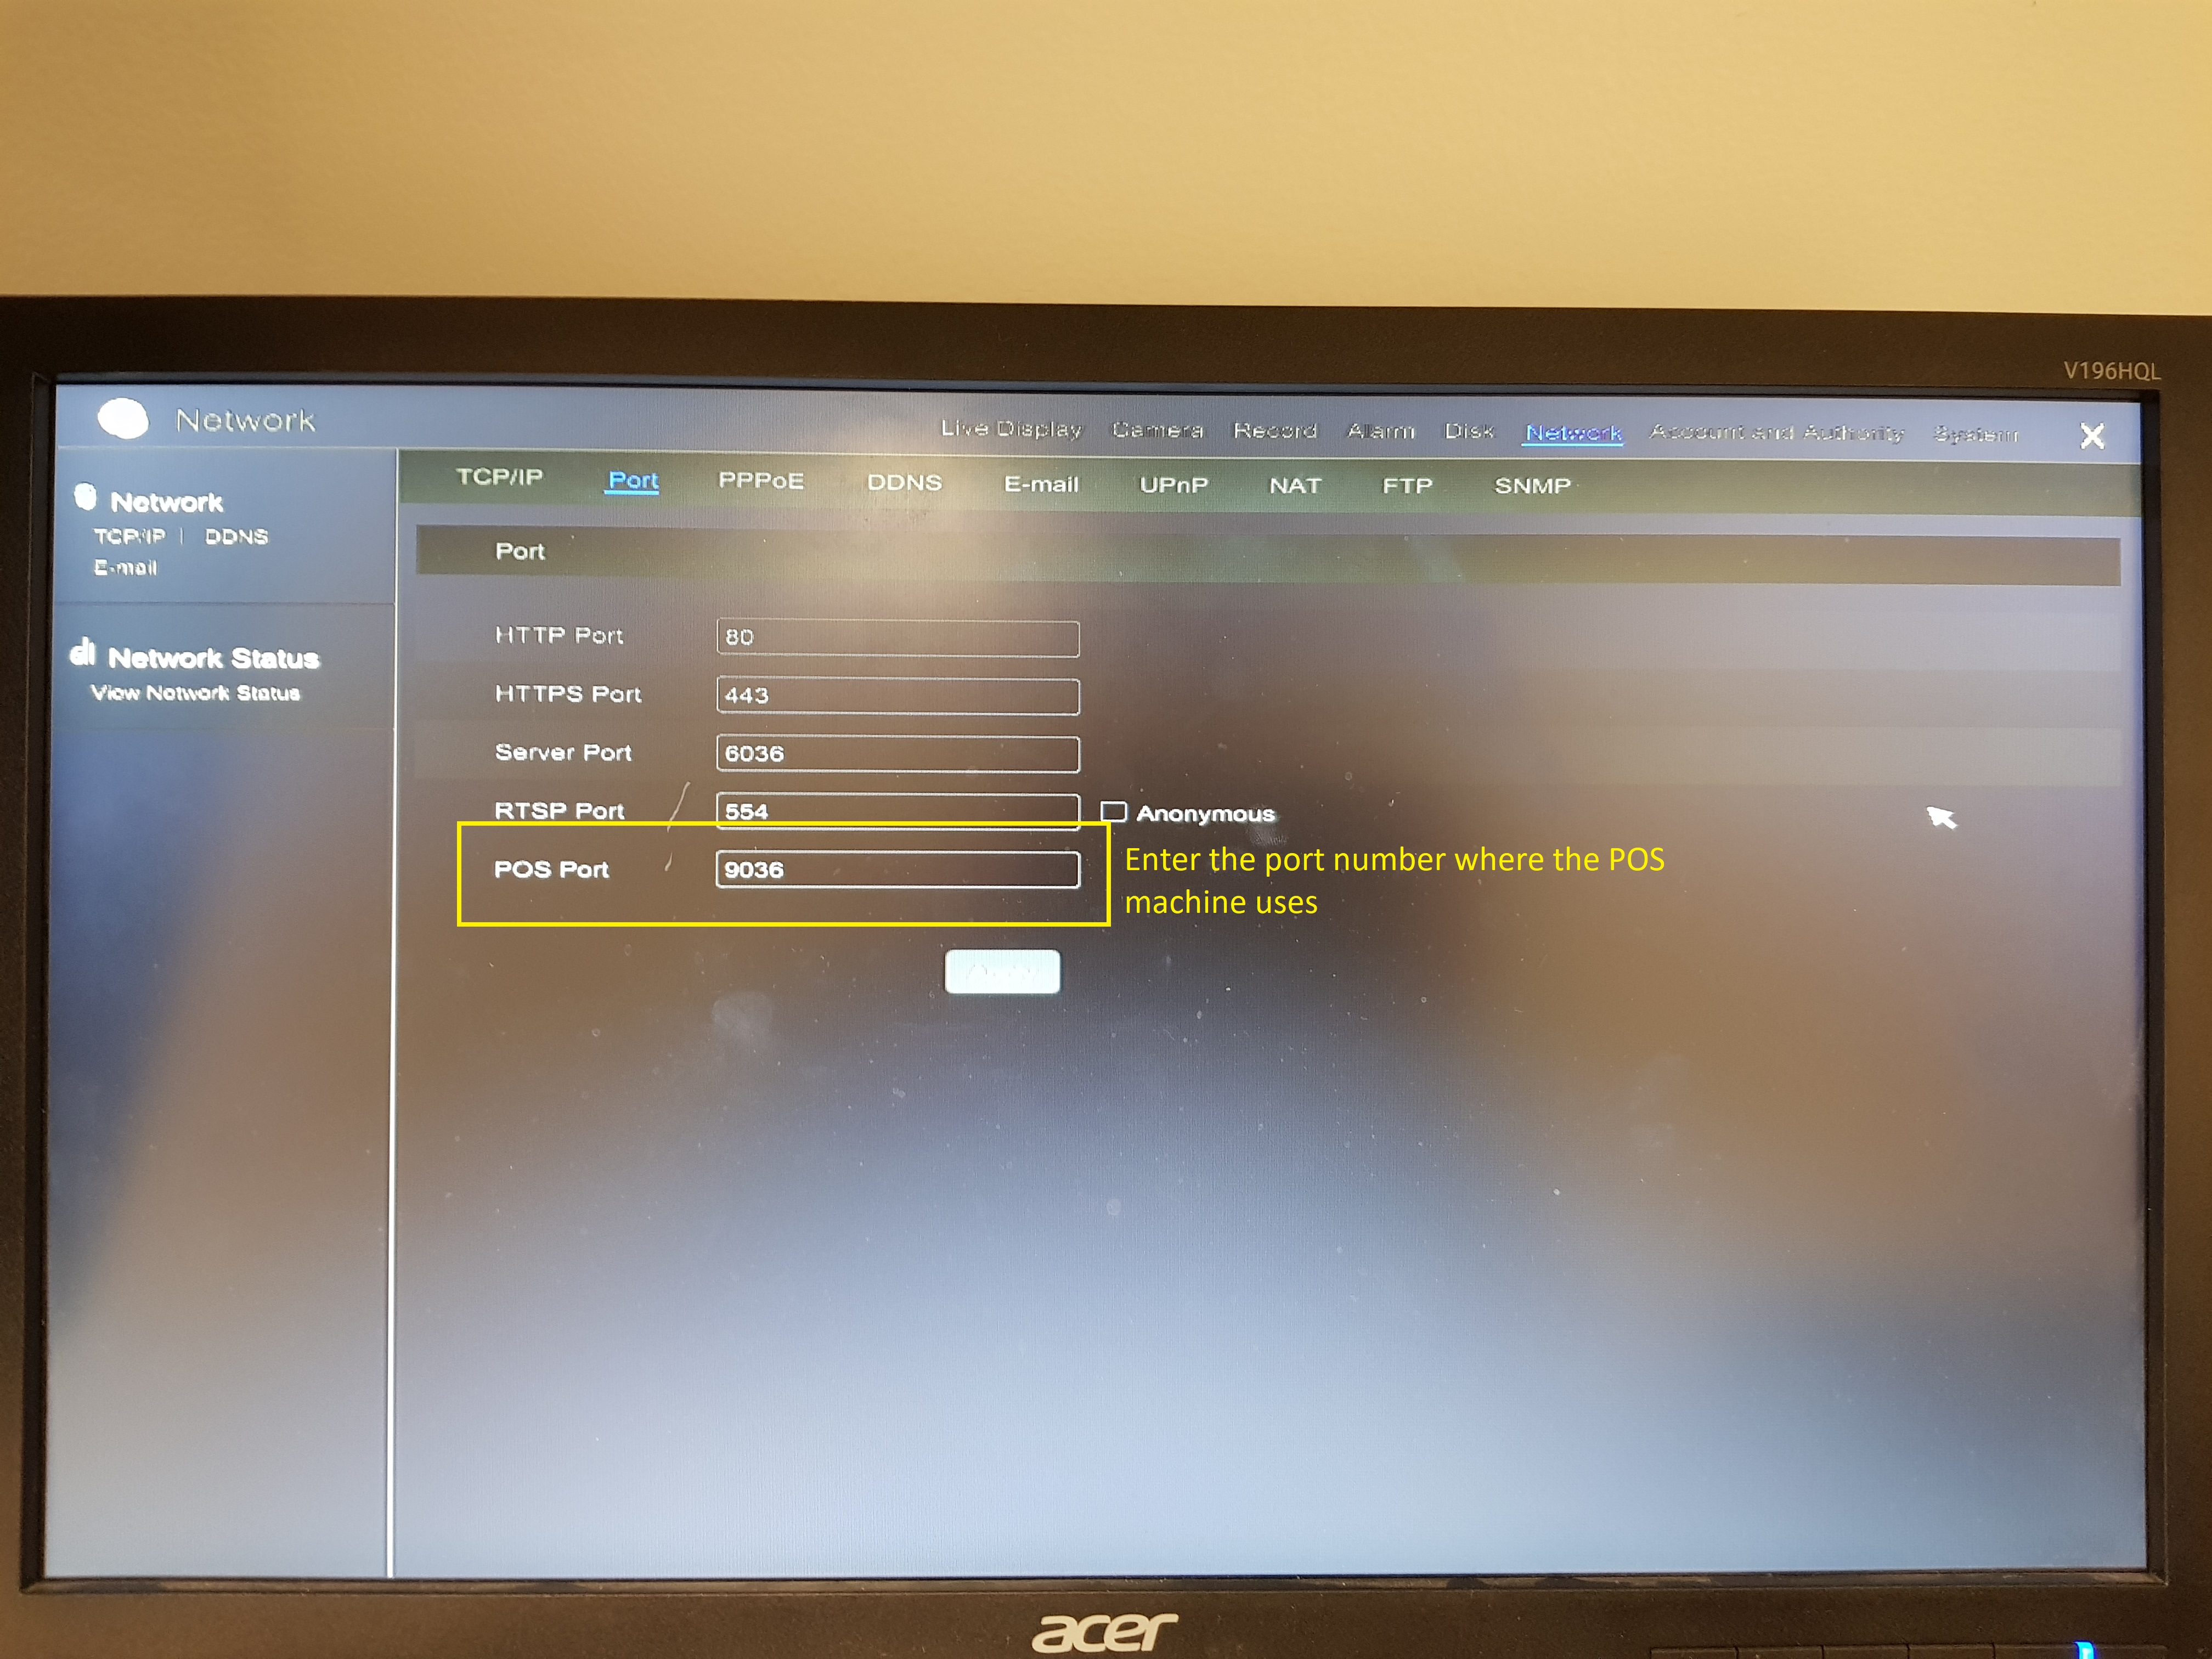
POS Port: the default HTTP port of the NVR is 9036.
POS Settings
-
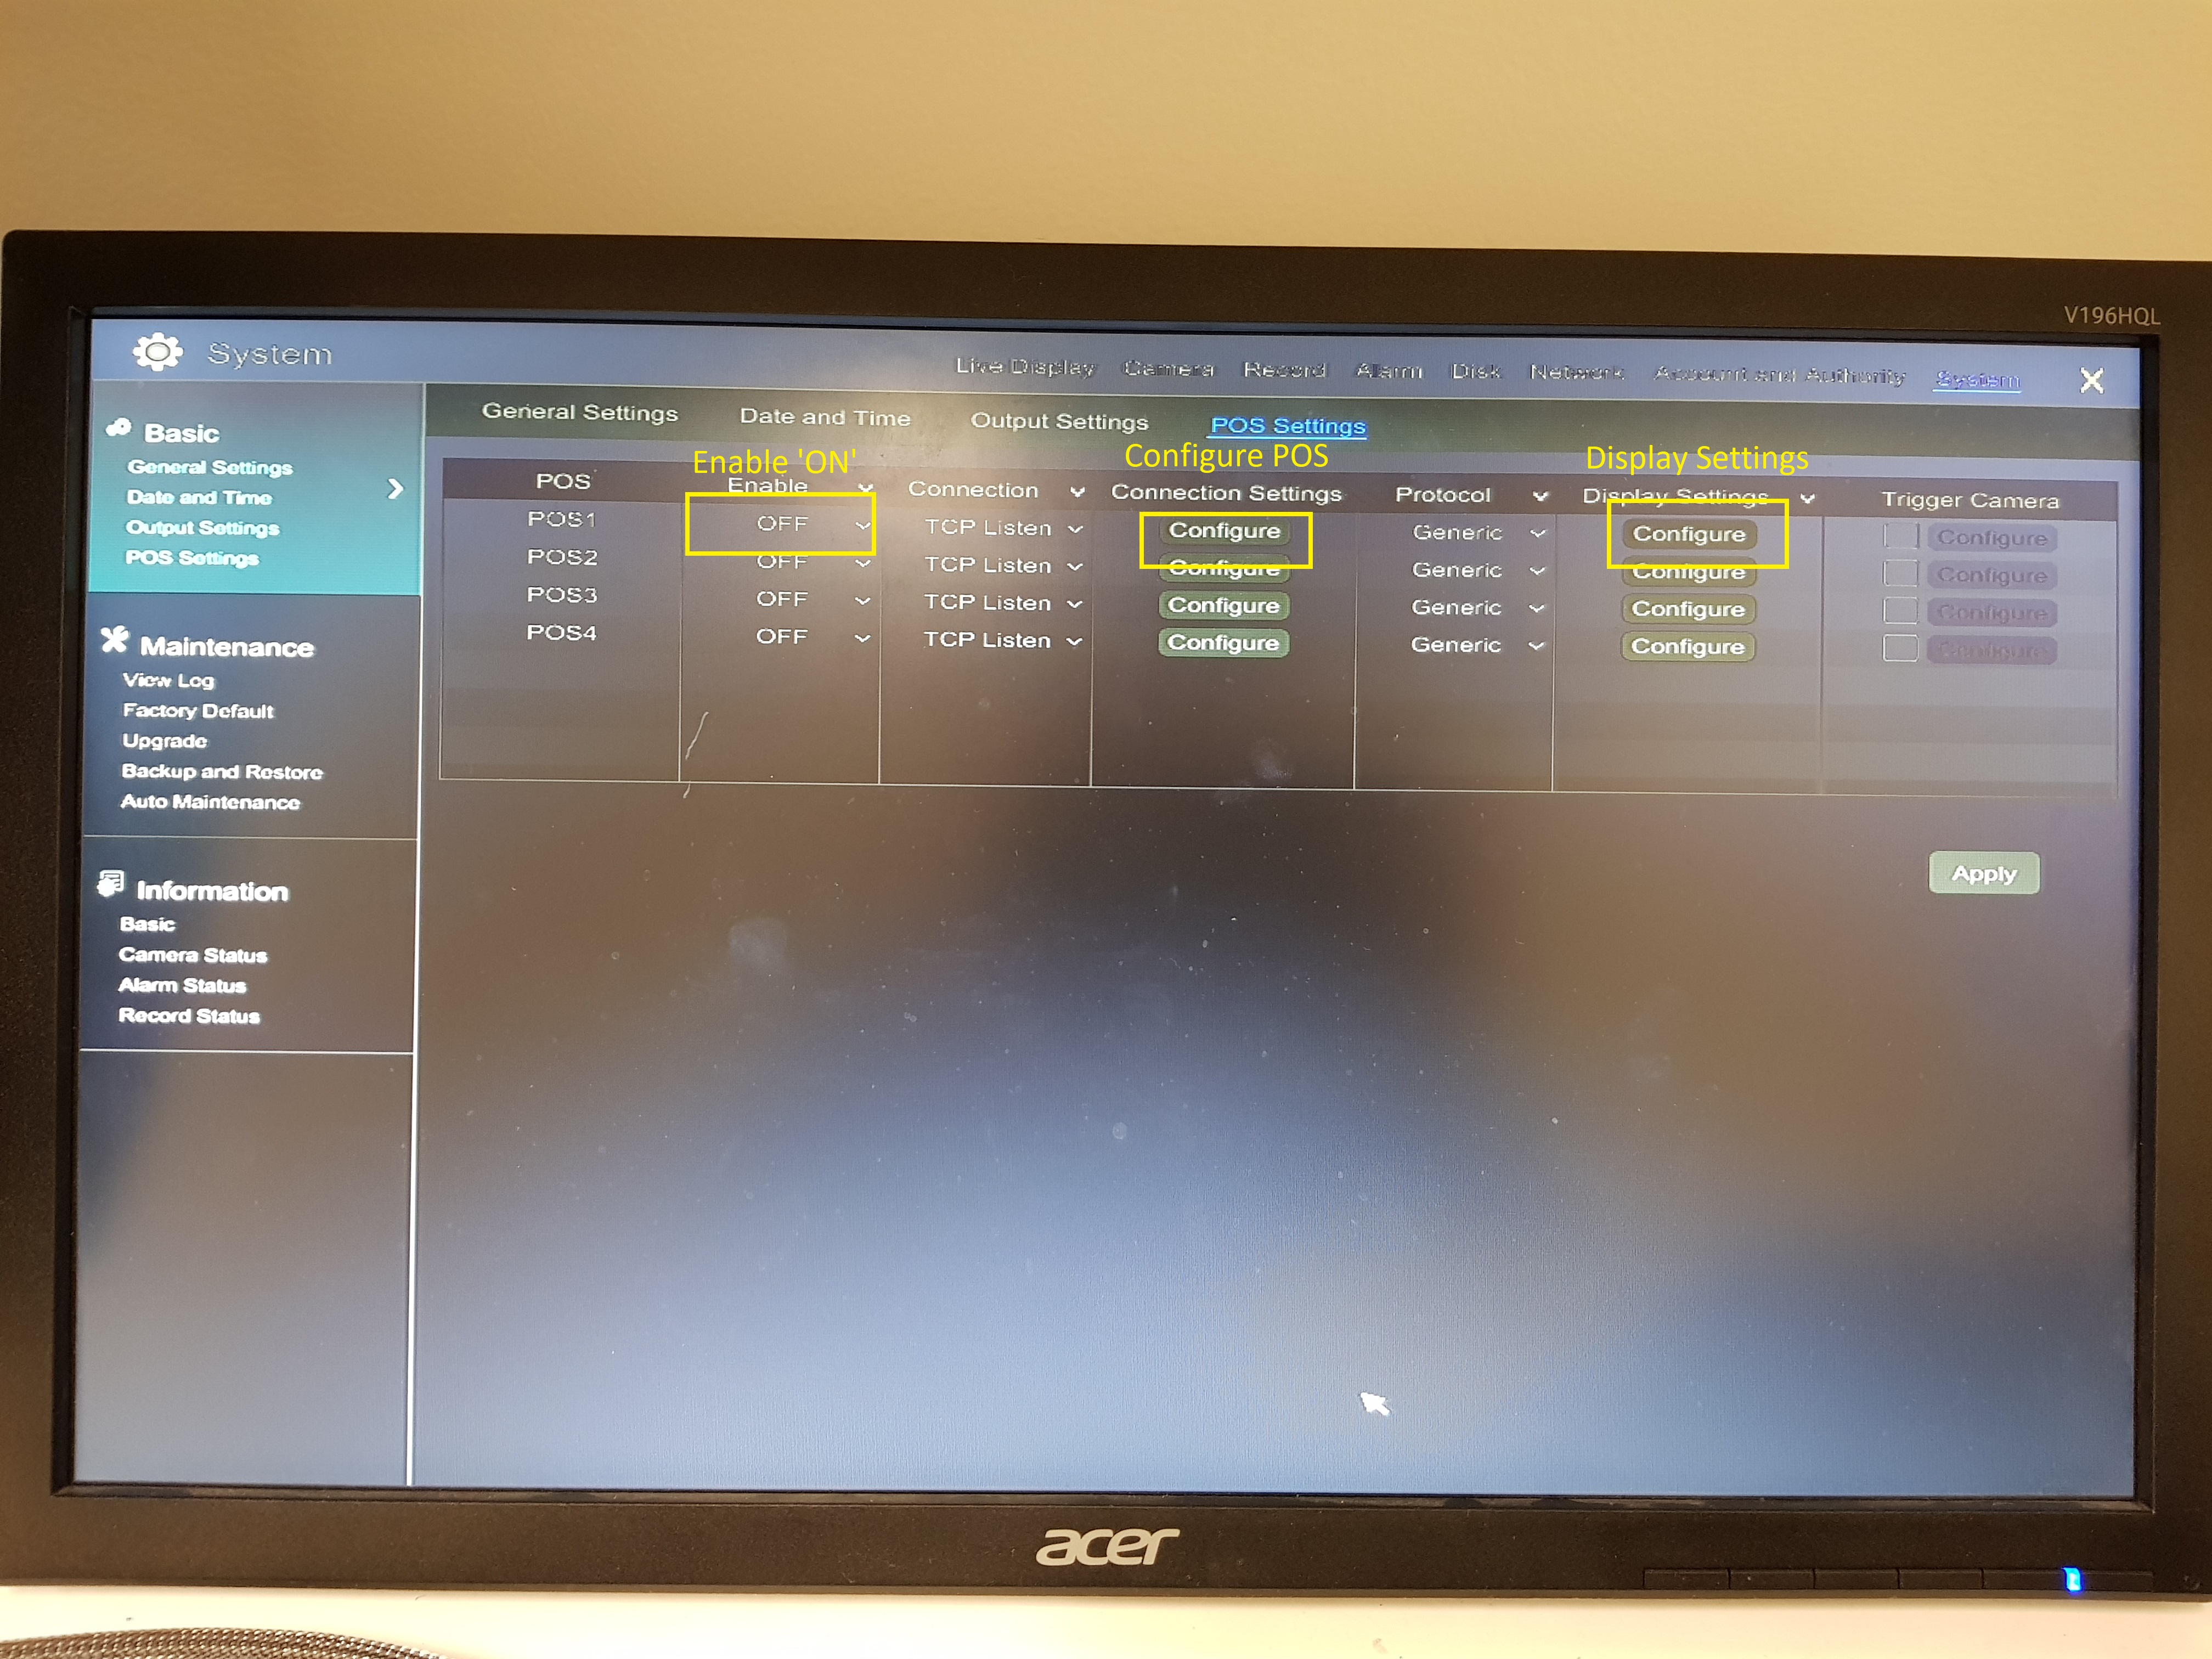
Click Start ->Settings ->Basic ->POS Settings to go to the interface.
-
Enable POS and click “Configure” under “Connection Settings” to go to the following interface.
-
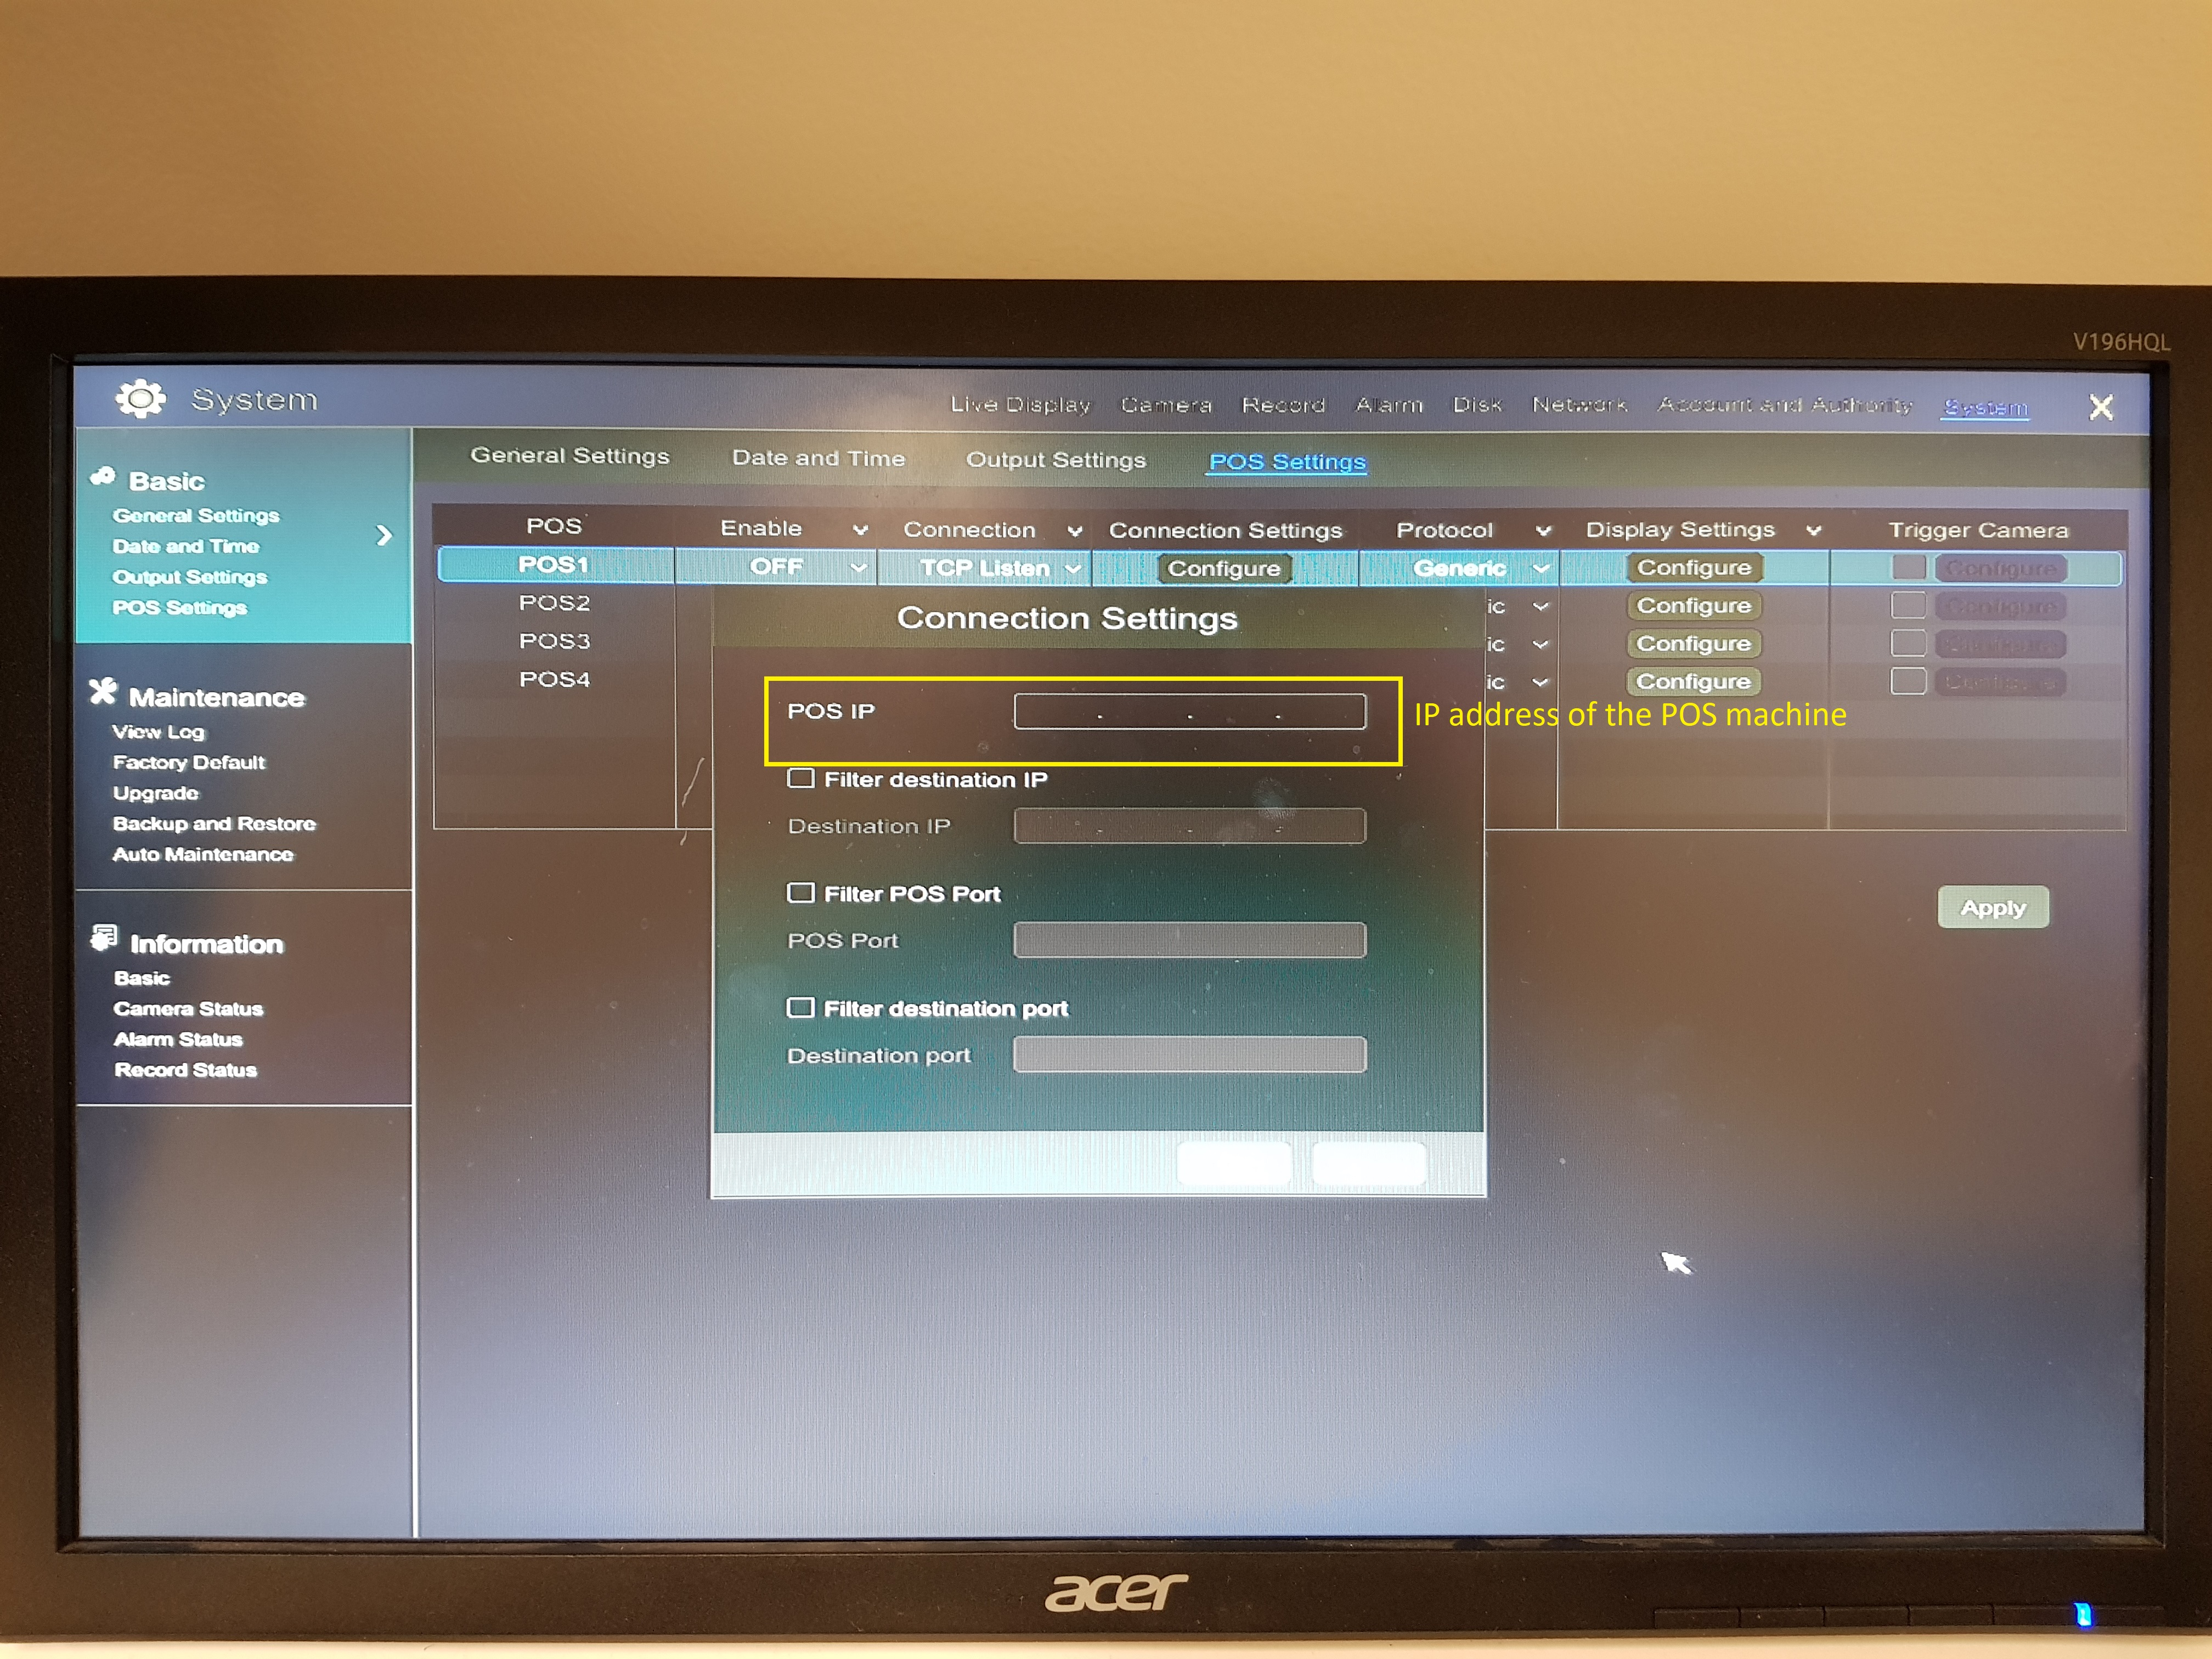
Enter IP address of the POS you want to add.
-
Check “Filter destination”, “Filter POS port” and “Filter destination Port” (If you do not check them, please skip this step) and enter destination IP, POS port and destination port you want to filter.
-
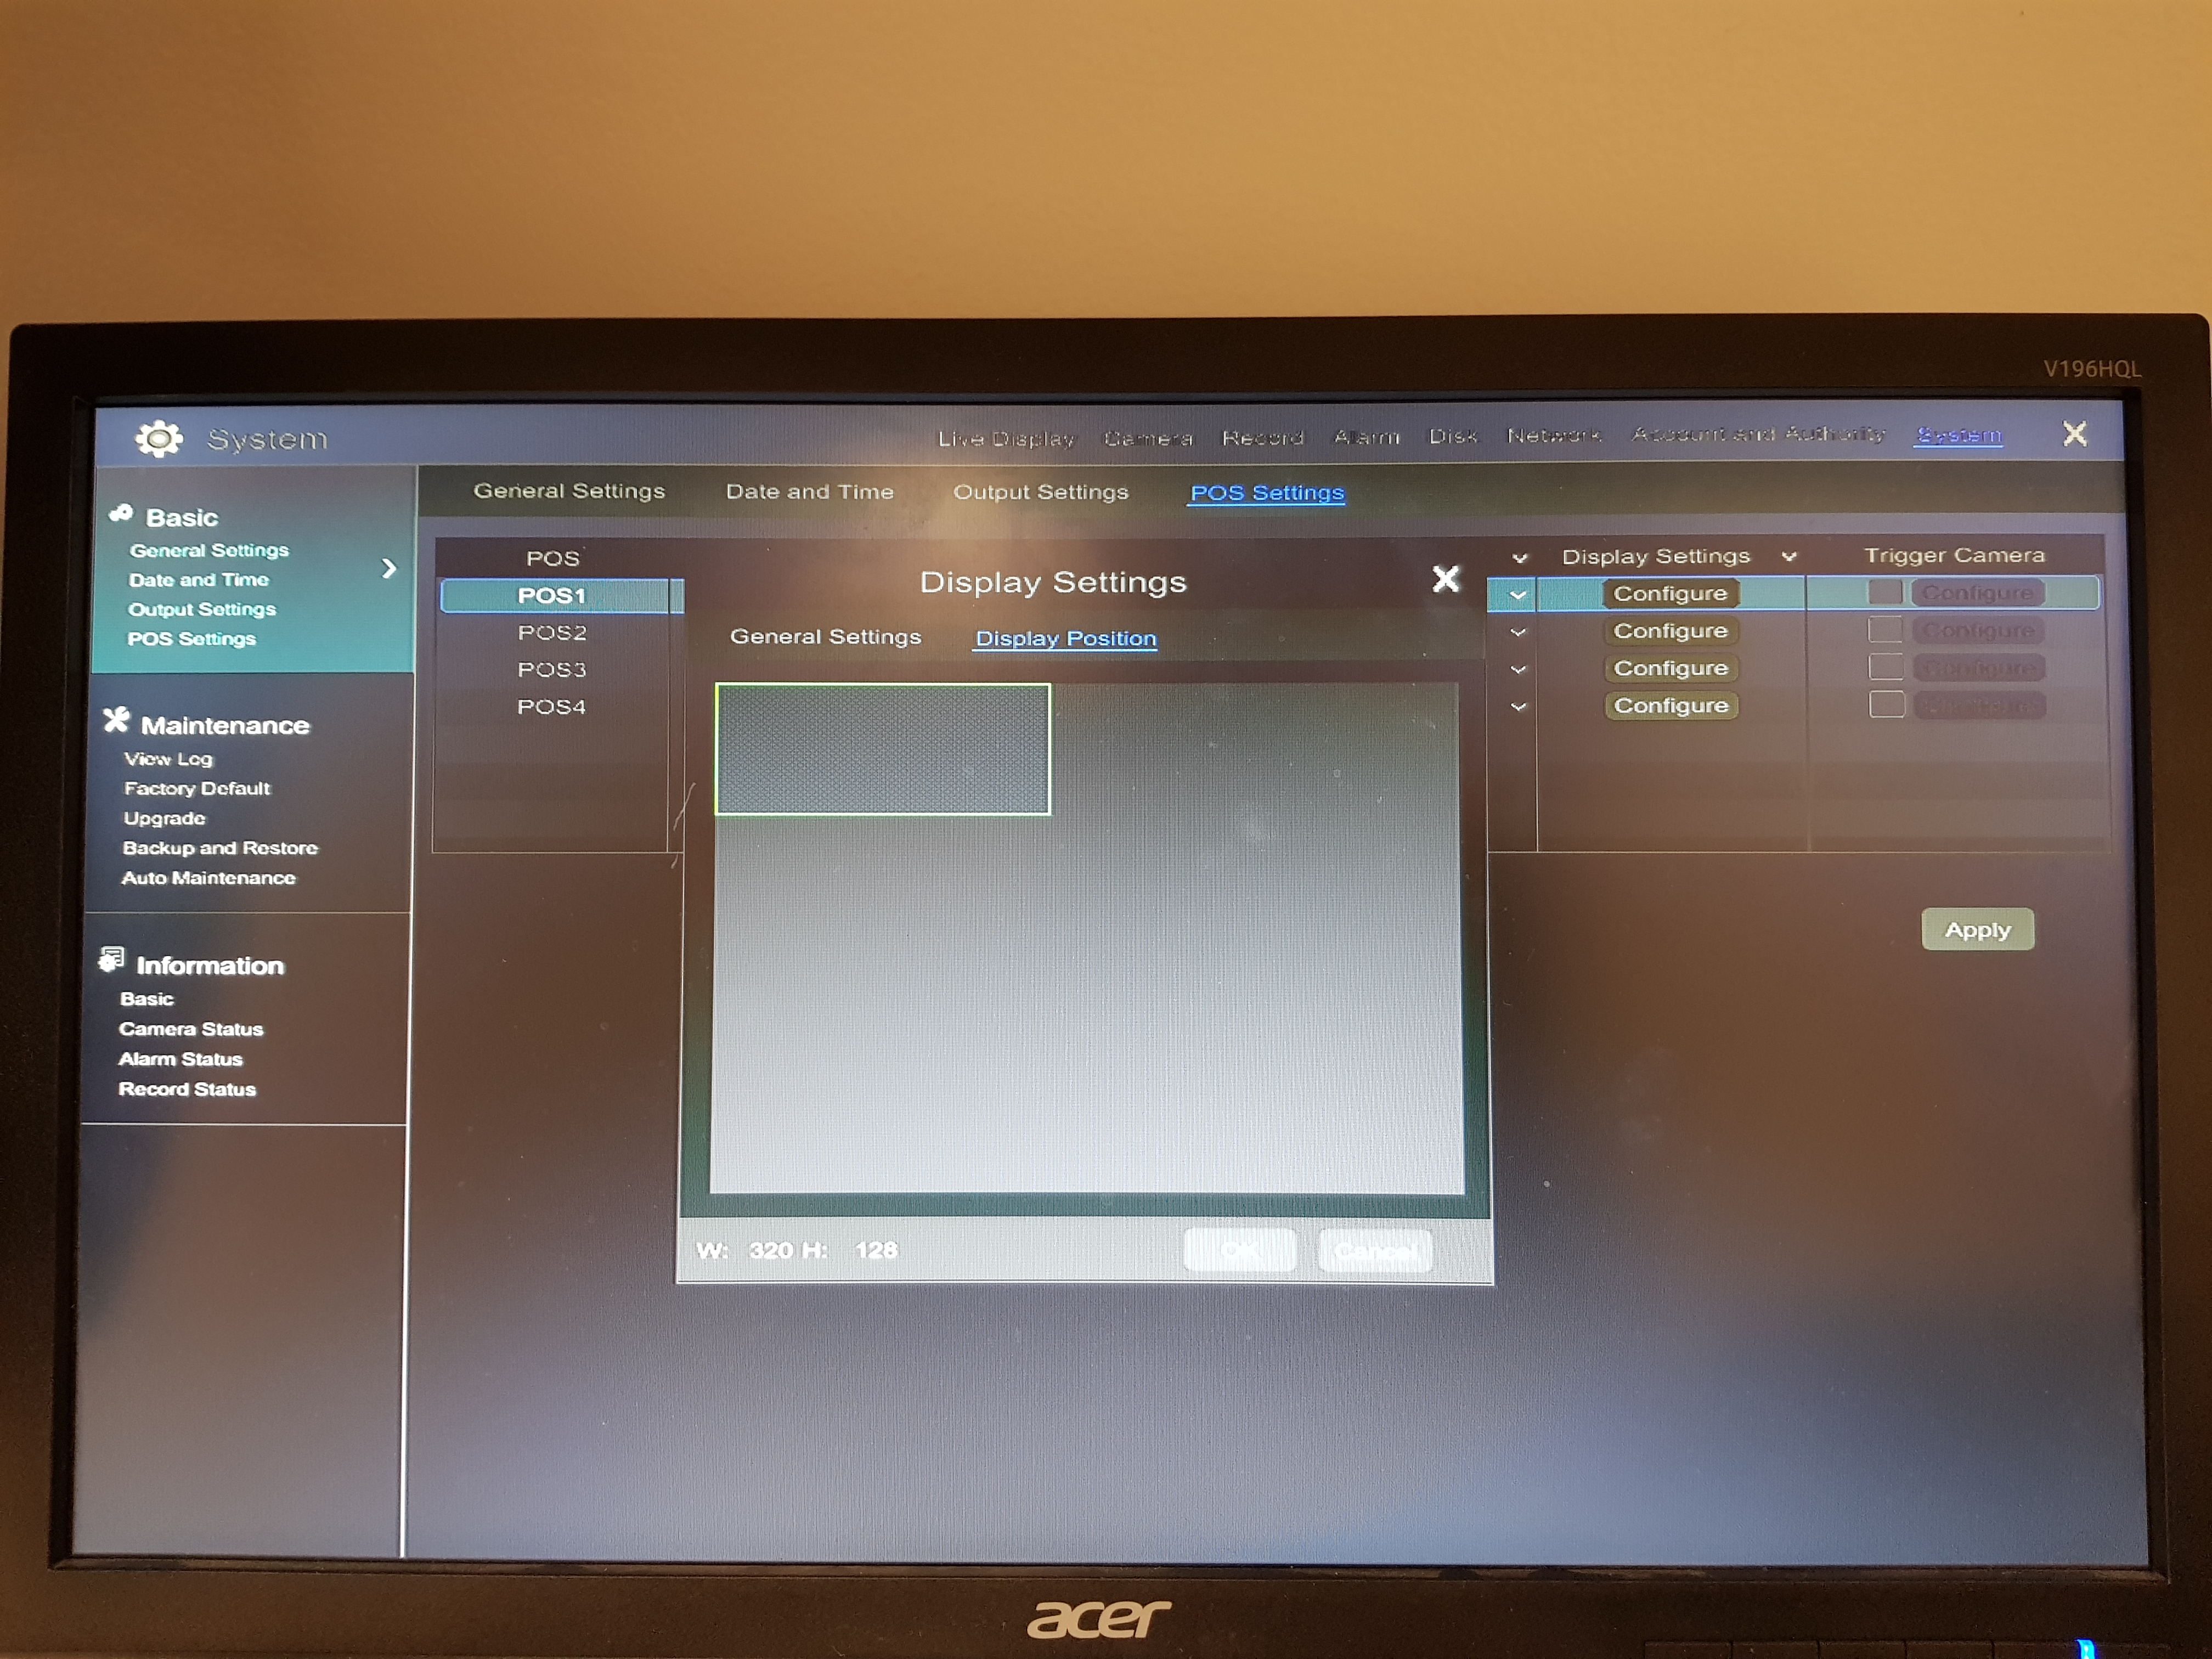
Click “Display Position” under “Display Settings” to set the position of the POS information (Use the default settings of the general settings).
-
Check “Trigger Camera” and click “Configure” under it to bind POS to the camera. One POS can be bound to multiple channels, but one channel can only be bound to one POS.
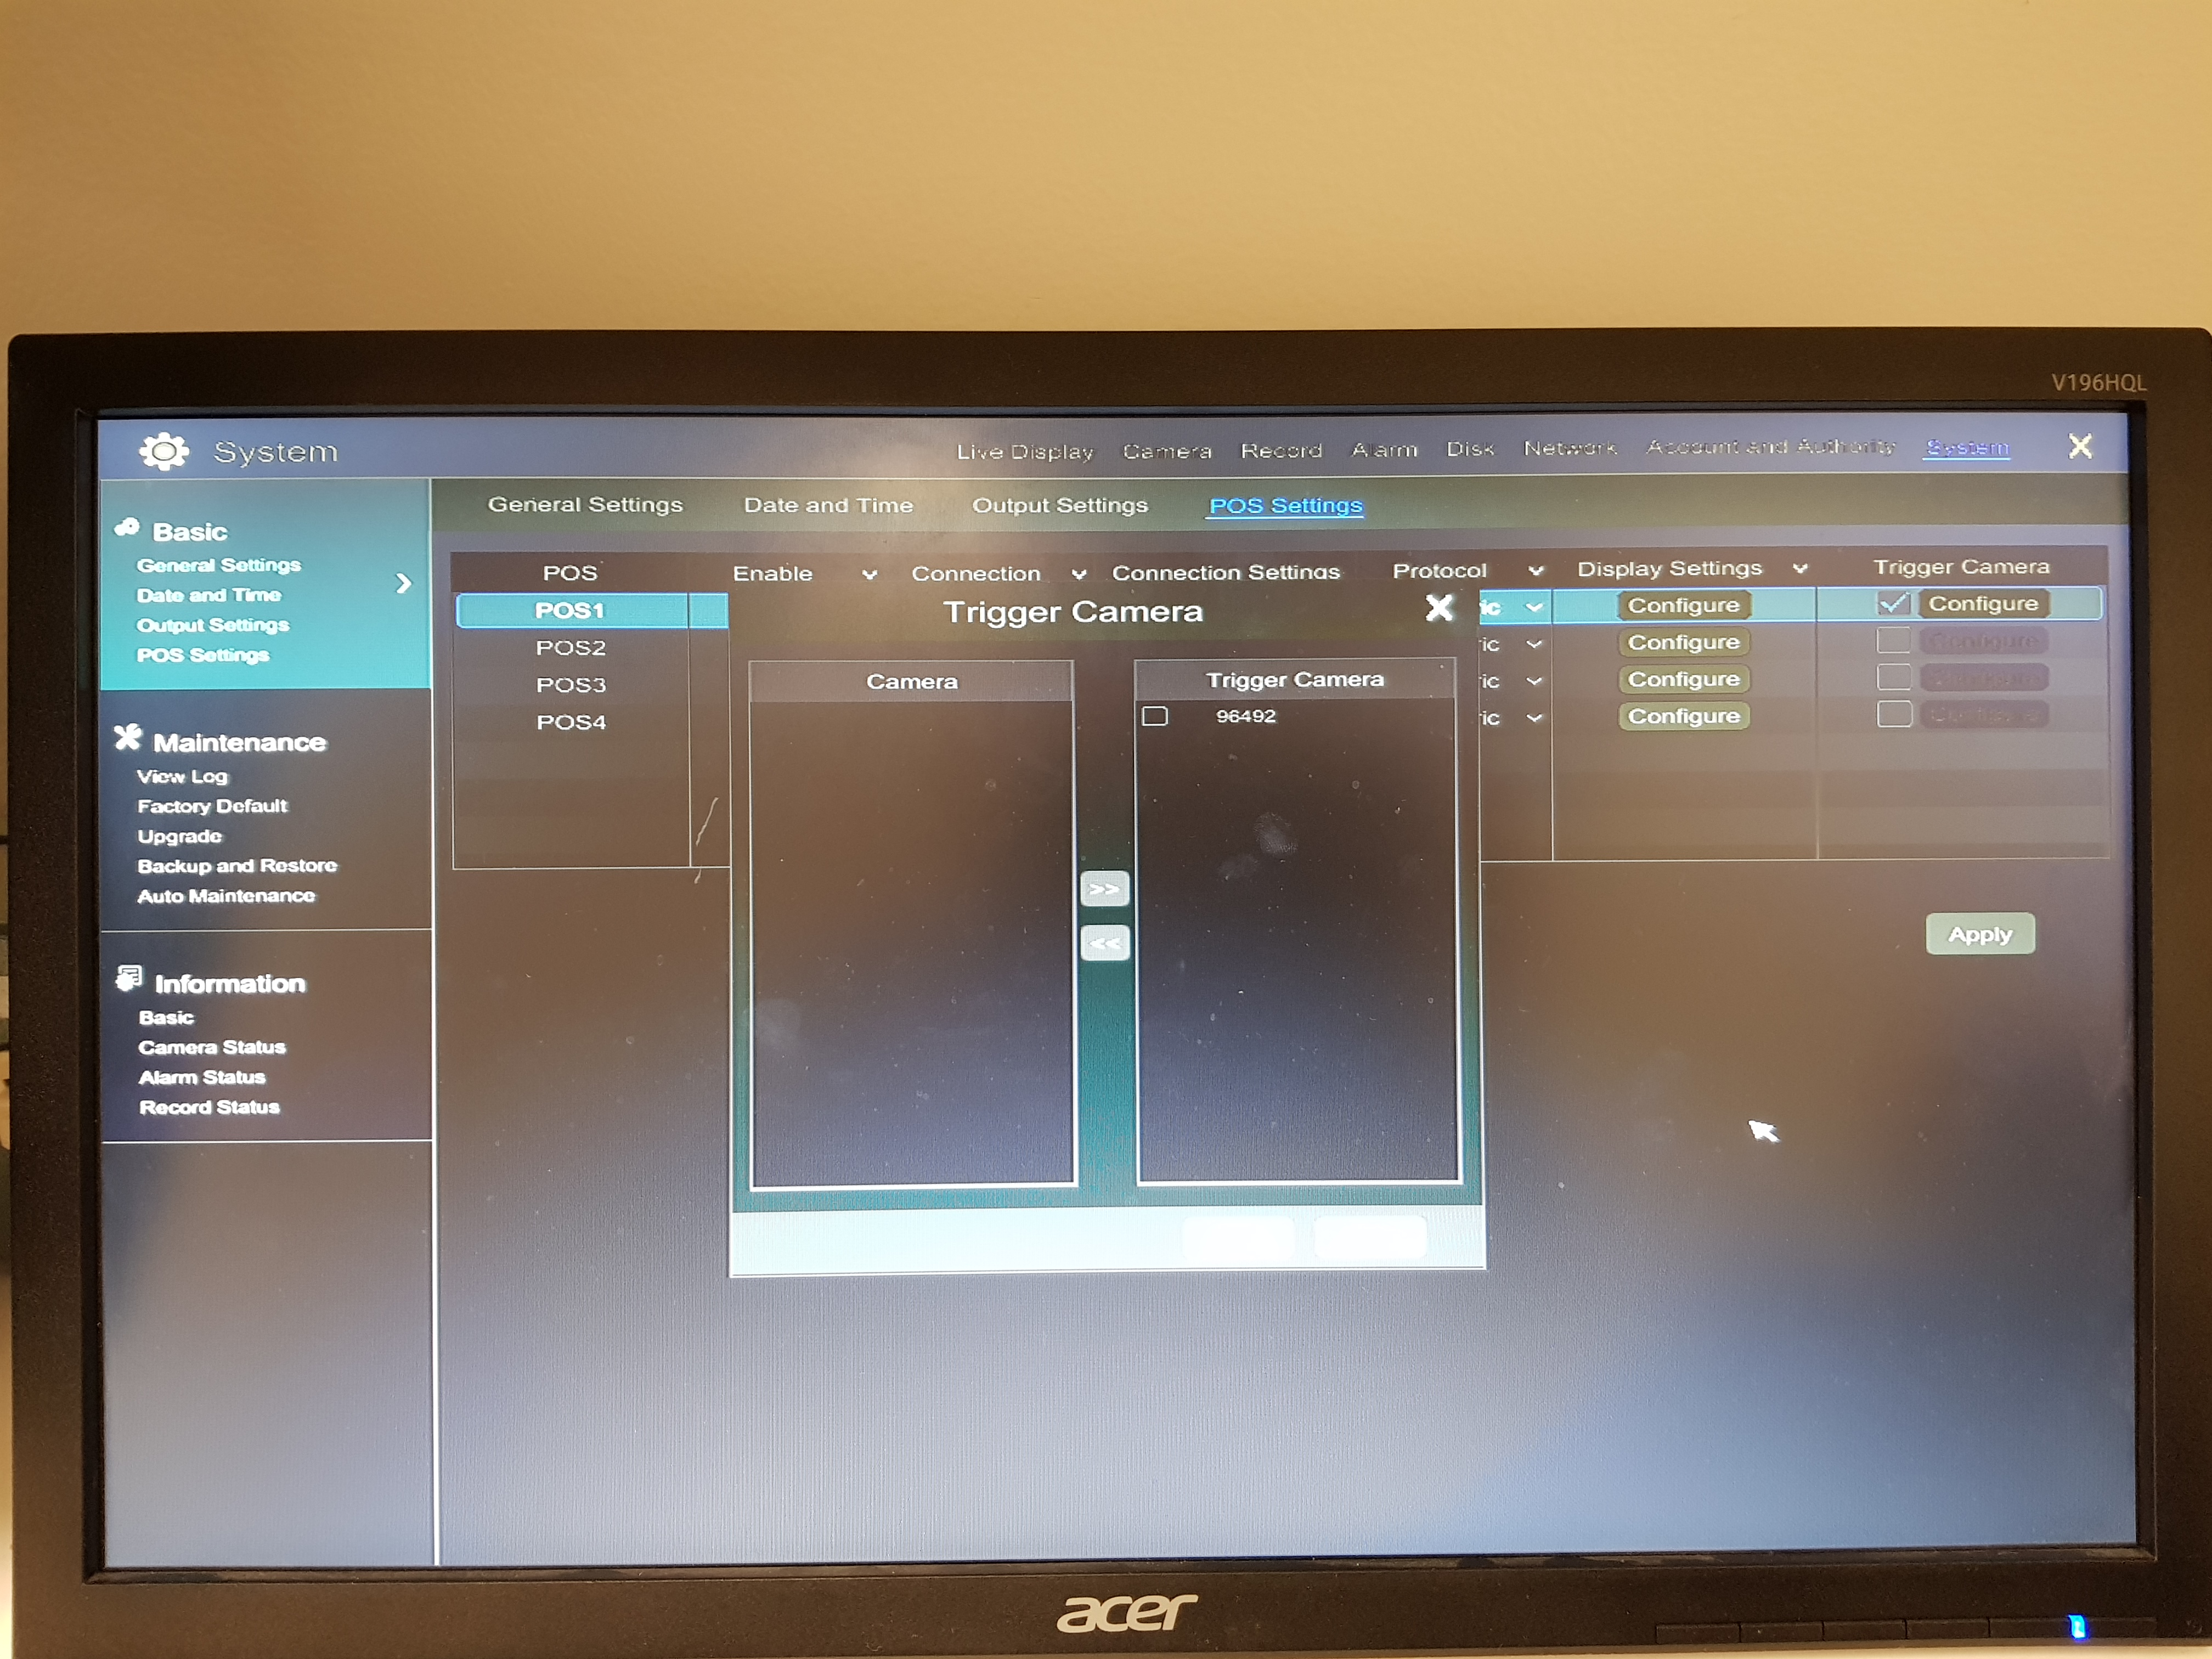
- Click “Apply” to save the settings and then the transaction information will be displayed on the preview image in real-time.