Start Up Wizard (Device Initialization)
Topic:
Compatible List:
Model | Version |
NVR3104-4P | V8.2.4.1-20240914 |
NVR3108-8P | |
NVR3216-16P | |
NVR3216-16P-AI | |
NVR3432(No POE) |
Related question:
- What is the default username and password for the initial login to the NVR?
- How to setup recorder?
- what is the NVR setup?
- Need training for Aibase color.
On the Local Monitor
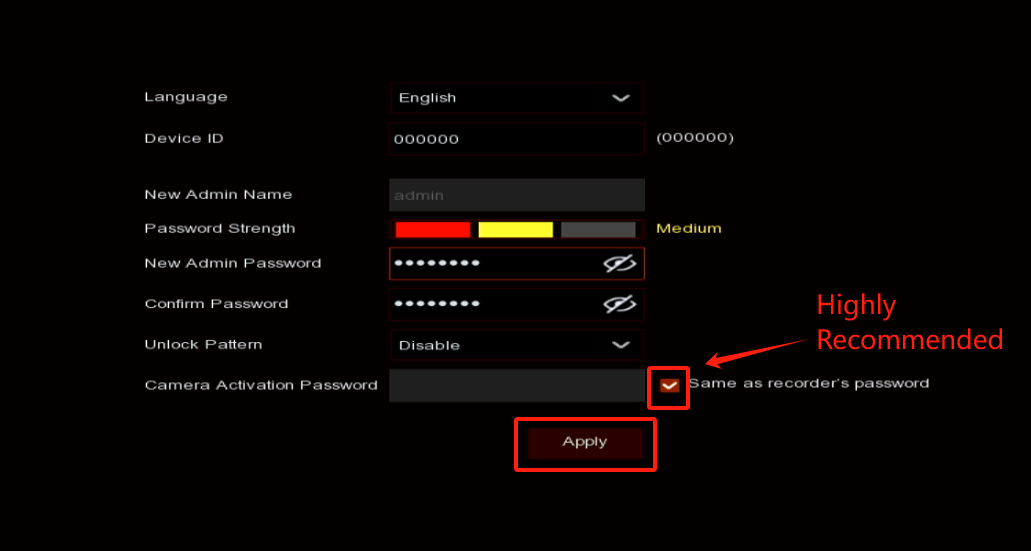
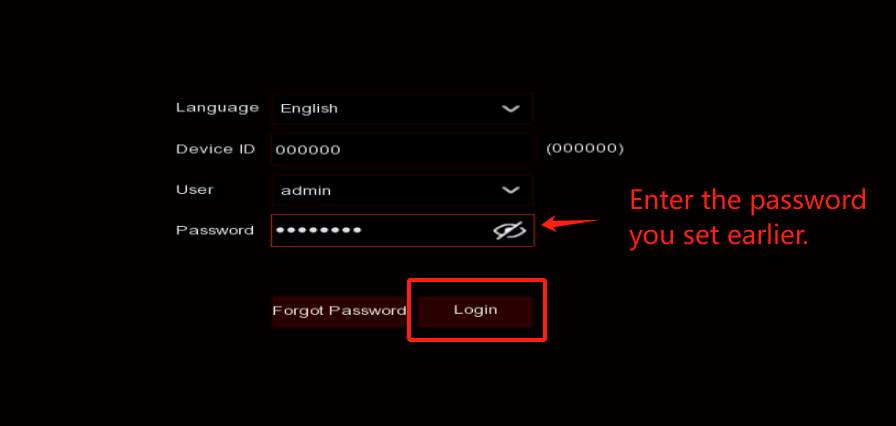
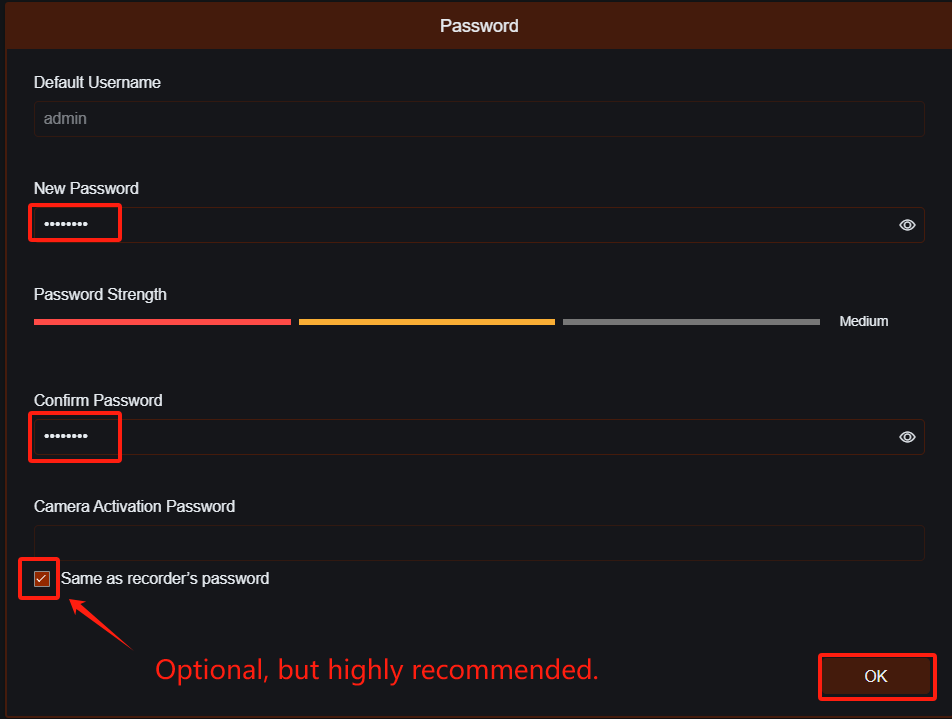
1. When you first turn on the recorder, you will be prompted to configure some basic settings. The default username for the NVR is 'admin', and there is no default password. The password is set during the initialization process. By selecting the 'Same as recorder’s password' checkbox', all cameras added to this NVR will have the same password as the NVR.
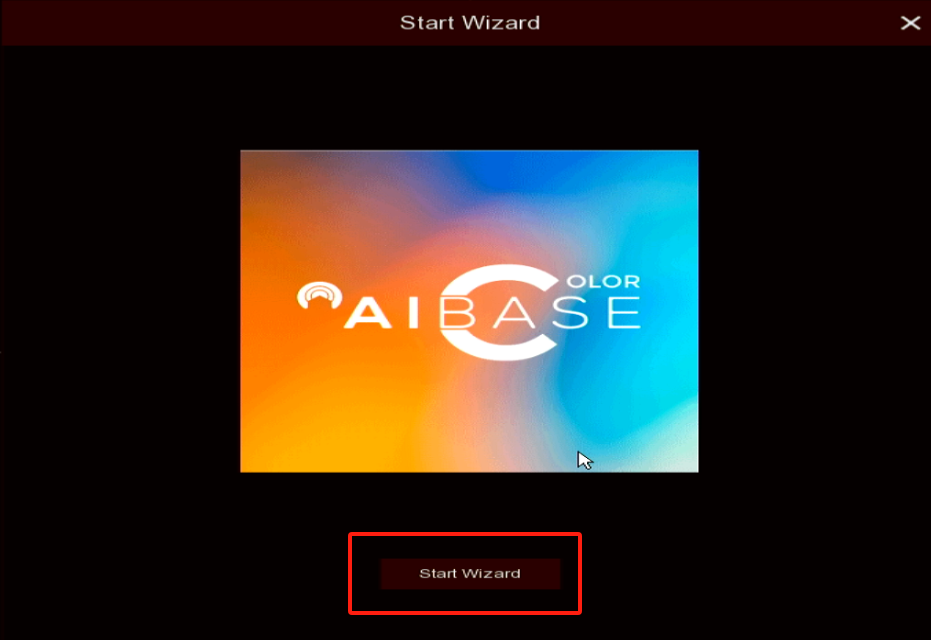
2. Click on the 'Start Wizard' button.
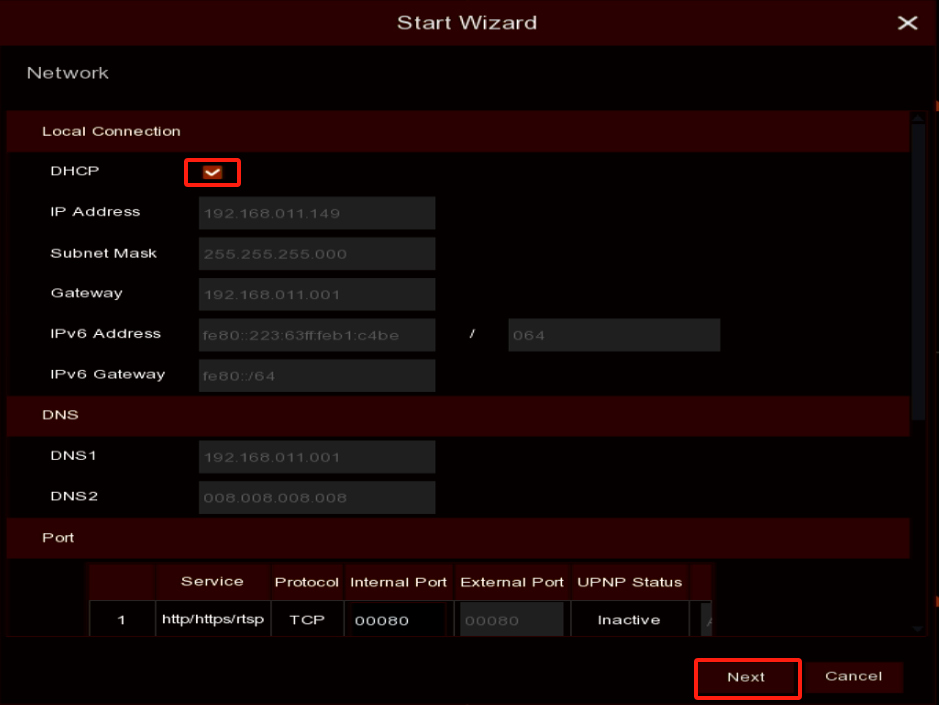
3. DHCP is enabled by default, but you can disable it and assign the NVR a unique static IP address. Click on the 'Next' button.
4. Please select your local time zone and modify the current time.
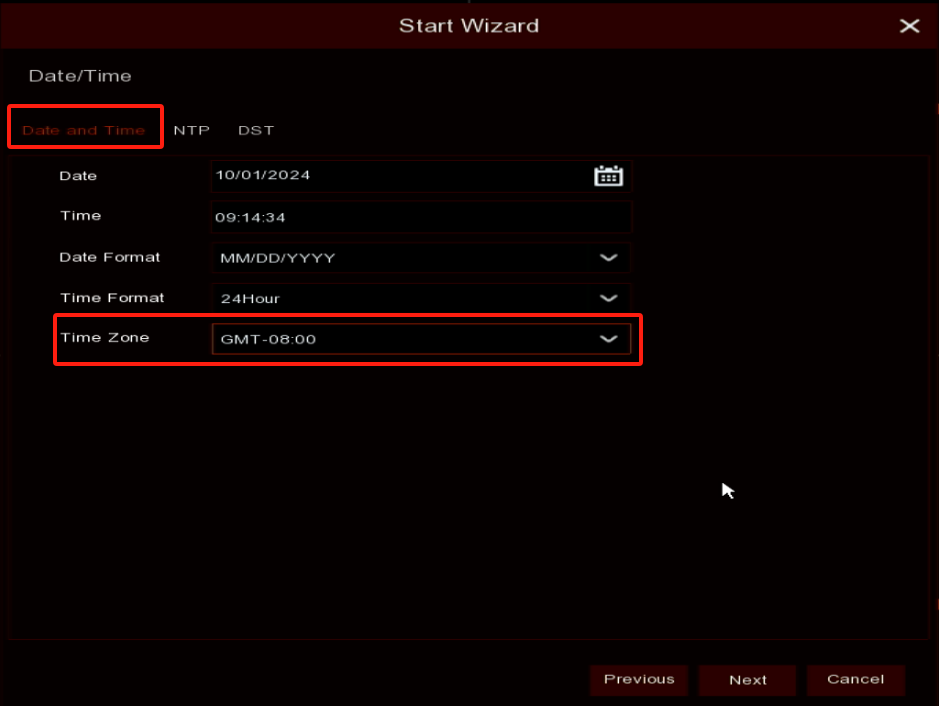
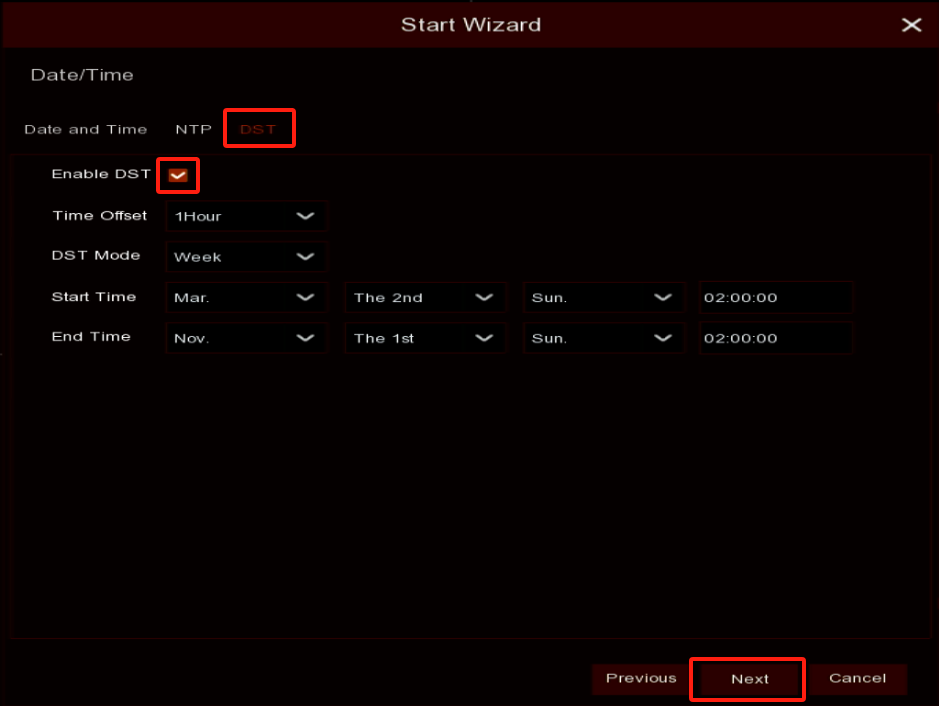
5. Enable DST and click on the 'Next' button.
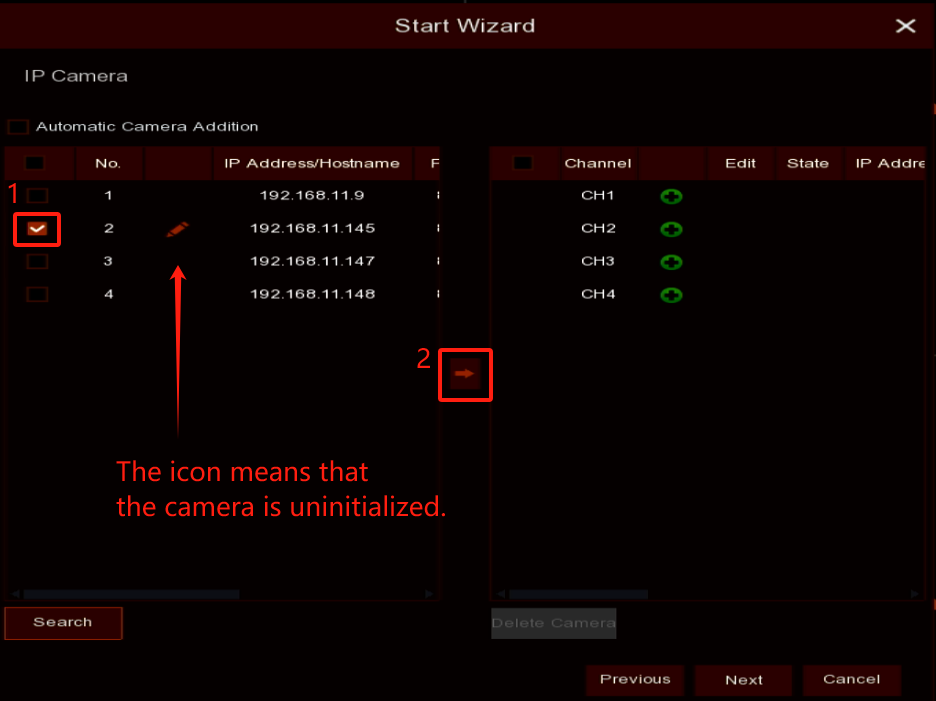
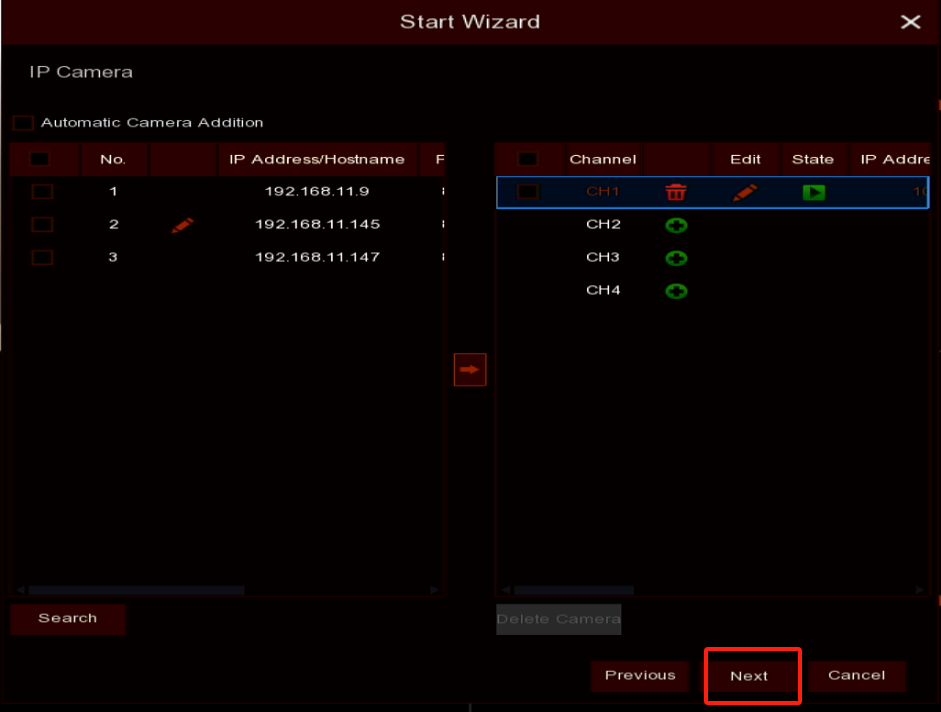
6. Cameras on the built-in POE ports of the NVR will show on the list to the right. You can also click on the 'Search' button at the bottom left to search for cameras using the external POE switch.

7. (You can skip steps 7 and 8 if you are only using the built-in POE ports.) Select the cameras you want to add to the recorder and click on the arrow button in the middle of the screen.
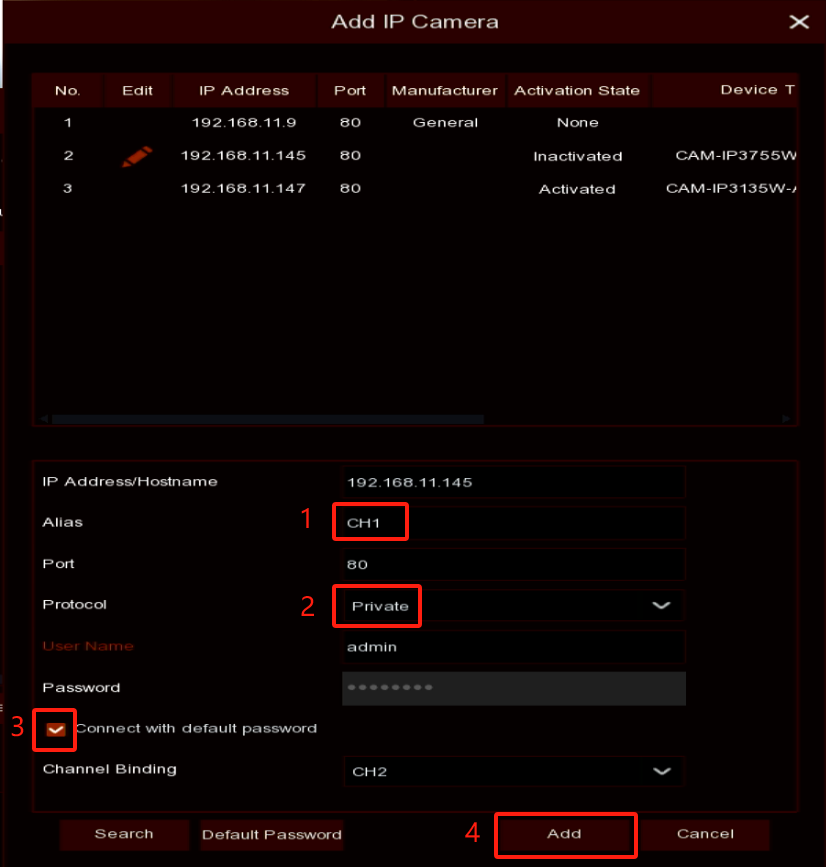
8. Assign a channel alias, change the protocol ('Private' for AiColor cameras, 'ONVIF' for other brand cameras). Check the check box for 'Connect with default password'(if the camera is uninitialized), then click the 'Add' button.
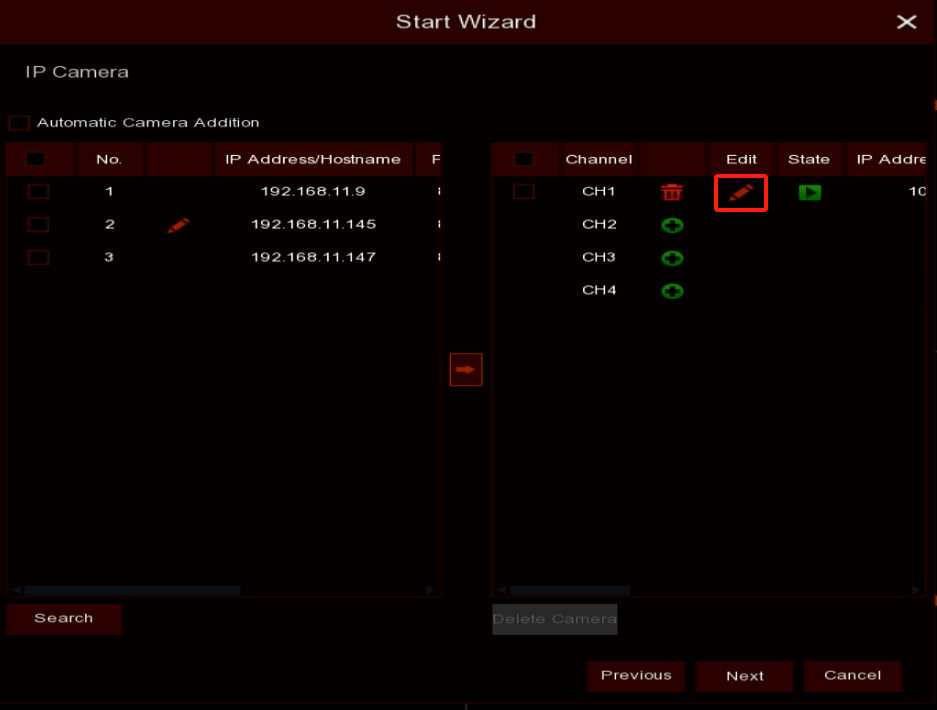
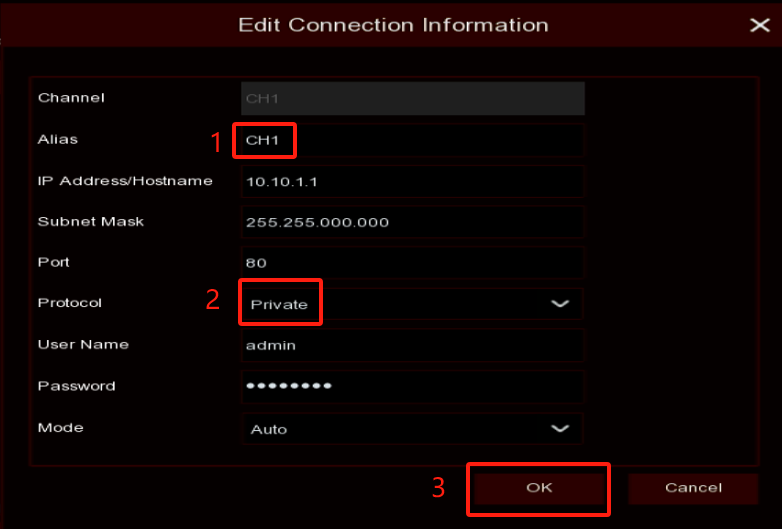
9. For adding cameras using built-in POE ports, click on the 'Edit' button of the camera. Assign a channel alias, change the protocol ('Private' for AiColor cameras, 'Onvif' for other brand cameras), and click on the 'OK' button.
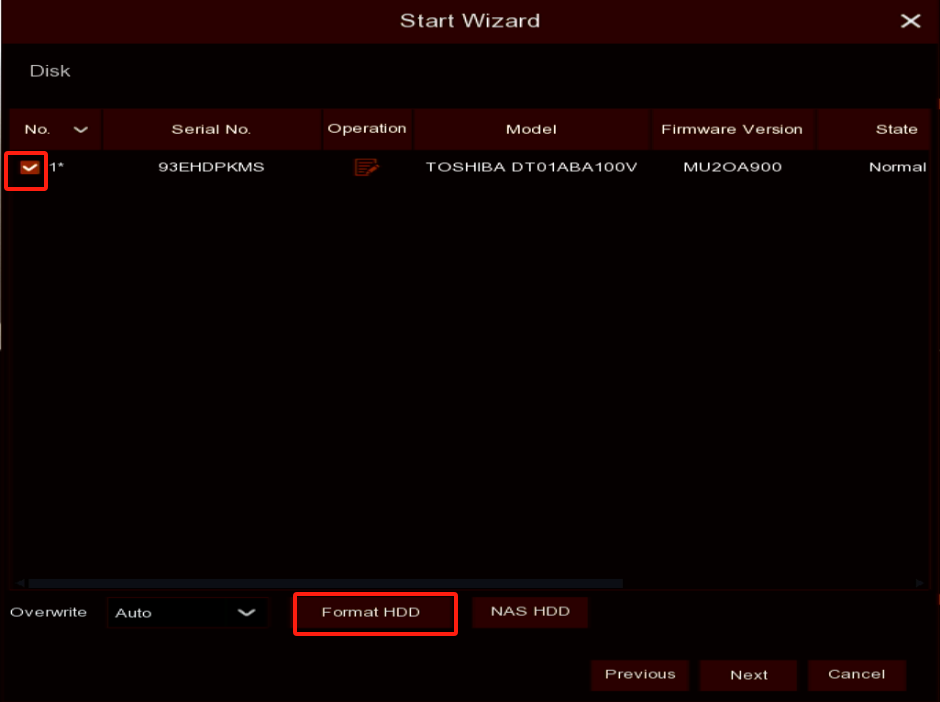
10. After all cameras are added, click the 'Next' button to proceed to the next step. If this is your first time using it, please format the HDD before use.
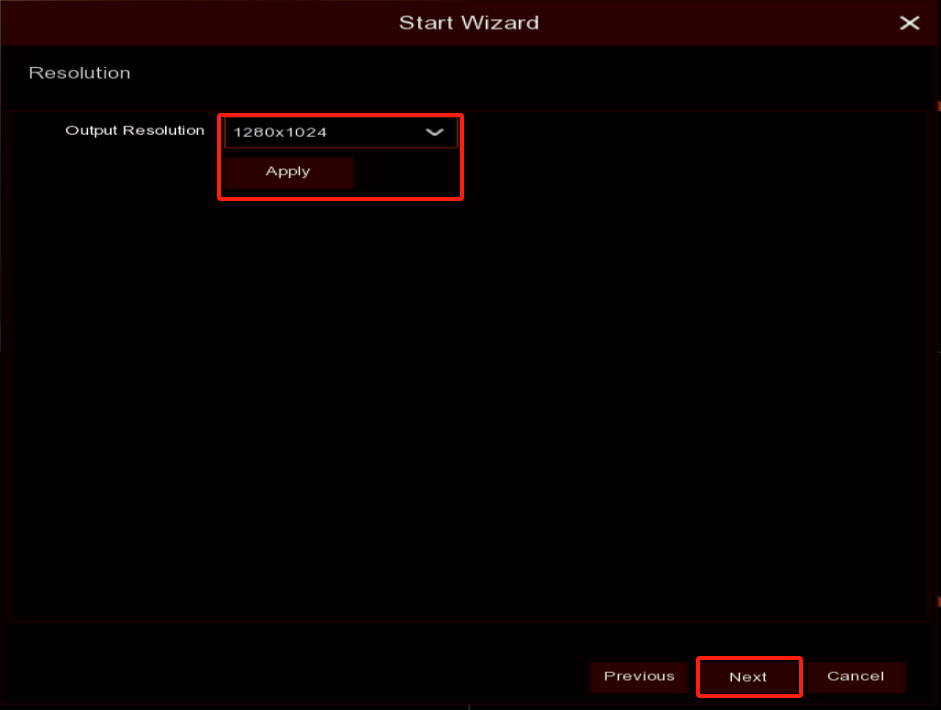
11. Choose the output resolution and click on the 'Next' button.
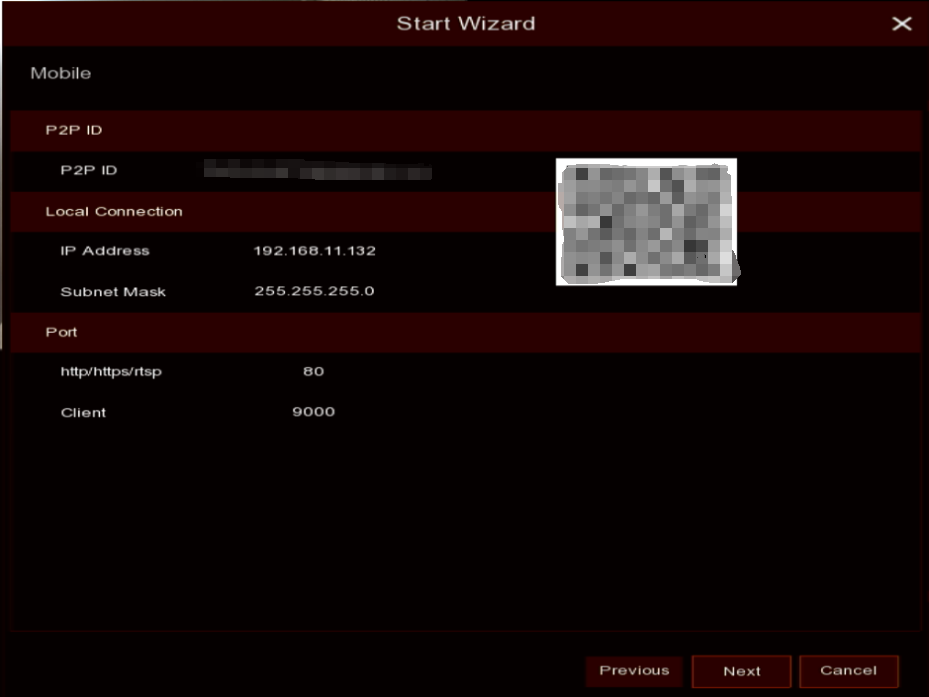
12. You can use your AI Color app to scan the QR code or use the P2P ID to add the device to your phone's application. Click on the 'Next' button.
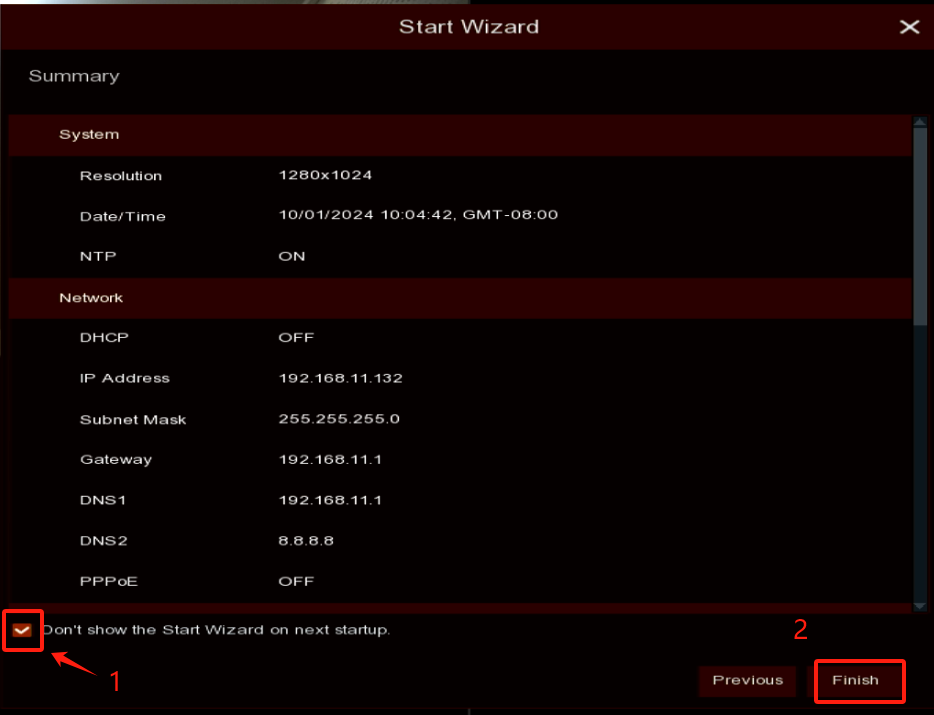
13. Check the checkbox and click on the 'Finish' button.
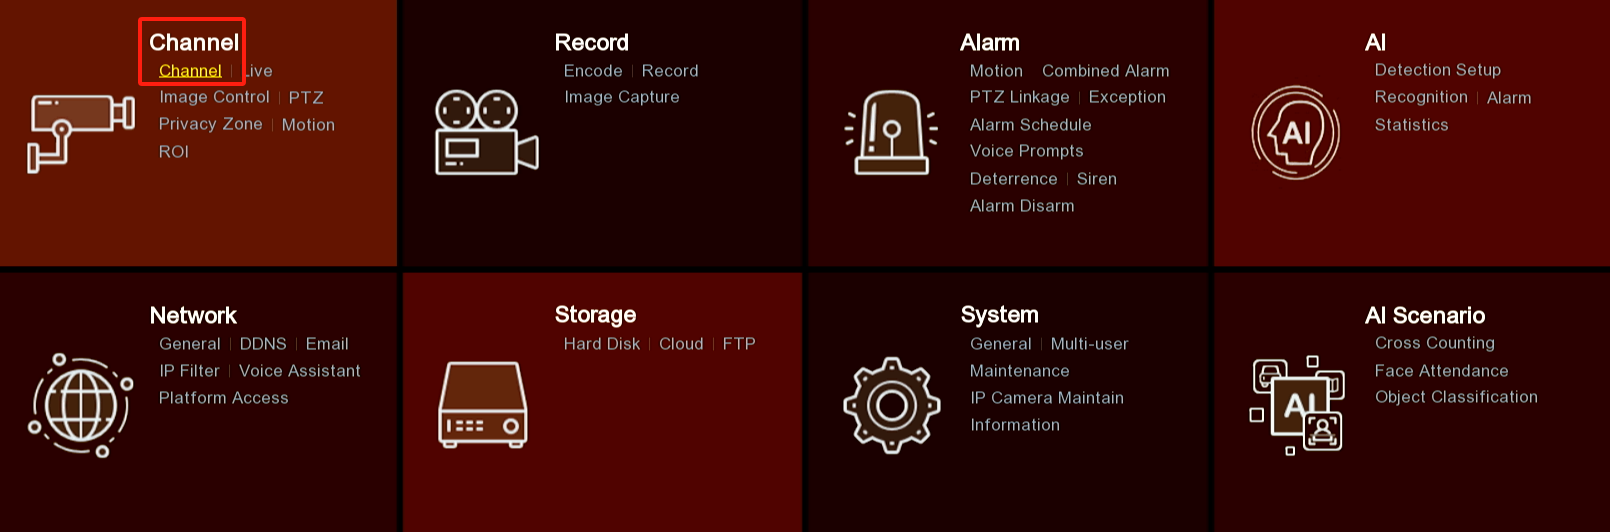
14. In the Main menu, select Channel in the Channel Section
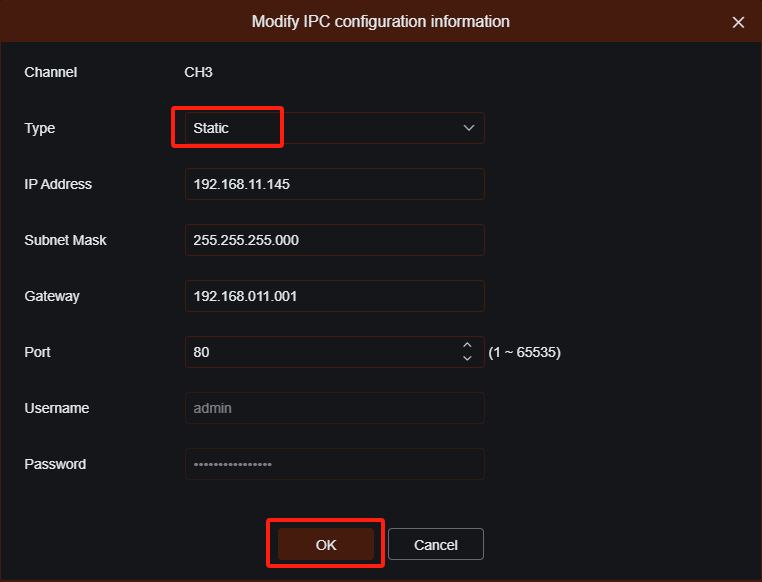
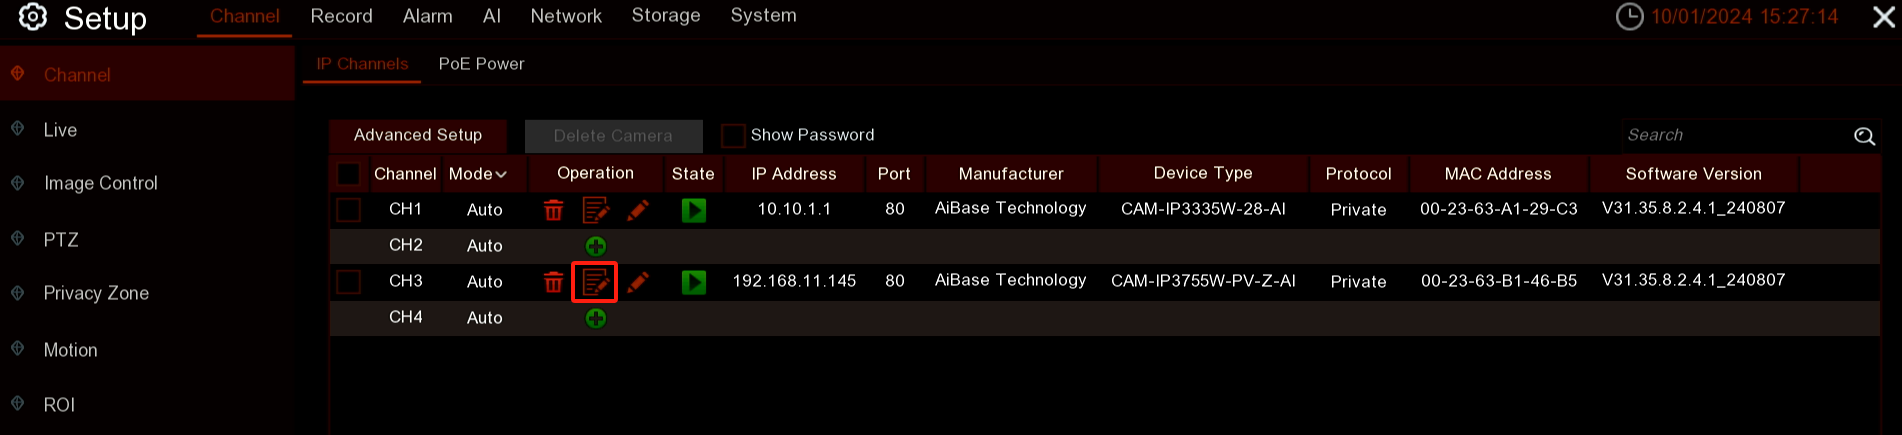
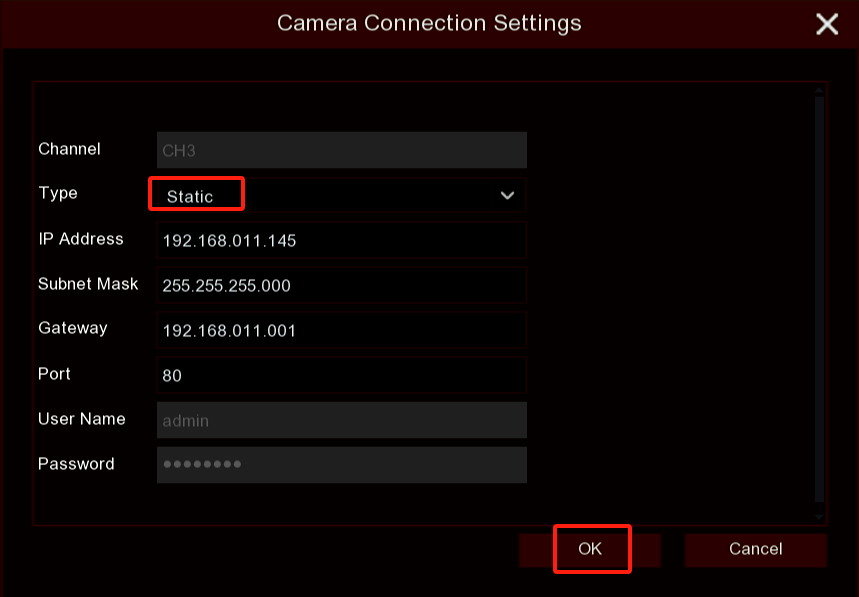
15. Click on the Edit icon (not the pencil icon) for the cameras you added form the POE switch device. Change the Type to Static instead of DHCP and click on the OK button.
On the NVR’s Web Page
- When you first turn on the recorder, you will be greeted with some basic settings. The default username of the NVR is “admin,” and there is no default password. The password is assigned during the initialization process.
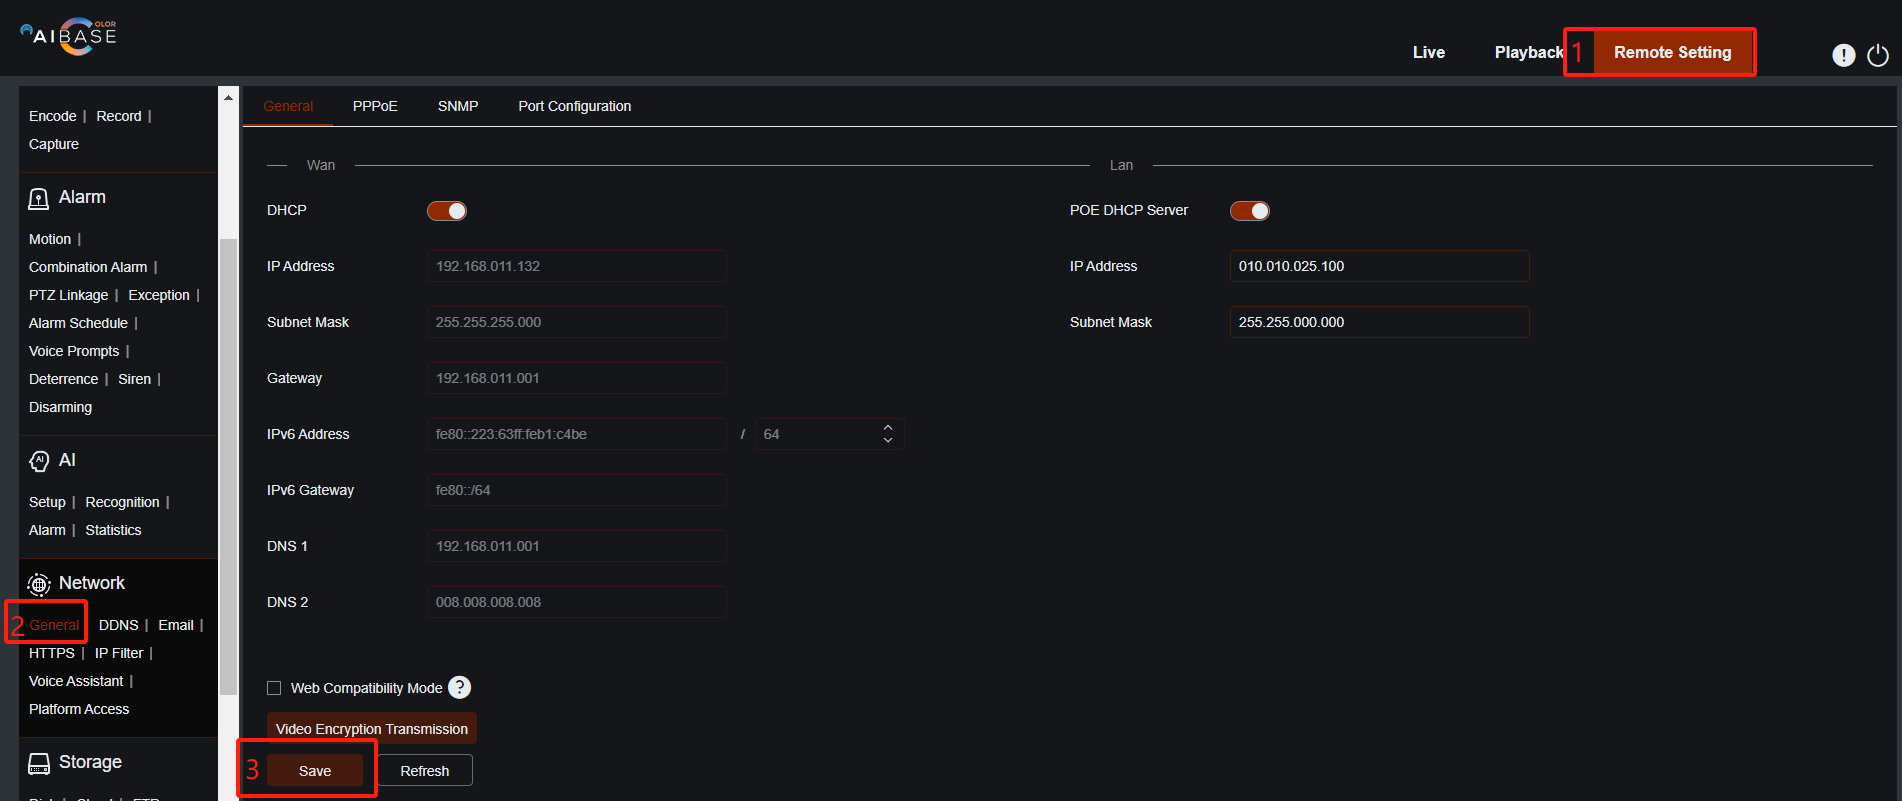
2. On the NVR’s web page, click on "Remote Setting," then choose "General" in the "Network" section. DHCP is enabled by default, but you can disable it and assign the NVR a unique static IP address. After making any modifications, click the "Save" button.
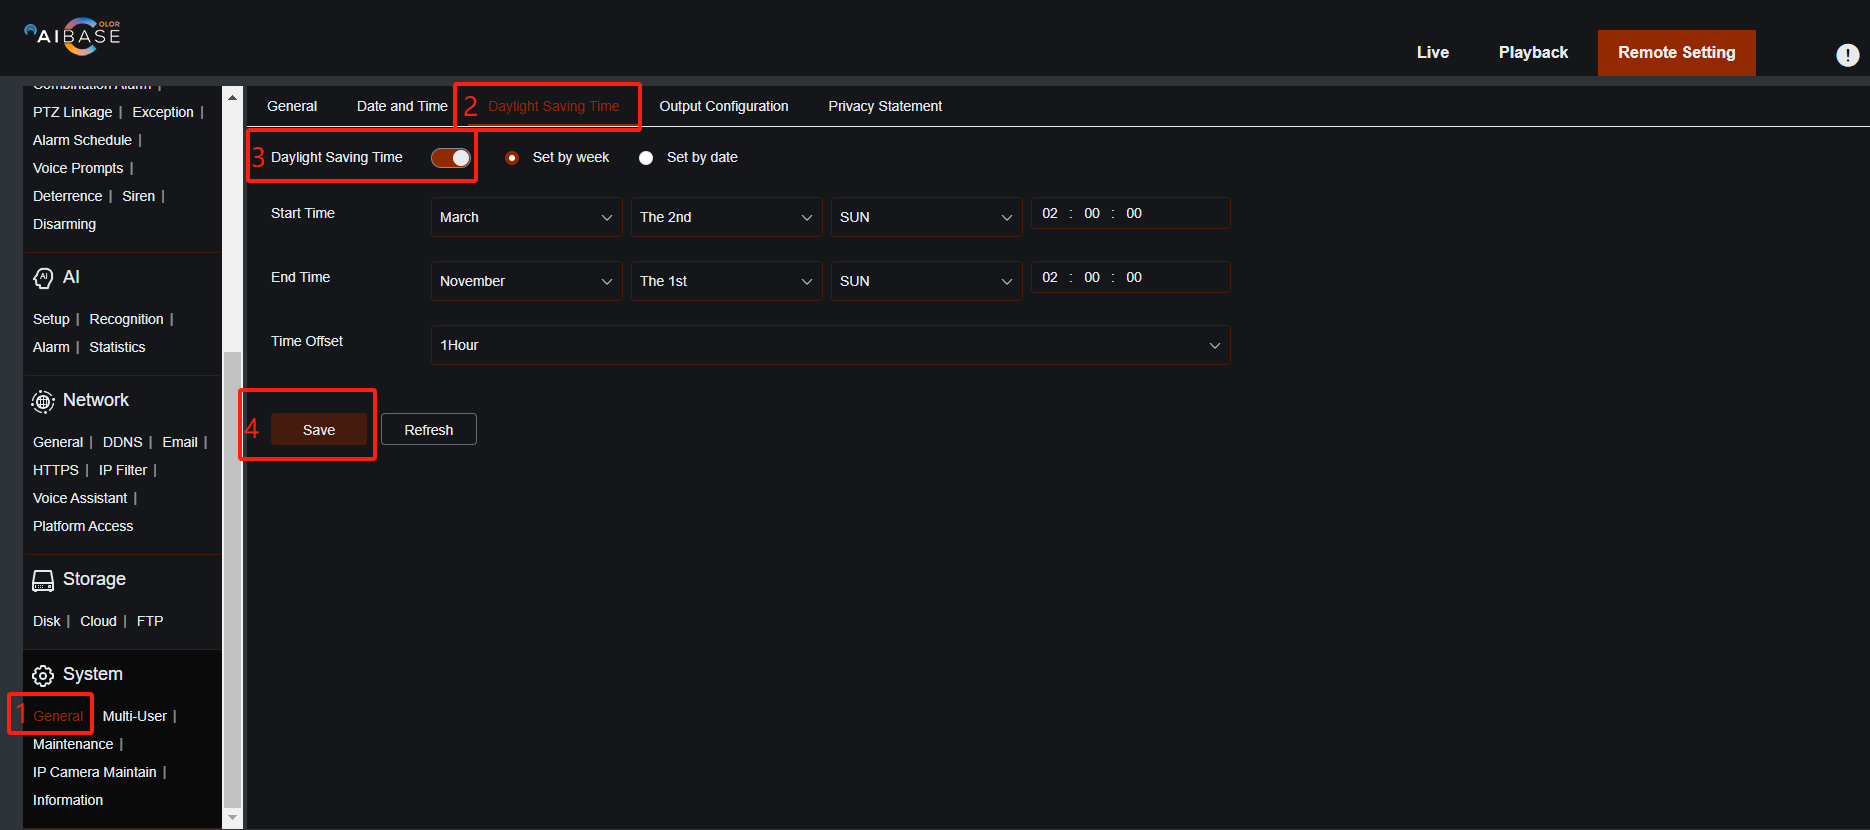
3. Click "General" in the "System" section. Then, click "Daylight Saving Time", enable the feature, and click the "Save" button.
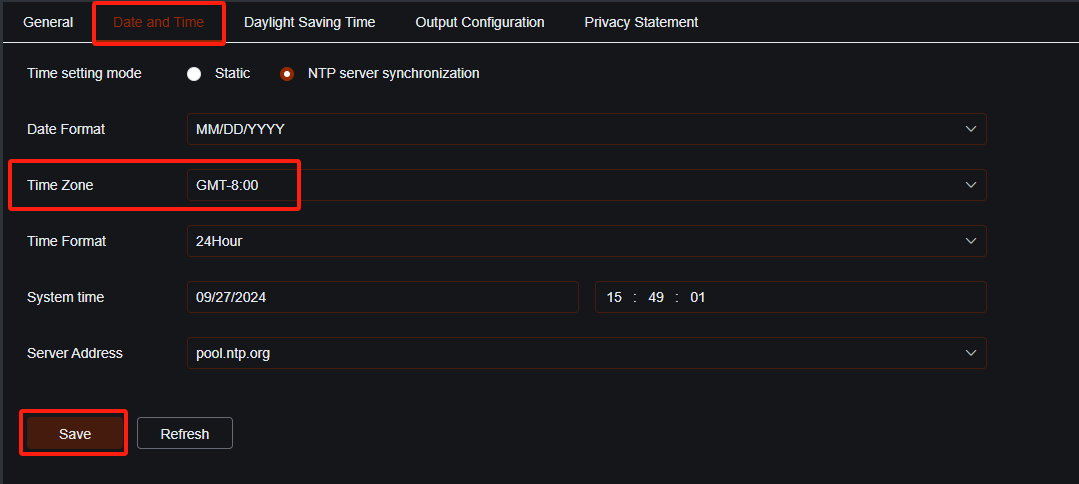
4. Click "Date and Time Zone," select your local Time Zone, and then click the "Save" button.
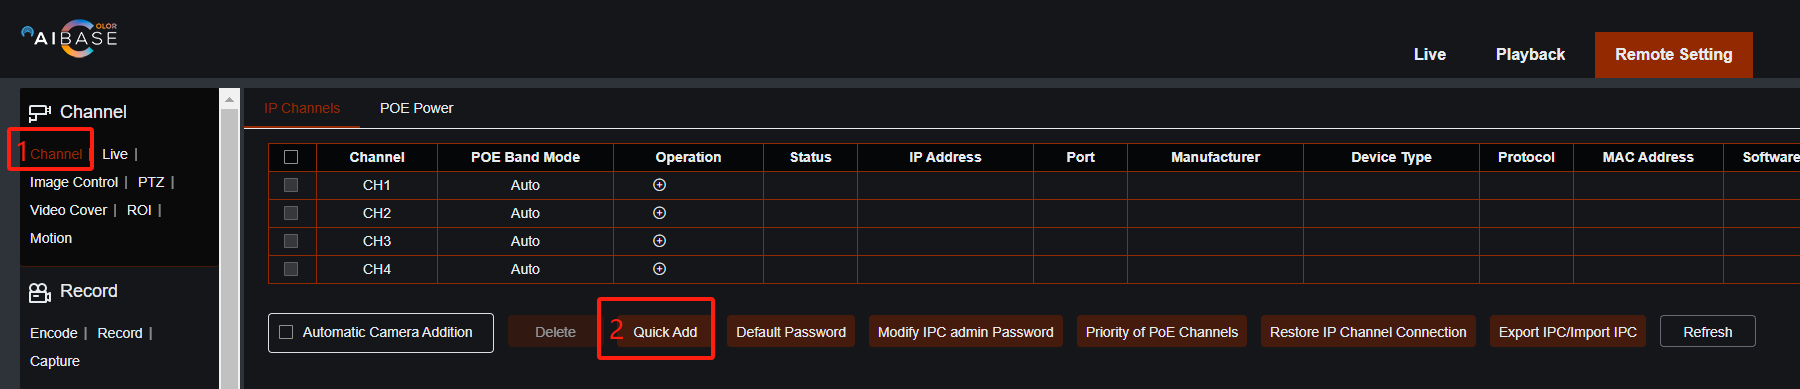
5. Click "Channel" in the "Channel" section, then click the "Quick Add" button to add cameras.
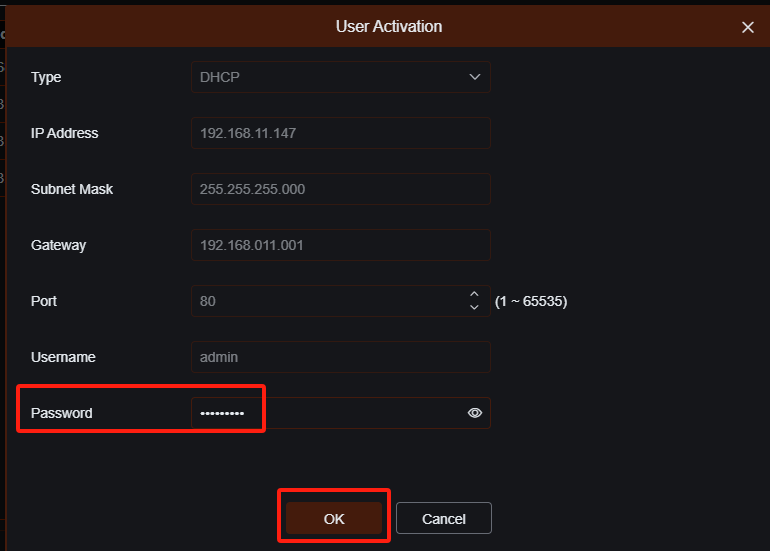
6. If the cameras in the list are inactive, you need to activate them (set up a password for the camera) before adding them to the NVR. You can initialize them one by one, or you can use the AI Color Search tool to batch initialize them. Click the pencil icon for the camera, enter a password, and then click the "OK" button.

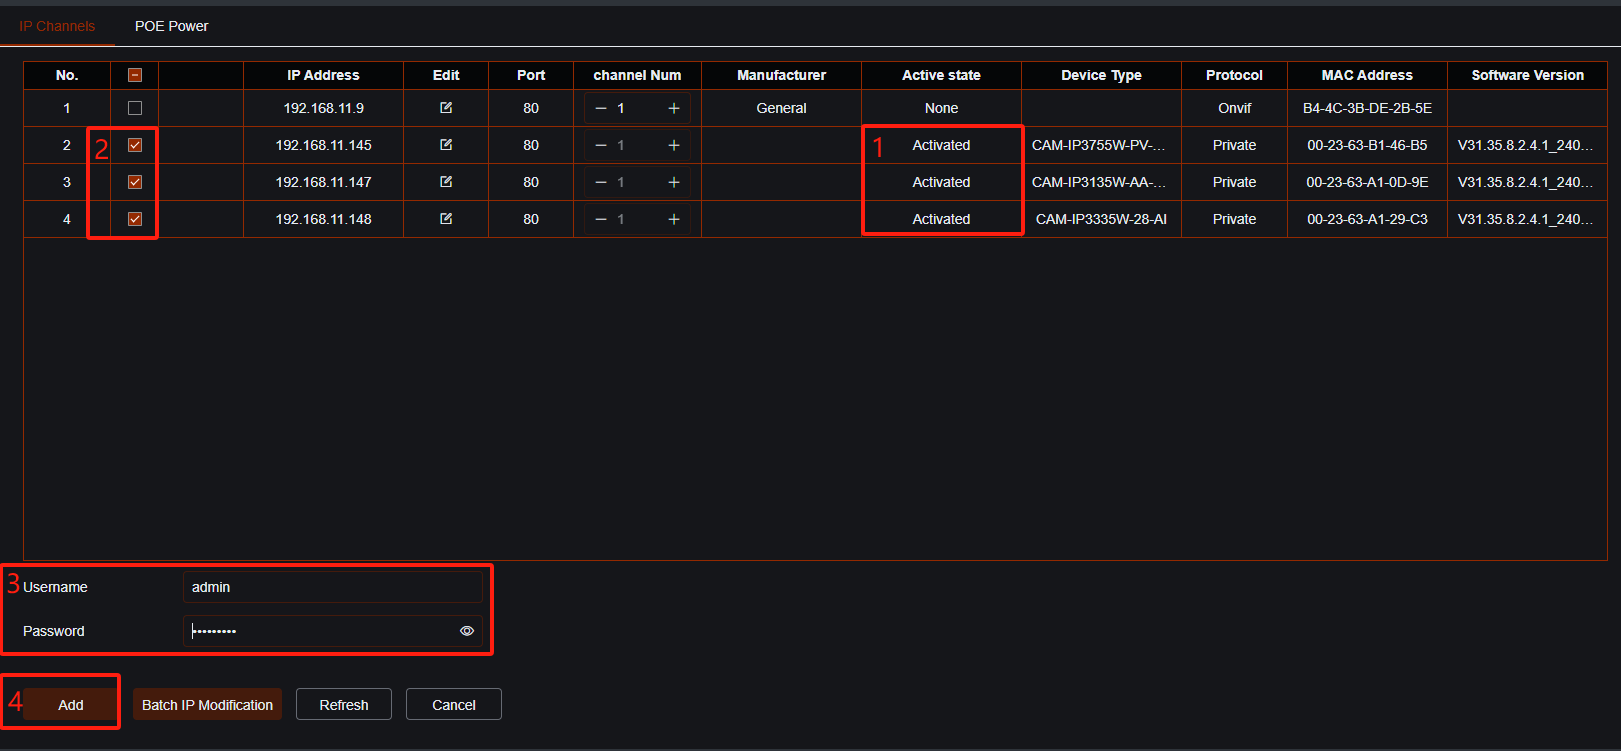
7. After all cameras are activated, check all the cameras you want to add to the NVR, enter the username ("admin") and password (for the cameras), then click the "Add" button.
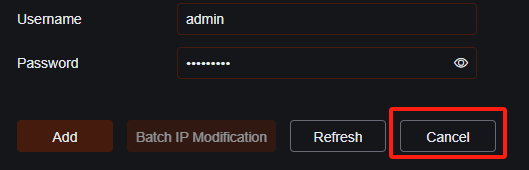
8. Click the "Cancel" button to go back to the "Channel" page.
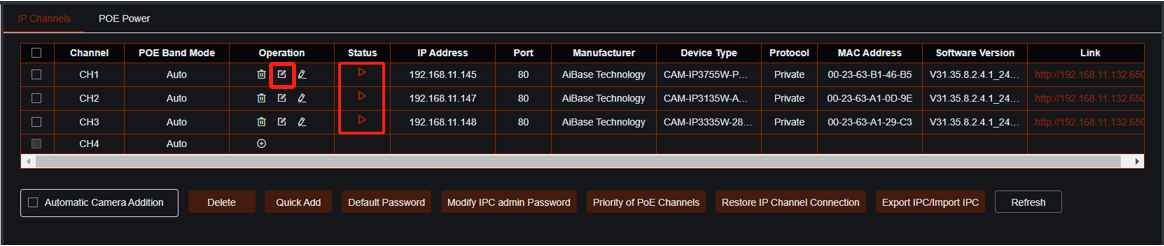
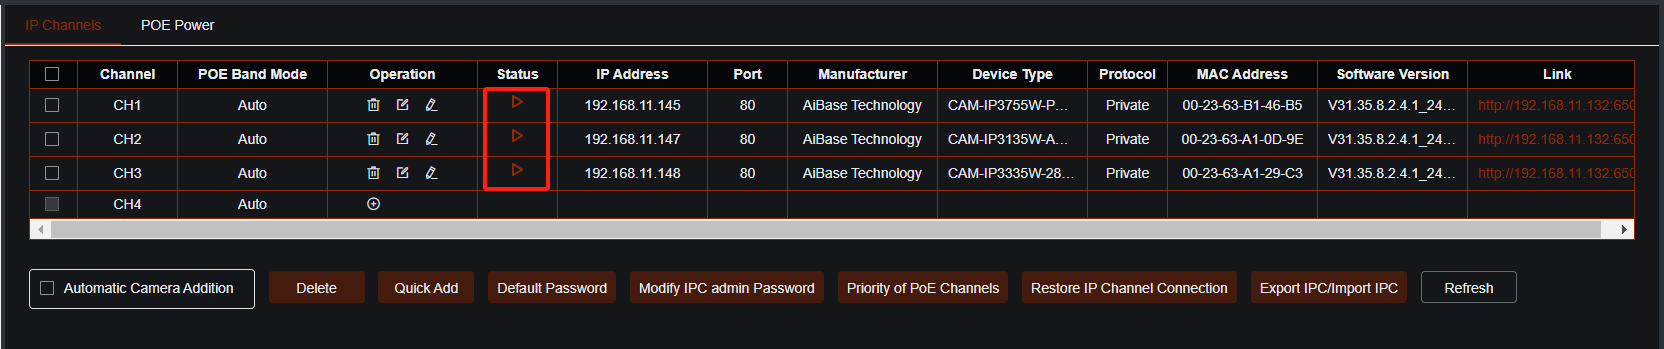
9. The  icon under "Status" indicates the cameras is online.
10. Click on the Edit icon (not the pencil icon) for the cameras you added form the POE switch device. Change the Type to Static instead of DHCP and click on the OK button.