Compatible List:
Model | Version |
NVR-3104-4P-AI-S2 | VC1.2.0-250809 |
NVR-3108-8P-AI-S2 | |
NVR-3216-16P-AI-S2 | |
NVR-3432-AI-S2 | |
NVR-3864-AI |
On the Local Monitor
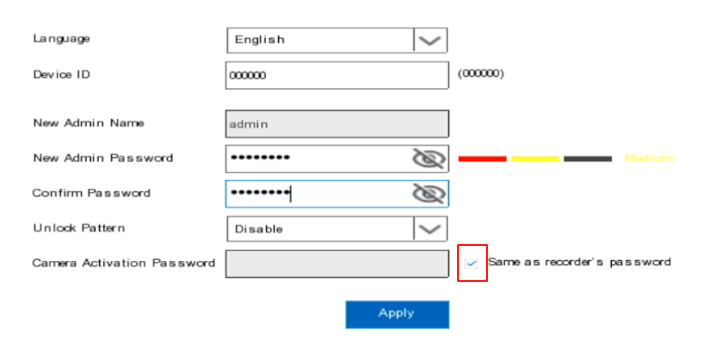
When you first turn on the recorder, you will be prompted to configure some basic settings. The default username for the NVR is 'admin', and there is no default password. The password is set during the initialization process. By selecting the 'Same as recorder’s password' checkbox', all cameras added to this NVR will have the same password as the NVR.
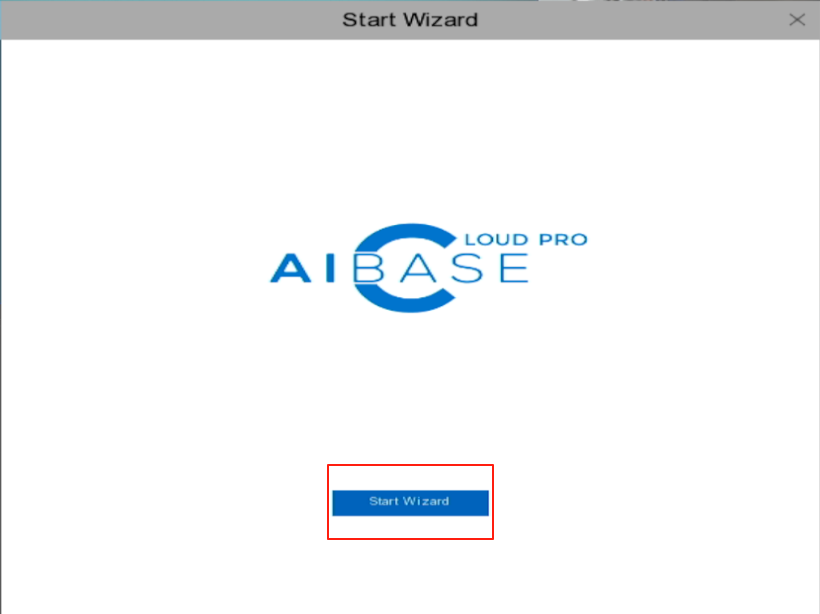
2. Click on the 'Start Wizard' button.
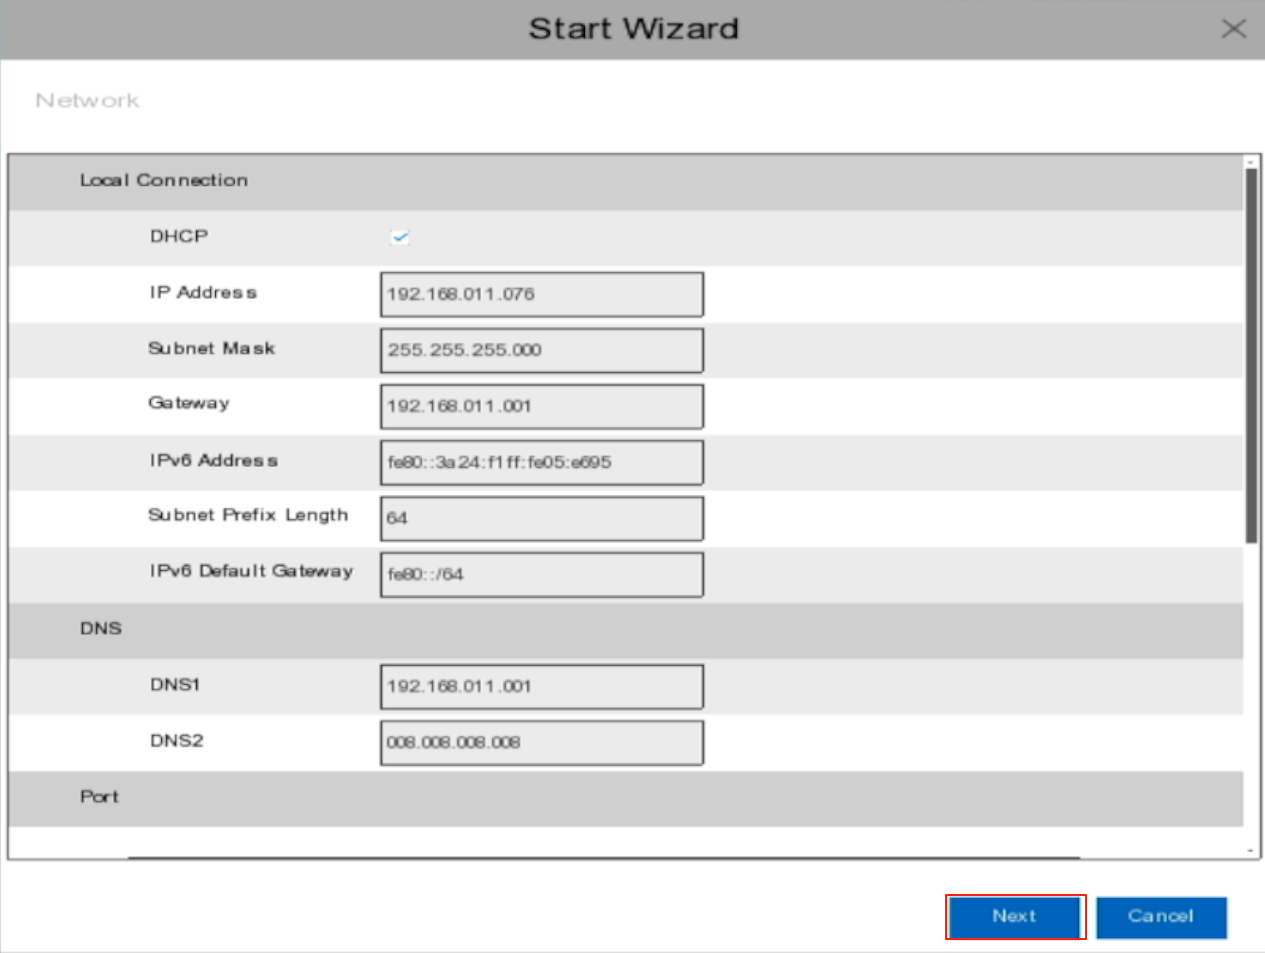
3. DHCP is enabled by default, but you can disable it and assign the NVR a unique static IP address. Click on the 'Next' button.
4. Please select your local time zone and modify the current time.

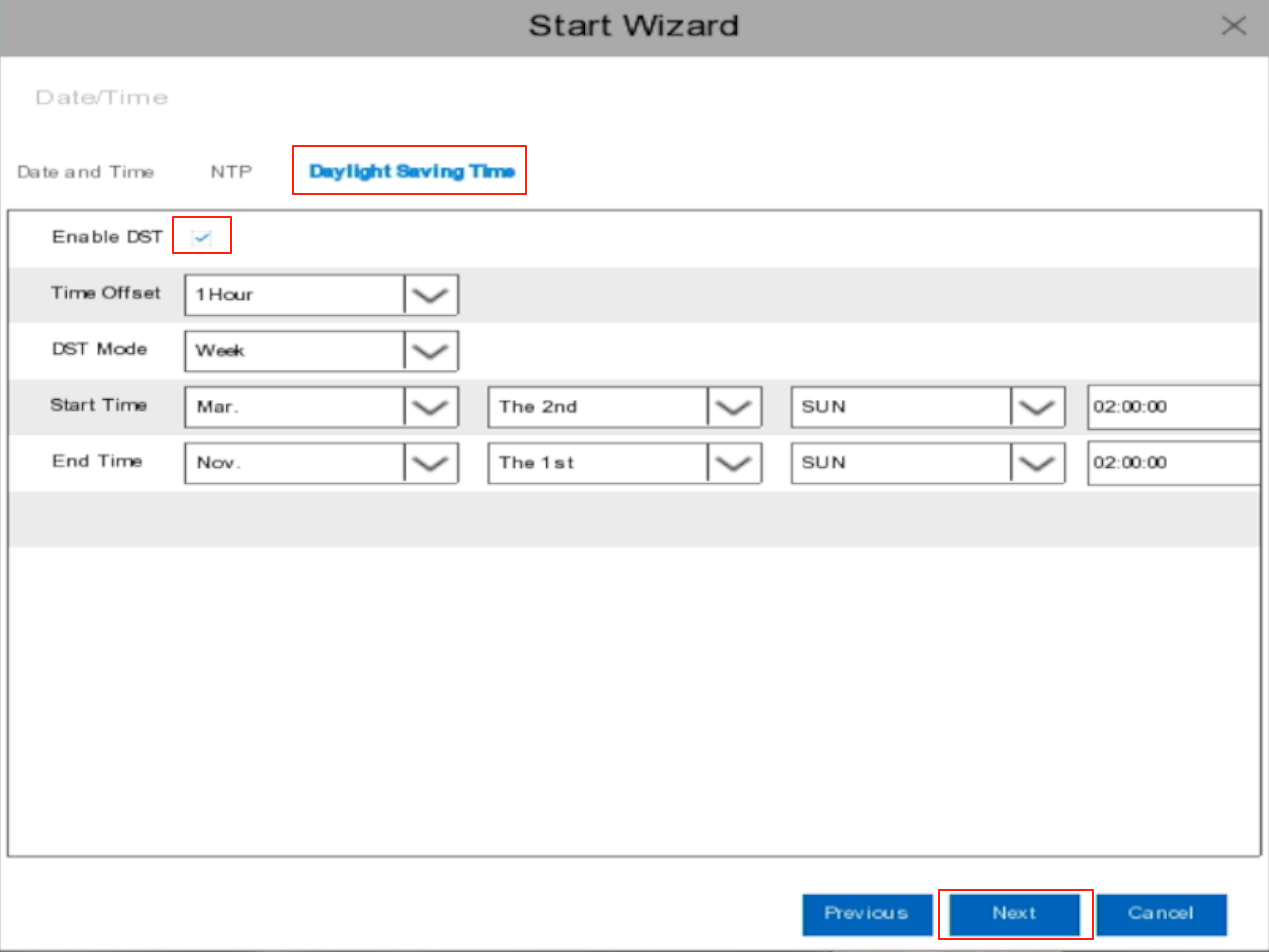
5. Enable DST and click on the 'Next' button.
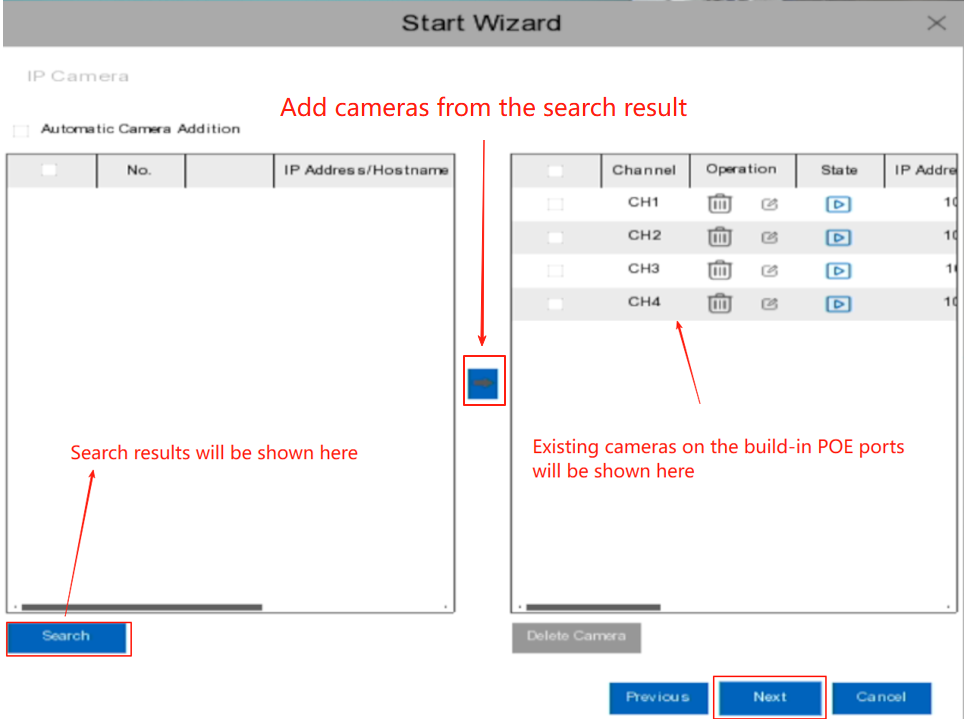
6. Cameras connected to the NVR’s built-in PoE ports appear in the list on the right. To find cameras on an external PoE switch, click the Search button at the bottom left. Select the desired cameras from the search results and click the arrow button in the center to add them.
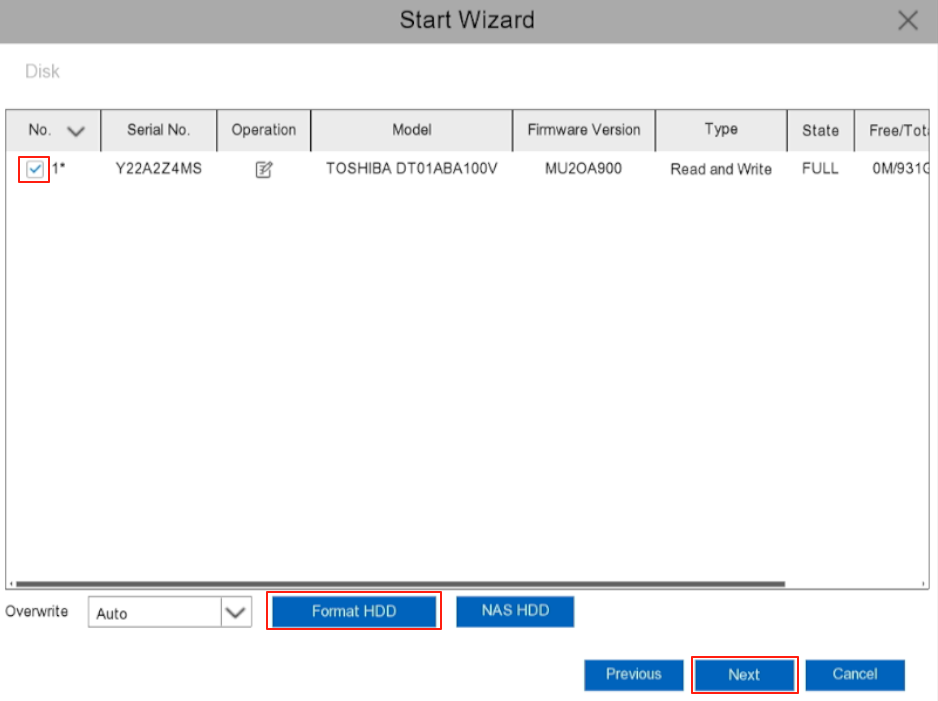
7. After all cameras are added, click the 'Next' button to proceed to the next step. If this is your first time using it, please format the HDD before use.
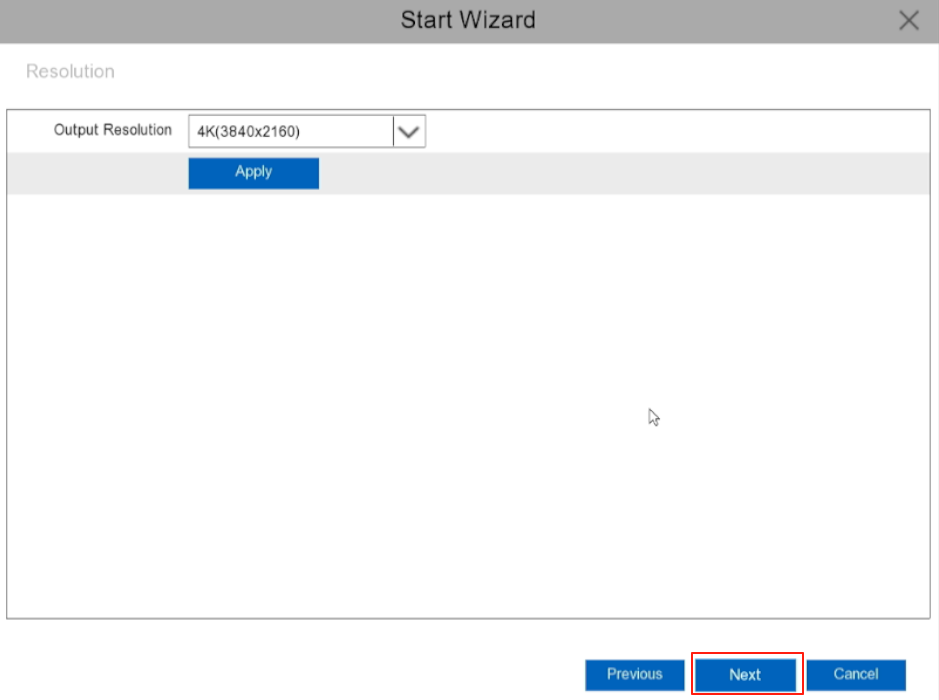
8. Choose the output resolution and click on the 'Next' button.
9. Click on the 'Next' button to continue.
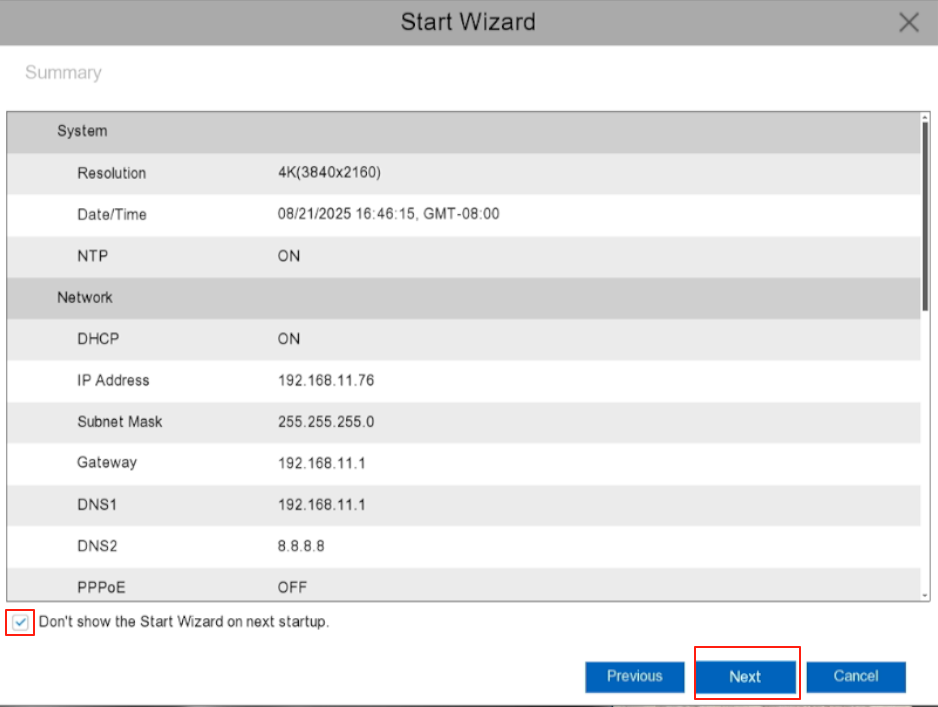
10. Check the checkbox and click on the 'Next' button.
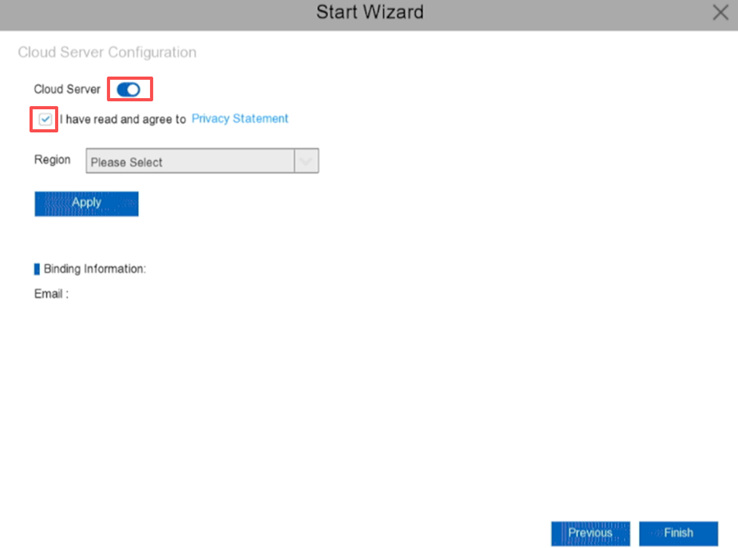
11. Enable Cloud Server, check the box, review the Privacy Statement, and click Apply on the Privacy Statement page.
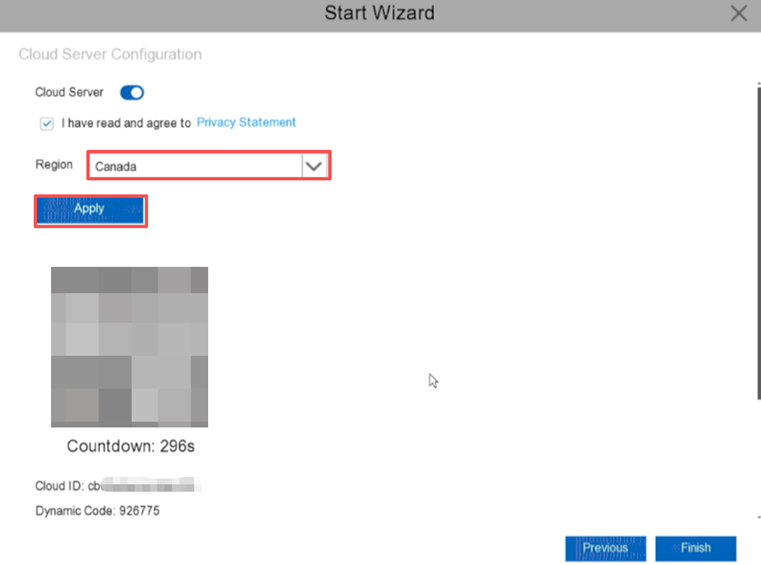
12. Choose your Region, click Apply, then use the AiColor Pro app to scan the QR code within the 5-minute countdown to add the device to your mobile app.
Warning:
Do not use the AiColor Cloud Pro app to scan the QR code on the device sticker.
Steps to download the AI Color Pro app and add a device:
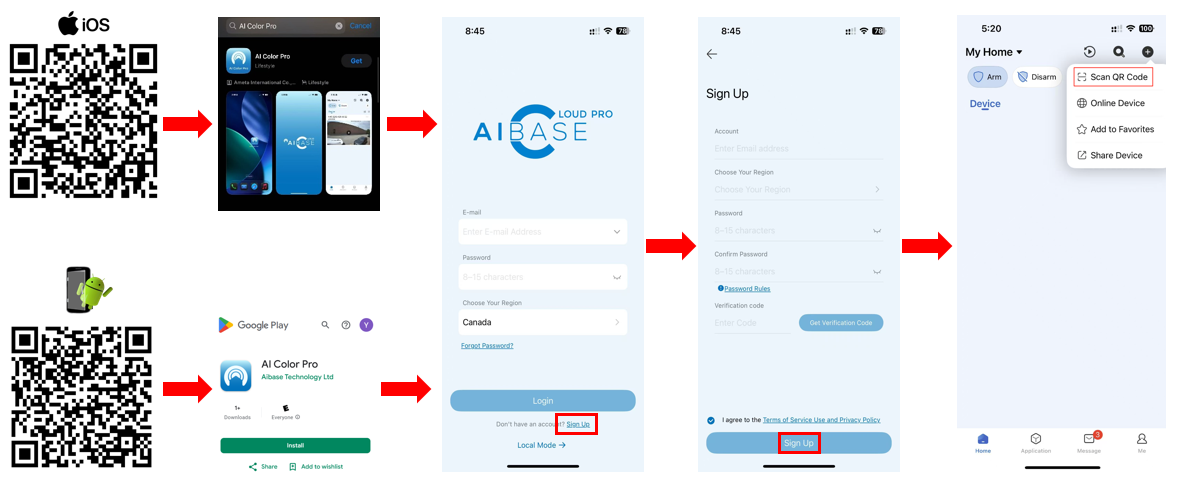
13. Once the device is successfully bound, the binding details will be displayed.
