Description
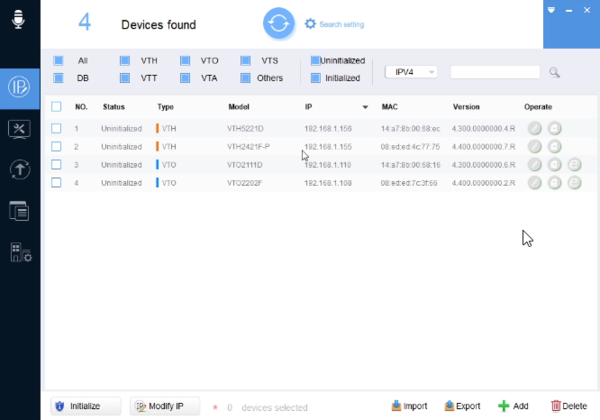
This guide will show how to setup multiple VTO and VTH devices on a network
In this example a VTO will be designated as the main VTO and also act as the SIP server for the installation
Video Instructions
Step by Step Instructions
Main VTO Setup (SIP Server)
- Find the VTO you would like to make the Main
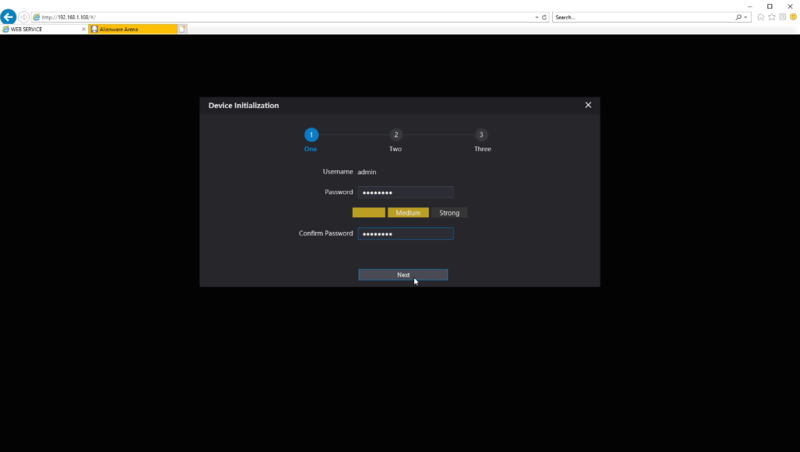
- Type the IP Address on a browser and setup a password for the VTO. In this tutorial we used admin123
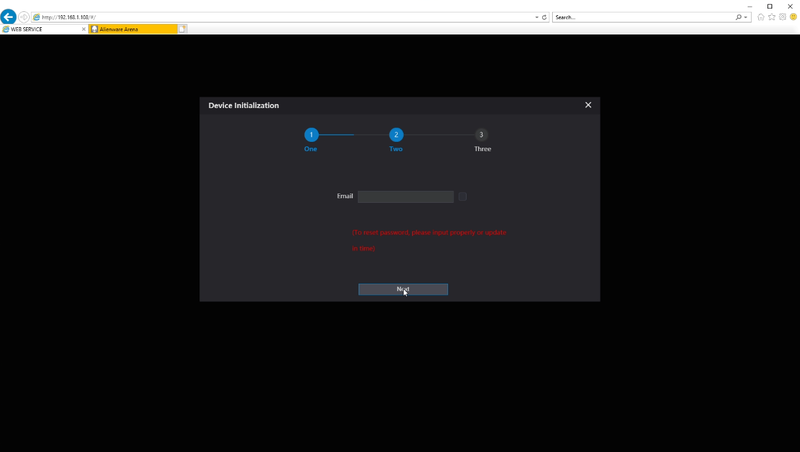
- Please enter an email in case you lose the admin password
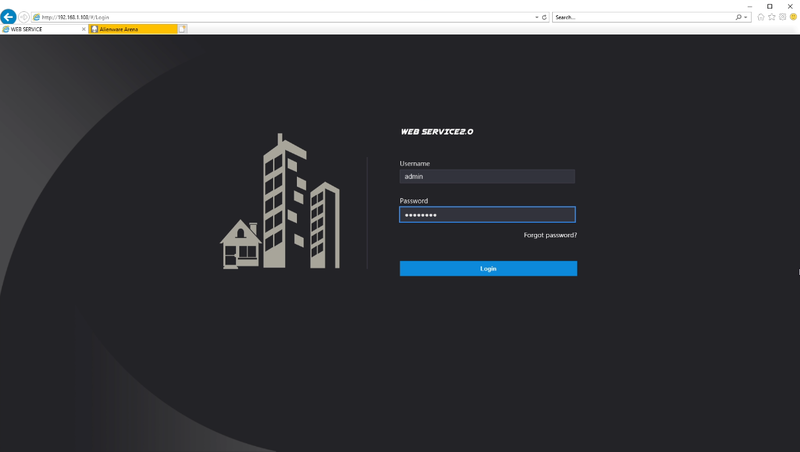
- Login to the WEBUI using the password you just created
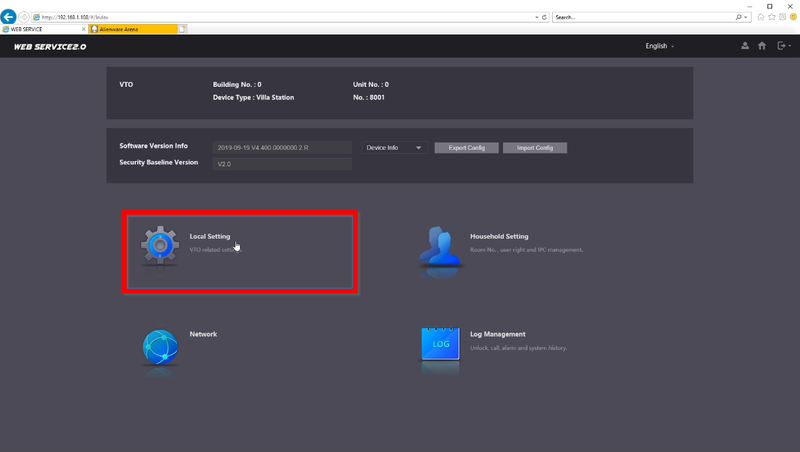
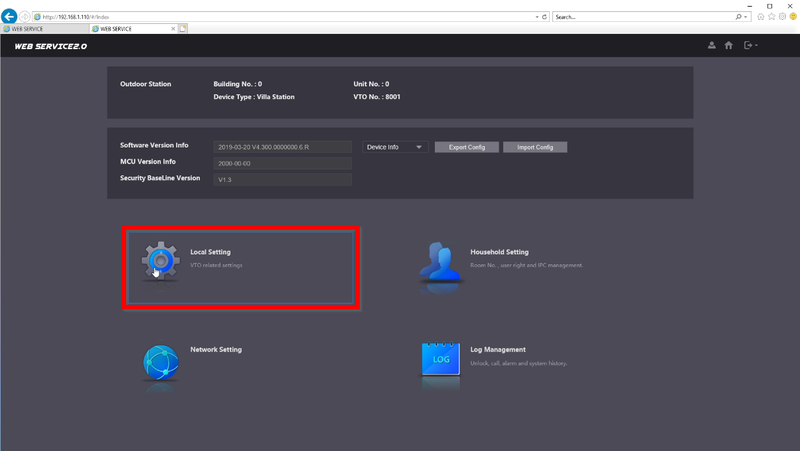
- First step is to go to "Local Setting"
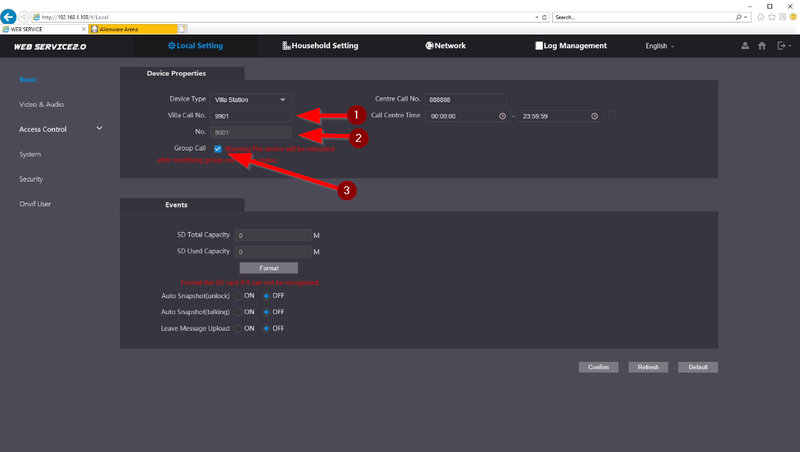
- Review the settings and make sure Group Call is enabled
Villa Call No. : This indicates the Room No on the VTH it will reach out too
No. : No. is the VTO Number. It can be changed when SIP server is disabled Group Call: This will call all VTHs on the same Room No family including Extensions
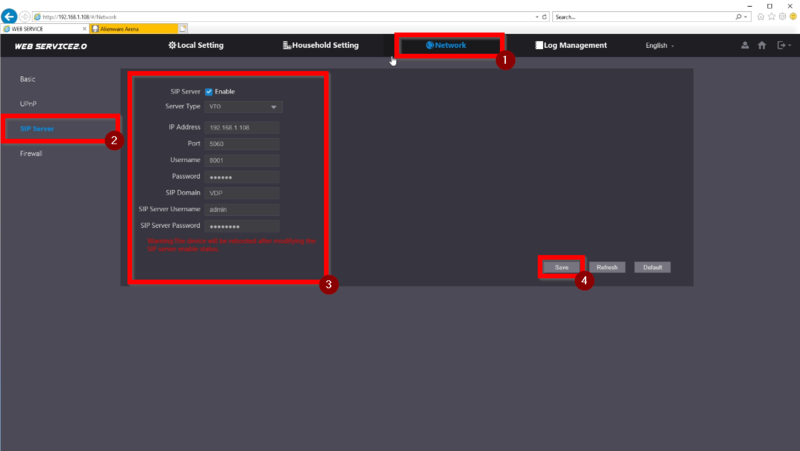
- Navigate to over to Network -> SIP Server (You will need to Disable the SIP Server in order to make changes)
SIP Server: Enabled
Server Type: VTO
IP Address: 192.168.1.108 (Master VTO)
Port: 5060
Username: 8001
Password: (Leave default)
SIP Domain: VDP
SIP Server Username: (Leave default)
SIP Server Password: (Leave default)
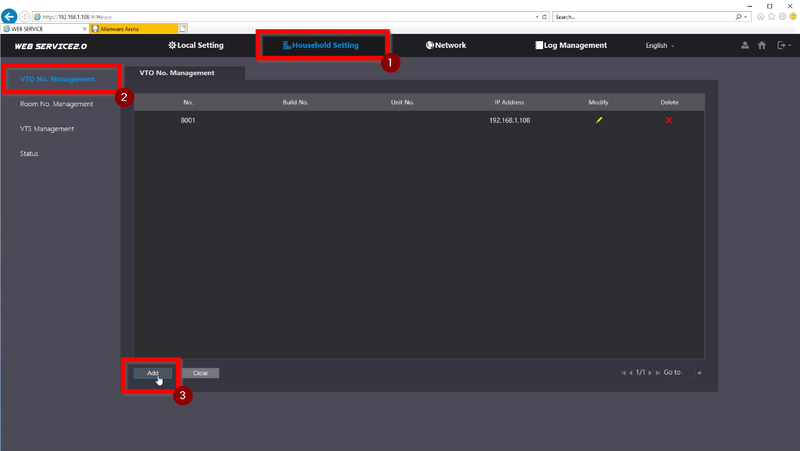
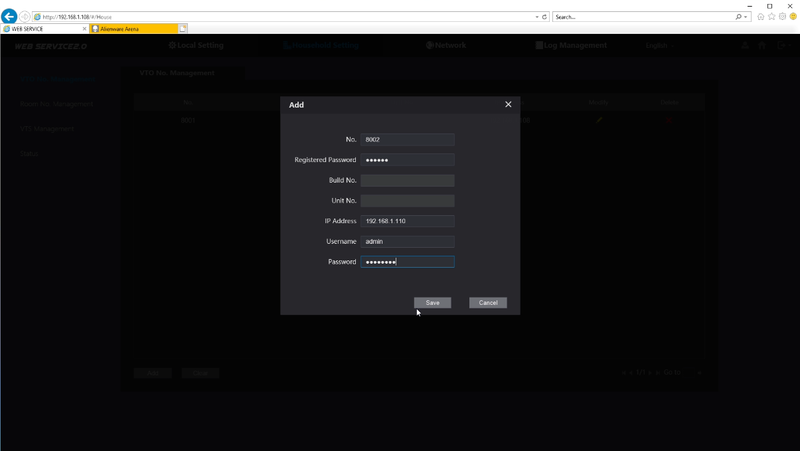
- Navigate over to VTO No. Management and click on "Add" to add the SUB VTO we will be adding later
- Enter the info and credentials of the SUB VTO we will be using
No.: 8002
Registered Password: (Leave default)
Build No.: (Leave default)
Unit No.: (Leave default)
IP Address: 192.168.1.110
Username: admin
Password: admin123
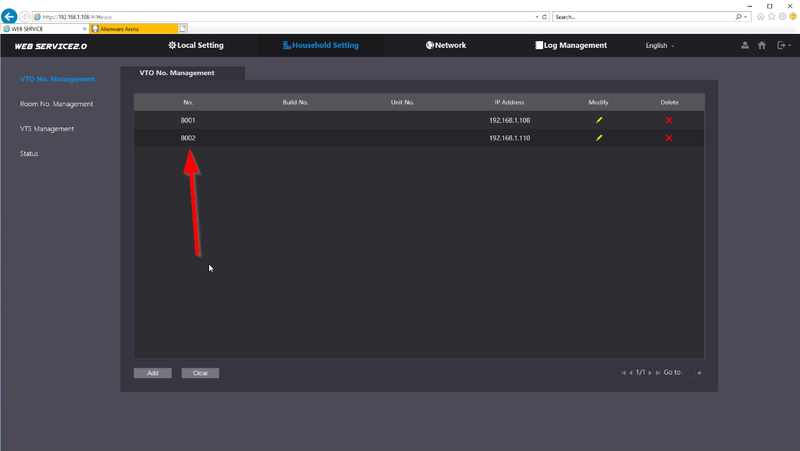
- Once added you will see the entry in the list.
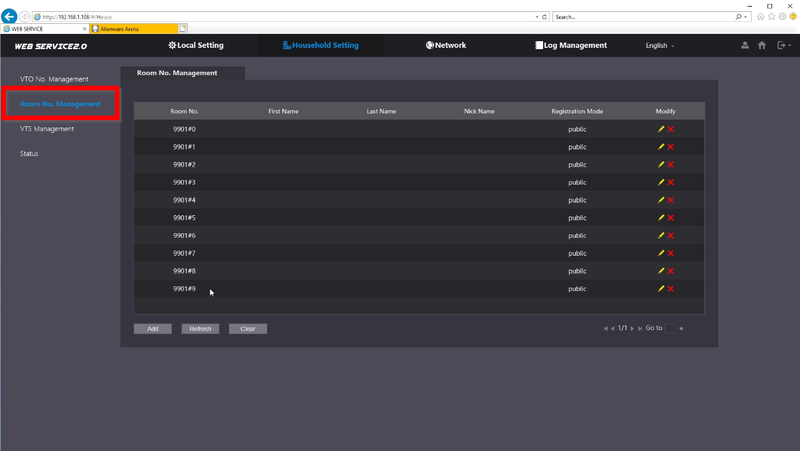
- The VTHs should already be added by default.
If not please add the Master VTH 9901#0 and any other extensions needed by adding #1, #2, etc..
SUB VTO Setup
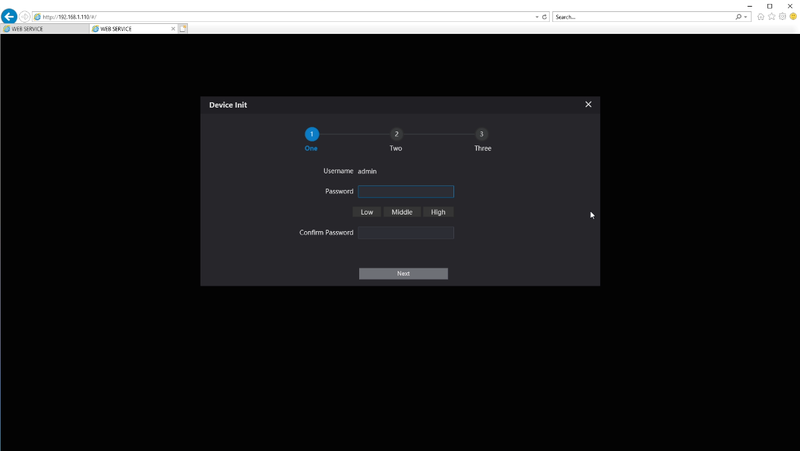
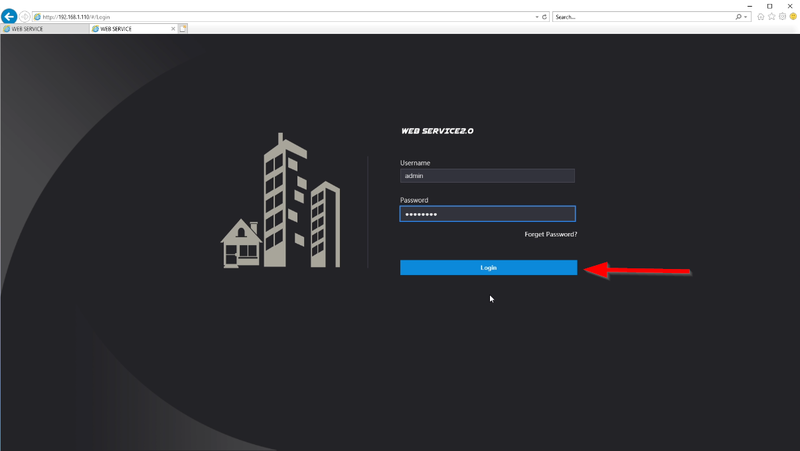
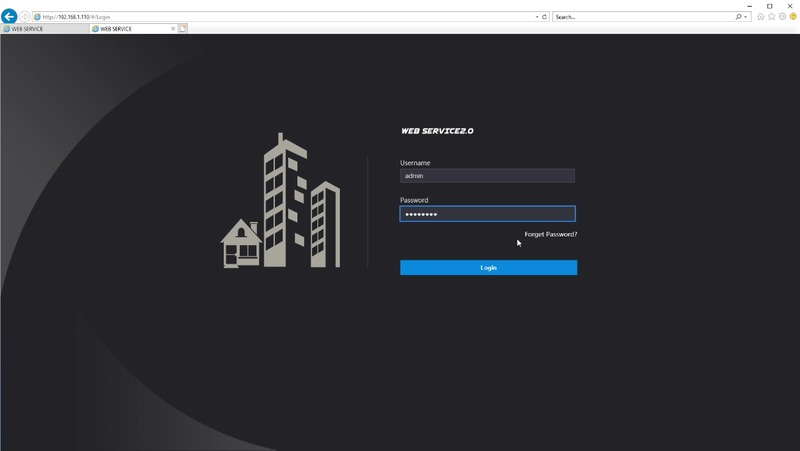
- Use the IP Address of the SUB VTO to login to the WEBUI. Go through the Initialization phase.
- Login with the password we just created. In this tutorial we used admin123
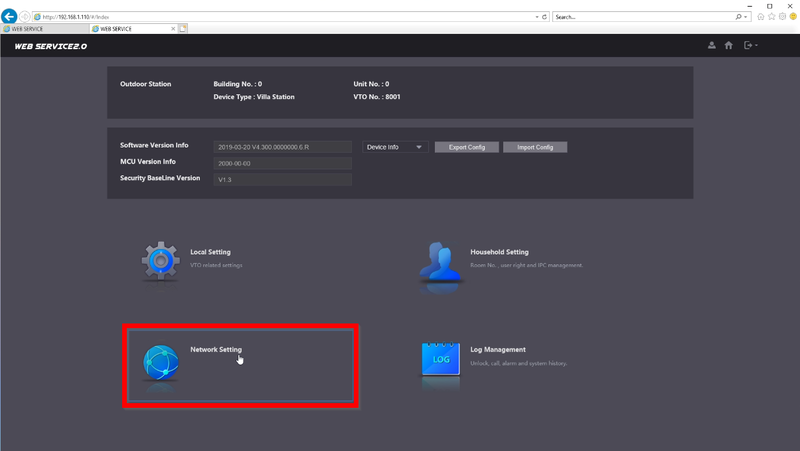
- Go to "Network Settings"
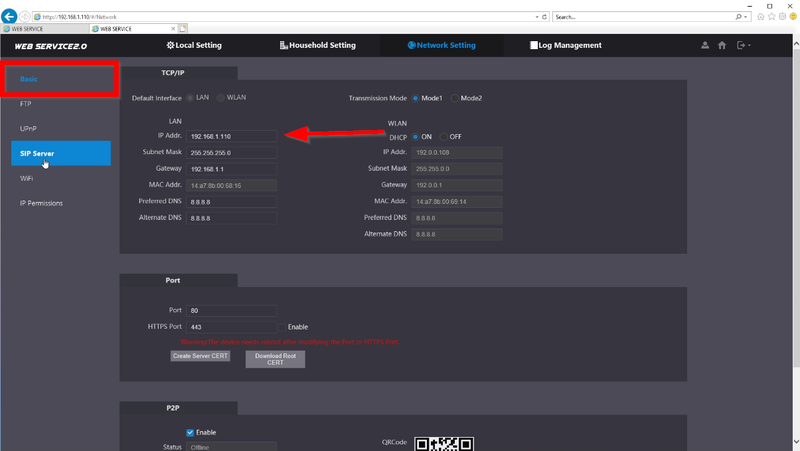
- We will be using 192.168.1.110 for the SUB VTO
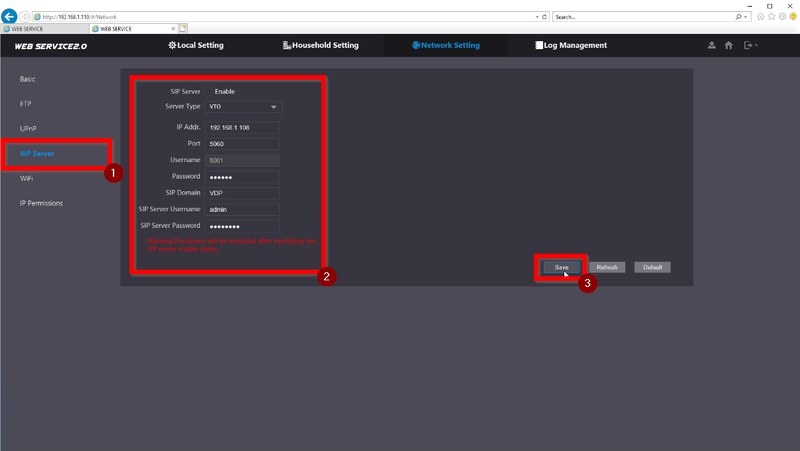
- Go to SIP Server and enter the SIP Server Information. The device will reboot after saving the settings.
SIP Server: Disabled
Server Type: VTO
IP Address: 192.168.1.108
Port: 5060
Username:8002 (this will not be changeable until the device reboots)
Password: (Leave Default)
SIP Domain: VDP
SIP Server Username: (Leave default)
SIP Server Password: (Leave default)
- Login after the reboot
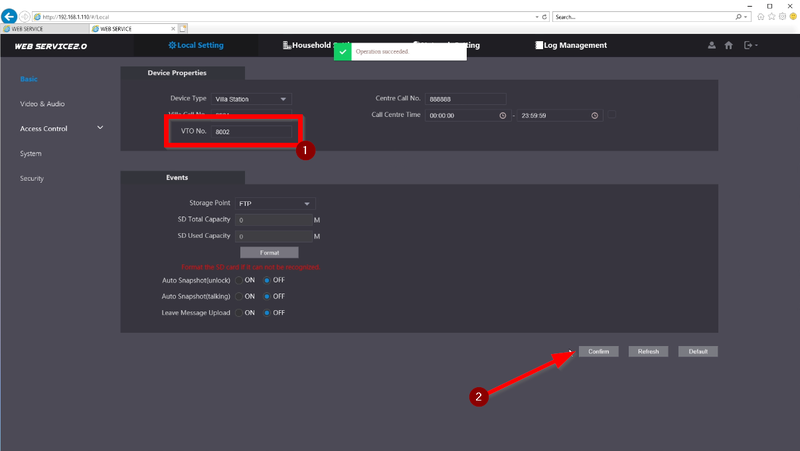
- Go to Local Settings
- Change the VTO No. to 8002 and click on "Confirm" to save
Main VTH Setup
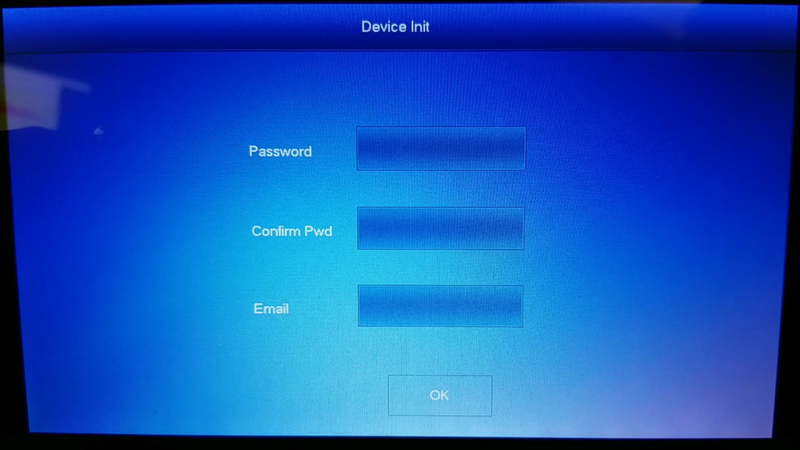
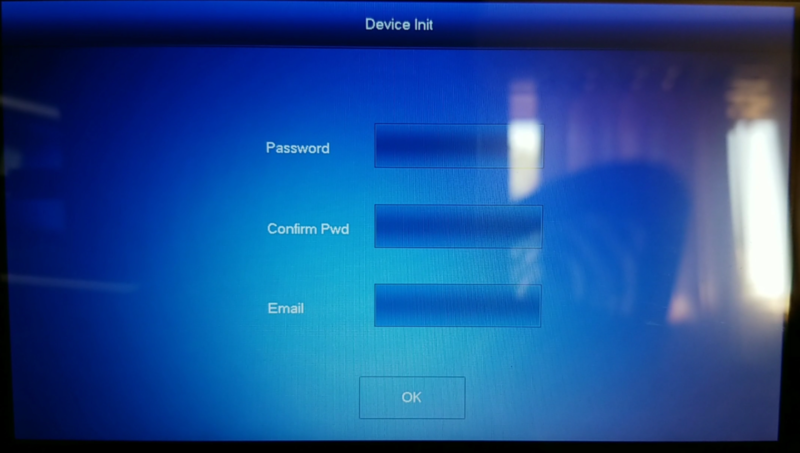
- Initialize the VTH with a password and email. In this tutorial we used 123456
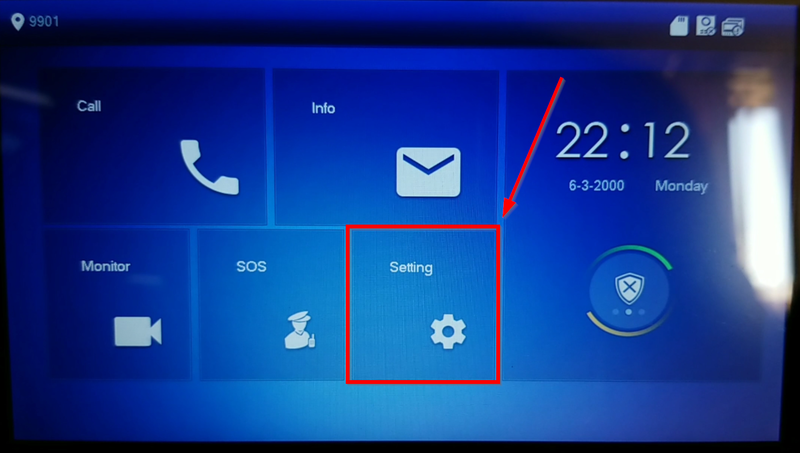
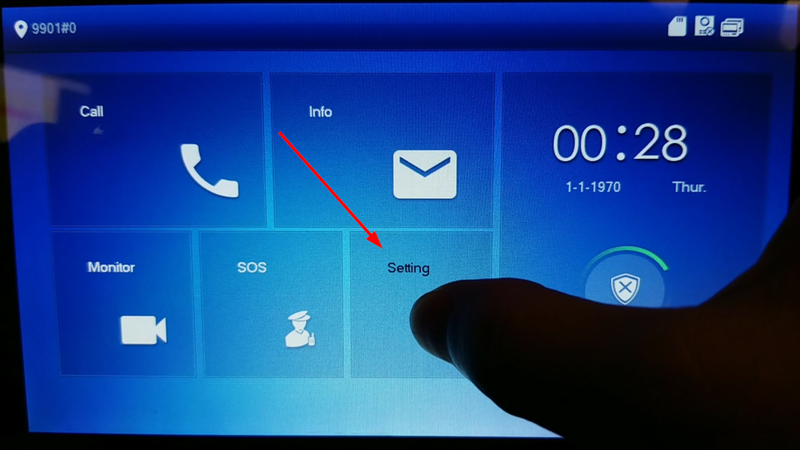
- Tap and hold the settings icon to enter the Configuration settings and use the password you initialized the VTH with
Note: a single tap will enter the general settings so be sure to tap and hold until the login prompt comes up. General Settings uses default password "123456"
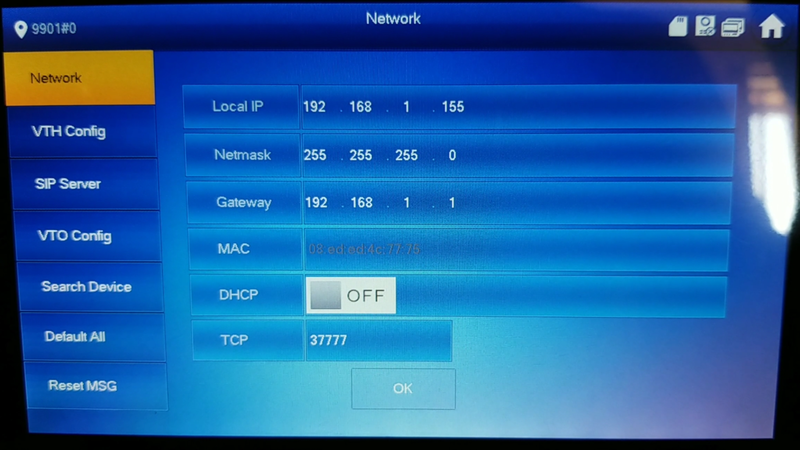
- We will be using IP Address 192.168.1.155 for the Master VTH
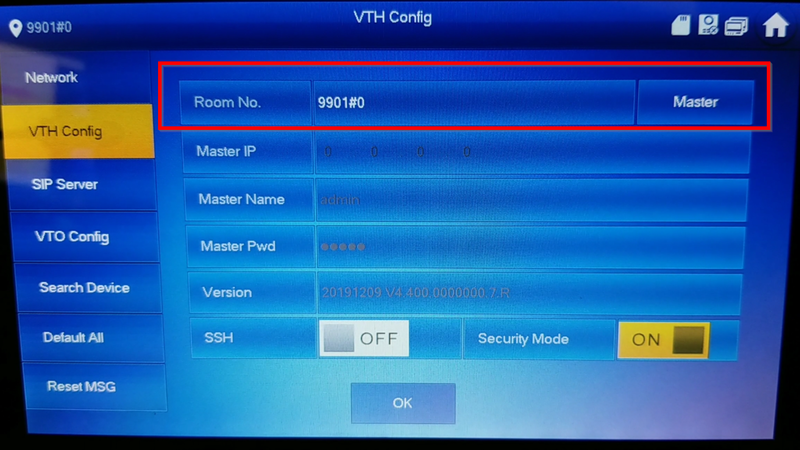
- Go to VTH Config and confirm that the Room No. is 9901#0 with the label as "Master"
The #0 indicates that its the master. #1 will be the first following Extension followed by #2, #3, etc..
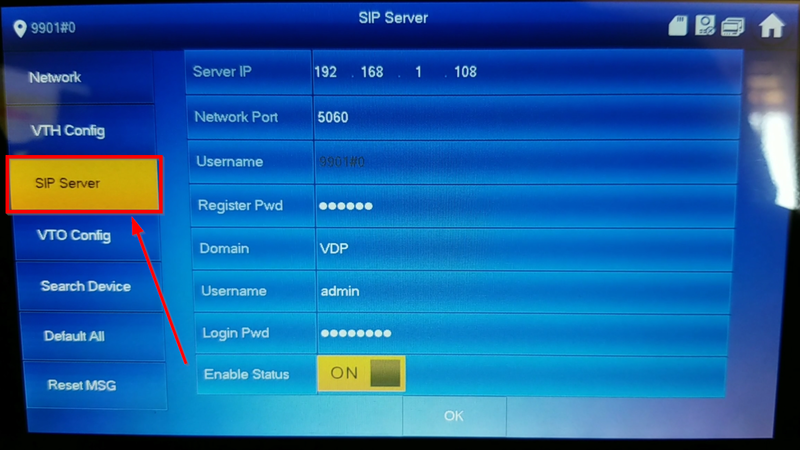
- Go to SIP Server and enter the SIP Server information
Server IP:192.168.1.108
Network Port: 5060
Username: 9901#0
Register Pwd: (Leave Default)
Domain:VDP
Username: (Leave default)
Password: (Leave default)
Status: ON
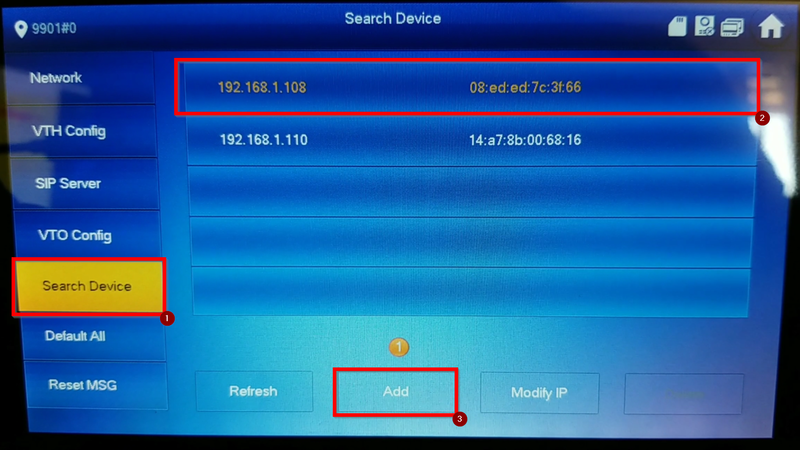
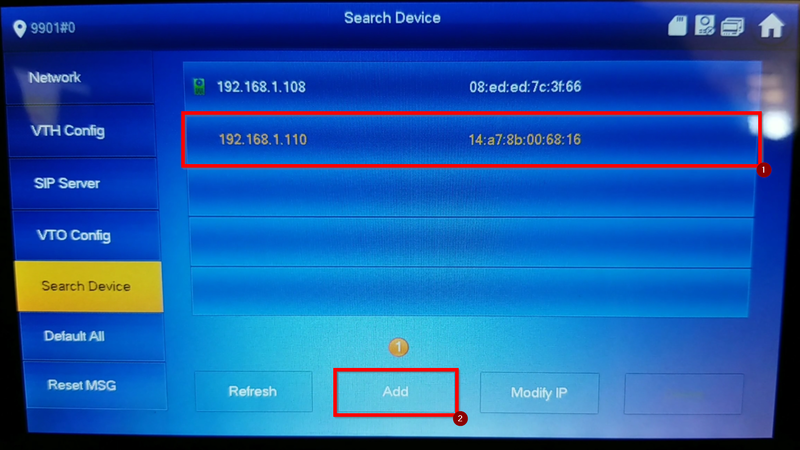
- No we need to add the VTOs to be able to Monitor through the VTH's Home Screen.
Highlight the Main VTO and tap on "Add"
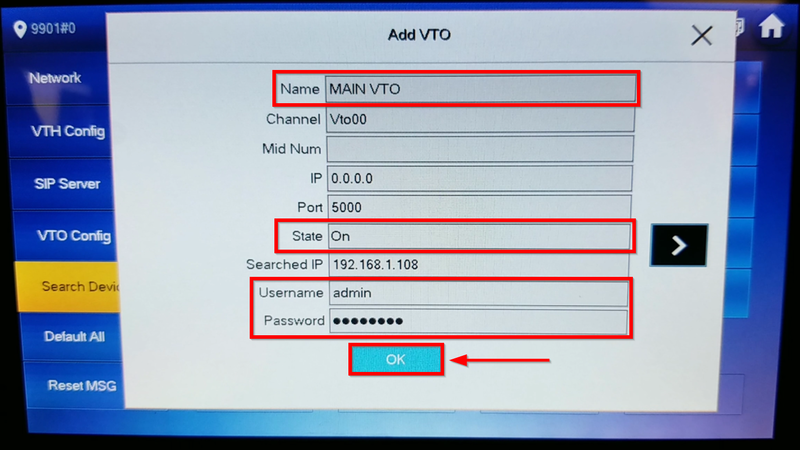
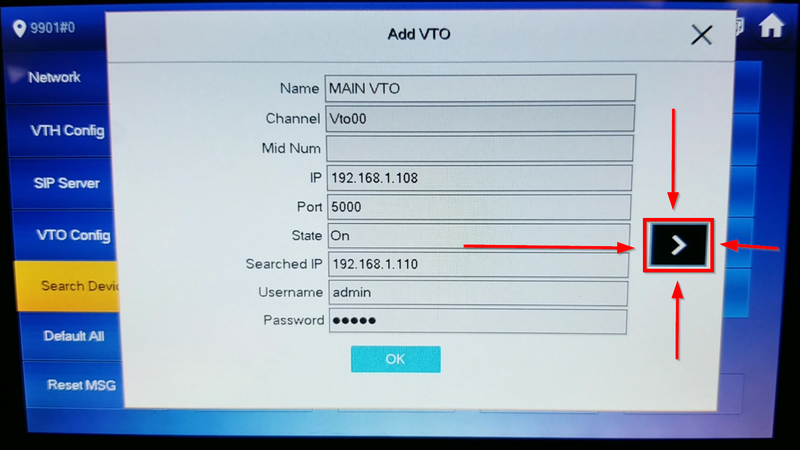
- Enter only the highlighted sections
Name: (Nickname so enter any name to identify the Master VTO)
State: ON
Username: admin (VTO username)
Password: admin123 (VTO Password)
- A green icon will appear next to the VTO added. Now Tap and highlight the Sub VTO and click on "Add"
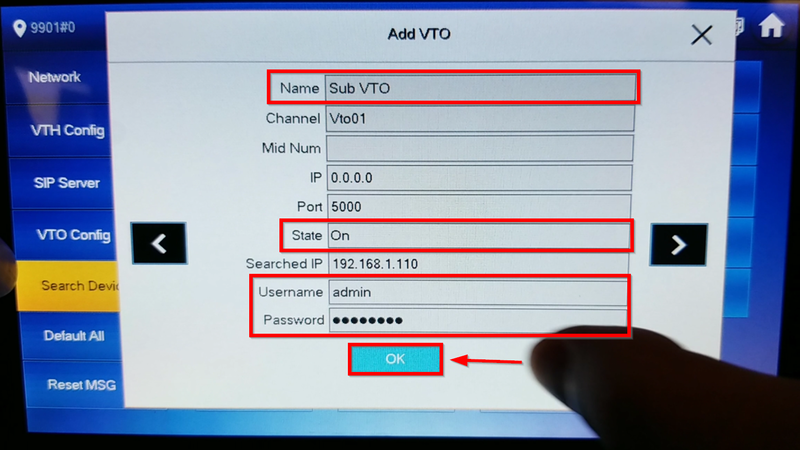
- The same prompt will appear but don't override the Main Entry, click on the arrow to go to the second entry.
- Change only the highlighted sections
Name: (Nickname to identify the SUB VTO)
State: ON
Username: admin (SUB VTO username)
Password: admin123 (SUB VTO Password)
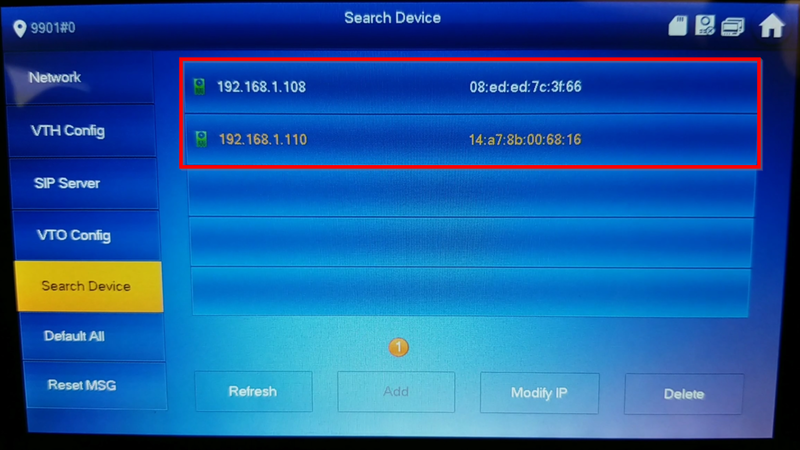
- Both devices will show a green icon after being added.
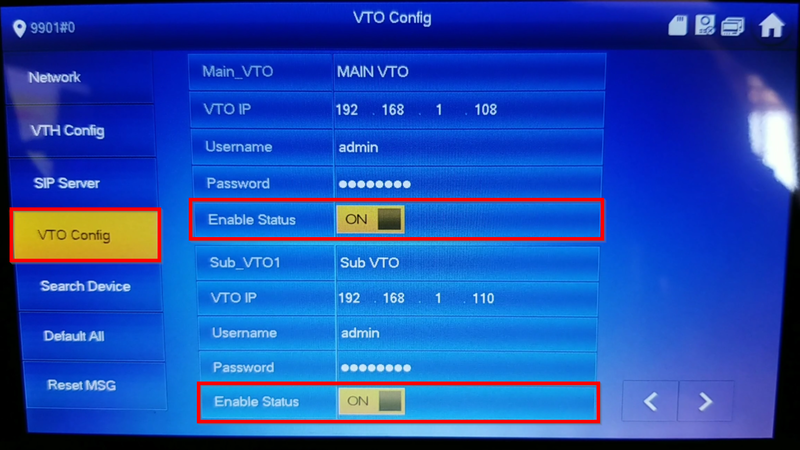
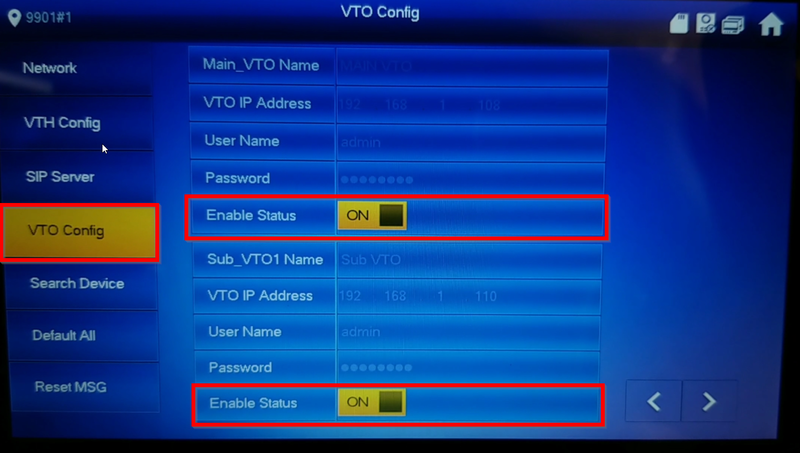
- Go to "VTO Config" and confirm that the status on all added VTOs are enabled.
Sub VTO Setup
The Extension VTH will grab the information from the Master VTH if configured properly
- Initialize the SUB VTO that will be acting as the first Extension
- Enter the Configuration Settings by taping and holding the settings icon
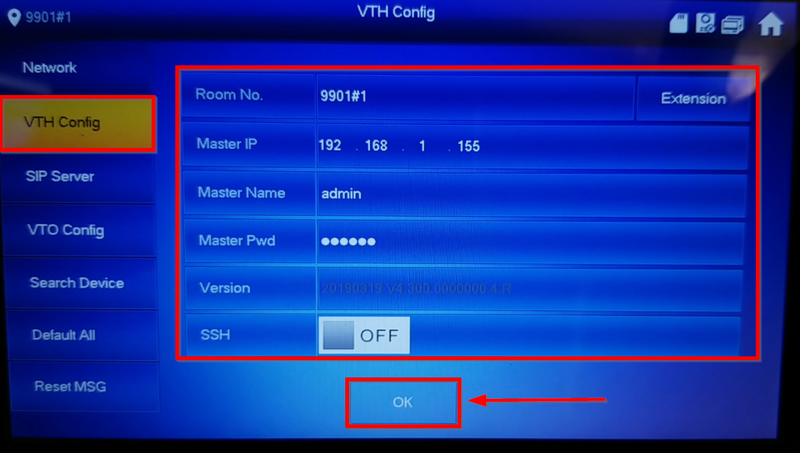
- Go to VTH Config and change the label to "Extension". Be sure to change the Room No to the first extension by adding #1 after 9901. Click OK to Save
Room No.:9901#1
Master IP: 192.168.1.155 (Enter the IP Address of the Main VTH)
Master Name: admin (username of the Main VTH)
Master Pwd: 123456 (Password of the Main VTH)
- If Step 3 was successful you should see the entries of the VTOs. Be sure to enable them
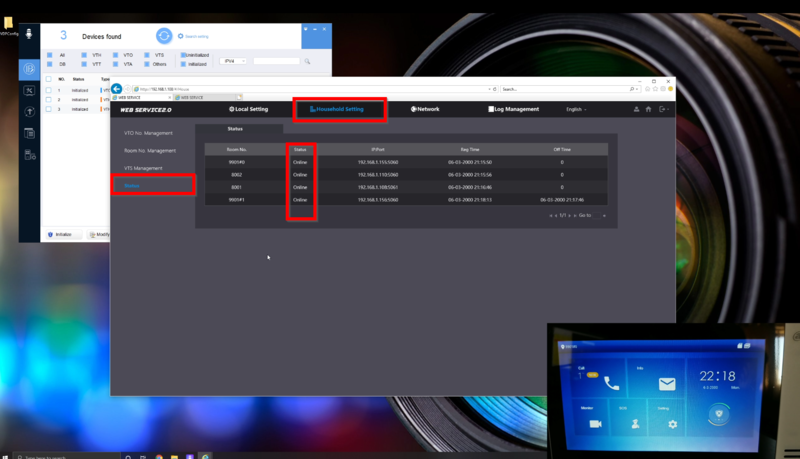
- All devices should be online and ready to call.
