Description
When a face is detected in the area, the system compares the face image captured with faces added to the face database and can link to an alarm output based on the comparison result.
Initial Setup for Recorder
-
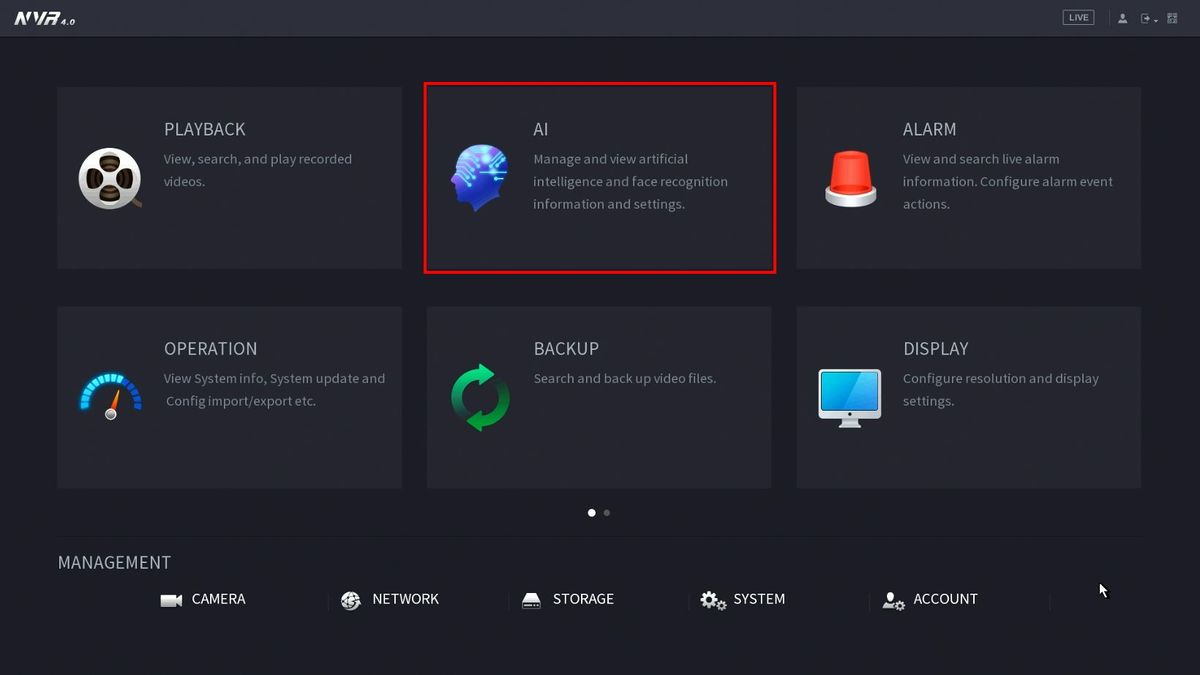
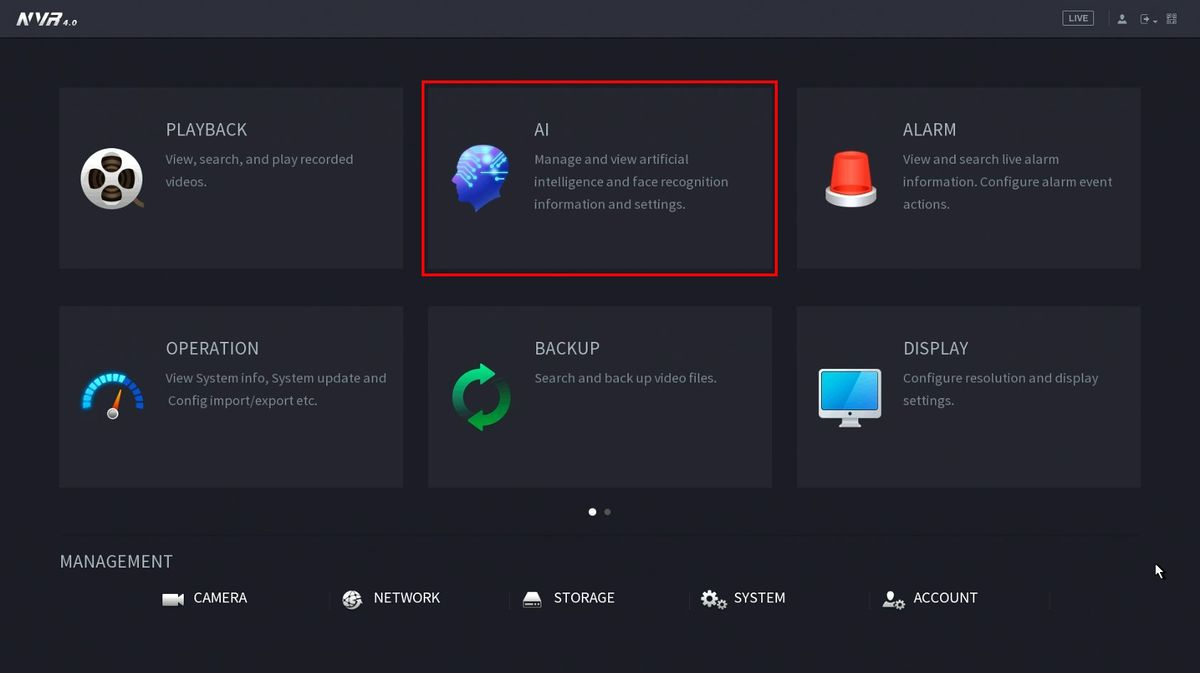
Enter the Main Menu and select AI
-
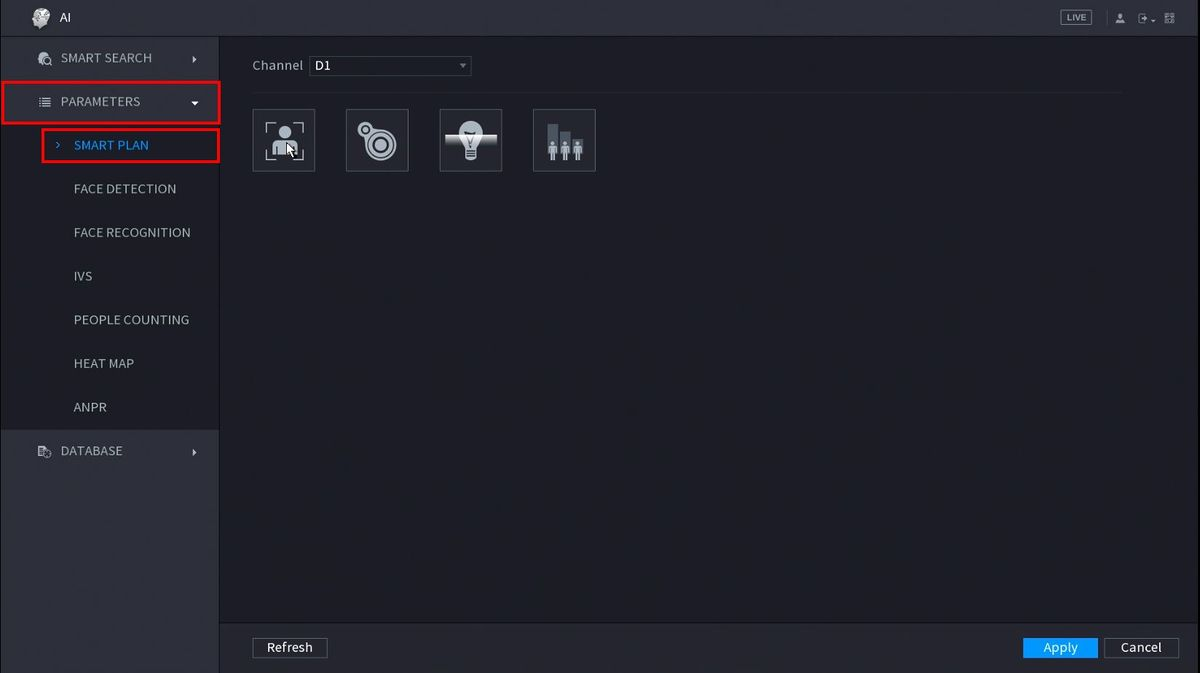
Click Parameters > Smart Plan
-
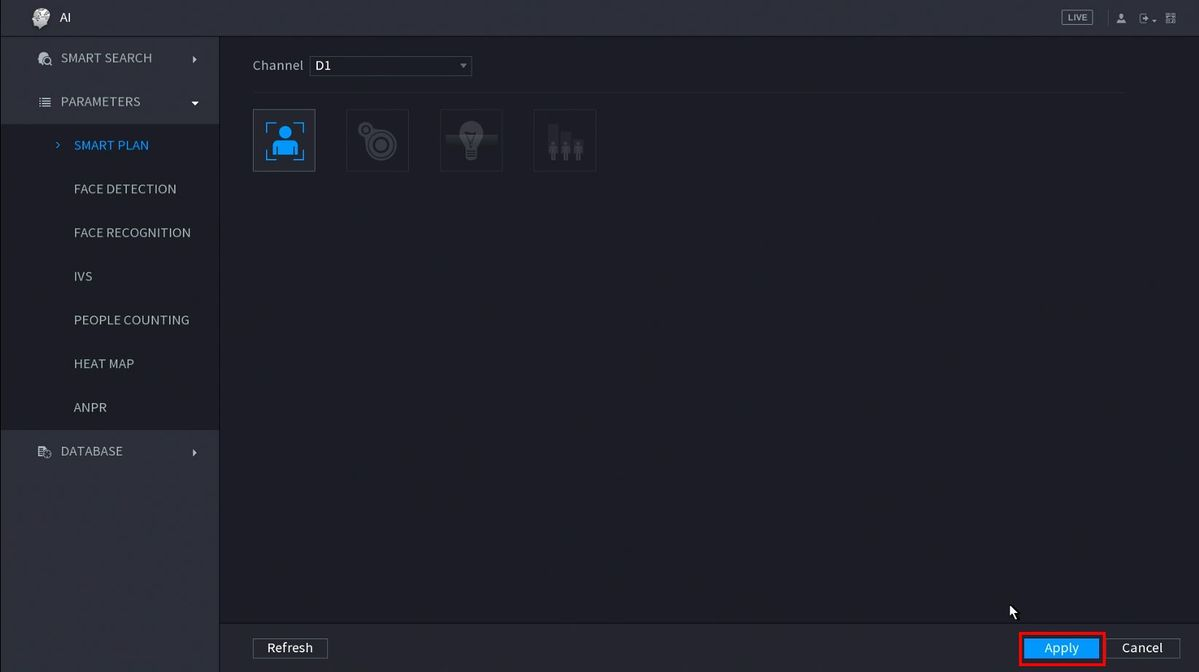
Click the Face Detection icon. It will highlight once enabled

-
Click Apply to save settings.
-
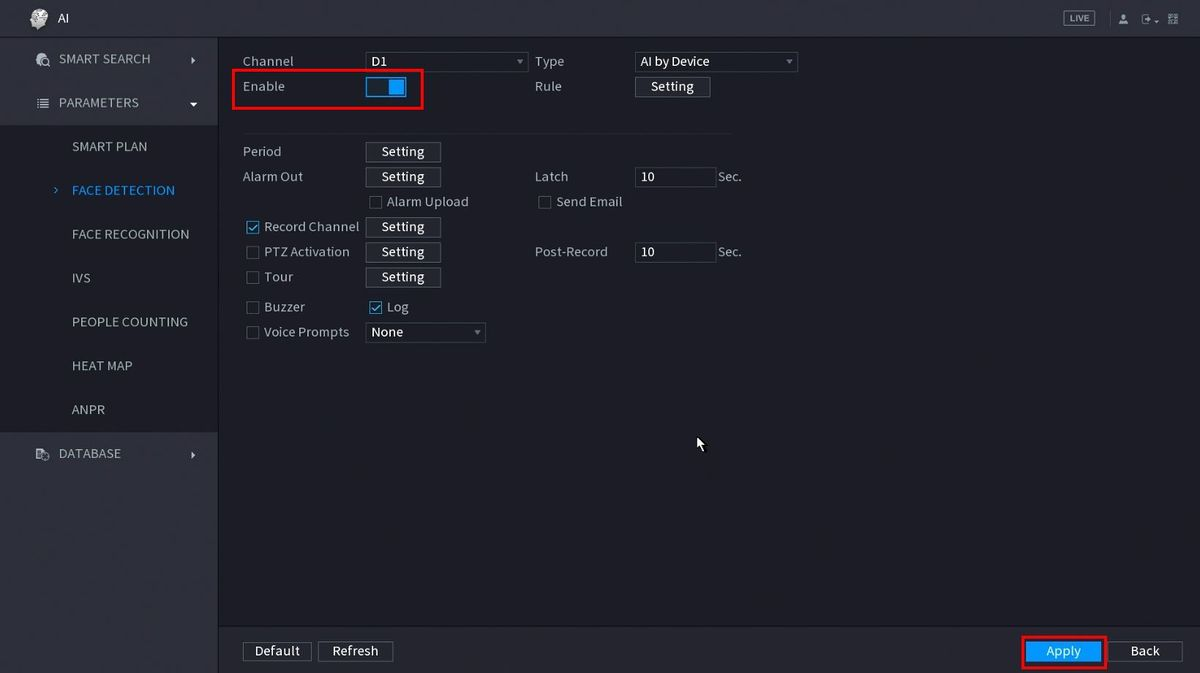
Click Parameters > Face Detection
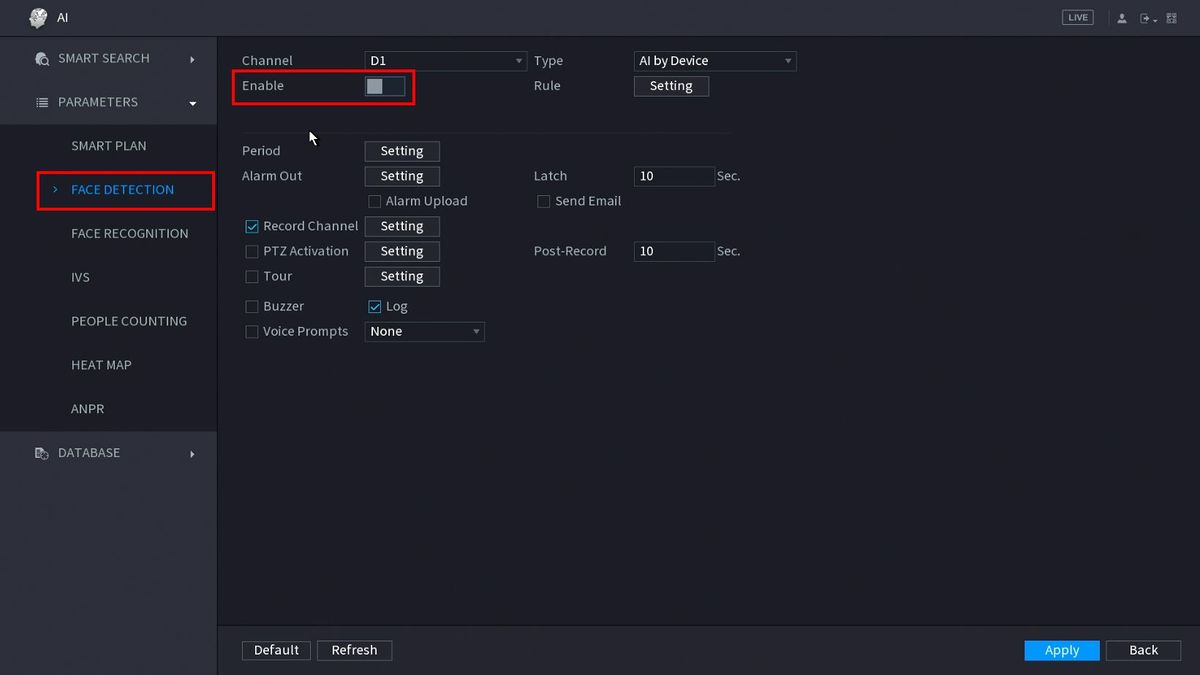
-
Toggle the setting to Enable then click Apply
-
Click Parameters > Face Recognition
Toggle the setting to Enable then click Apply
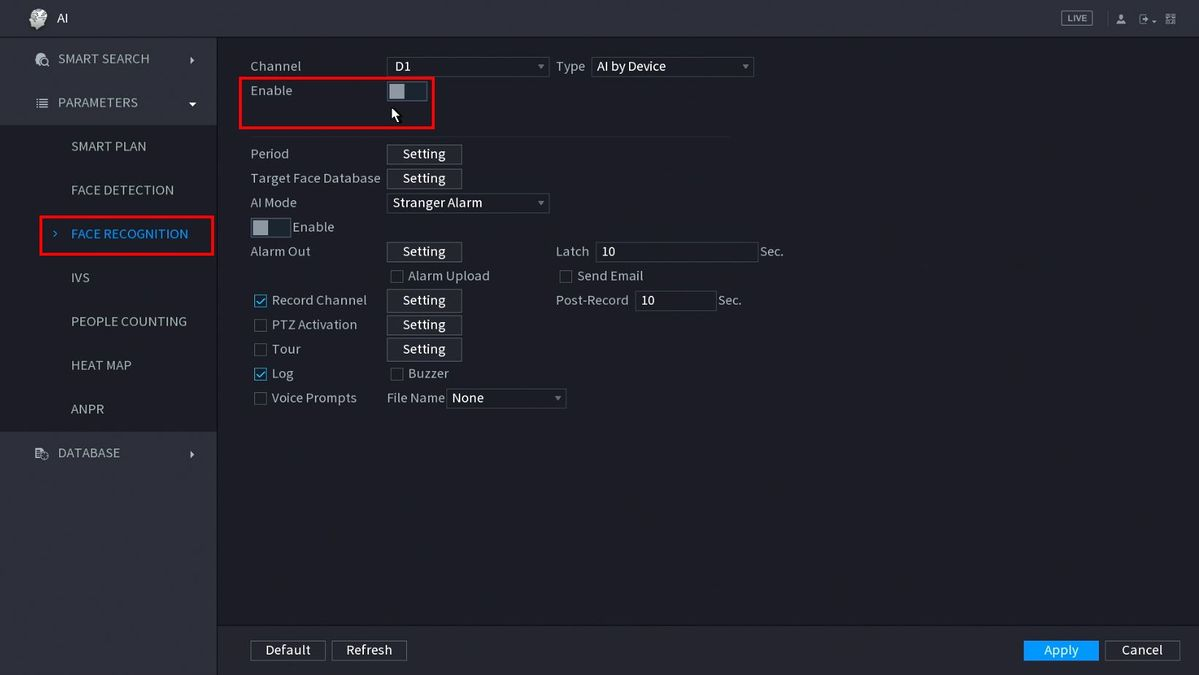
Face Recognition is now enabled
Create Face Database
-
From the Main Menu click AI
-
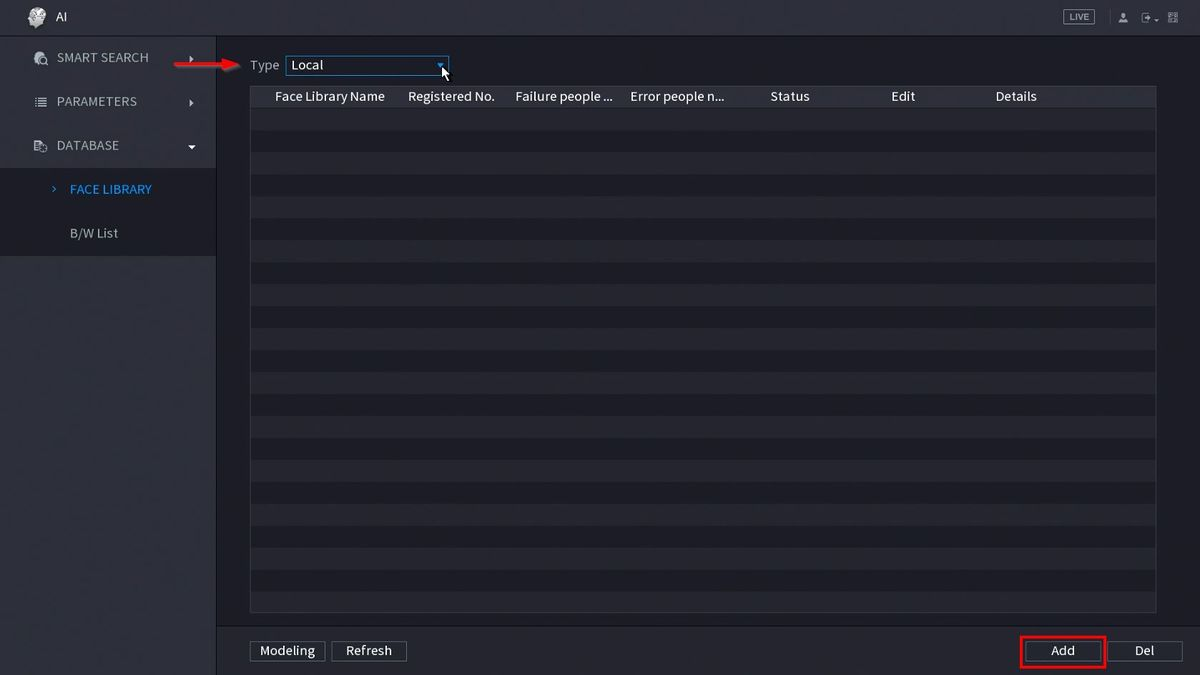
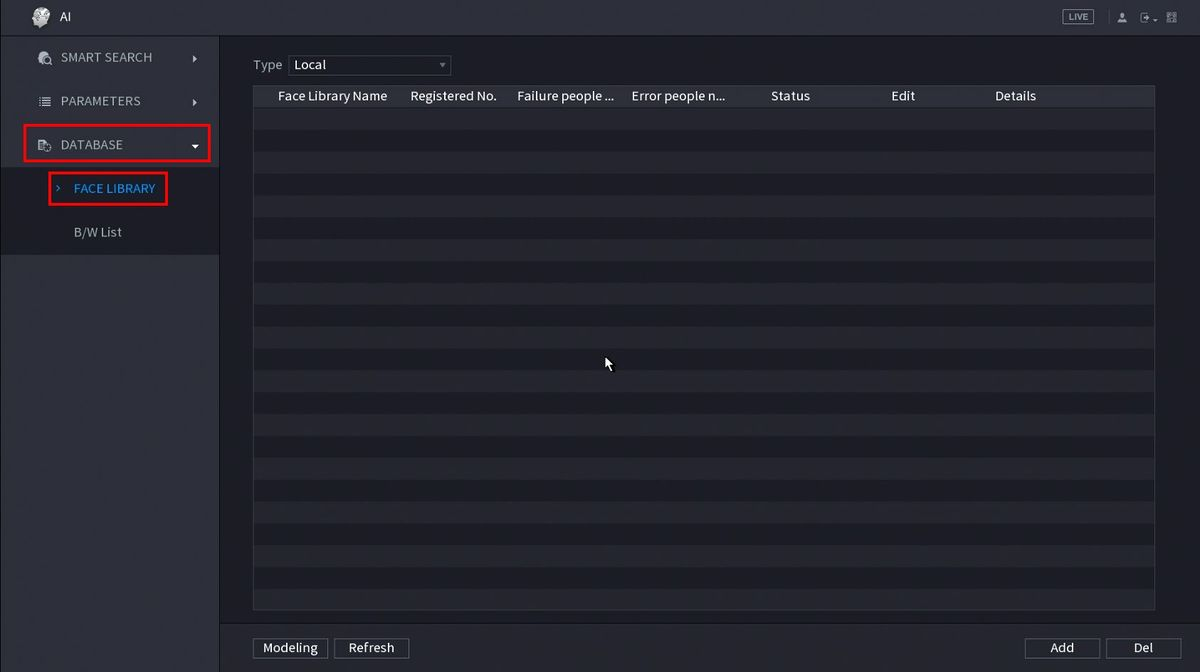
Click Database > Face Library

-
Make sure 'Type' is set to 'Local' using the drop down box - This will create a database direct on the recorder.
Click Add in the bottom right of the screen to add a new database
-
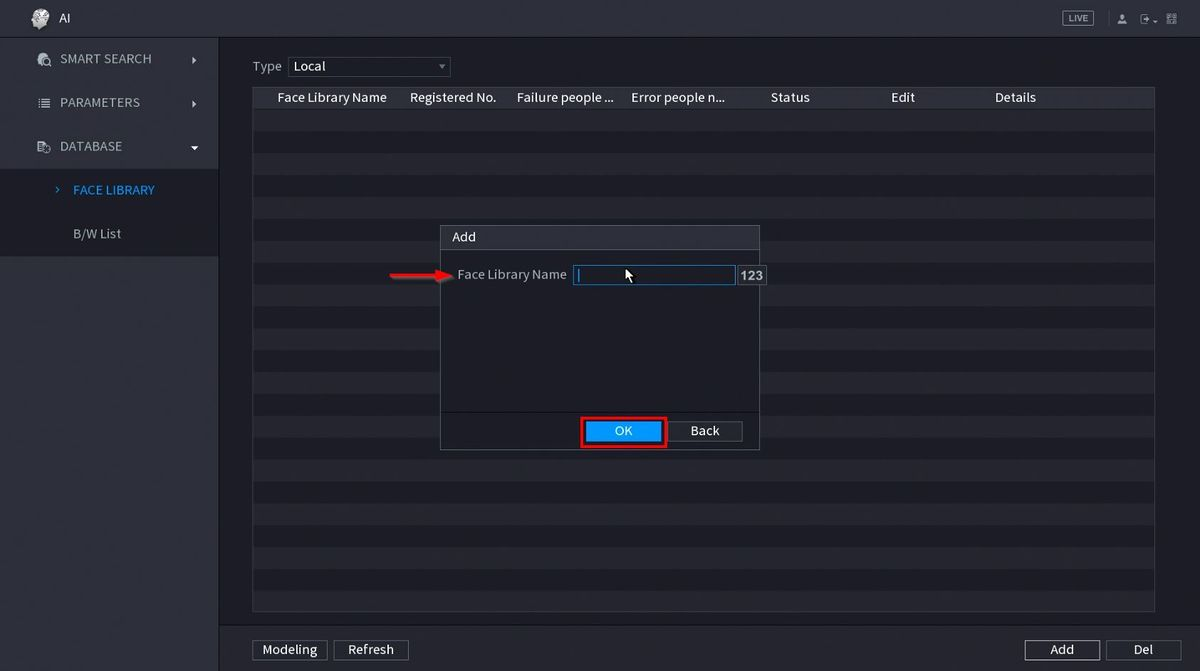
Enter a name for the Face Library Name and click OK
-
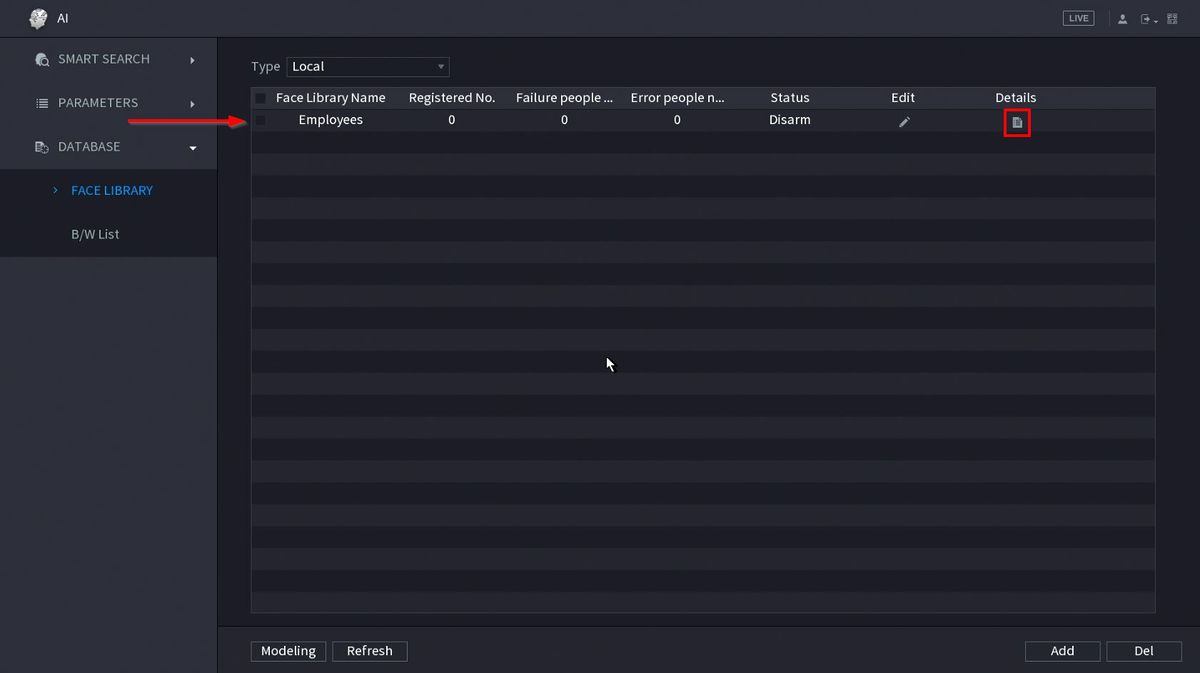
The created database will appear in the Face Library list when created successfully
Add Face To Database
- Add By USB Drive
USB drive with face picture(s) to create database should be plugged into recorder.
-
From the Main Menu click AI

-
Click Database > Face Database
-
Select the face database in the list you want to add the face to by double clicking it. How To Create Face Database
Click the  icon under Details to configure the database.

-
Click 'Register ID' to add a face to the database.
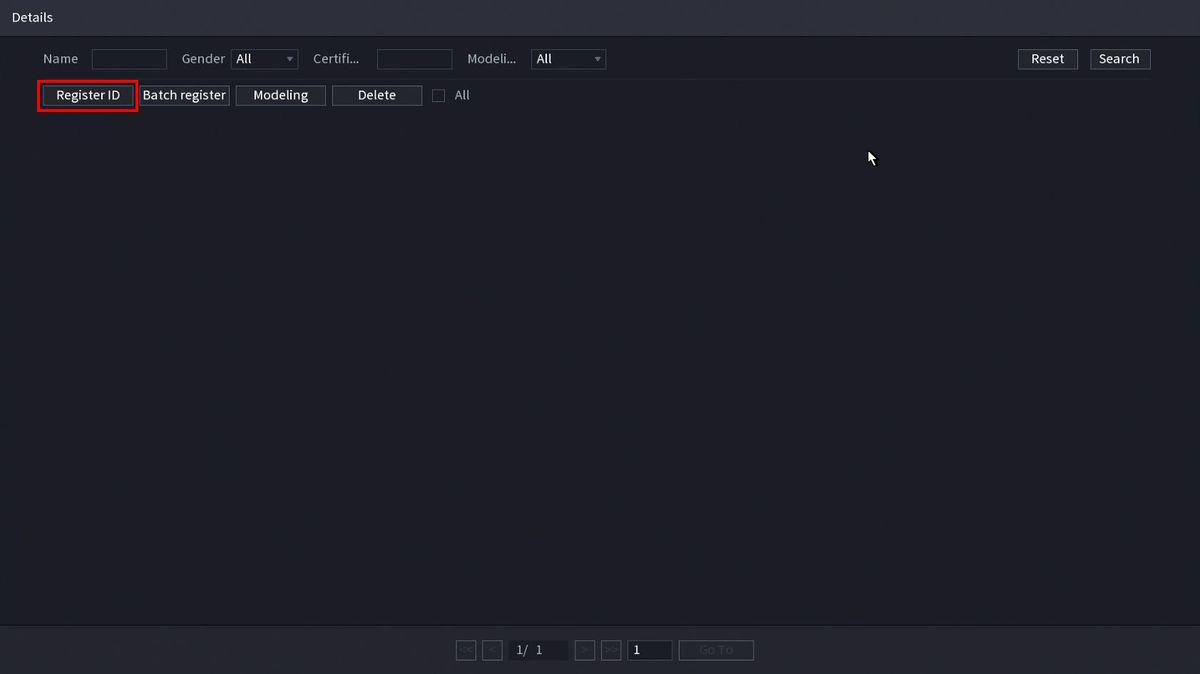
-
The Register ID interface will appear.
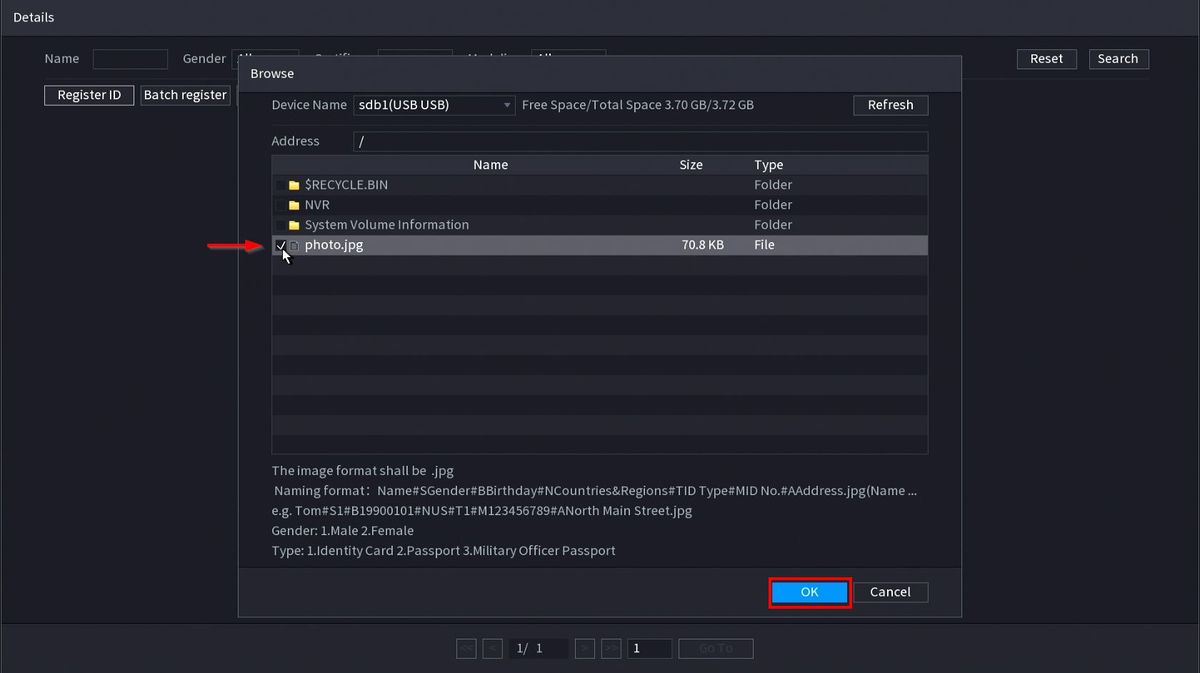
Click the + to upload a new face image

- The USB drive will automatically be loaded. Check the box next to the face image then click OK
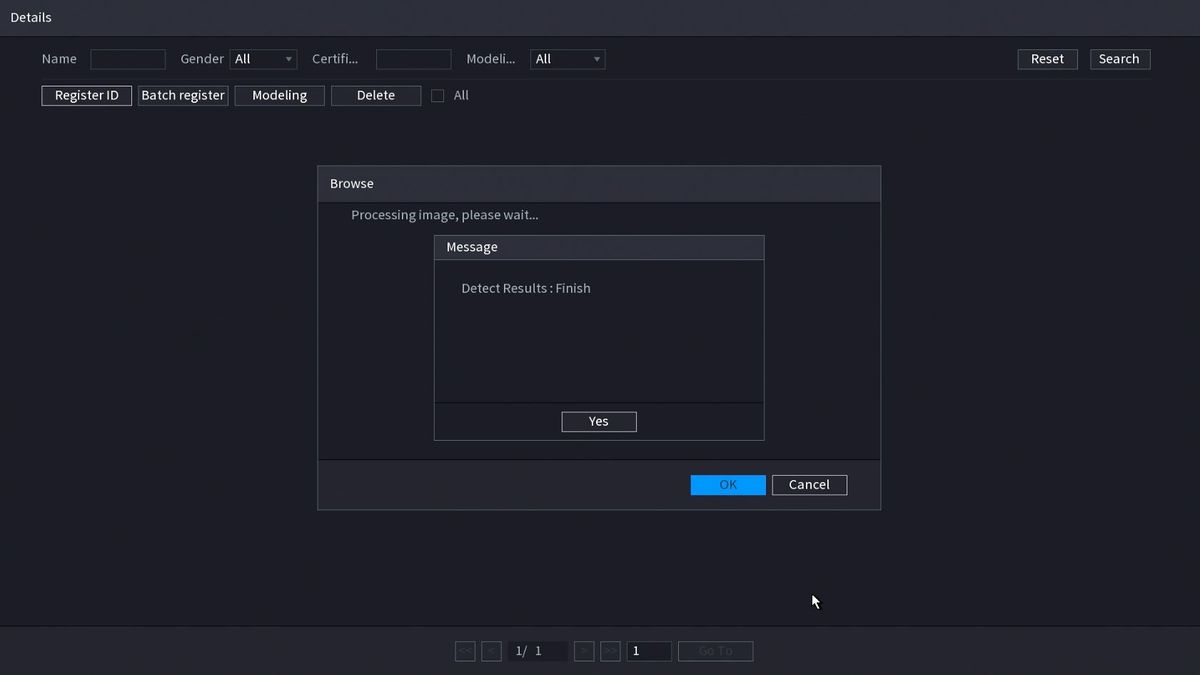
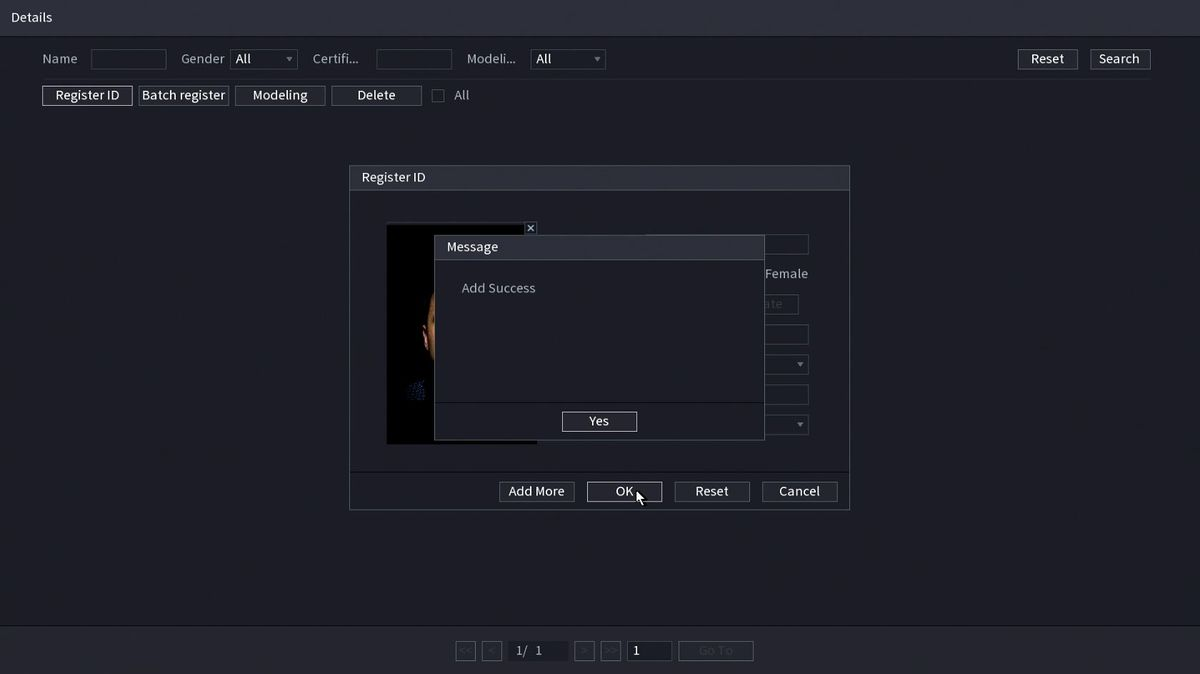
A message will confirm a successful upload
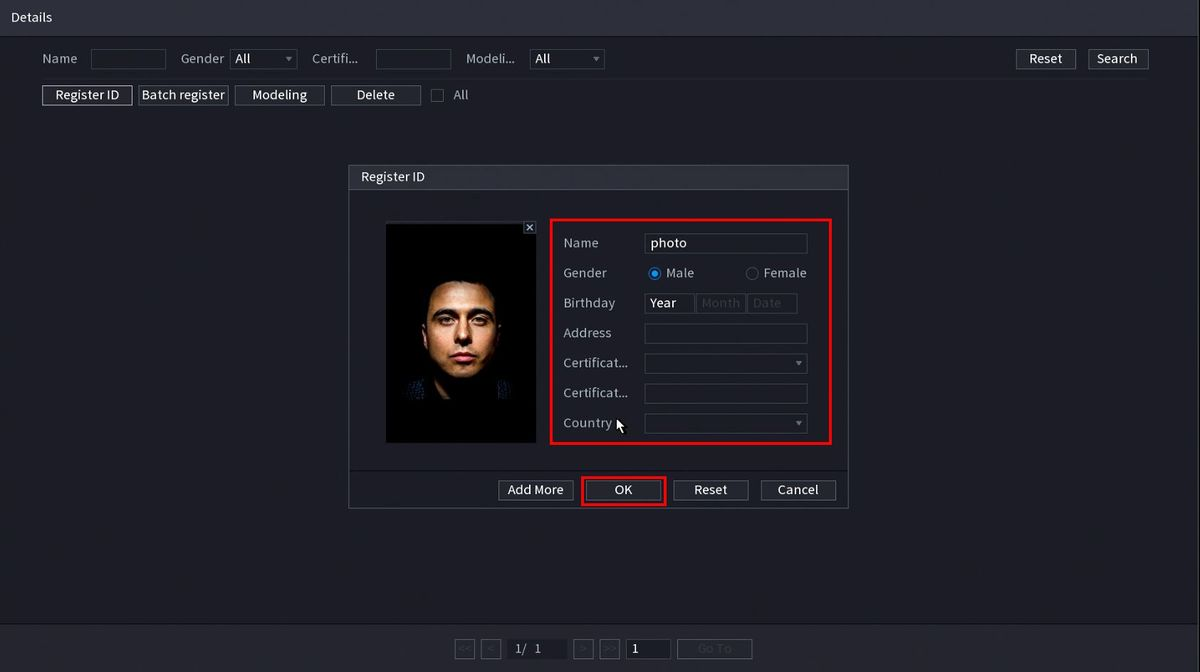
- Use the Register ID window to add additional information to this face entry, including Name and gender
Click OK to save
-
A message will confirm a successful face addition
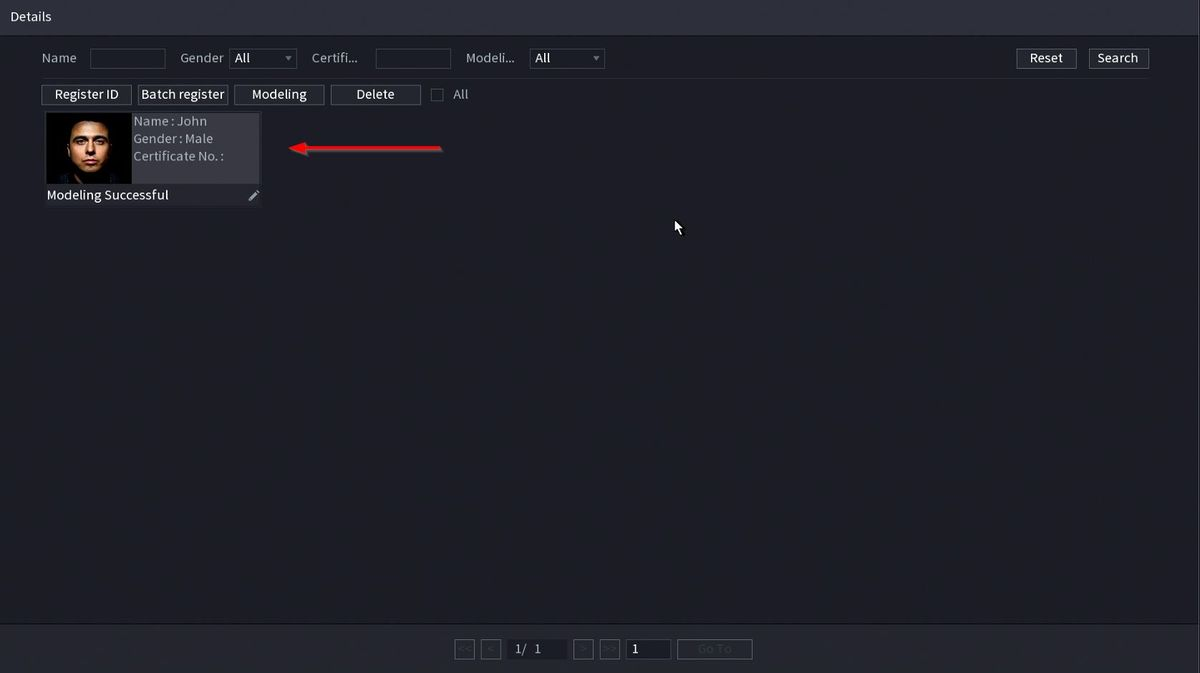
-
The added face will appear in the face database
Add By USB Drive (Batch Add)
Face pictures can also be imported in batches which is useful when adding a large number of faces at one time.

Before importing pictures in batches, you can name the picture files using the following format for easier import:
"Name#SGender#BDate of Birth#NRegion#TCredentials Type#MID No.jpg"
"[Name]#S[Gender]#B[Date of Birth]#T[Type of Credentials]#M[ID Number]"
For example a face picture for the following person:
Name: John
Date of Birth: 1990-01-01
Type of Credentials: ID Card
ID Number: 0000
Should have the file name:
"John#S1#B1990-01-01#T1#M0000".JPG or PNG
| Parameter | Description |
|---|---|
| Name | Enter a name, required |
| Gender | Enter a value, optional. 1 is 'male' and '2' is female |
| Date of Birth | Enter a value, optional. Format: yyyy-mm-dd, such as 2017-11-23 |
| Gender | Enter a value, optional. 1 is 'male' and '2' is female |
| Credentials Type | Enter a value, optional. 1 is ID card and '2' is passport |
| ID number | Enter ID No. , optional |
| Add From Captured Face Detection | |
| You can add images to build the Face Database using images that have been captured using the Face Recognition feature |
From the Live View, with AI Mode enabled:
-
AI mode will display recently captured Face images in Live View on the right side of the screen
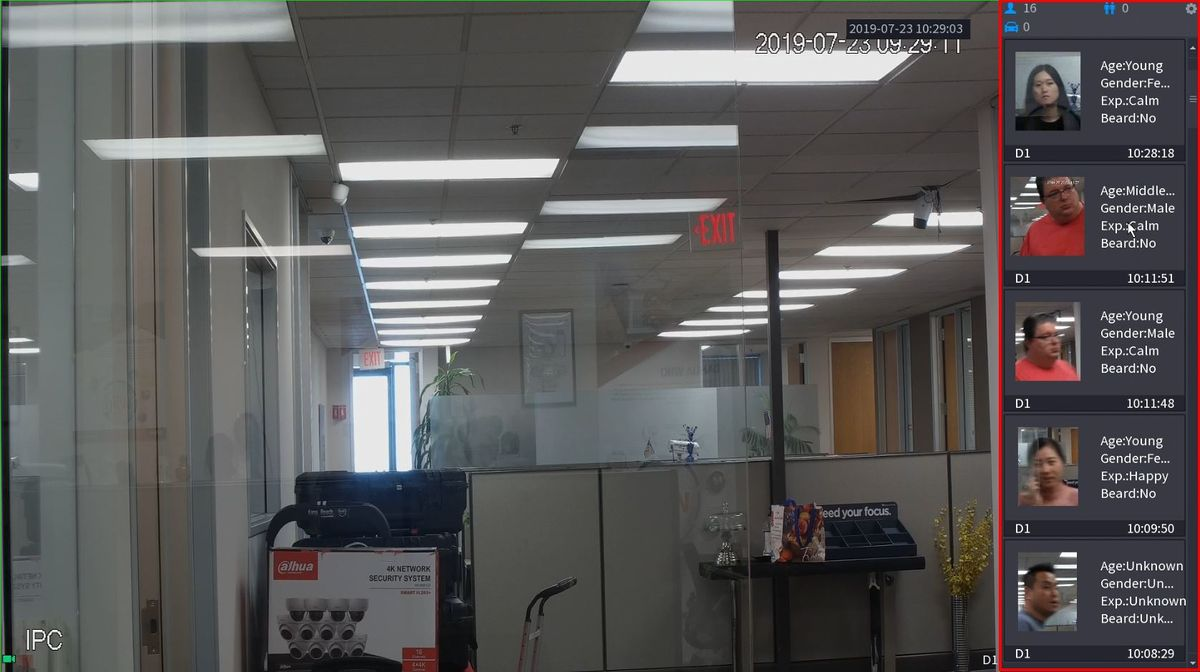
-
Click to select the Face you want to add from the list
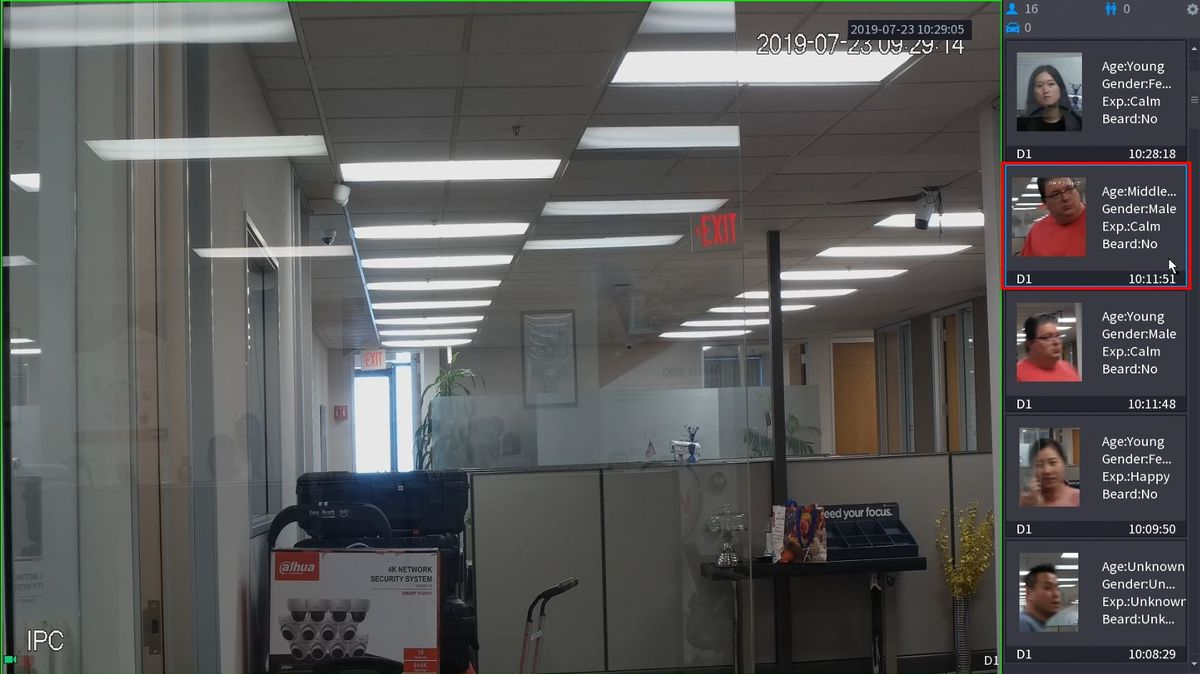
-
The image will full screen.
Click the button labeled "Add to Human Face Database" in the top right of the screen

- The Register ID window will appear.
You can add additional details for the Face entry including Name
Check the box next to the Face Library you wish to add the face to
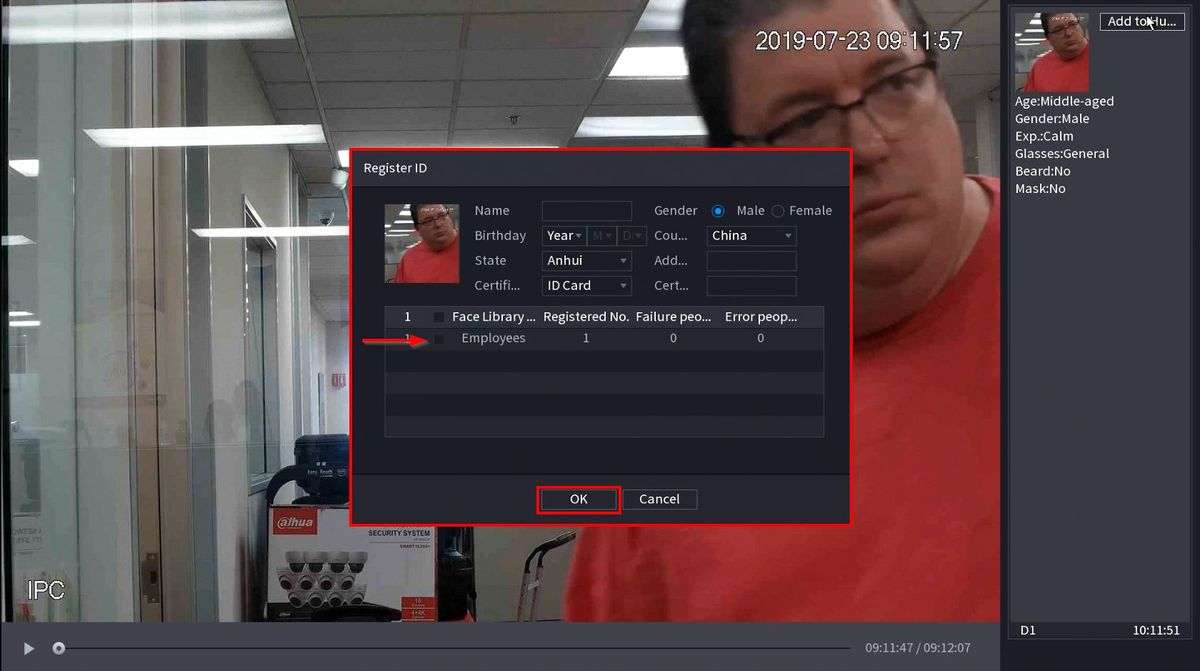
-
Click OK to save

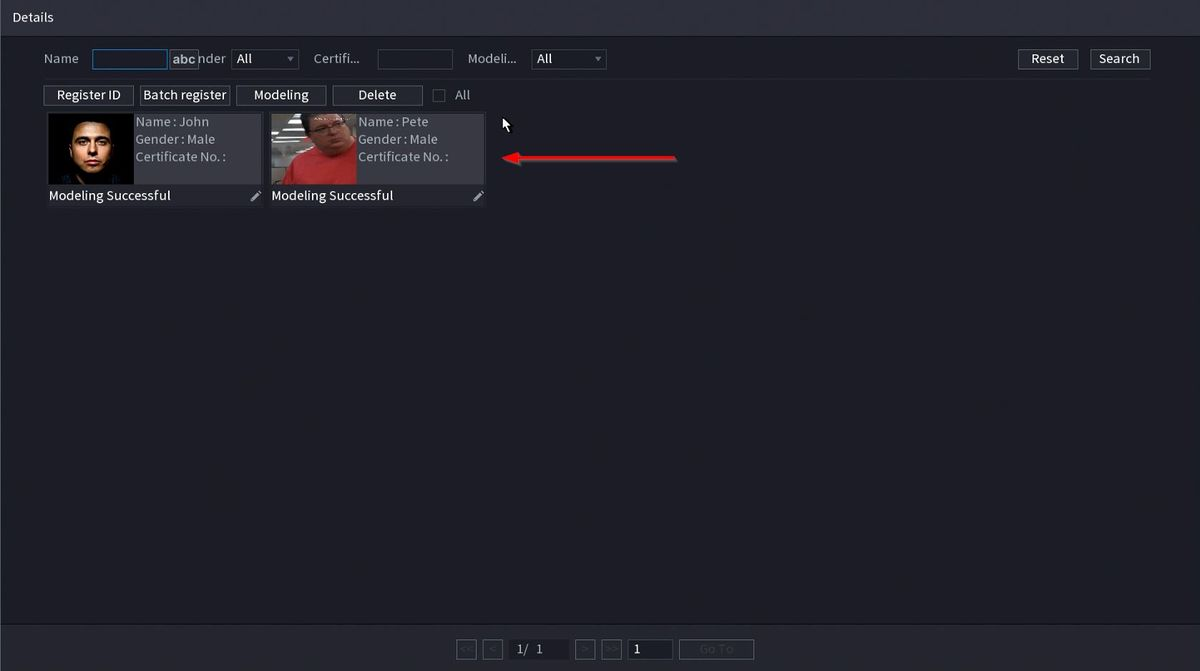
-
The added face will appear in the Face Library
- Add Trigger or Alarm Based on Face Recognition
-
Enter the Main Menu and select AI

-
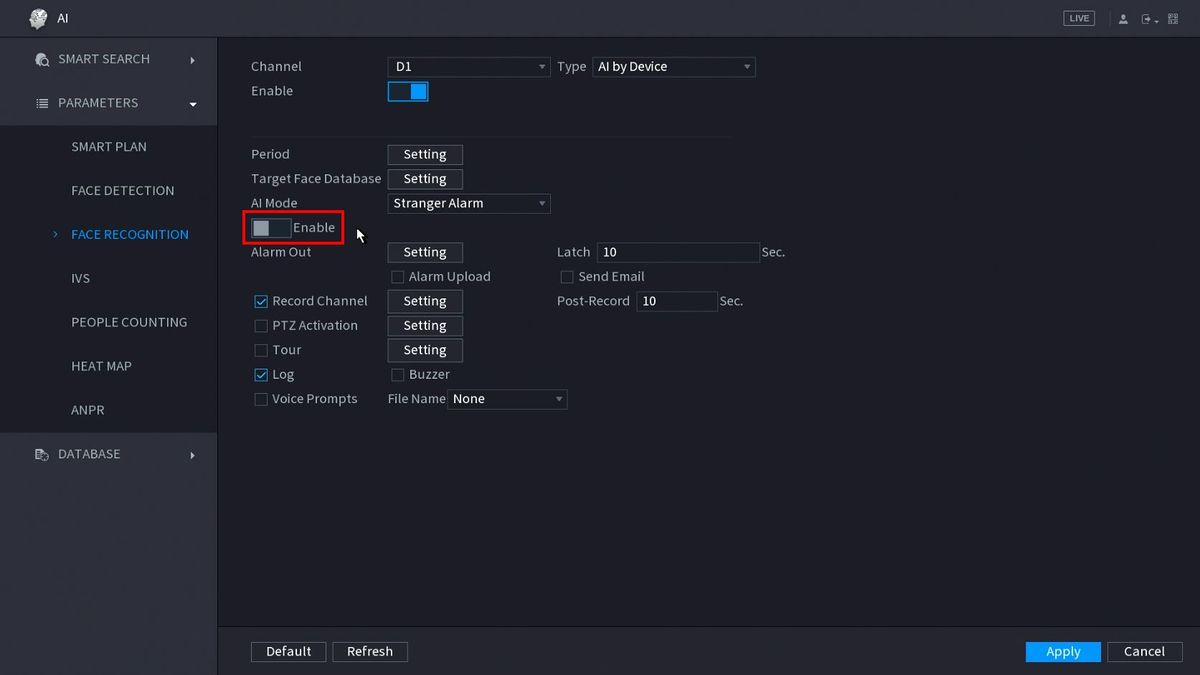
Click Parameters > Face Recognition
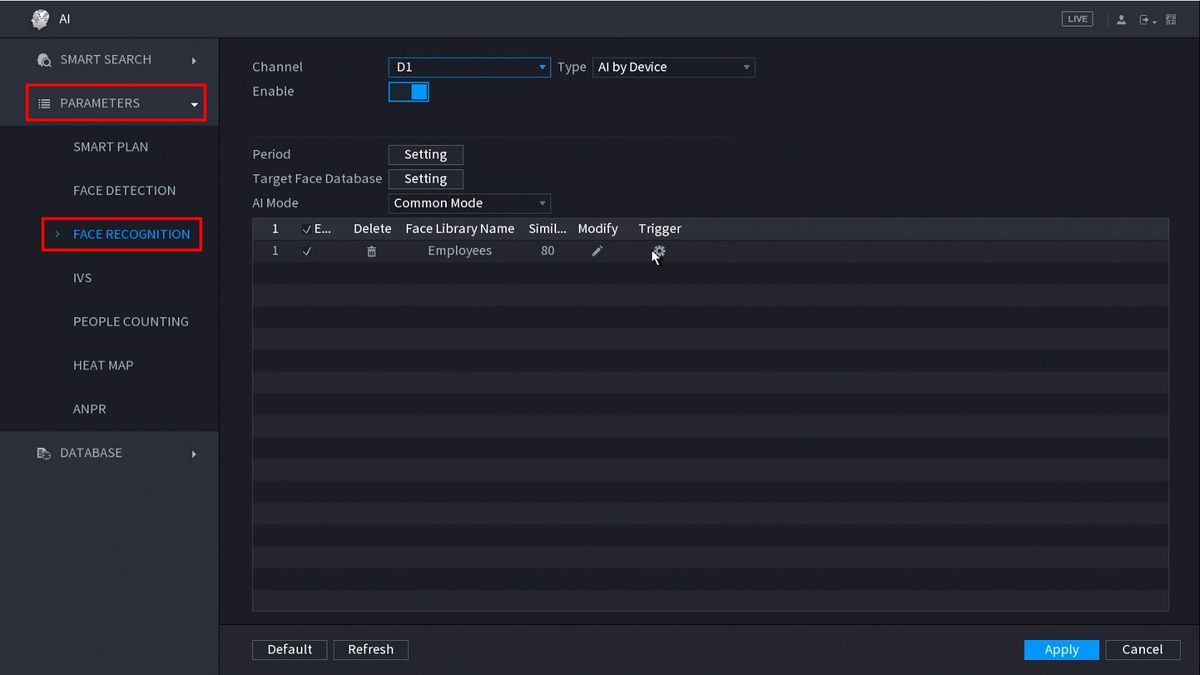
-
Use the drop-down box to select the AI mode to configure.
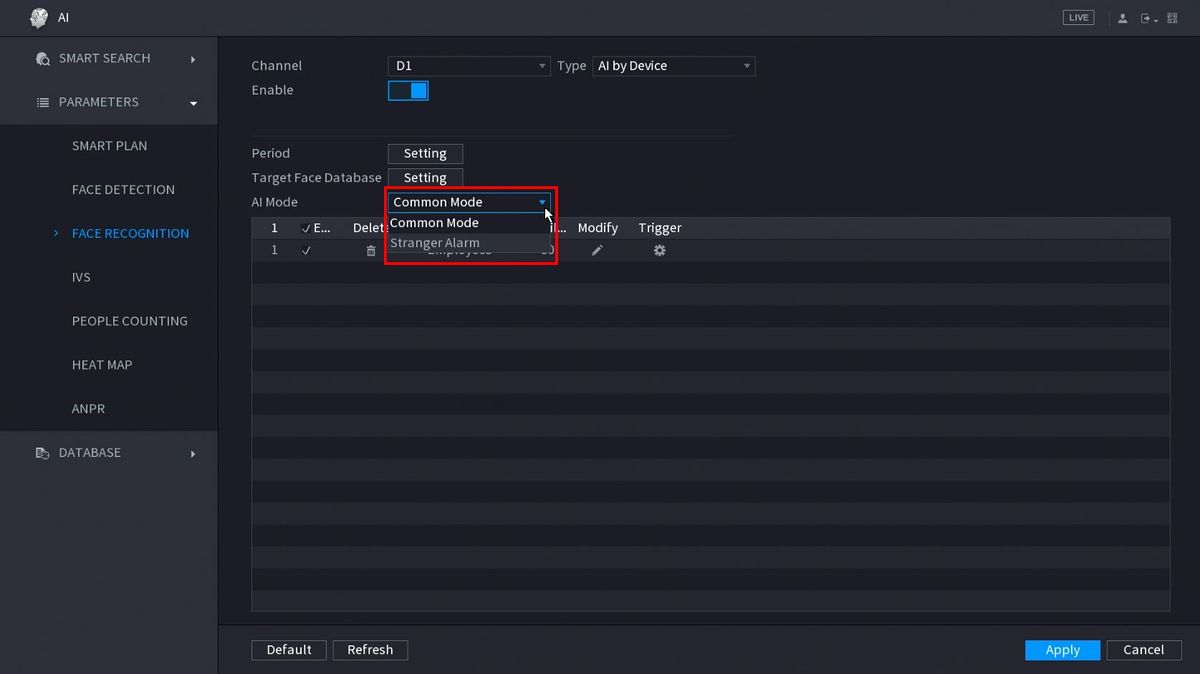
Stranger Alarm
Stranger Alarm: The NVR will compare live detected faces to faces that have been entered into the Face Library database. If the Face is not recognized the alarm will be triggered.
-
Click the toggle button to enable
-
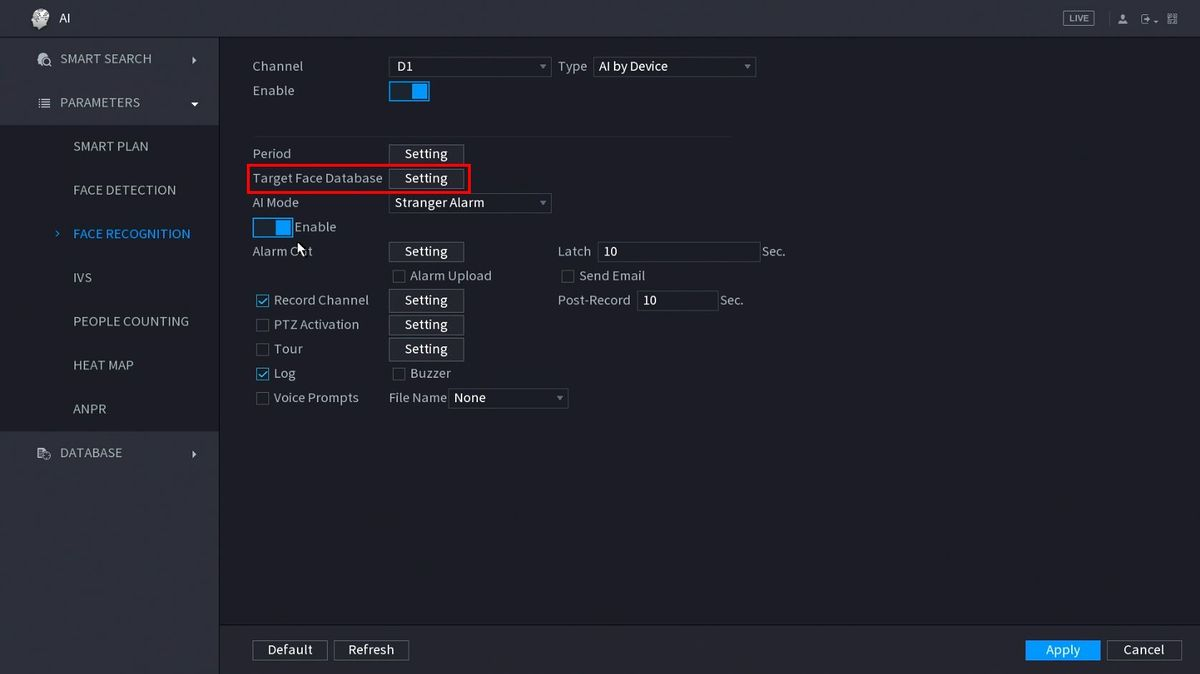
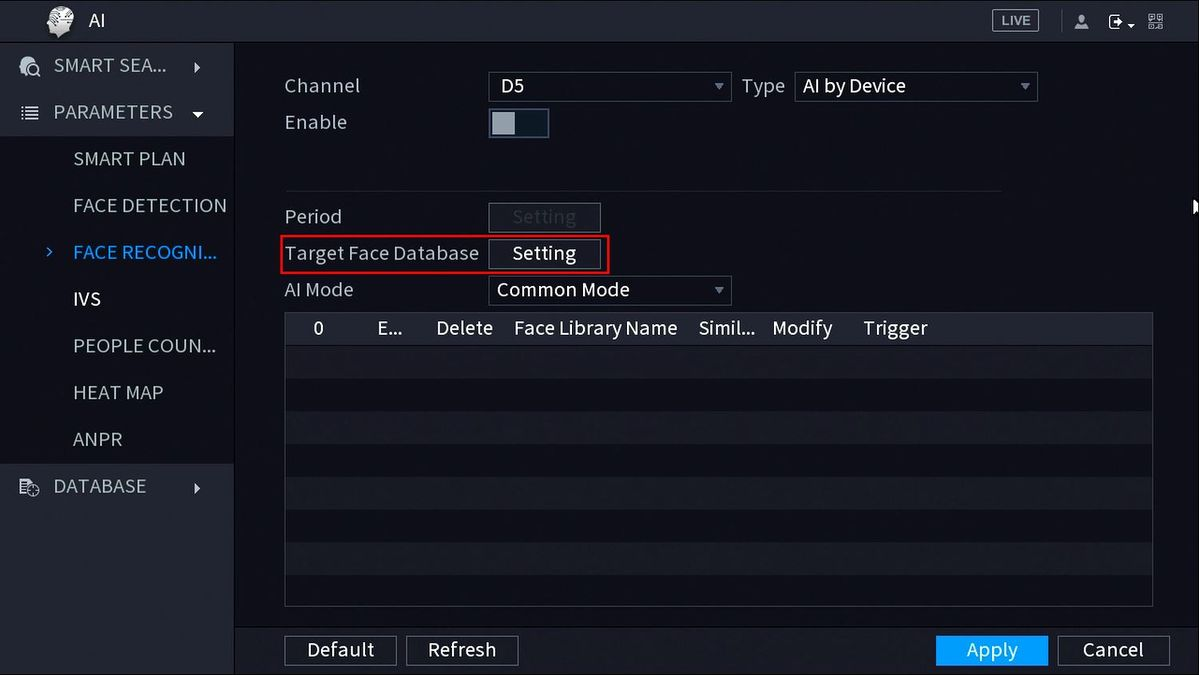
Click the Setting button next to Target Face Database
-
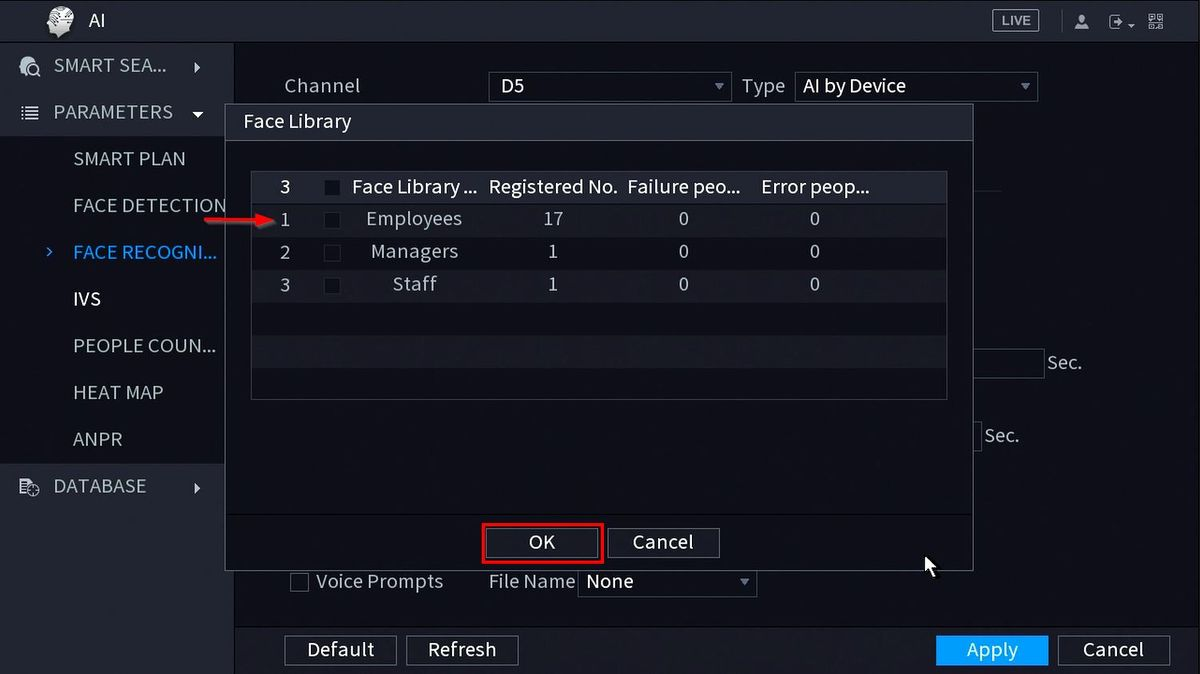
Check the box next to the Face Library to be used for Face Recognition then click OK
-
You can set various events to happen when the alarm is triggered including:
Alarm Out Email Alert PTZ Activation Tour Buzzer
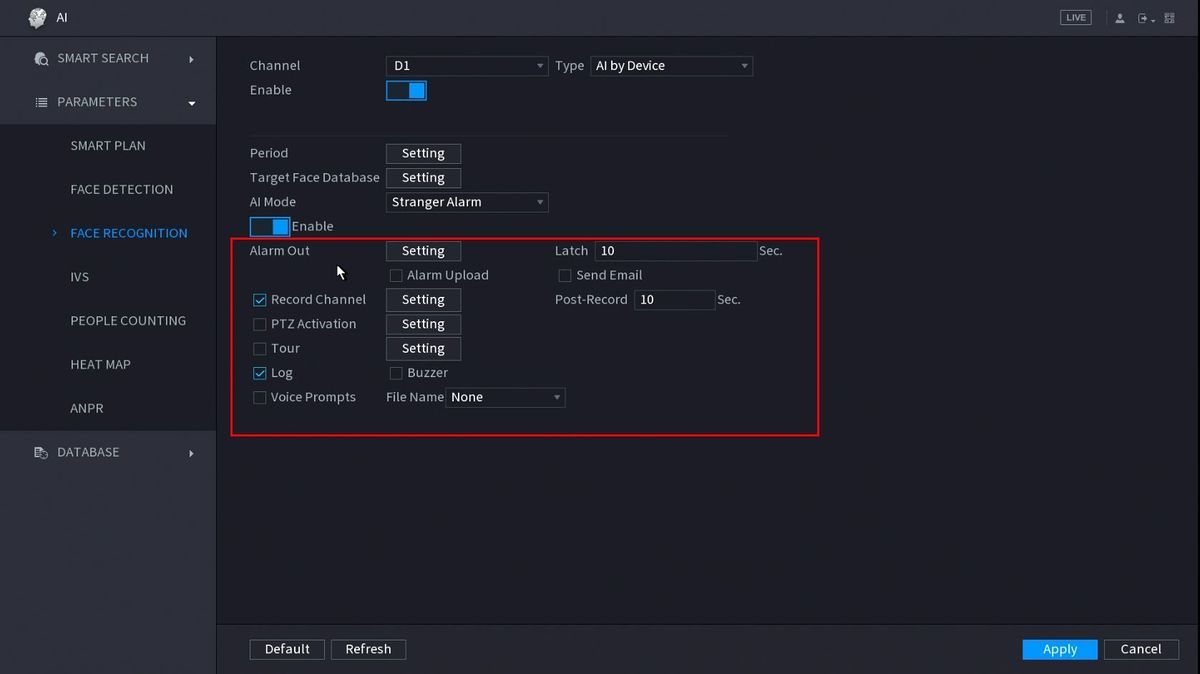
Click Apply to save all settings
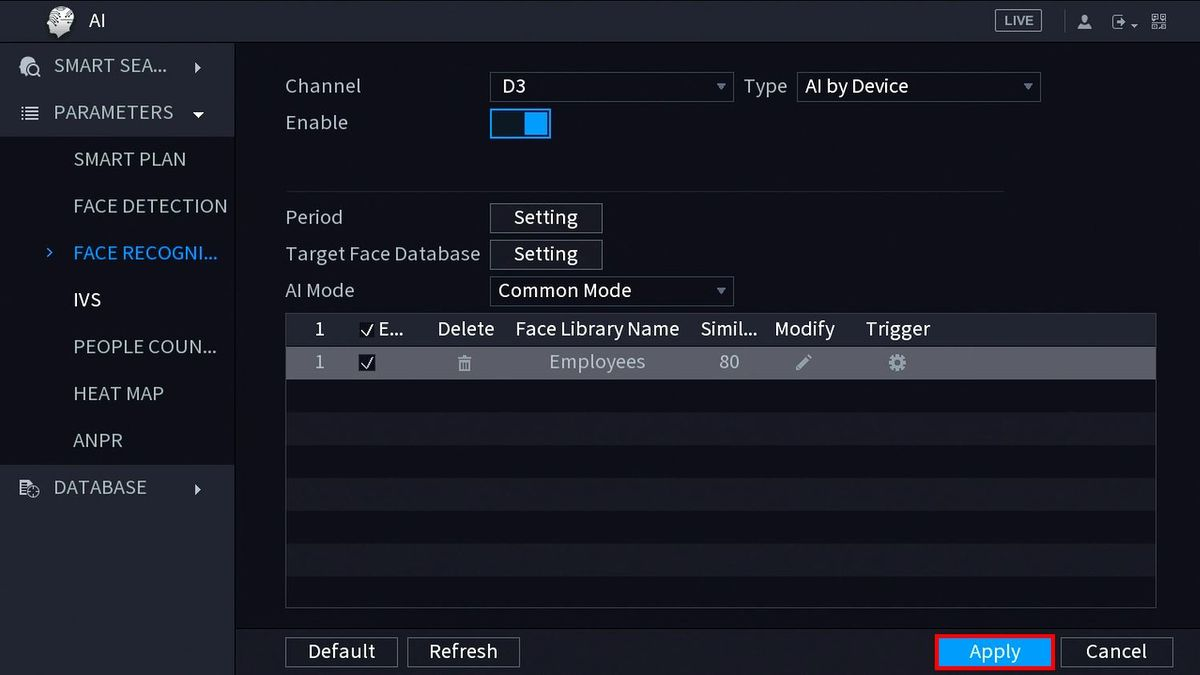
Common Mode
Common Mode: The NVR will compare live detected faces to faces that have been entered into the Face Library database. When a face that has been added to the library has been detected, you can configure the NVR to respond with various actions, such as Buzzer, Email, and Alarm Outputs among others. A Similarity value (default 80%) can be adjusted
-
Click the Setting button next to Target Face Database
-
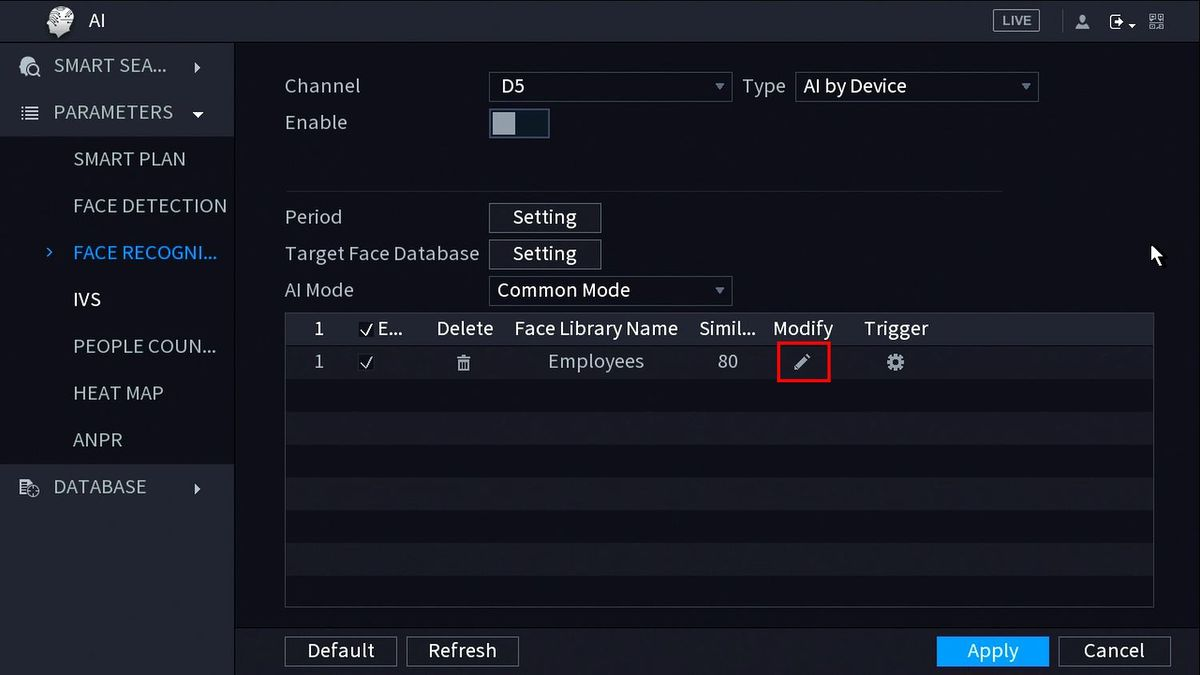
Check the box next to the Face Library to be used for Face Recognition then click OK

-
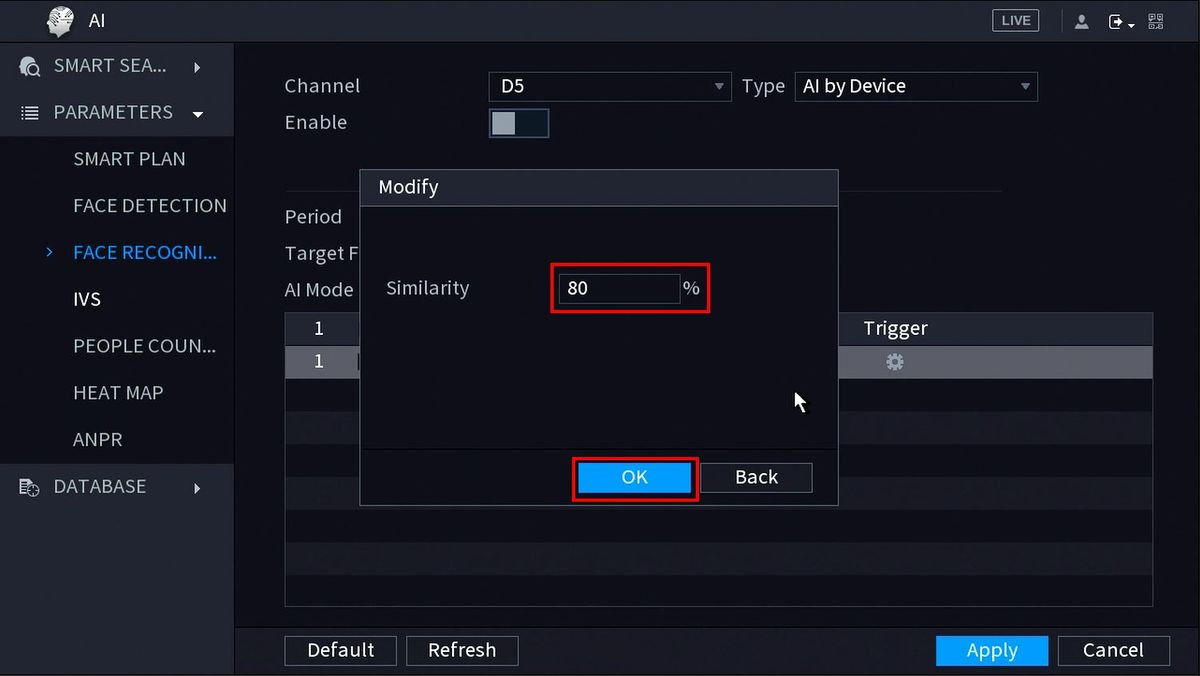
To adjust the Similarity value click the icon under Modify
-
Enter a value for the Similarity from 1-100 then click OK
-
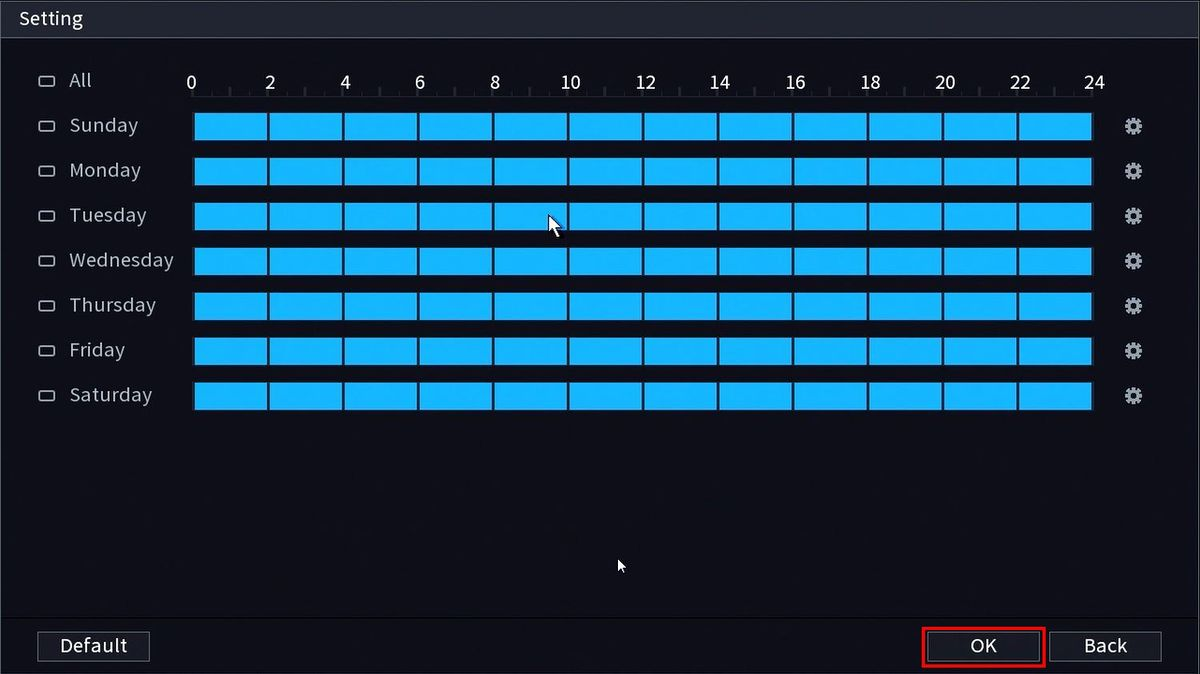
Click the Setting button next to Period

-
You can create a schedule for the alarm. By default the schedule is set to 24/7
-
Click the Tripwire Setup - NewGUI - Trigger.jpg icon to set the Trigger settings when the IVS Missing Object rule is engaged.

-
The Trigger menu will appear
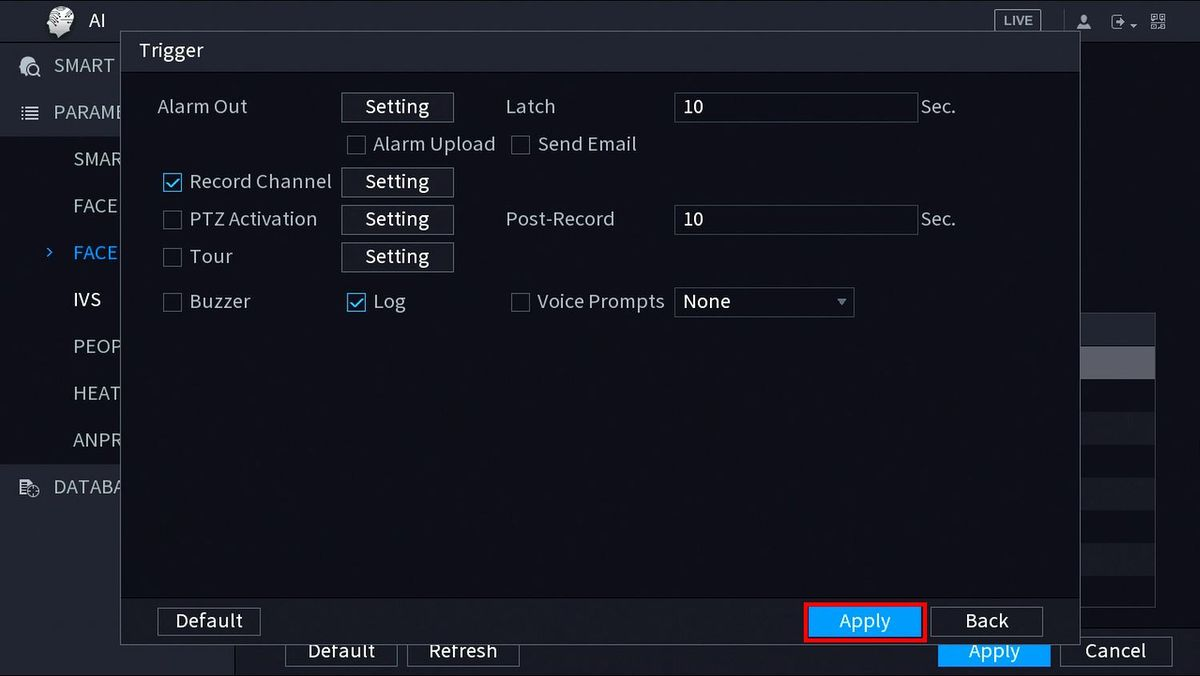
Once the trigger rule settings have been created click Apply, then click Back to return to the previous menu
- Once all Missing Object settings have been configured, Click Apply in the lower right of the screen to save all changes