Description
Initializing our Video intercom with Configtool simplifies and streamlines the process.
Configtool now handles the initialization phase and any IP address changes that need to be made. You no longer need to manually initialize our VDP devices manually
You can only Initialize the same type of Intercom at one time due to the password requirements
- VTHs requires a 6 character password (Numerical only)
- VTOs requires an 8 character password (Alpha Numerical combination)
Video Instructions
Step by Step Instructions
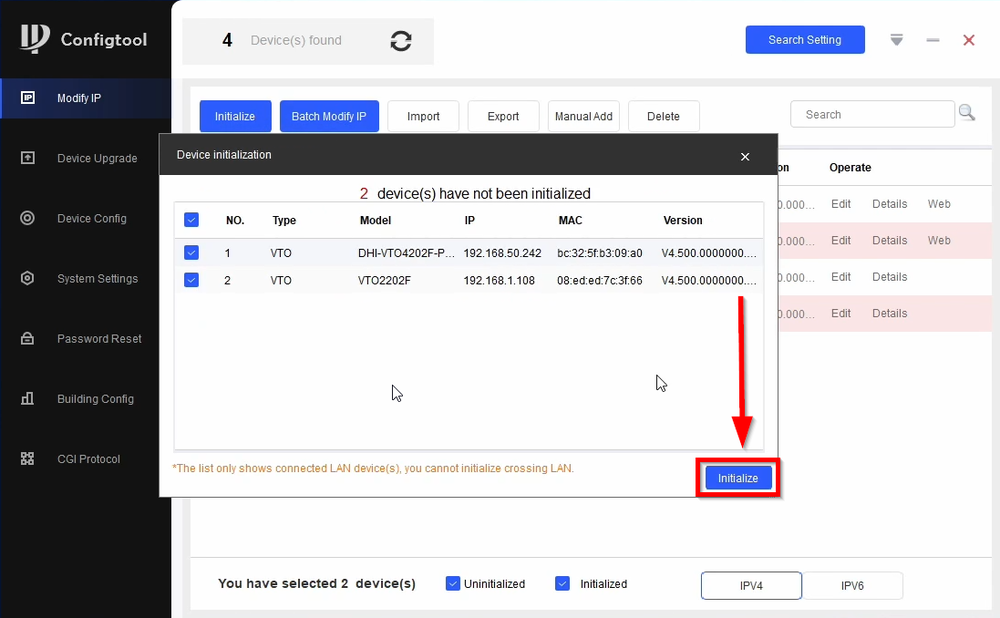
- Check the VTOs that you want to initialize and click on Initialize
Note:You can only Initialize the same type of Intercom at one time due to the password requirements
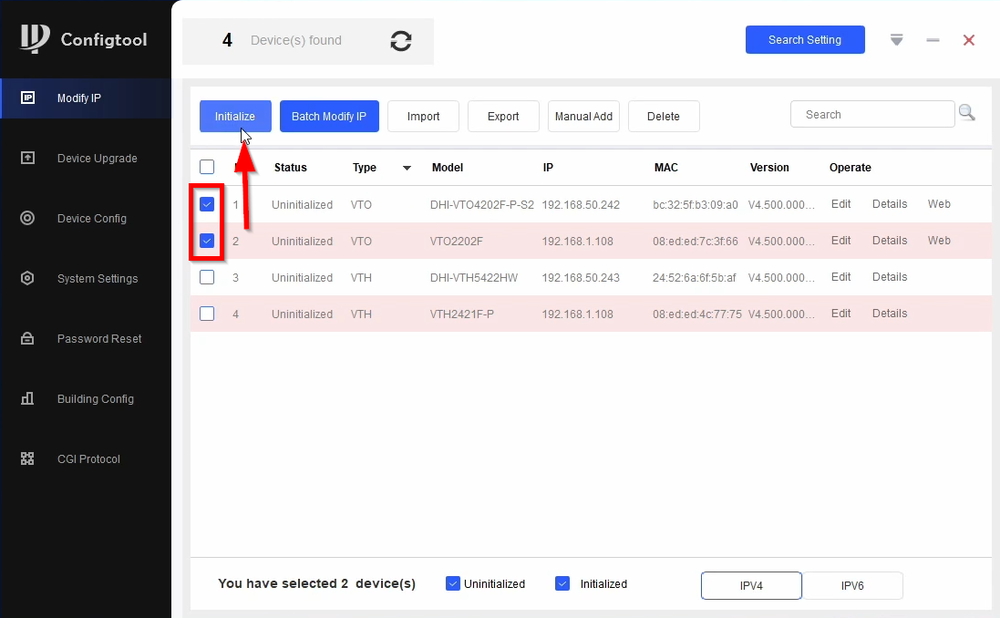
- Click on Initialize
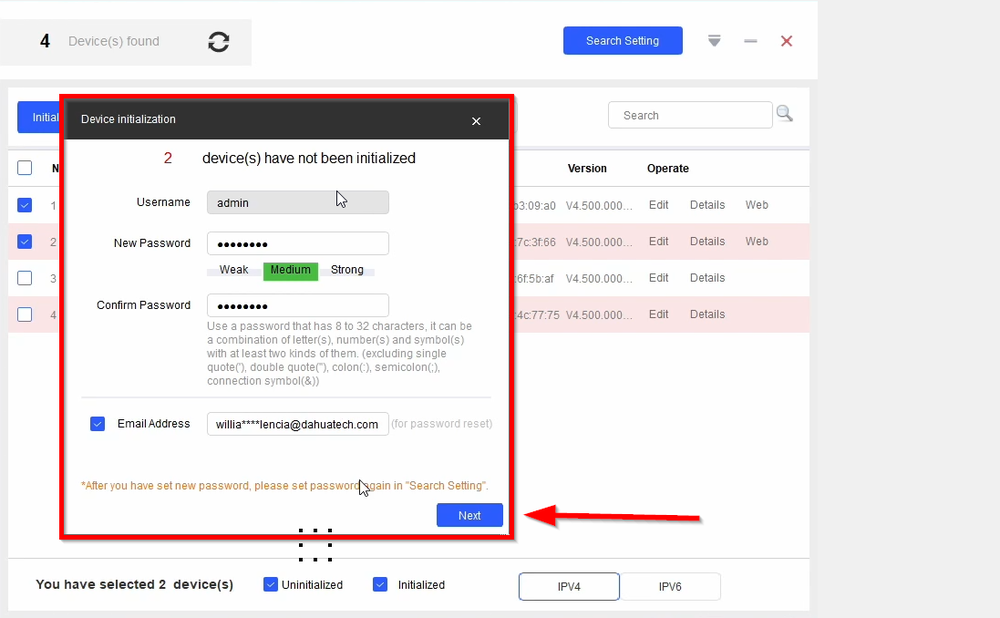
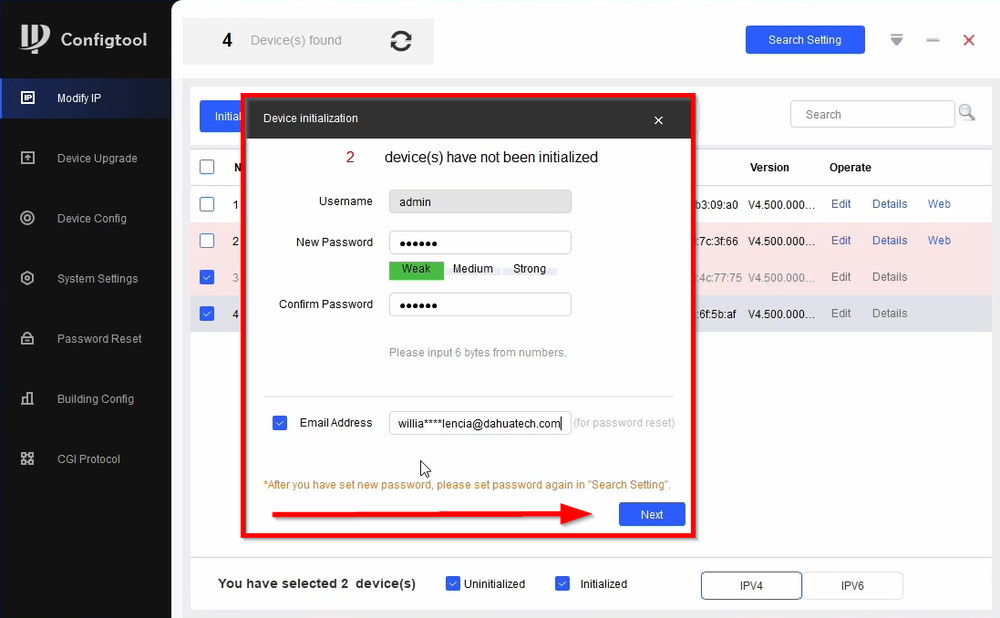
- VTOs require at least an 8 character Alpa-Numeric password. Be sure to enter an email as this will be your method resetting the password if forgotten or lost. Click on Next to proceed
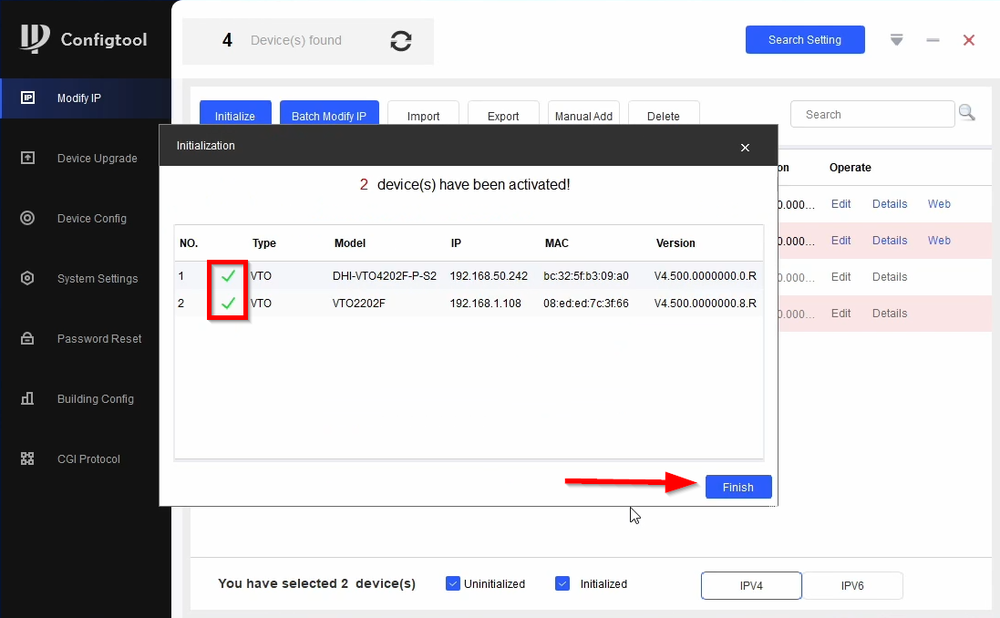
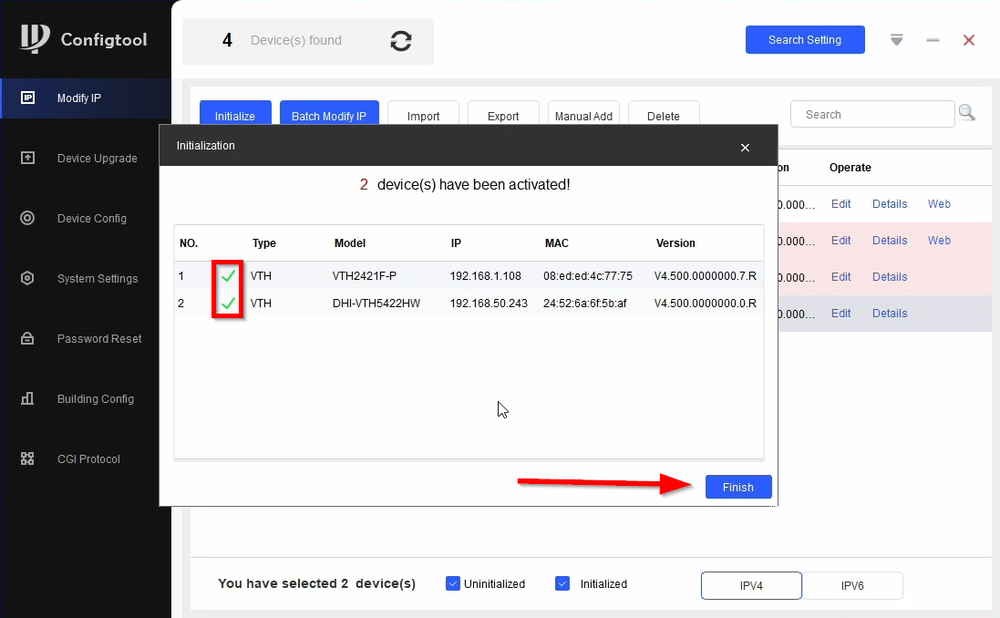
- The green check marks will indicate that the devices have been successfully initialized. Click on Finish to complete the VTO initialization.
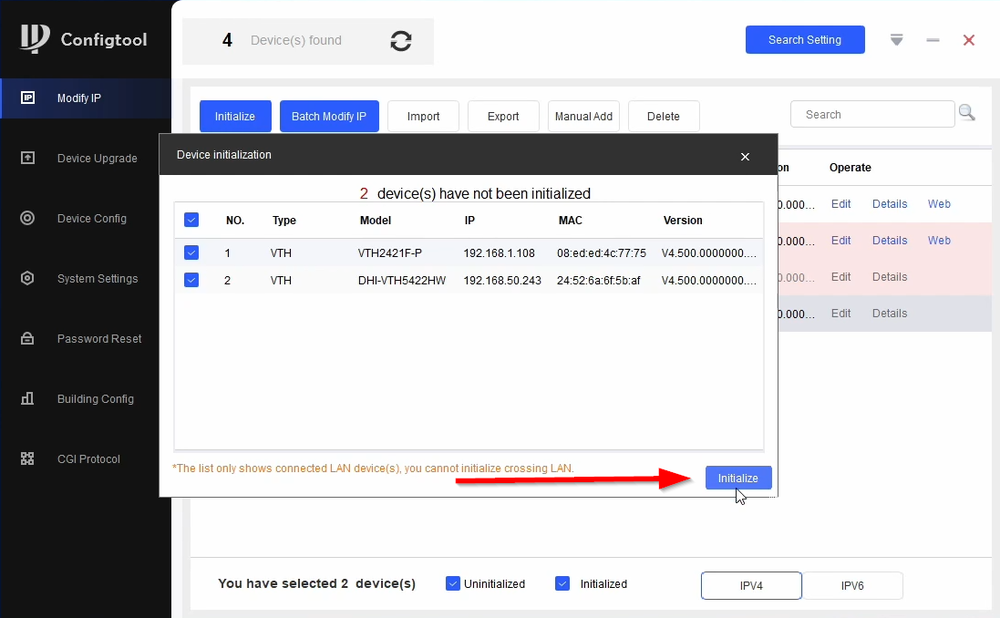
- Select the VTHs you want to initialize and click on Initialize
Note:You can only Initialize the same type of Intercom at one time due to the password requirements
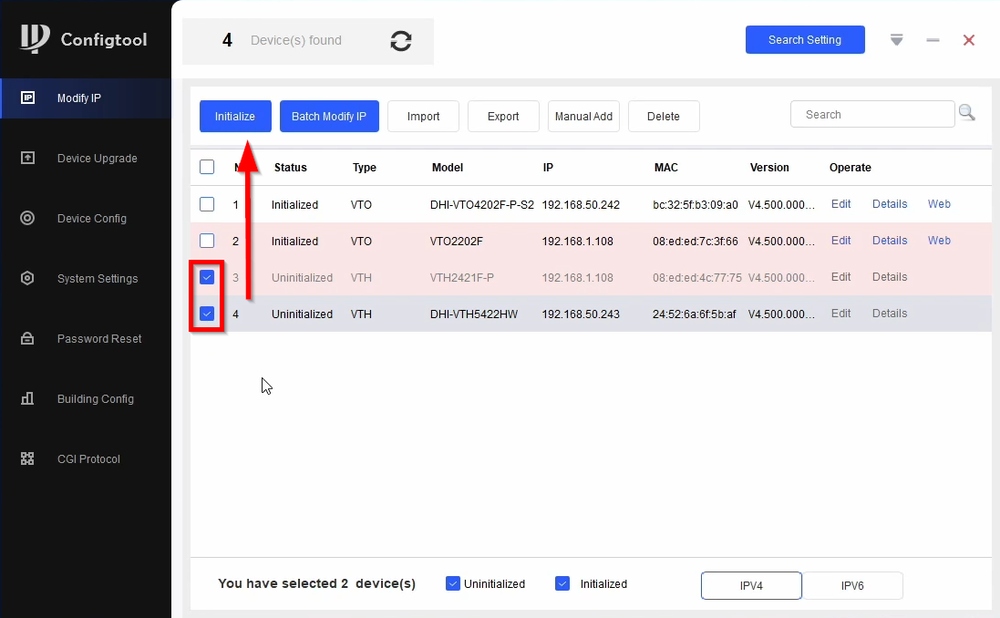
- Click on Initialize
- Enter a 6 Character Numerical password and an email as this will be your method to reset the password if forgotten or lost.
- Green check marks indicates it was successfully initialized. Click on Finish to finalize the initialization.
Changing IP Addresses
Once devices are initialized you may want to change their IP Addresses to be on the same IP Scheme
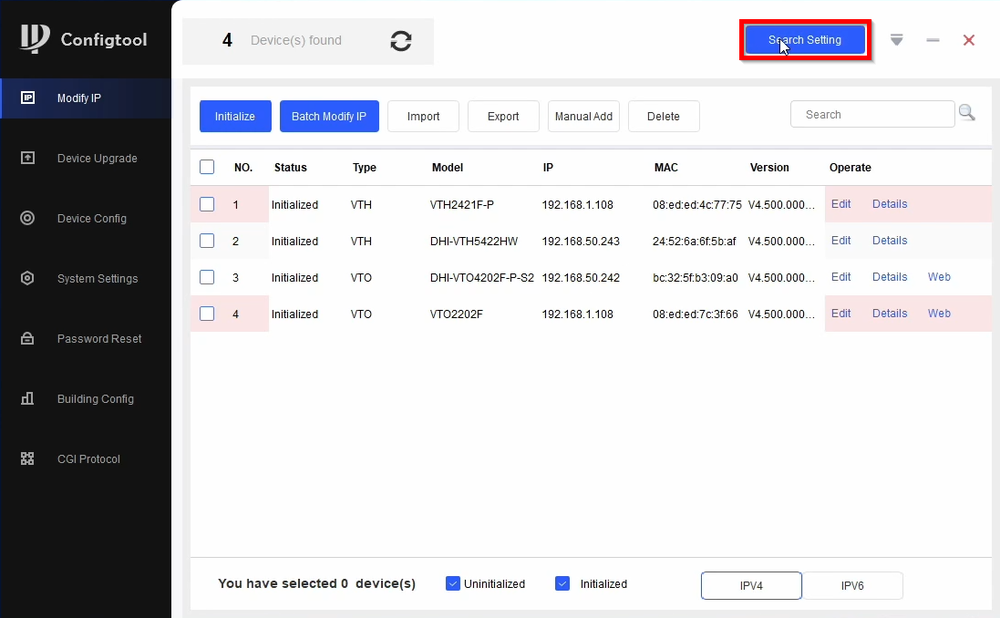
- To do that go to Search Setting
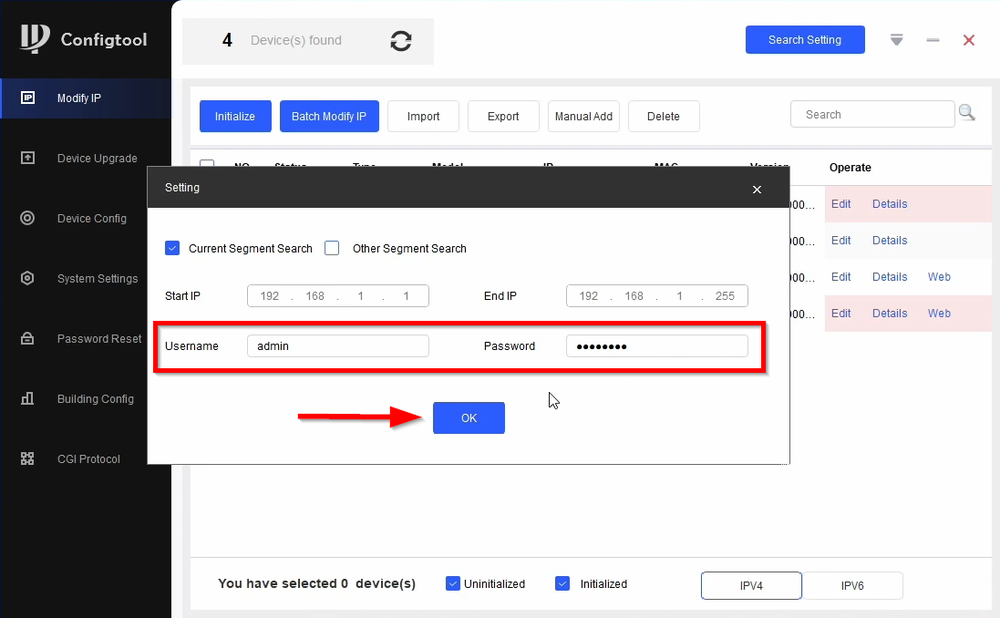
- Enter the credentials if the device you want to modify and click on OK
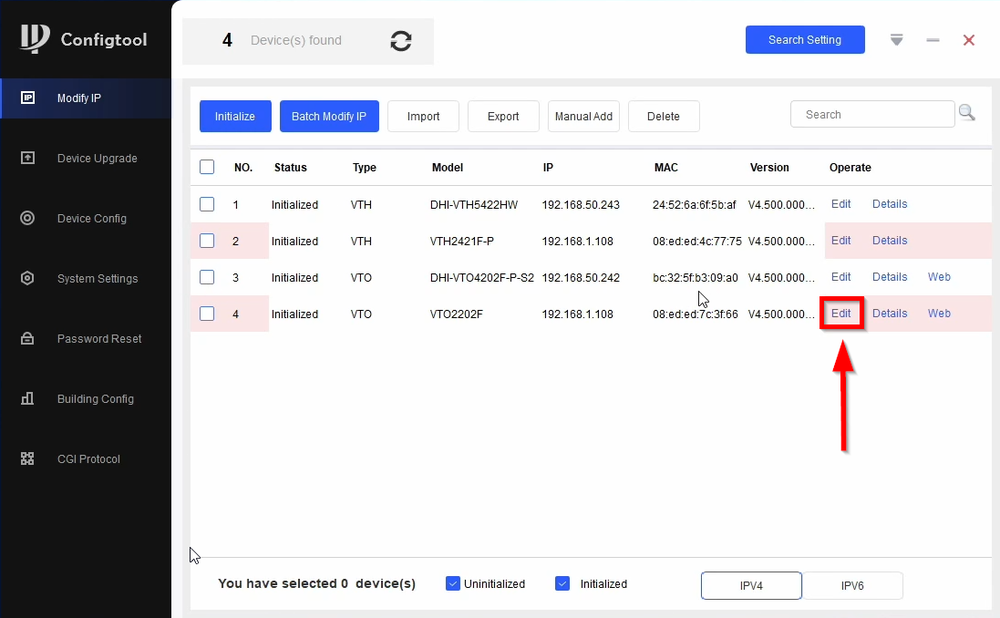
- The device list will refresh. Click on Edit for the device you want to edit
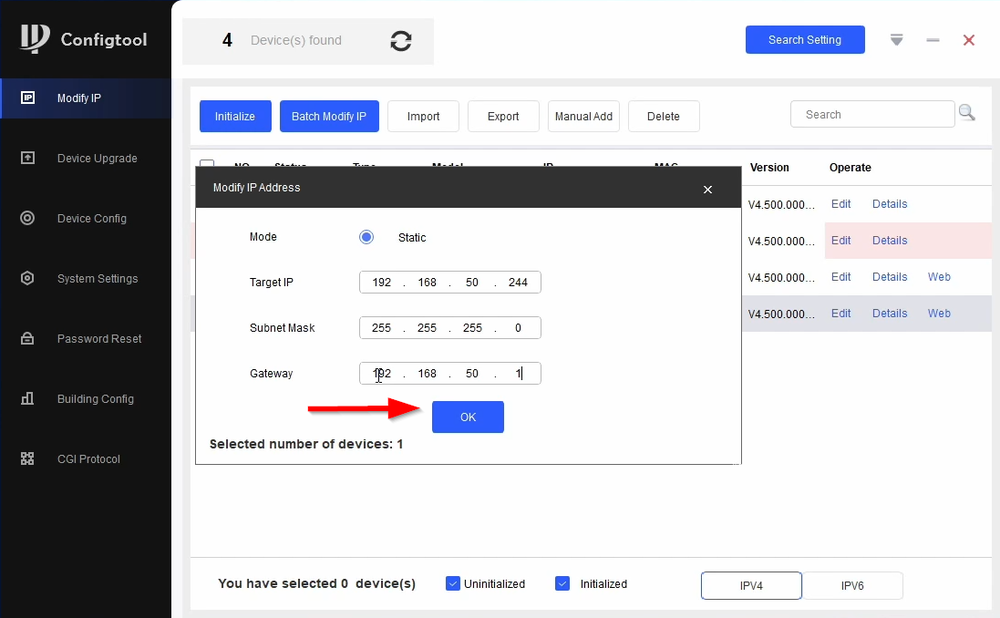
- Enter the desired IP Address then click on OK to finalize
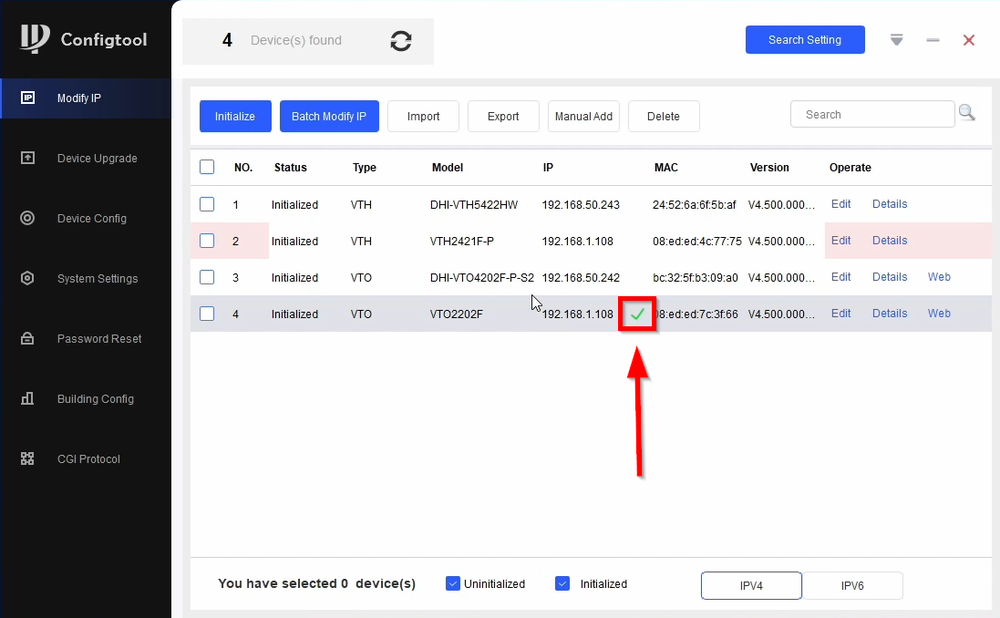
- The green check mark will indicate that the IP address change was successful.
