Introduction
This guide shows how to add Eyeonet IPC to Dahua NVR. It include how to use IPTool2.0.
We need to have a PC and a POE switch to do a few setup for camera before adding to Dahua NVR. Your PC and Eyeonet cameras should all connect to a same temporary POE switch.
First of all, if you don't have IPTool2.0, Please Download now.
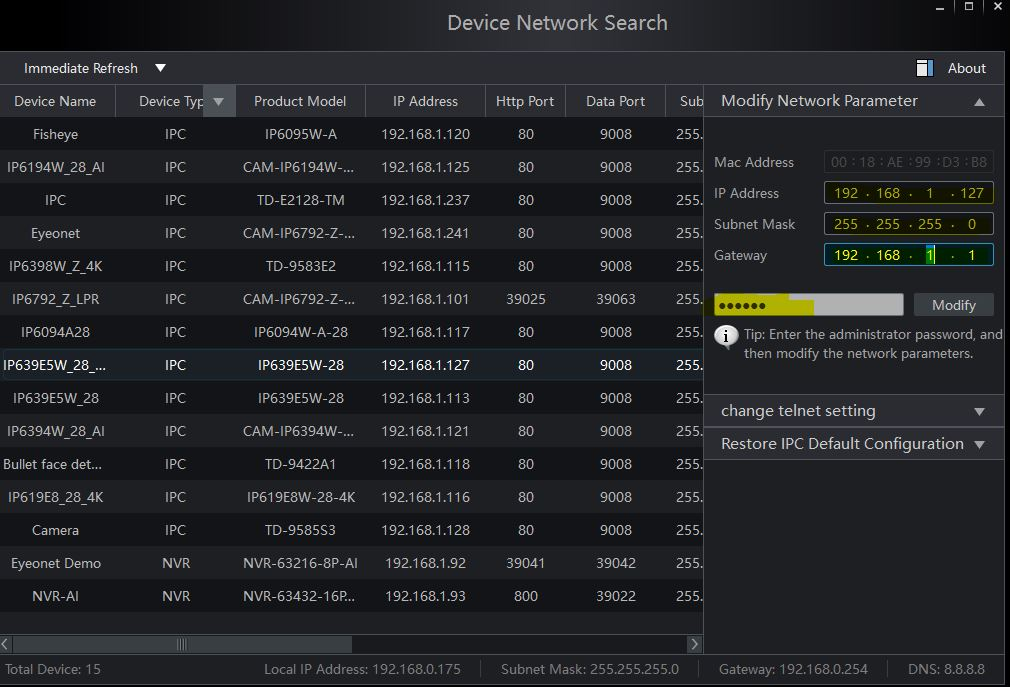
- Install and open IPTool2.0 on your PC
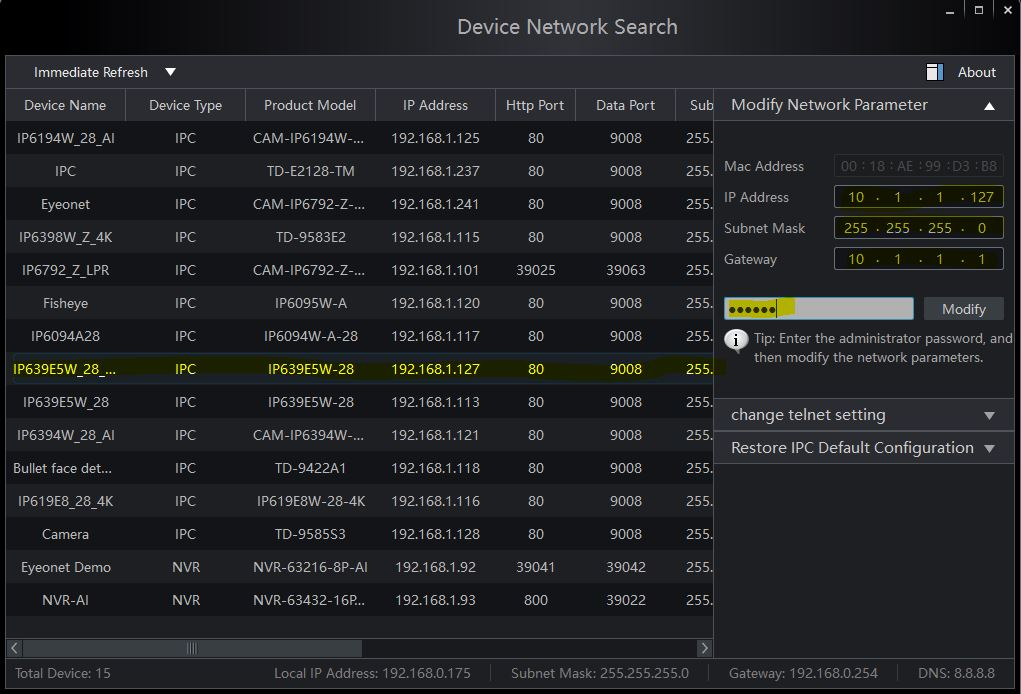
Select your Eyeonet IPC and modify network parameter.
If you decide to wire camera Directly To NVR POE, then IP setting is like:
IP address: 10.1.1. XXX
Mac addrs: 255.255.255.0
Gateway: 10.1.1.1
Eyeonet Camera Default Password: 123456
Once you finish IP setting, you can connect Camera directly to NVR internal POE port.
-
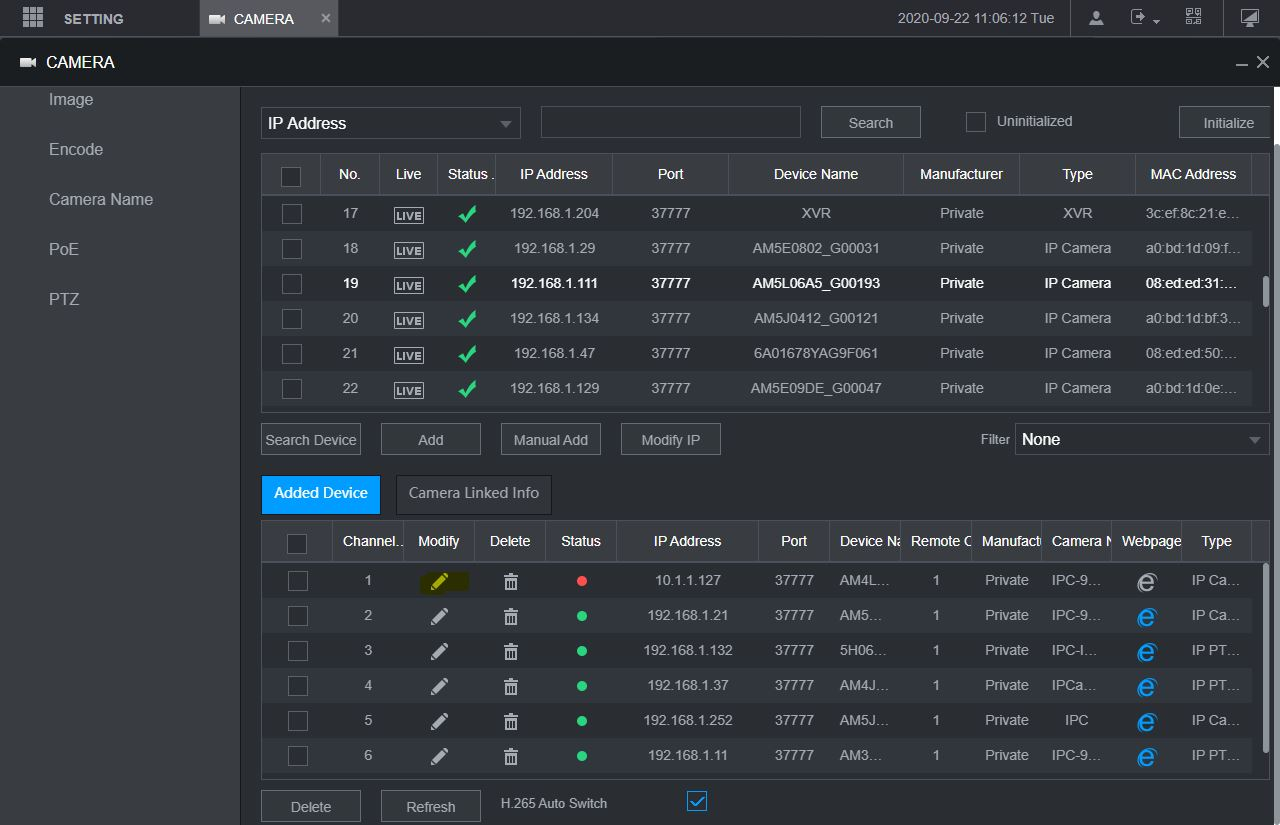
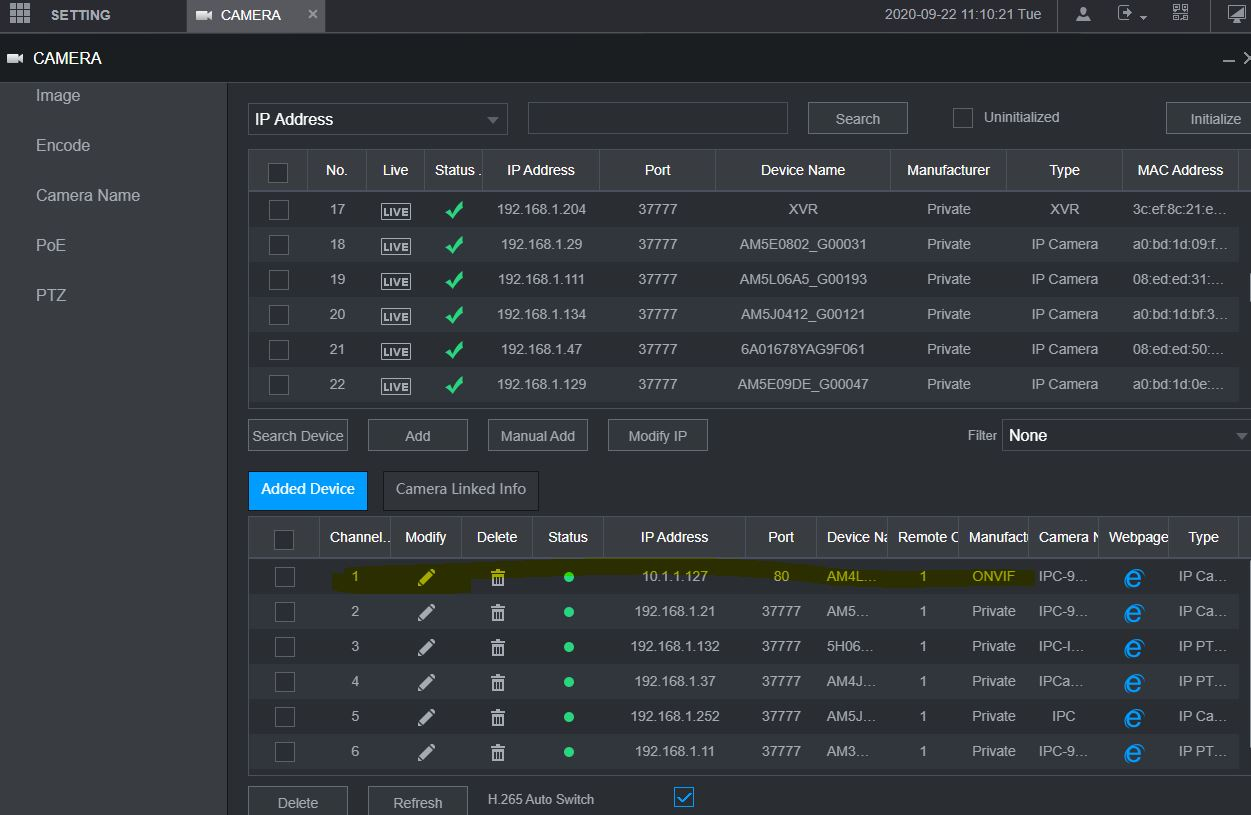
NVR Camera Interface, your IPC will be added automatically to 'Added Device' by NVR, then use 'Modify' to set up IPC.
-
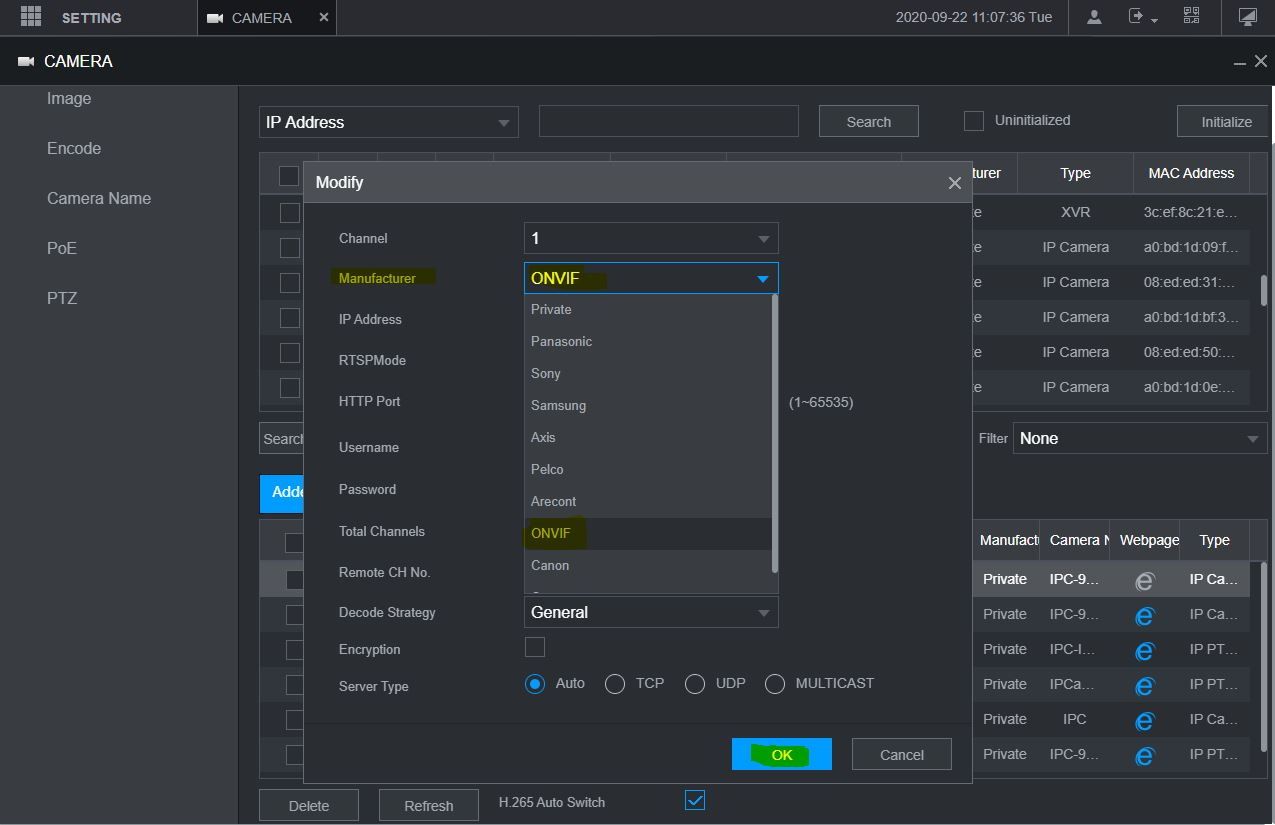
On Modify page, use 'Onvif' as manufacuter protocol.
-
Input Eyeonet Camera Password :123456

-
Succesfully Added. You will find status turn to 'Green' after your reflesh it.
-
If you decide to connect Eyeonet Camera over POE switch.
We change the IP of camrea to local network range.
Example: Local IP range on 192.168.1.XXX as below
-
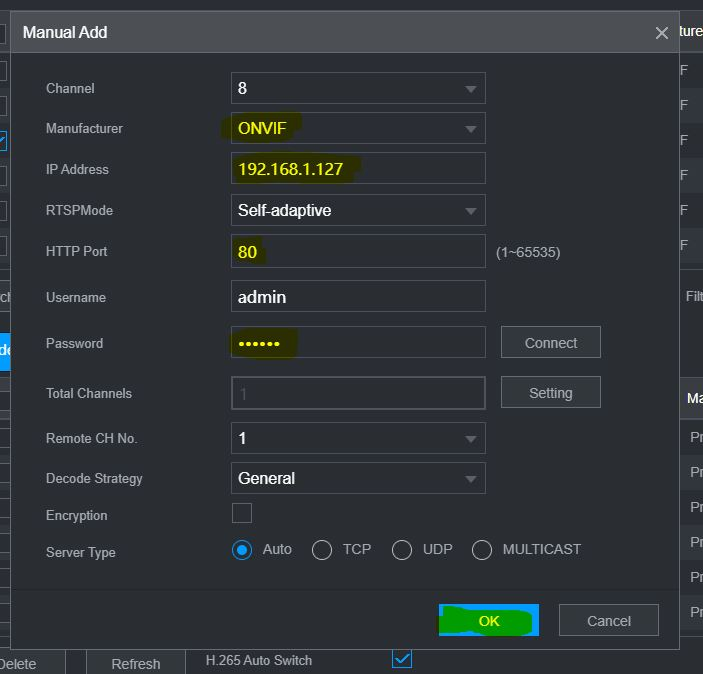
Similarly, On Dahua Camera Interface, find your device in searching table. And Click 'Manualy Add'.

-
Input Onvif protocol, IP address and camera password. Then it will connect to NVR.