Device requirment: -I Aibase recorder, LPR camera.
| Lens | 10mm-50mm |
| Speed | 80km/h |
| Maximum detection distance | 8-30m |
| Width detection area(lane) | Maximum:3.5M |
| Software platform | DSS express/PMS(data Sync automatically) |
| Detection algorism | Car and plate |
| Accuracy | >98%(car capture 100%) |
| Recorder | I series |
| White list | 10,000 |
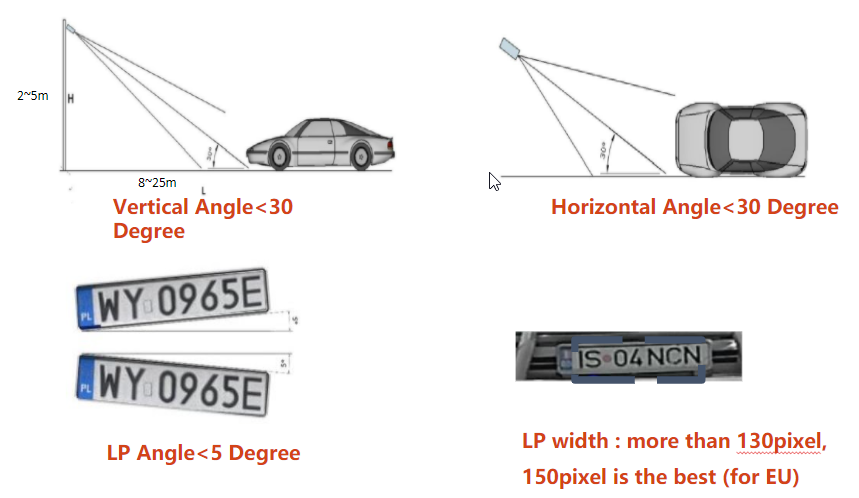
Installation angle
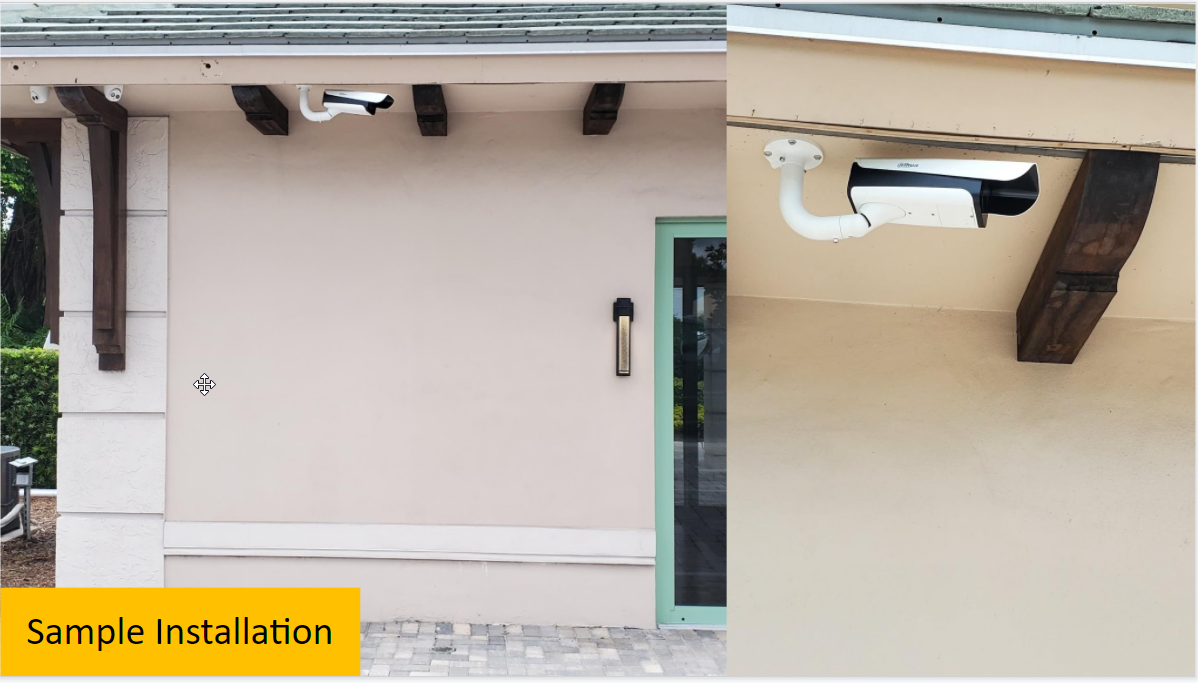
Installation sample
Setup
-
Make sure you can web login to the camera on your network
-
Guide
On the Guide interface, you can configure capture scenarios, and get assistance with setting
installation scenario.
You can click at the upper-right corner of Guide interface to exit.
Step 1 Click the Guide tab.
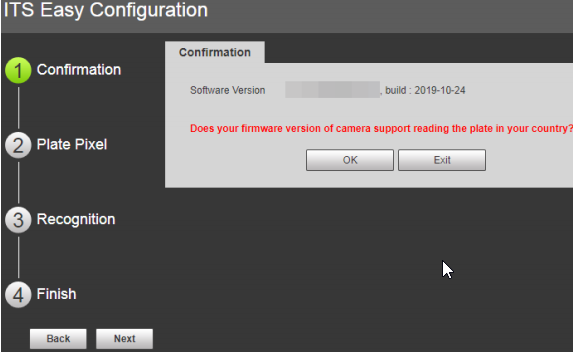
Step 2 Confirm Software Version, and then click Confirm.
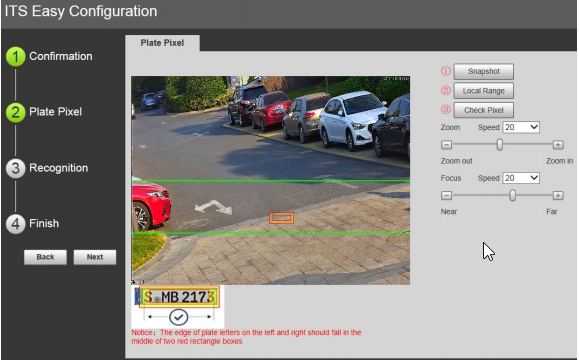
Step 3 You can check whether the video image is properly zoomed and focused by checking
the plate pixel.
- Drag zoom and focus bar to adjust the video image properly.
- When the vehicle plate comes into the green line area, click Snapshot to take a
snapshot of the plate.
Snapshot becomes Resume. - Drag the yellow plate pixel box to the position of the plate.
- Click Zoom.
Zoom in the picture selected by the plate pixel box. It can realize 2x or 4x zoom
rate. - Adjust the position of plate pixel box and make it the optimal plate size. See Figure
4-16.
If the plate within the yellow box is larger than the optimal plate size in the example,
zoom out the video image; if smaller, zoom in the video image.
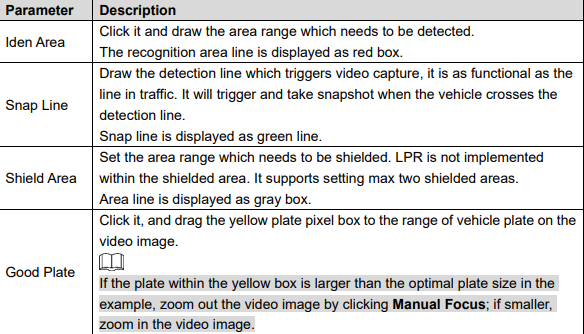
Step 4 Configure recognition area.
The configuration example on the right of video interface can be used as a reference.
- Click Iden Area (identification area).
Click and draw 4 lines on the video interface and the recognition area is formed. - Click Snap Line.
Draw snap line by dragging mouse on the area. The snap line must cross the area. - Click Save to complete the Settings.
Step 5 Click Finish, exit Guide interface and enter Live interface.
Config LPR
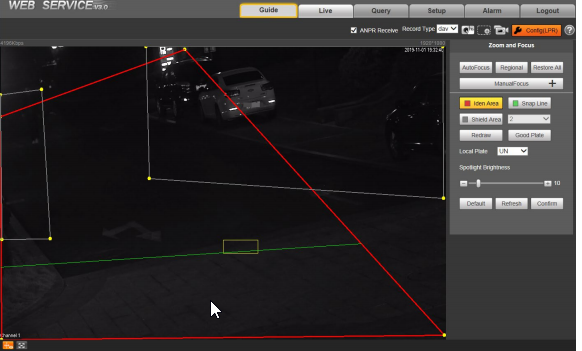
The steps of config (LPR) are shown as follows.
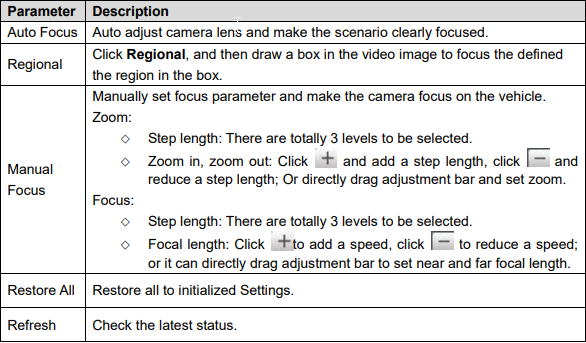
Step 1 Set focus and zoom mode, which is used to recognize vehicle. Refer to Table 4-7 for
more details.
Step 2 Select the config line type which needs to be drawn. Refer to Table 4-8 for more details.
The configured area line and detection line in Guide are displayed in the video
interface.
Step 3 Draw lines on the view interface.
Click Redraw to delete lines one by one.
Step 4 Adjust the vehicle snapshot location to yellow box.
Make sure that the location and size of plate is in accordance with that of the yellow
box.
Plate optimal width range is from 140 to 160. If you want to modify the range, go to
Setup > ITC > Intelligent > Video Analyse > Recognition, and make Settings.
Step 5 Set Local Plate. Set local plate according to the location of the Camera.
Step 6 Set Spotlight Brightness. Drag the block and set brightness of flashing light according
to actual requirement.
Step 7 Click Confirm.